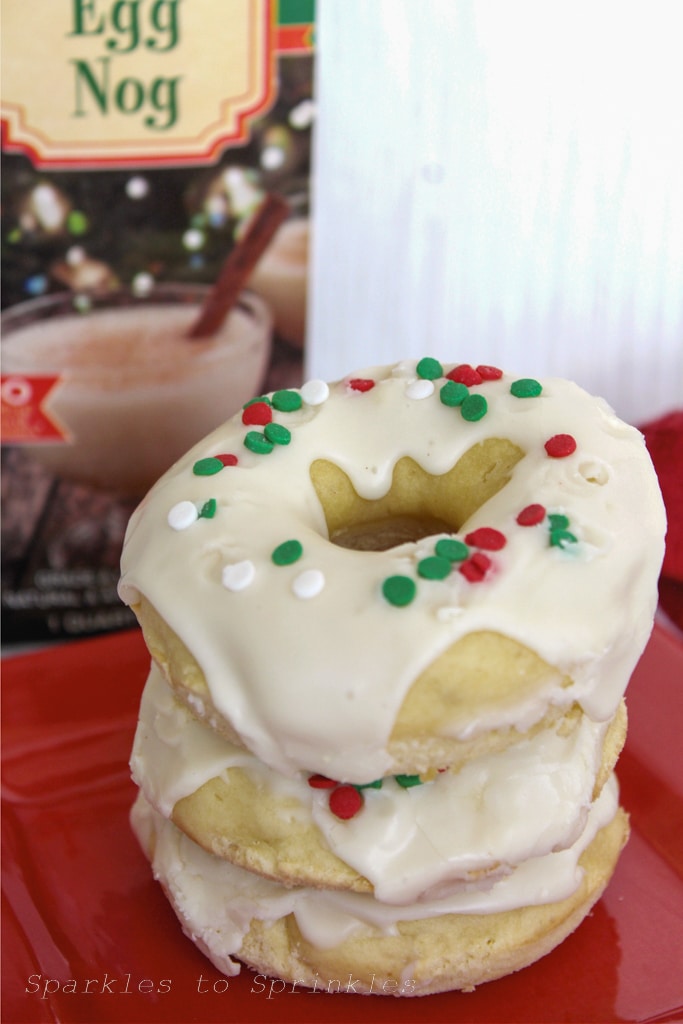
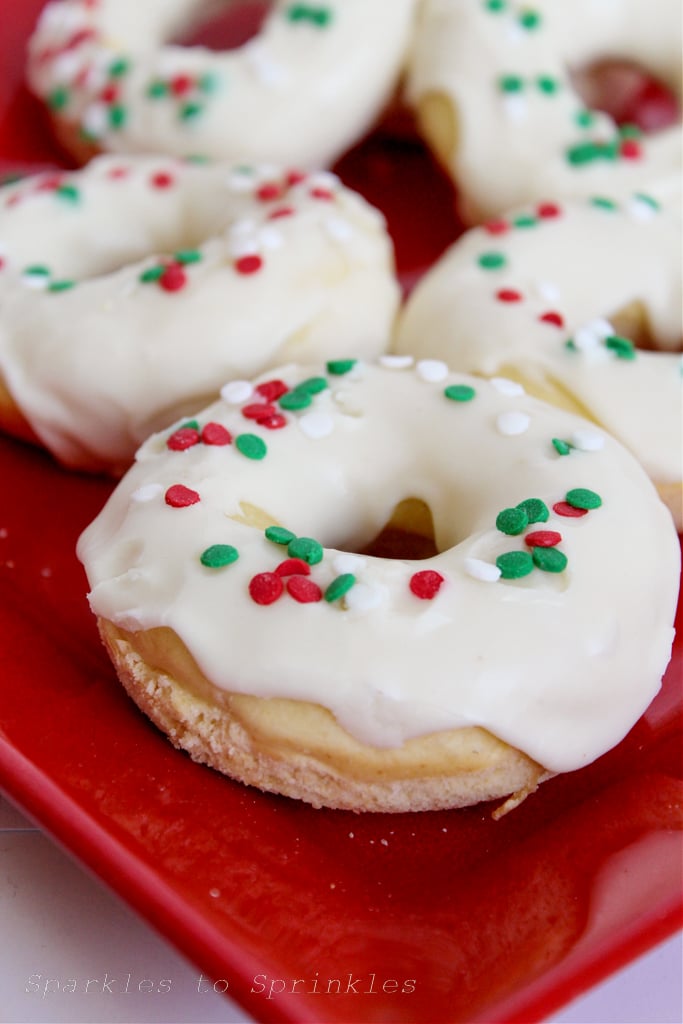
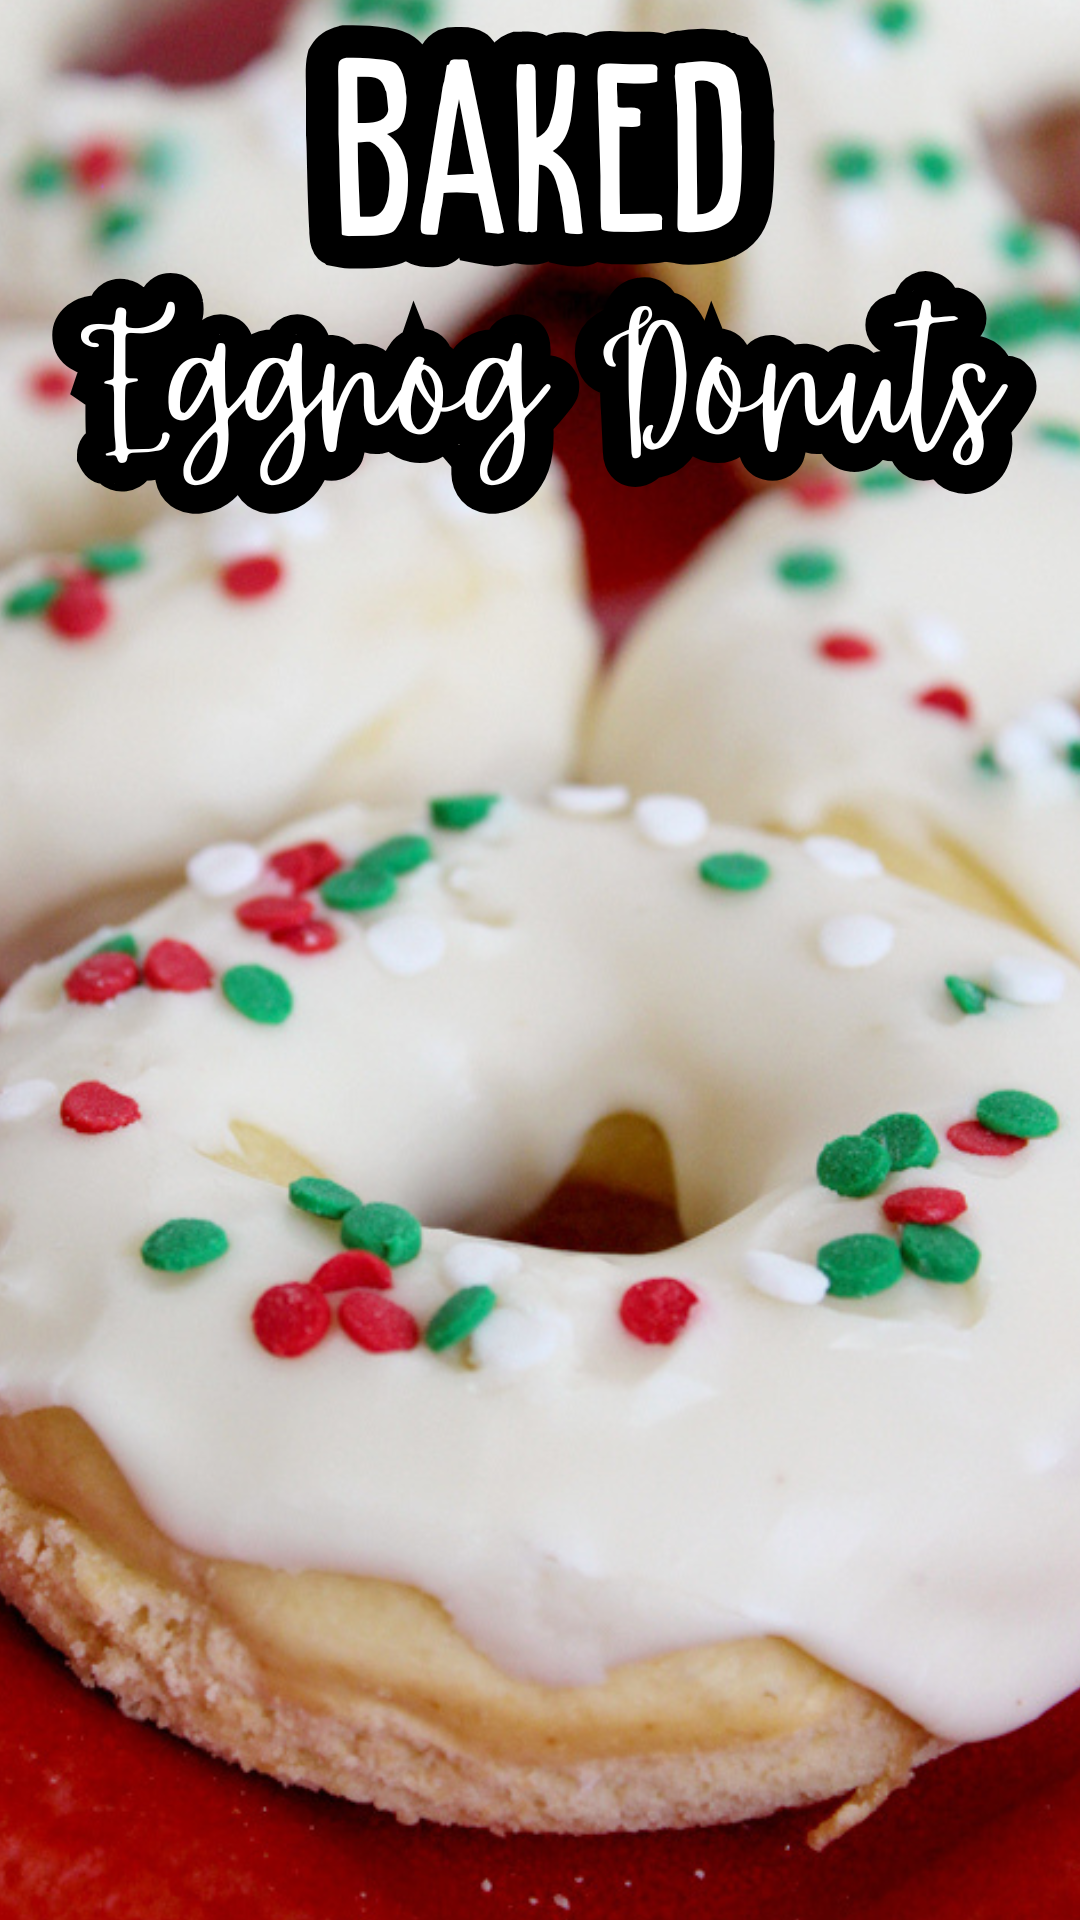
Baked Eggnog Donuts: A Festive Treat You’ll Love
Eggnog lovers, this one’s for you! These baked eggnog donuts combine the rich, spiced flavors of your favorite holiday drink with the soft, fluffy texture of a homemade donut. Perfect for holiday brunches, dessert tables, or just a cozy snack, these donuts are as festive as they are delicious.

Baked Eggnog Donuts
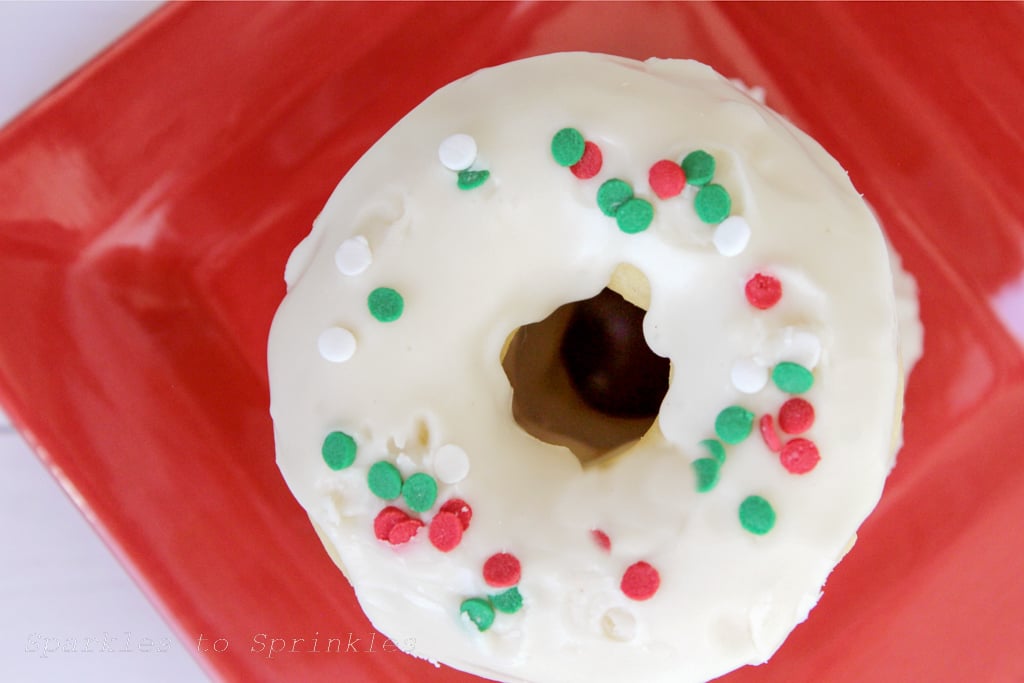
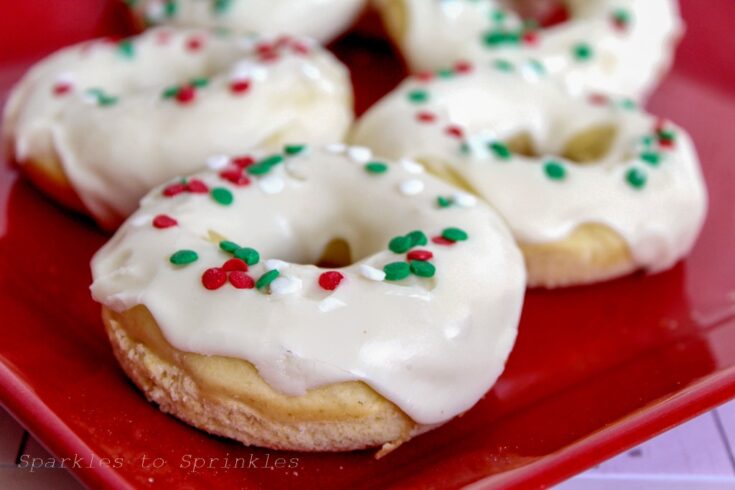
Skip the deep fryer—these donuts are baked to golden perfection, making them a lighter option without sacrificing flavor. Topped with a sweet, eggnog-infused glaze, every bite is a celebration of the season.
Whether you’re a seasoned baker or new to the kitchen, this simple recipe comes together quickly and delivers bakery-quality results. Plus, the addition of rum extract in both the batter and glaze gives these donuts an authentic eggnog kick that will have everyone reaching for seconds.
What You Will Love About This Recipe
Festive flavors: The eggnog and rum extract create a classic holiday taste that’s irresistible.No frying required: These donuts are baked, not fried, making them easier and less messy to prepare.Perfectly glazed: The eggnog glaze adds the ideal amount of sweetness and holiday flair.Easy and quick: With minimal prep and baking time, you’ll have a batch of donuts ready in under 30 minutes.Customizable: Add festive sprinkles, cinnamon sugar, or a dash of nutmeg to make these donuts your own.
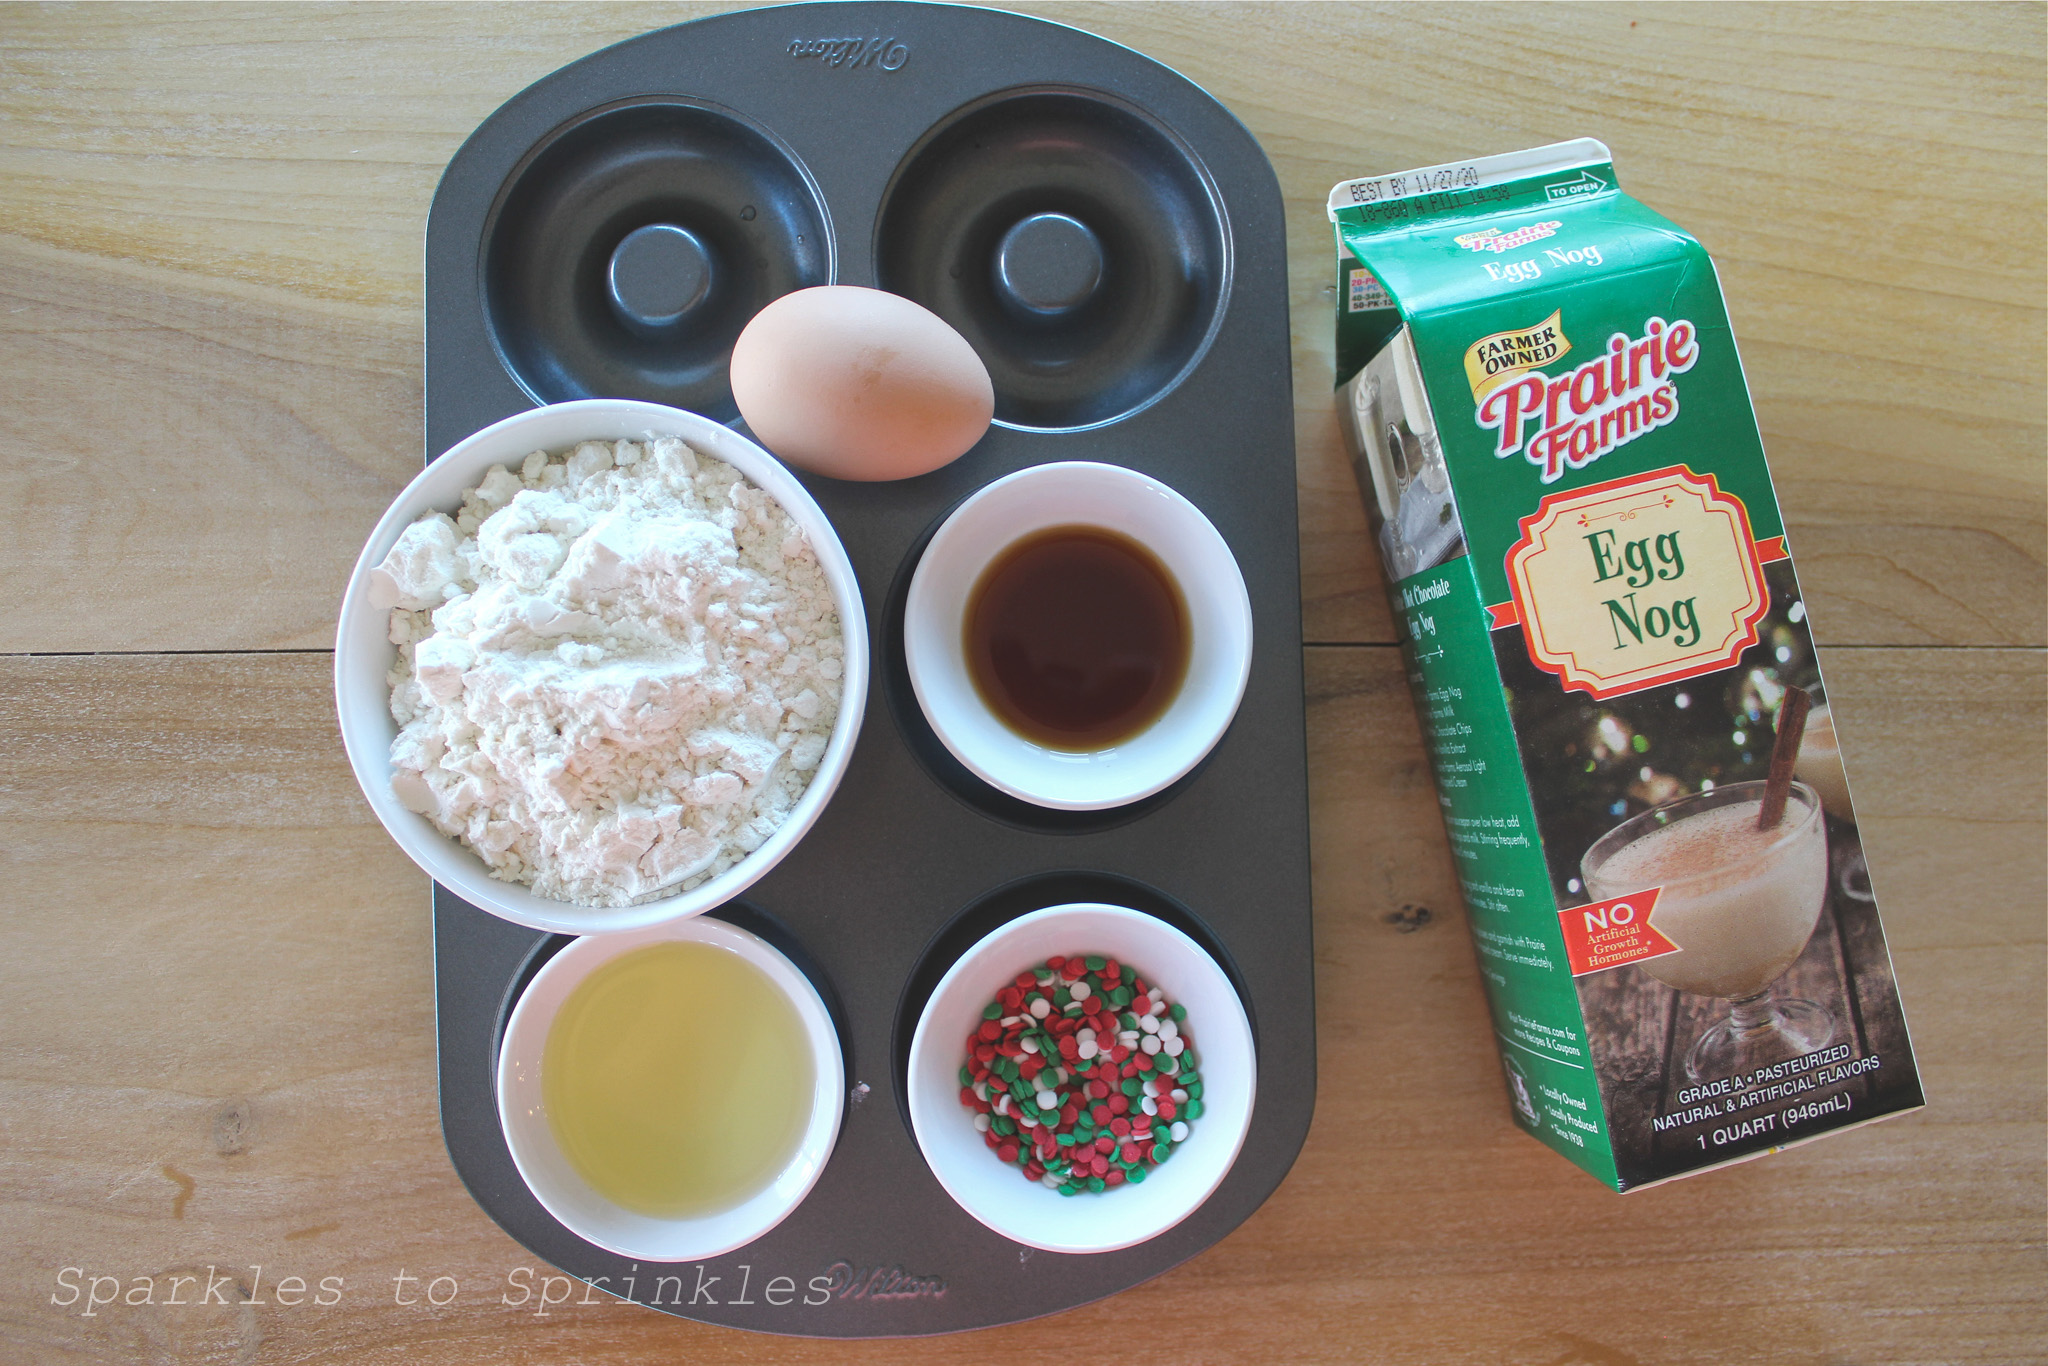
Ingredients:
- 1 cup all-purpose flour
- 3 Tablespoon granulated sugar
- 1 teaspoon baking powder
- ½ teaspoon salt
- 6 Tablespoons eggnog
- 1 teaspoon rum extract
- 1 egg
- 3 Tablespoons vegetable oil
Eggnog White Glaze
- 1 cup powdered sugar
- 2 to 3 Tbsp. eggnog (depending on thickness of glaze)
- ¼ teaspoon rum extract
How to make Baked Eggnog Donuts
- Preheat oven to 325 degrees F and prepare a donut pan
- In a large bowl, mix together eggnog, rum extract, egg, oil, and sugar. Once combined, add the flour, baking powder, and salt.
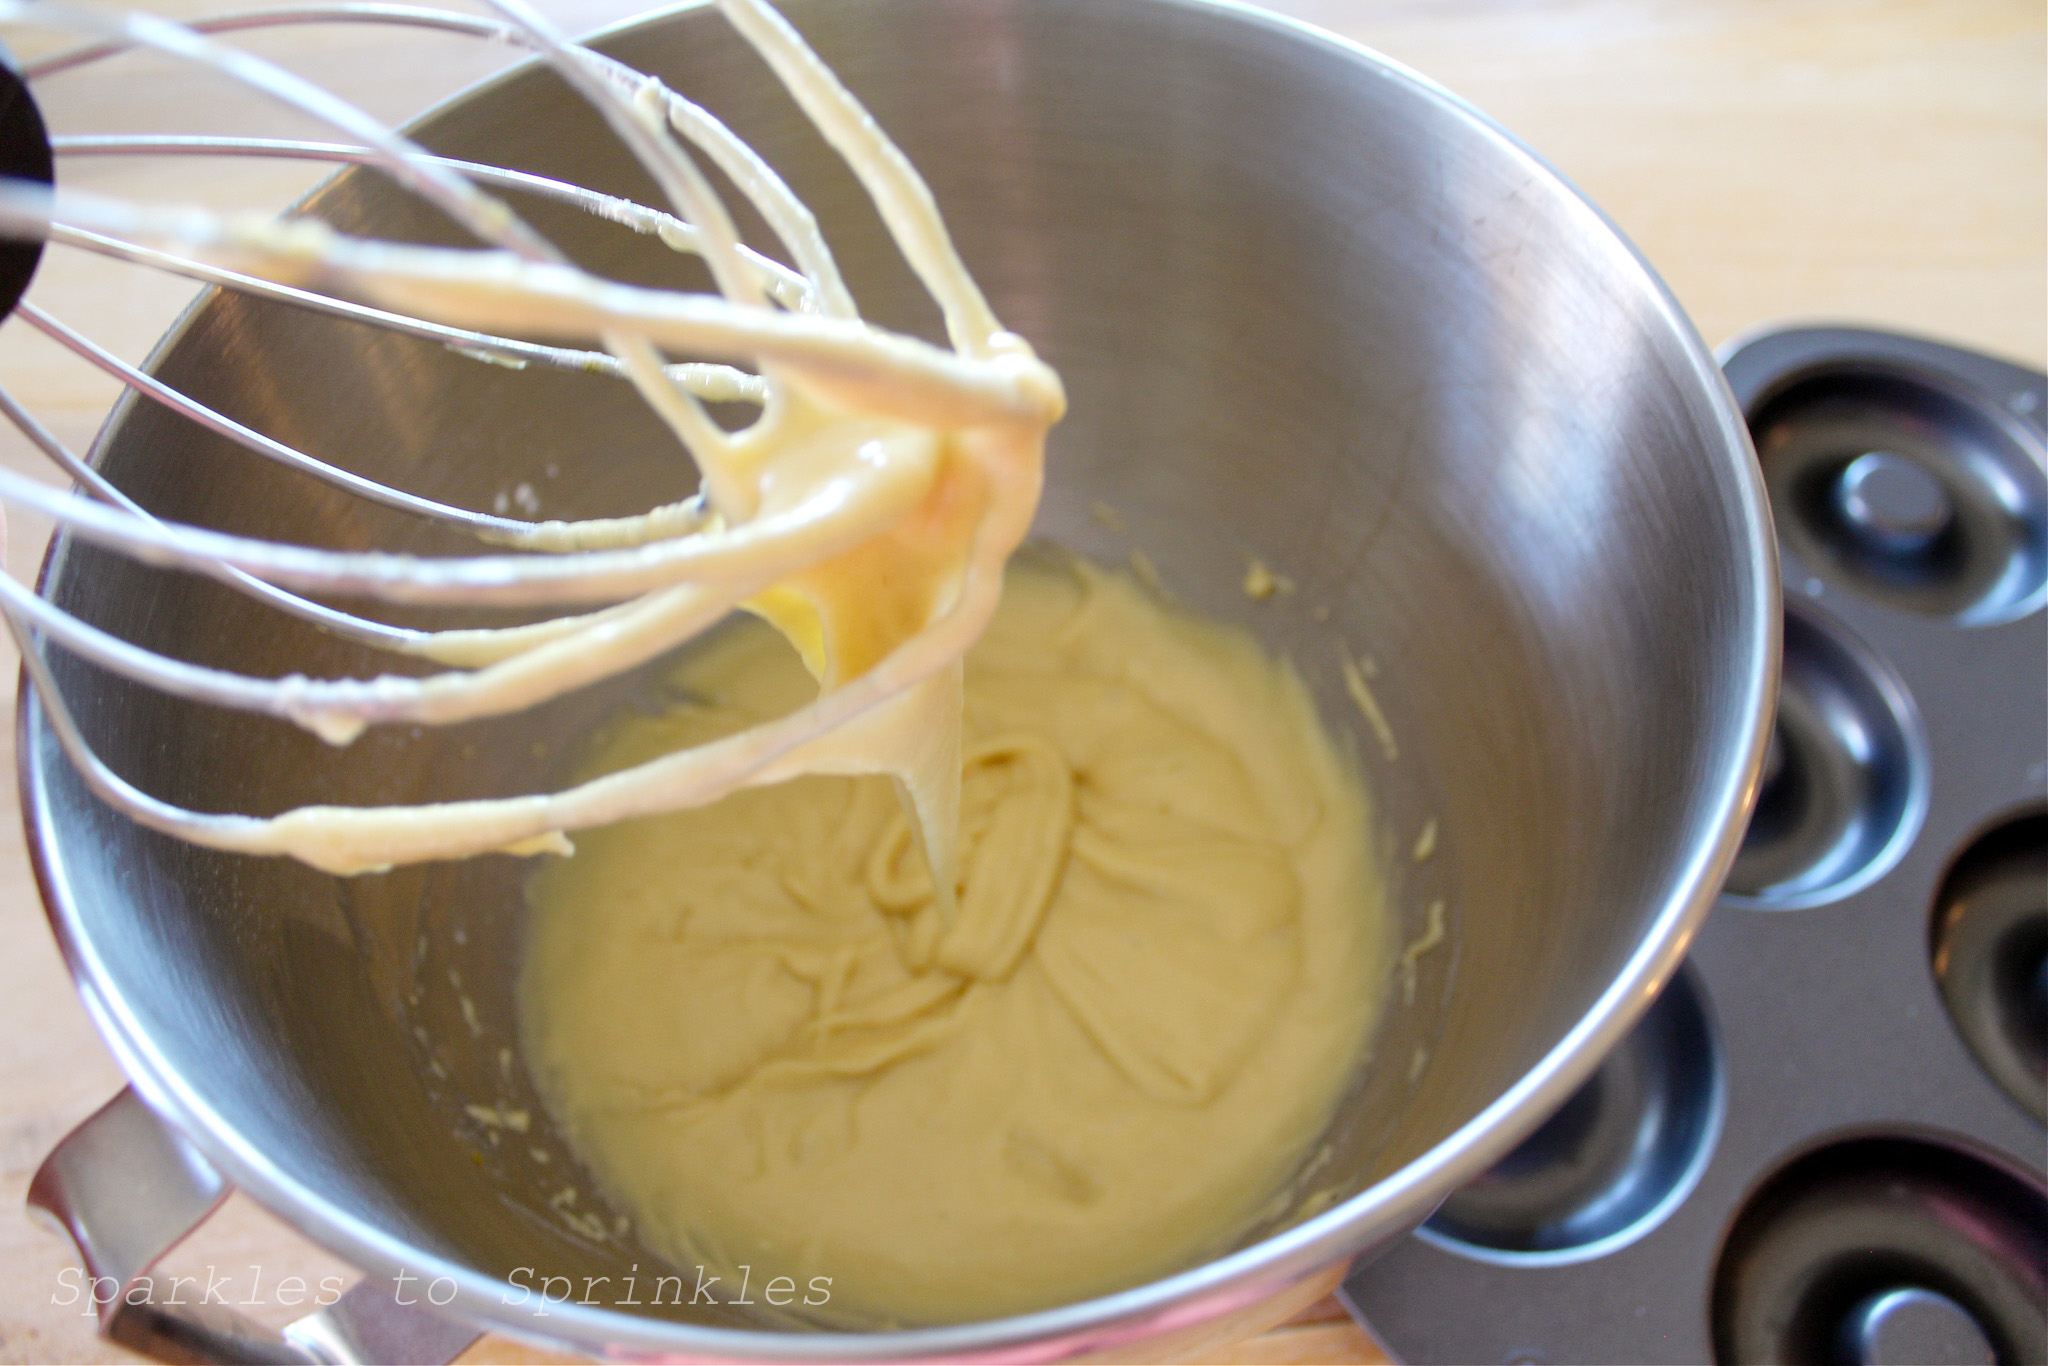
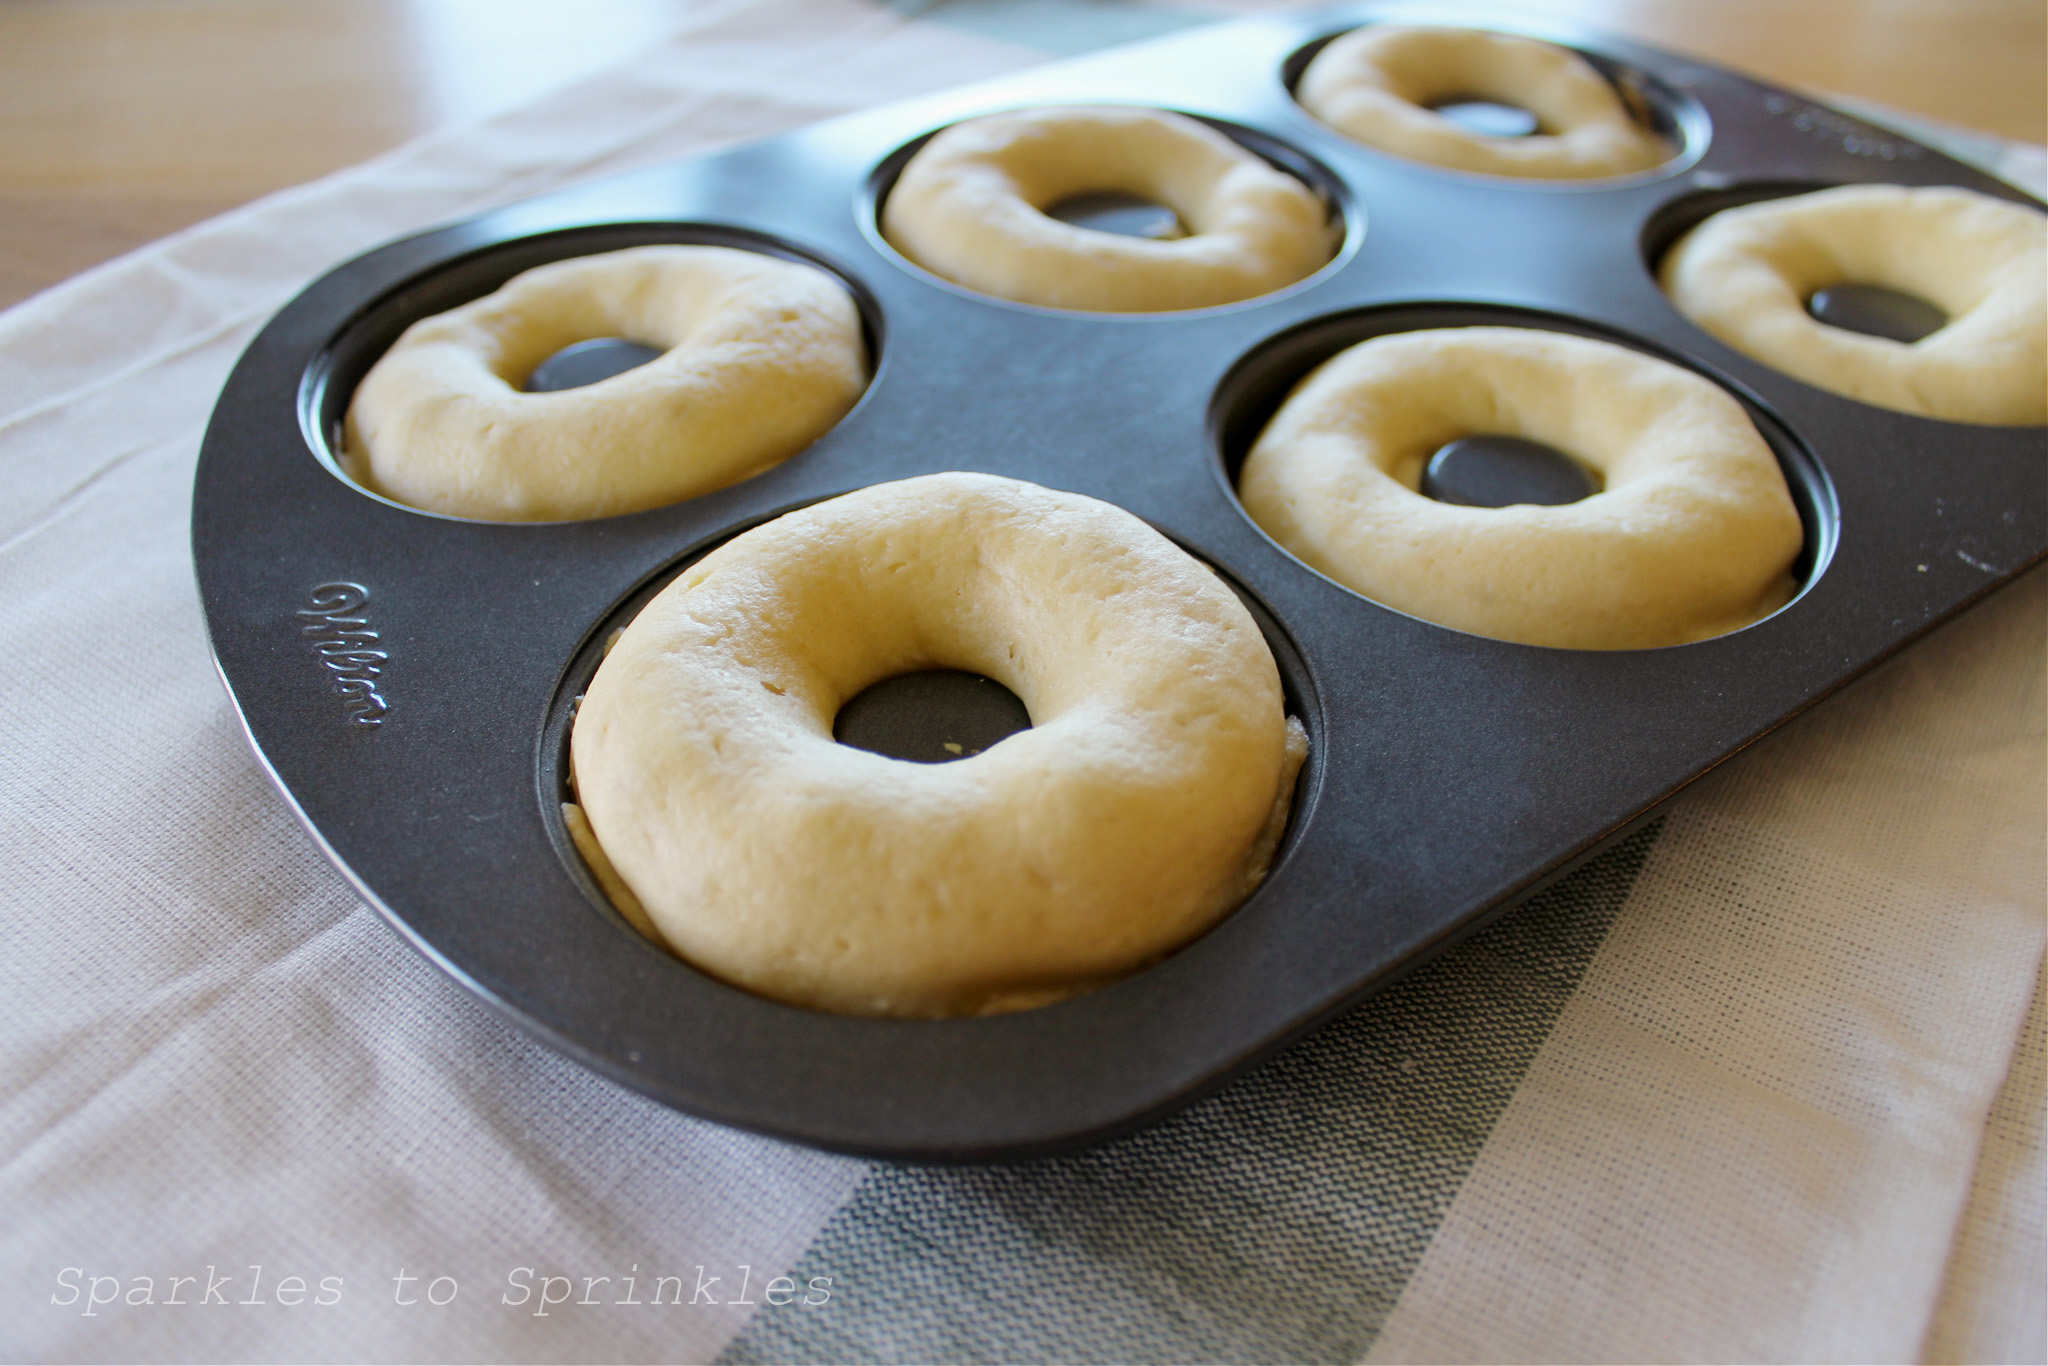
- Place batter into a piping bag and cut off a small corner. Pipe dough into your prepared donut pan.

- Bake for 10 to 13 minutes until a toothpick comes out clean
- Prepare the glaze by mixing together the powdered sugar with 2 Tbsp. eggnog; you can add more to reach your desired thickness for the glaze. However be sure, as you don’t want it too thick.
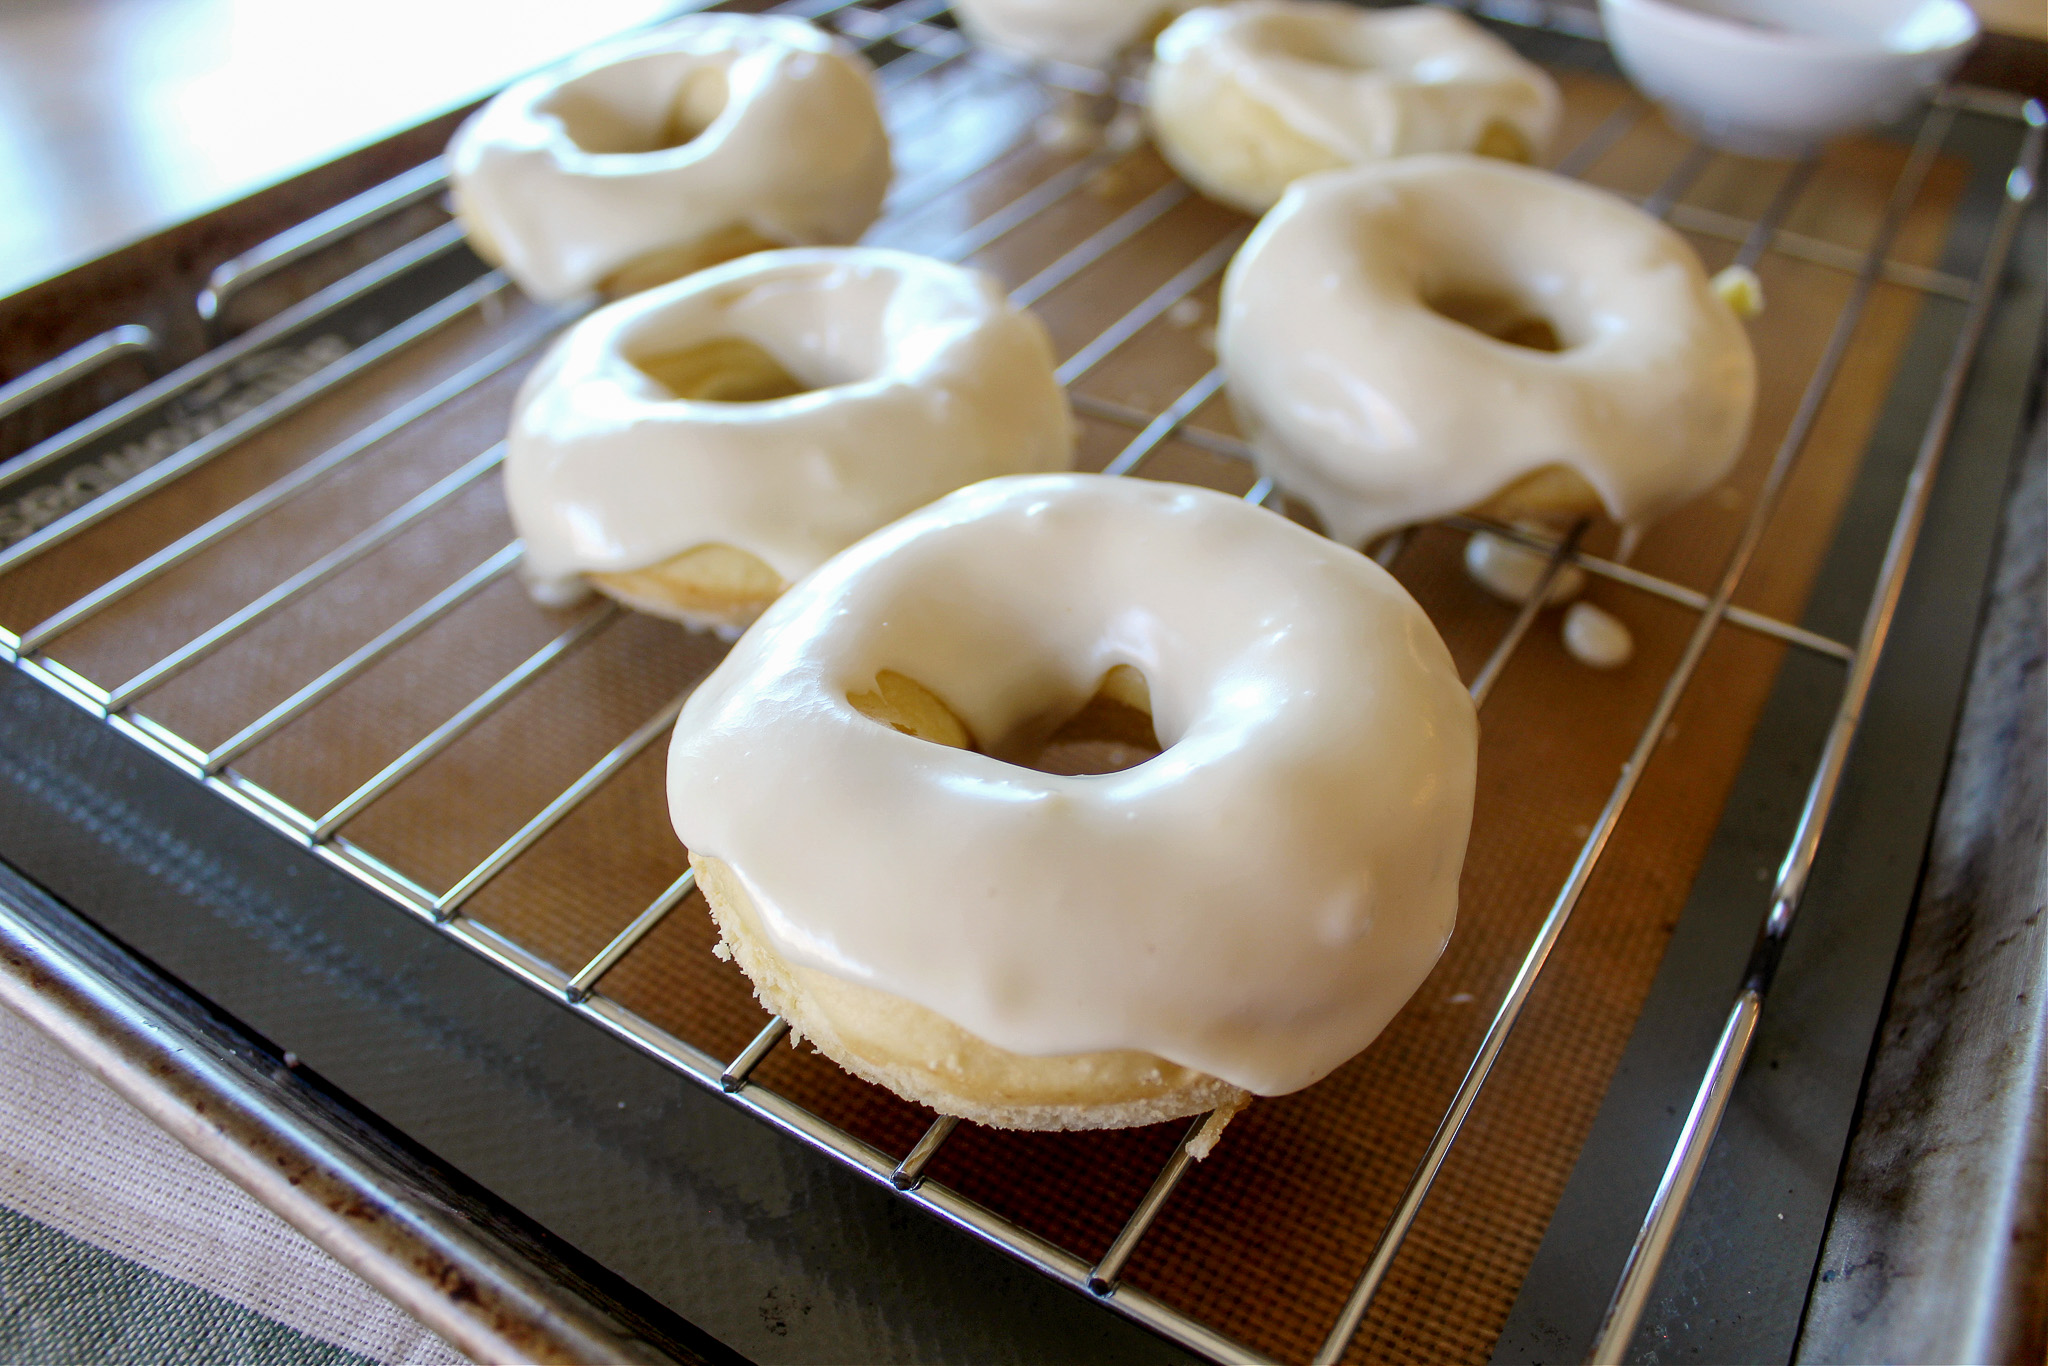
- While the donuts are still warm, dip donuts into glaze and place on a wire rack. Feel free to add sprinkles to make them more festive!

Tips & Tricks
Use a piping bag: Piping the batter into the donut pan ensures even shapes and avoids mess.
Don’t overfill the pan: Fill each cavity about ¾ full to allow the donuts to rise perfectly without spilling over.
Fresh eggnog works best: Use high-quality eggnog for the best flavor in both the donuts and glaze.
Cool slightly before glazing: Let the donuts cool for a few minutes after baking, but glaze them while they’re still warm for the perfect finish.
Make it kid-friendly: If you’re baking for kids, you can swap the rum extract for vanilla extract for a more subtle flavor.
FAQ’s
Can I make these donuts without a donut pan?
Yes! Use a muffin tin instead. Fill each cup halfway, and you’ll get delicious eggnog donut muffins.
Can I use non-dairy eggnog?
Absolutely. Swap traditional eggnog with your favorite non-dairy alternative, like almond, oat, or coconut-based eggnog.
How do I store these donuts?
Store glazed donuts in an airtight container at room temperature for up to 2 days. If you’d like to keep them longer, refrigerate them, but note that the glaze may lose some of its shine.
Can I freeze these donuts?
Yes, but freeze them without the glaze. Once thawed, whip up a fresh batch of glaze to dip them in for a just-made taste.
What can I top these donuts with?
Sprinkles, crushed candy canes, or a dusting of powdered sugar make these donuts even more festive. You can also add a pinch of cinnamon or nutmeg to the glaze for extra holiday spice.

Crockpot Apple Cinnamon Roll Casserole
Sweet and Salty Bacon Cinnamon Roll Monkey Bread
Baked Eggnog Donuts
Baked Eggnog Donuts are soft delicious and bursting with Eggnog flavor. With just a few simple steps you will have a fun festive treat to share with friends and family.
Ingredients
- 1 cup all-purpose flour
- 3 Tablespoon granulated sugar
- 1 teaspoon baking powder
- ½ teaspoon salt
- 6 Tablespoons eggnog
- 1 teaspoon rum extract
- 1 egg
- 3 Tablespoons vegetable oil
- Eggnog White Glaze
- 1 cup powdered sugar
- 2 to 3 Tbsp. eggnog (depending on thickness of glaze)
- ¼ teaspoon rum extract
Instructions
- Preheat oven to 325 degrees F and prepare a donut pan
- In a large bowl, mix together eggnog, rum extract, egg, oil and sugar. Once combined, add the flour, baking powder and salt.
- Place batter into a piping bag and cut off a small corner. Pipe dough into your prepared donut pan.
- Bake for 10 to 13 minutes until toothpick comes out clean
- Prepare the glaze by mixing together the powdered sugar with 2 Tbsp. eggnog; you can add more to reach your desired thickness for the glaze. However be sure, as you don’t want it too thick.
- While the donuts are still warm, dip donuts into glaze and place on a wire rack. Feel free to add sprinkles to make them more festive!
- Enjoy! ☺
Notes
*Makes 6 donuts
Nutrition Information:
Yield:
6Serving Size:
1Amount Per Serving: Calories: 330Total Fat: 11gSaturated Fat: 3gTrans Fat: 0gUnsaturated Fat: 8gCholesterol: 75mgSodium: 311mgCarbohydrates: 51gFiber: 1gSugar: 35gProtein: 7g
I’m Melissa, the imaginative force behind Sparkles to Sprinkles, where creativity comes to life, and sprinkles of joy are scattered generously. Melissa is a proud Jersey girl who found love with a New York boy. As a mom to four wonderful boys and a few fur babies, her journey into the world of blogging began after making the life-changing decision to stay home and raise her children. Previously a dedicated workaholic, Melissa’s blog became her creative outlet and passion project. Inspired by her mother-in-law, a masterful cook renowned for her delicious home-cooked meals and legendary holiday feasts (think mouthwatering sausage stuffing), Melissa honed her culinary skills through a combination of family recipes and countless cooking classes. She often attended these classes with her son Michael, who shared her enthusiasm for cooking from a young age. Melissa’s love for learning extends beyond familiar cuisines, as she enjoys exploring international recipes in hands-on cooking classes. Her blog features a diverse array of recipes, showcasing her expertise with various kitchen appliances such as the Instant Pot, air fryer, Slow Cooker, Ninja Foodi, Instant Vortex Plus, and more. Join Melissa on her culinary adventures as she shares tried-and-true family favorites alongside exciting new discoveries!