
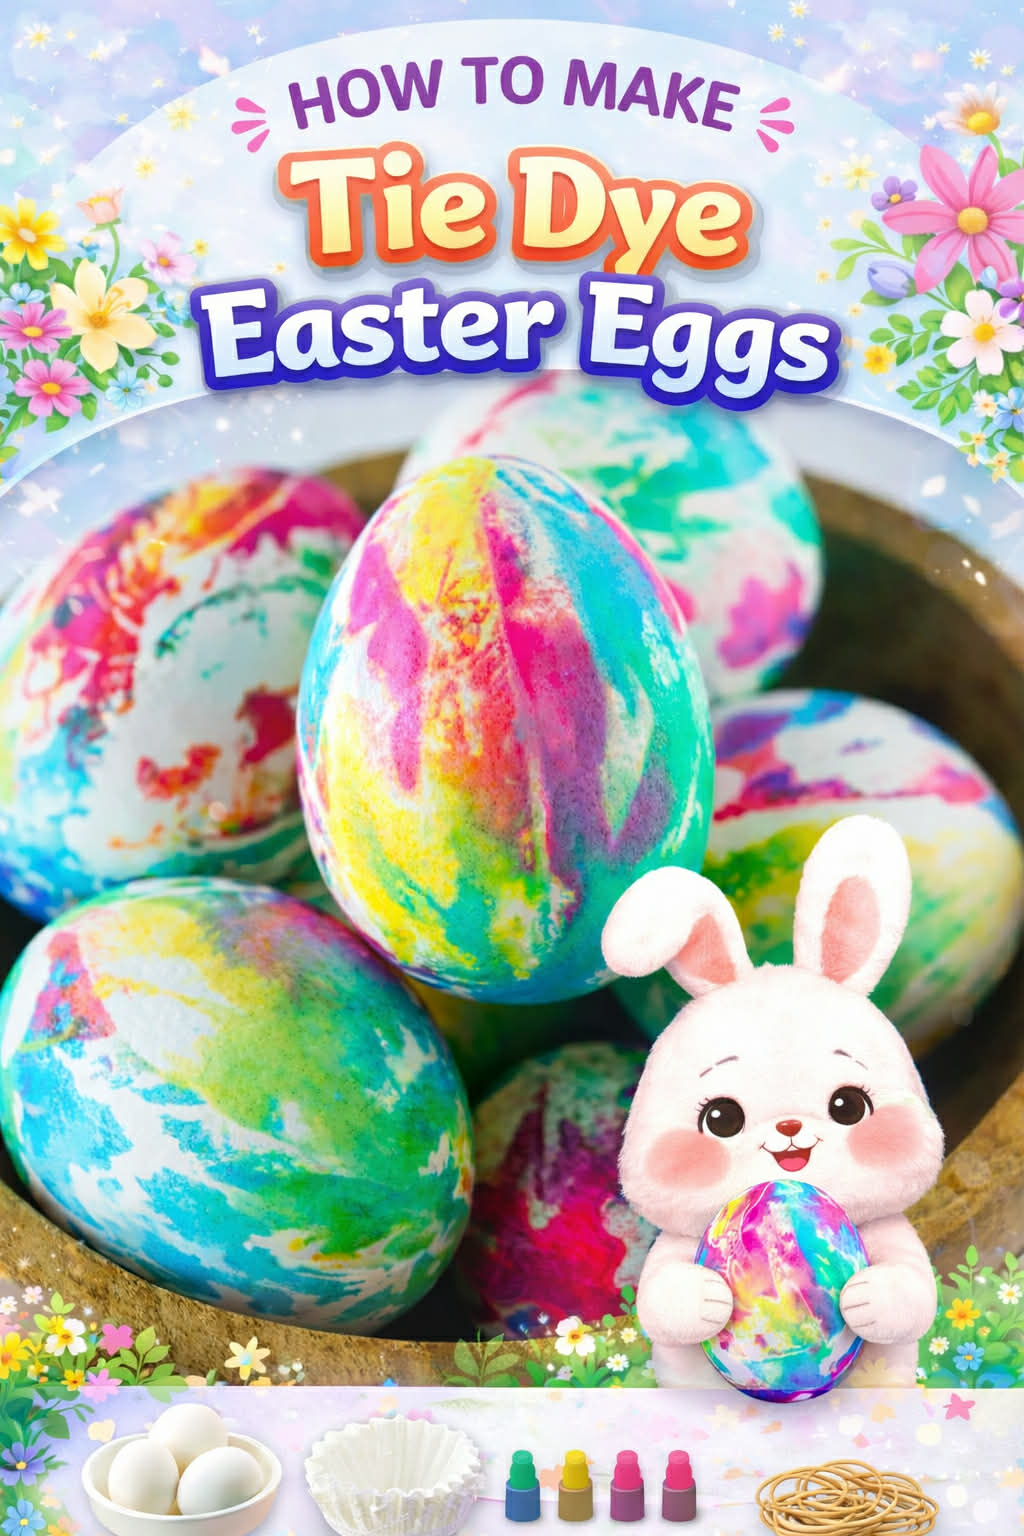
Tie Dye Easter Eggs
Are you ready to add some vibrant colors to your Easter egg decorating this year? Look no further than tie-dye Easter eggs! This fun and creative technique will take your egg decorating to the next level, making for a memorable and eye-catching Easter display. Using simple household ingredients and a few easy steps, you can create stunning tie-dye Easter eggs that will impress friends and family alike. Let’s dive into the colorful world of tie-dye Easter egg decorating!

Tie Dye Easter Eggs
Get ready to add a splash of color to your Easter festivities with these vibrant tie-dye Easter eggs! With just a few simple ingredients and a little creativity, you can transform ordinary hard-boiled eggs into stunning works of art. Follow along as we guide you through the step-by-step process of creating these eye-catching eggs that are sure to impress everyone at your Easter celebration. Let’s dive in and get started on this fun and festive Easter activity!
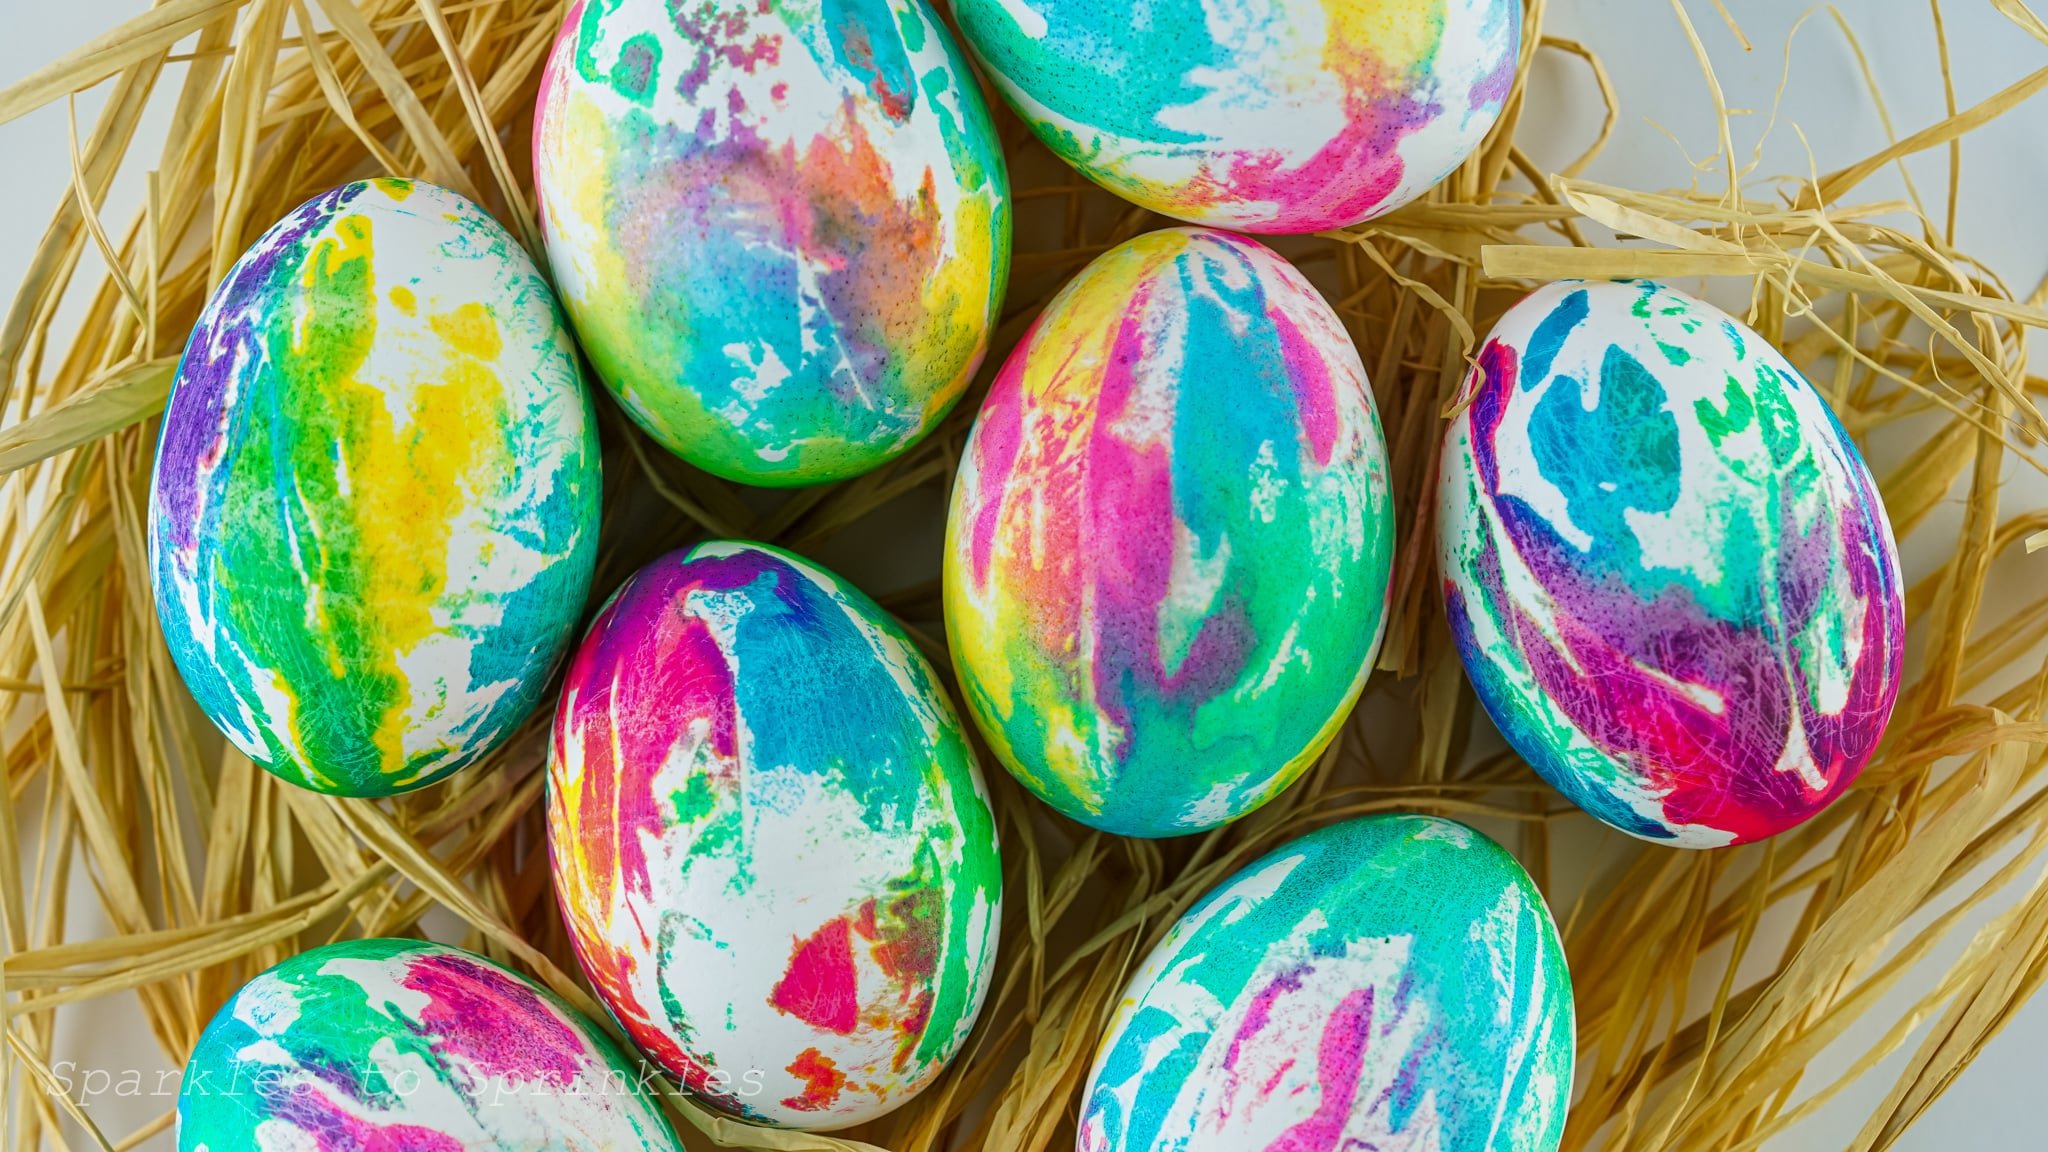
With Easter quickly approaching we have been testing out all the different fun ways to die Easter eggs this year. We have made Glitter Easter Eggs, dyed Easter eggs with rice, traditional Easter Eggs with food coloring, and made Natural Easter Egg dye in the Instant Pot, but I have to say these tie dye Easter Eggs might just be my favorite.

Tie dye Easter eggs create vibrant colored, unique eggs that no matter how you try won’t look quite the same as one another. These are sure to be a hit with the whole family. So skip the vinegar and water cups and try your hand at these tie dye Easter eggs.

First, gather your materials. Prepare your work area by covering it with newspaper or paper towels to protect against any spills or messes. Now, let’s get ready to create some beautiful tie-dye Easter eggs!
Items Needed:
- Boiled Eggs
- Coffee Filters
- Water Based Food Coloring
- Rubber Bands
- Paper Towels
- Rubber Gloves (optional)

How to Tie Dye Easter Eggs
- Place one egg in the middle of one coffee filter and wrap it tightly, bringing the excess coffee filter to the tip of the egg and securing it with a rubber band.


- Get your food coloring and start with one color, putting one drop in random spots around the egg. Do this with as many colors as you like, however, I tend to use 4 different colors, the basic red, green, blue, and yellow are what I used in this recipe. Do this until the coffee filter around the egg is mostly filled with food coloring. It spreads, so a little goes a long way.


- Leave the eggs to sit for 5 minutes.

- Using rubber gloves if desired, gently unwrap the eggs and pat them dry with a paper towel.

- Set them back in the egg carton to dry for about 5 minutes. Enjoy!

Tips & Tricks
- Use fresh, boiled eggs for the best results. Older eggs may not hold the color as well.
- Experiment with different color combinations to create unique and vibrant tie-dye patterns.
- Be cautious when adding food coloring drops to avoid saturating the coffee filter too much, as it can lead to the colors blending together too quickly.
- Allow the eggs to sit for at least 5 minutes to allow the colors to spread and blend effectively.
- Consider wearing rubber gloves to prevent staining your hands with food coloring.
- After unwrapping the eggs, gently pat them dry with a paper towel to remove excess moisture and prevent smudging of the colors.
- Place the eggs back in the egg carton to dry completely before handling or displaying them.
- Have fun and get creative with your tie-dye designs! Experiment with different wrapping techniques and color placements to achieve your desired look.

FAQ’s For Making Tie Dye Easter Eggs
Q: Can I use other types of food coloring? A: Yes, you can experiment with gel or liquid food coloring if you prefer. Just be mindful of the intensity of the colors and adjust accordingly.
Q: How long will the tie-dye effect last on the eggs? A: The tie-dye effect should last as long as the eggshell remains intact. However, if the eggs are cracked or damaged, the colors may fade or seep into the egg.
Q: Can I reuse the coffee filters and rubber bands? A: It’s best to use fresh coffee filters and rubber bands for each batch of tie-dye eggs to ensure clean and vibrant colors. Reusing them may result in duller colors or uneven dye distribution.
Q: Can I use other types of eggs, such as duck or quail eggs? A: Yes, you can use other types of eggs for tie-dyeing, but keep in mind that the size and shape may affect the wrapping process and the final appearance of the eggs. Adjust the amount of food coloring accordingly.
Q: How far in advance can I make tie-dye Easter eggs? A: Tie-dye Easter eggs can be made a day or two in advance and stored in the refrigerator until ready to use. However, for the best appearance, it’s recommended to make them no more than a day before Easter.
Storage
Once your tie dyed eggs are dry, you will want to store them in the fridge. They will keep them for about 5 days from when you hard boil them.

Tie Dye Easter Eggs
Ready for a fun new way to dye Easter eggs this year? These Tye Dye easter eggs are sure to be a hit! With very few supplies, you will have the most unique Easter Eggs in the neighborhood that everyone will be in awe about!
Materials
- Boiled Eggs
- Coffee Filters
- Water Based Food Coloring
- Rubber Bands
- Paper Towels
- Rubber Gloves (optional)
Instructions
- Place one egg in the middle of one coffee filter and wrap it tightly, bringing the excess coffee filter to the tip of the egg and securing it with a rubber band.
- Get your food coloring and start with one color, putting one drop in random spots around the egg. Do this with as many colors as you like, however, I tend to use 4 different colors, the basic red, green, blue, and yellow is what I used for this recipe. Do this until the coffee filter around the egg is mostly filled with food coloring. It spreads, so a little goes a long way.
- Leave the eggs to sit for 5 minutes,
- Using rubber gloves if desired, gently unwrap the eggs and pat them dry with a paper towel.
- Set them back in the egg carton to dry for about 5 minutes. Enjoy!
I’m Melissa, the imaginative force behind Sparkles to Sprinkles, where creativity comes to life, and sprinkles of joy are scattered generously. Melissa is a proud Jersey girl who found love with a New York boy. As a mom to four wonderful boys and a few fur babies, her journey into the world of blogging began after making the life-changing decision to stay home and raise her children. Previously a dedicated workaholic, Melissa’s blog became her creative outlet and passion project. Inspired by her mother-in-law, a masterful cook renowned for her delicious home-cooked meals and legendary holiday feasts (think mouthwatering sausage stuffing), Melissa honed her culinary skills through a combination of family recipes and countless cooking classes. She often attended these classes with her son Michael, who shared her enthusiasm for cooking from a young age. Melissa’s love for learning extends beyond familiar cuisines, as she enjoys exploring international recipes in hands-on cooking classes. Her blog features a diverse array of recipes, showcasing her expertise with various kitchen appliances such as the Instant Pot, air fryer, Slow Cooker, Ninja Foodi, Instant Vortex Plus, and more. Join Melissa on her culinary adventures as she shares tried-and-true family favorites alongside exciting new discoveries!


