How To Dye Easter Eggs With Rice
Are you tired of the soggy mess of dye cups and stained countertops that come with traditional Easter egg dyeing? Then you’re in for a real treat! Forget about vinegar water and time-consuming boiling processes. With a few simple items like uncooked white rice, food coloring, and some basic kitchen supplies, you can create beautiful, vibrant Easter Eggs without all the mess. In this article, we’ll provide an easy-to-follow guide on how to dye Easter eggs with rice. You’ll learn the materials needed, step-by-step instructions, and tips for adding additional details to your eggs. Plus, it’s fun for the entire family! So, let’s get started and make your Easter egg decorating season a little less messy!
How To Dye Easter Eggs With Rice
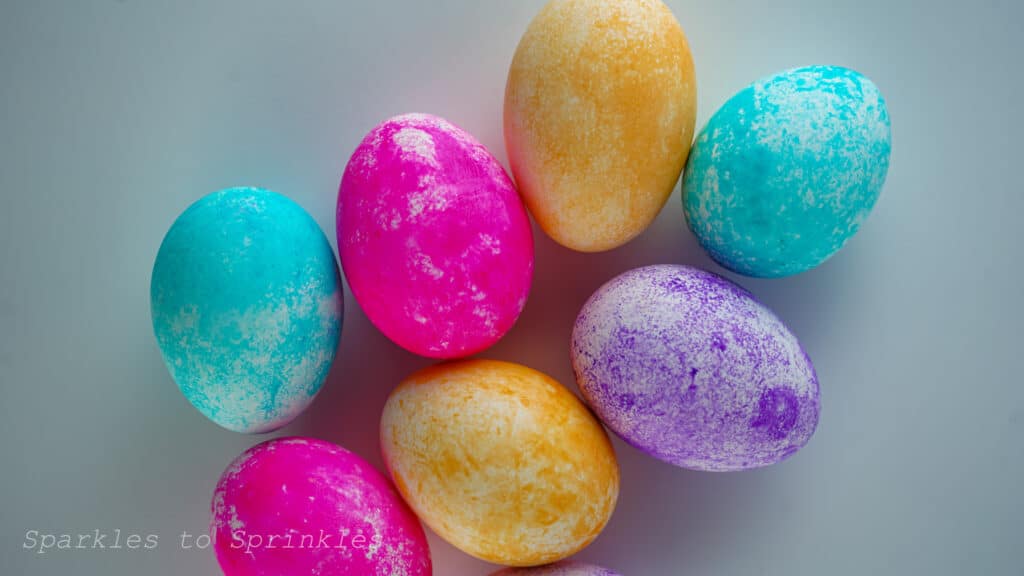
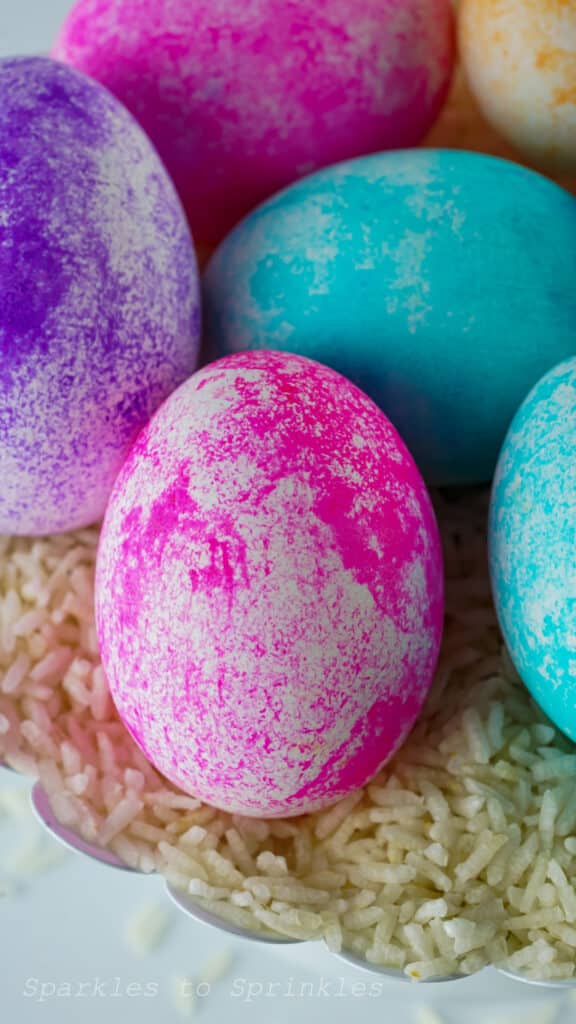
Dying Eggs is a staple around Easter time. Usually, it involves vinegar and food coloring to get just the perfect egg, but did you know that you can dye Easter Eggs with rice? It is true! And the end result is simply magical. Follow this step-by-step guide to dying Easter eggs with rice.

What You Will Love About Dying Easter Eggs With Rice
- Creative and colorful: Making Easter eggs with rice allows you to create vibrant and unique patterns on your eggs using food dye and rice. You can mix and match colors to create beautiful and eye-catching designs that are sure to impress.
- Easy and fun for all ages: This method is simple enough for kids to join in on the fun and get creative with their egg designs. It’s a hands-on activity that provides hours of entertainment for the whole family.
- Mess-free: Unlike traditional egg dyeing methods that can be messy and require lots of cleanup, using rice to dye eggs is relatively mess-free. The rice contains the dye and prevents it from spreading everywhere, making cleanup a breeze.
- Customizable: You can customize your Easter eggs to match your personal style or decor theme. Experiment with different colors, patterns, and techniques to create one-of-a-kind eggs that reflect your creativity.
- Quick and efficient: This method is quick and efficient, allowing you to dye multiple eggs at once without waiting for them to dry between colors. Simply place the eggs in the baggies, shake them around, and watch as they transform into beautifully colored creations.
Overall, making Easter eggs with rice is a fun and creative way to celebrate the holiday and create lasting memories with your loved ones.
Looking for more ways to dye easter eggs, try these methods as well.
How to Dye Easter Eggs with Food coloring
Instant Pot Easter Eggs + Natural Easter Egg Dye
Items Needed:
- White Rice
- Food Dye
- Boiled Eggs
- Quart Baggies
- Rubber Gloves (optional)
How to Dye Easter Eggs with Rice
- Decide how many colors you’re going to do and have one baggie per color. If you’re using gloves, put them on now.
- Place about a cup of rice in each baggie. It doesn’t have to be perfect, you can just eyeball it if you don’t feel like measuring. Just don’t put a ton in the bag. About a ¼ full.
- Place four drops of food coloring in each baggie. Only one color per bag.
- Remove air from the bag and seal it before squishing the rice all around until the dye is distributed.
- Be sure your eggs are dry and not wet before choosing your color and placing the egg in the bag. Remove the air and seal the bag before gently moving the egg around in the colored rice until you’re satisfied with the color distribution.
- Set it aside to dry or place it in a second color if you want to get funky with it.
Tips & Tricks
- Use long-grain white rice: Long-grain white rice works best for this method as it has a larger surface area, allowing it to hold more dye and create vibrant colors on the eggs.
- Use gel food coloring: Gel food coloring provides more intense and vibrant colors compared to liquid food coloring. It’s also thicker, which helps it adhere better to the rice and transfer onto the eggs more evenly.
- Shake gently: When shaking the baggies containing the eggs and colored rice, be sure to do so gently to avoid cracking the eggs. A light shake is all that’s needed to distribute the dye evenly and create beautiful patterns on the eggs.
- Double-dip for more colors: If you want to create multi-colored eggs, you can double-dip them by placing them in a second baggie with a different color of rice after the first coat has dried. This adds depth and dimension to your egg designs.
- Experiment with patterns: Get creative with your egg designs by experimenting with different patterns and techniques. You can try swirling the eggs around in the rice to create marbled effects or use rubber bands to create striped patterns.
- Allow eggs to dry thoroughly: After removing the eggs from the baggies, place them on a paper towel or drying rack to allow them to dry thoroughly. This prevents the colors from smudging and ensures that your eggs look their best.
- Seal baggies securely: Make sure to seal the baggies securely before shaking them to prevent any leaks or spills. Double-check the seals to ensure that they’re tight to avoid any messes.
With these tips and tricks, you’ll be able to create beautifully dyed Easter eggs using rice that are sure to impress everyone!
FAQ’s
- Can I use any type of rice? It’s best to use long-grain white rice for this method as it provides the best results in terms of color intensity and adherence to the eggs.
- How much food coloring should I use? Start with four drops of food coloring per baggie of rice. You can adjust the amount based on your desired color intensity.
- How do I prevent the eggs from cracking? Handle the eggs gently and shake the baggies with rice carefully to avoid putting too much pressure on the eggs, which can cause cracking.
- Can I reuse the colored rice? Yes, you can reuse the colored rice for additional eggs. Just make sure to seal the baggies securely to prevent any leaks or spills.
- How long does it take for the eggs to dry? Allow the eggs to dry thoroughly after removing them from the baggies. This typically takes around 10-15 minutes, depending on the humidity level in your area.
- Can I create multi-colored eggs? Yes, you can create multi-colored eggs by double-dipping them in different bags of colored rice after the first coat has dried. This adds depth and variety to your egg designs.
- How should I store the colored eggs? Once the eggs are dry, you can store them in an egg carton or display them in a decorative basket for Easter festivities.

Storage
Once your dyed eggs are dry, place them in the fridge until you are ready to enjoy. These will keep for up to 1 week.

What type of rice should I use?
Any rice will work for this. Minute rice seemed to work the best, but long grain rice also worked. If you only have brown rice on hand you can use this as well.

Can I dye the same egg with multiple colors?
Yes, you can dye the same egg with multiple colors. Place the egg in your first color, then remove it and let it dry for a few minutes. Once dry, add it to our next color. Repeat this process until your egg is dipped in all the colors that you prefer.

How To Dye Easter Eggs With Rice
Ready to dye easter eggs with less mess? Skip the vinegar water cups and learn how to dye Easter Eggs with rice! It is less messy and you will love the end result!
Materials
- White Rice
- Food Dye
- Boiled Eggs
- Quart Baggies
- Rubber Gloves (optional)
Instructions
- Decide how many colors you’re going to do and have one baggie per color. If you’re using gloves, put them on now.
- Place about a cup of rice in each baggie. It doesn’t have to be perfect, you can just eyeball it if you don’t feel like measuring. Just don’t put a ton in the bag. About a ¼ full.
- Place four drops of food coloring in each baggie. Only one color per bag.
- Remove air from the bag and seal it before squishing the rice all around until the dye is distributed.
- Be sure your eggs are dry and not wet before choosing your color and placing the egg in the bag. Remove the air and seal the bag before gently moving the egg around in the colored rice until you’re satisfied with the color distribution.
- Set aside to dry or place it in a second color if you want to get funky with it.
Notes
Yields: As many as you like
I’m Melissa, the imaginative force behind Sparkles to Sprinkles, where creativity comes to life, and sprinkles of joy are scattered generously. Melissa is a proud Jersey girl who found love with a New York boy. As a mom to four wonderful boys and a few fur babies, her journey into the world of blogging began after making the life-changing decision to stay home and raise her children. Previously a dedicated workaholic, Melissa’s blog became her creative outlet and passion project. Inspired by her mother-in-law, a masterful cook renowned for her delicious home-cooked meals and legendary holiday feasts (think mouthwatering sausage stuffing), Melissa honed her culinary skills through a combination of family recipes and countless cooking classes. She often attended these classes with her son Michael, who shared her enthusiasm for cooking from a young age. Melissa’s love for learning extends beyond familiar cuisines, as she enjoys exploring international recipes in hands-on cooking classes. Her blog features a diverse array of recipes, showcasing her expertise with various kitchen appliances such as the Instant Pot, air fryer, Slow Cooker, Ninja Foodi, Instant Vortex Plus, and more. Join Melissa on her culinary adventures as she shares tried-and-true family favorites alongside exciting new discoveries!


