Chocolate Christmas Tree Pretzels
Looking for an easy, fun, and festive holiday treat that doubles as an edible decoration? These Chocolate Christmas Tree Pretzels are just what you need! With their vibrant green candy coating, colorful “ornament” gems, and crunchy pretzel trunks, they bring a cheerful holiday vibe to any dessert table. Whether you’re hosting a party, gifting treats, or spending time with the kids, this recipe is a crowd-pleaser.
Chocolate Christmas Tree Pretzels
What makes this recipe so special is how simple and customizable it is. All you need are a few candy melts, pretzel sticks, and sprinkles to create these adorable Christmas tree pretzels. They’re perfect for getting creative—let the kids drizzle the “branches” or decorate the “trees” with their favorite sprinkles and candies. Plus, there’s no baking involved, making them an easy last-minute addition to your holiday plans.
These festive pretzels aren’t just a treat—they’re also a great way to add a DIY touch to your celebrations. Serve them as a dessert centerpiece, wrap them in cellophane bags for gifts, or use them to top a holiday cake. No matter how you enjoy them, Chocolate Christmas Tree Pretzels are guaranteed to bring smiles and holiday cheer.

Pair these with our Christmas tree cupcakes or our Christmas Tree Brownies for some very happy and excited kids this holiday season!
What You Will Love About This Recipe
1. Fun and Festive Design
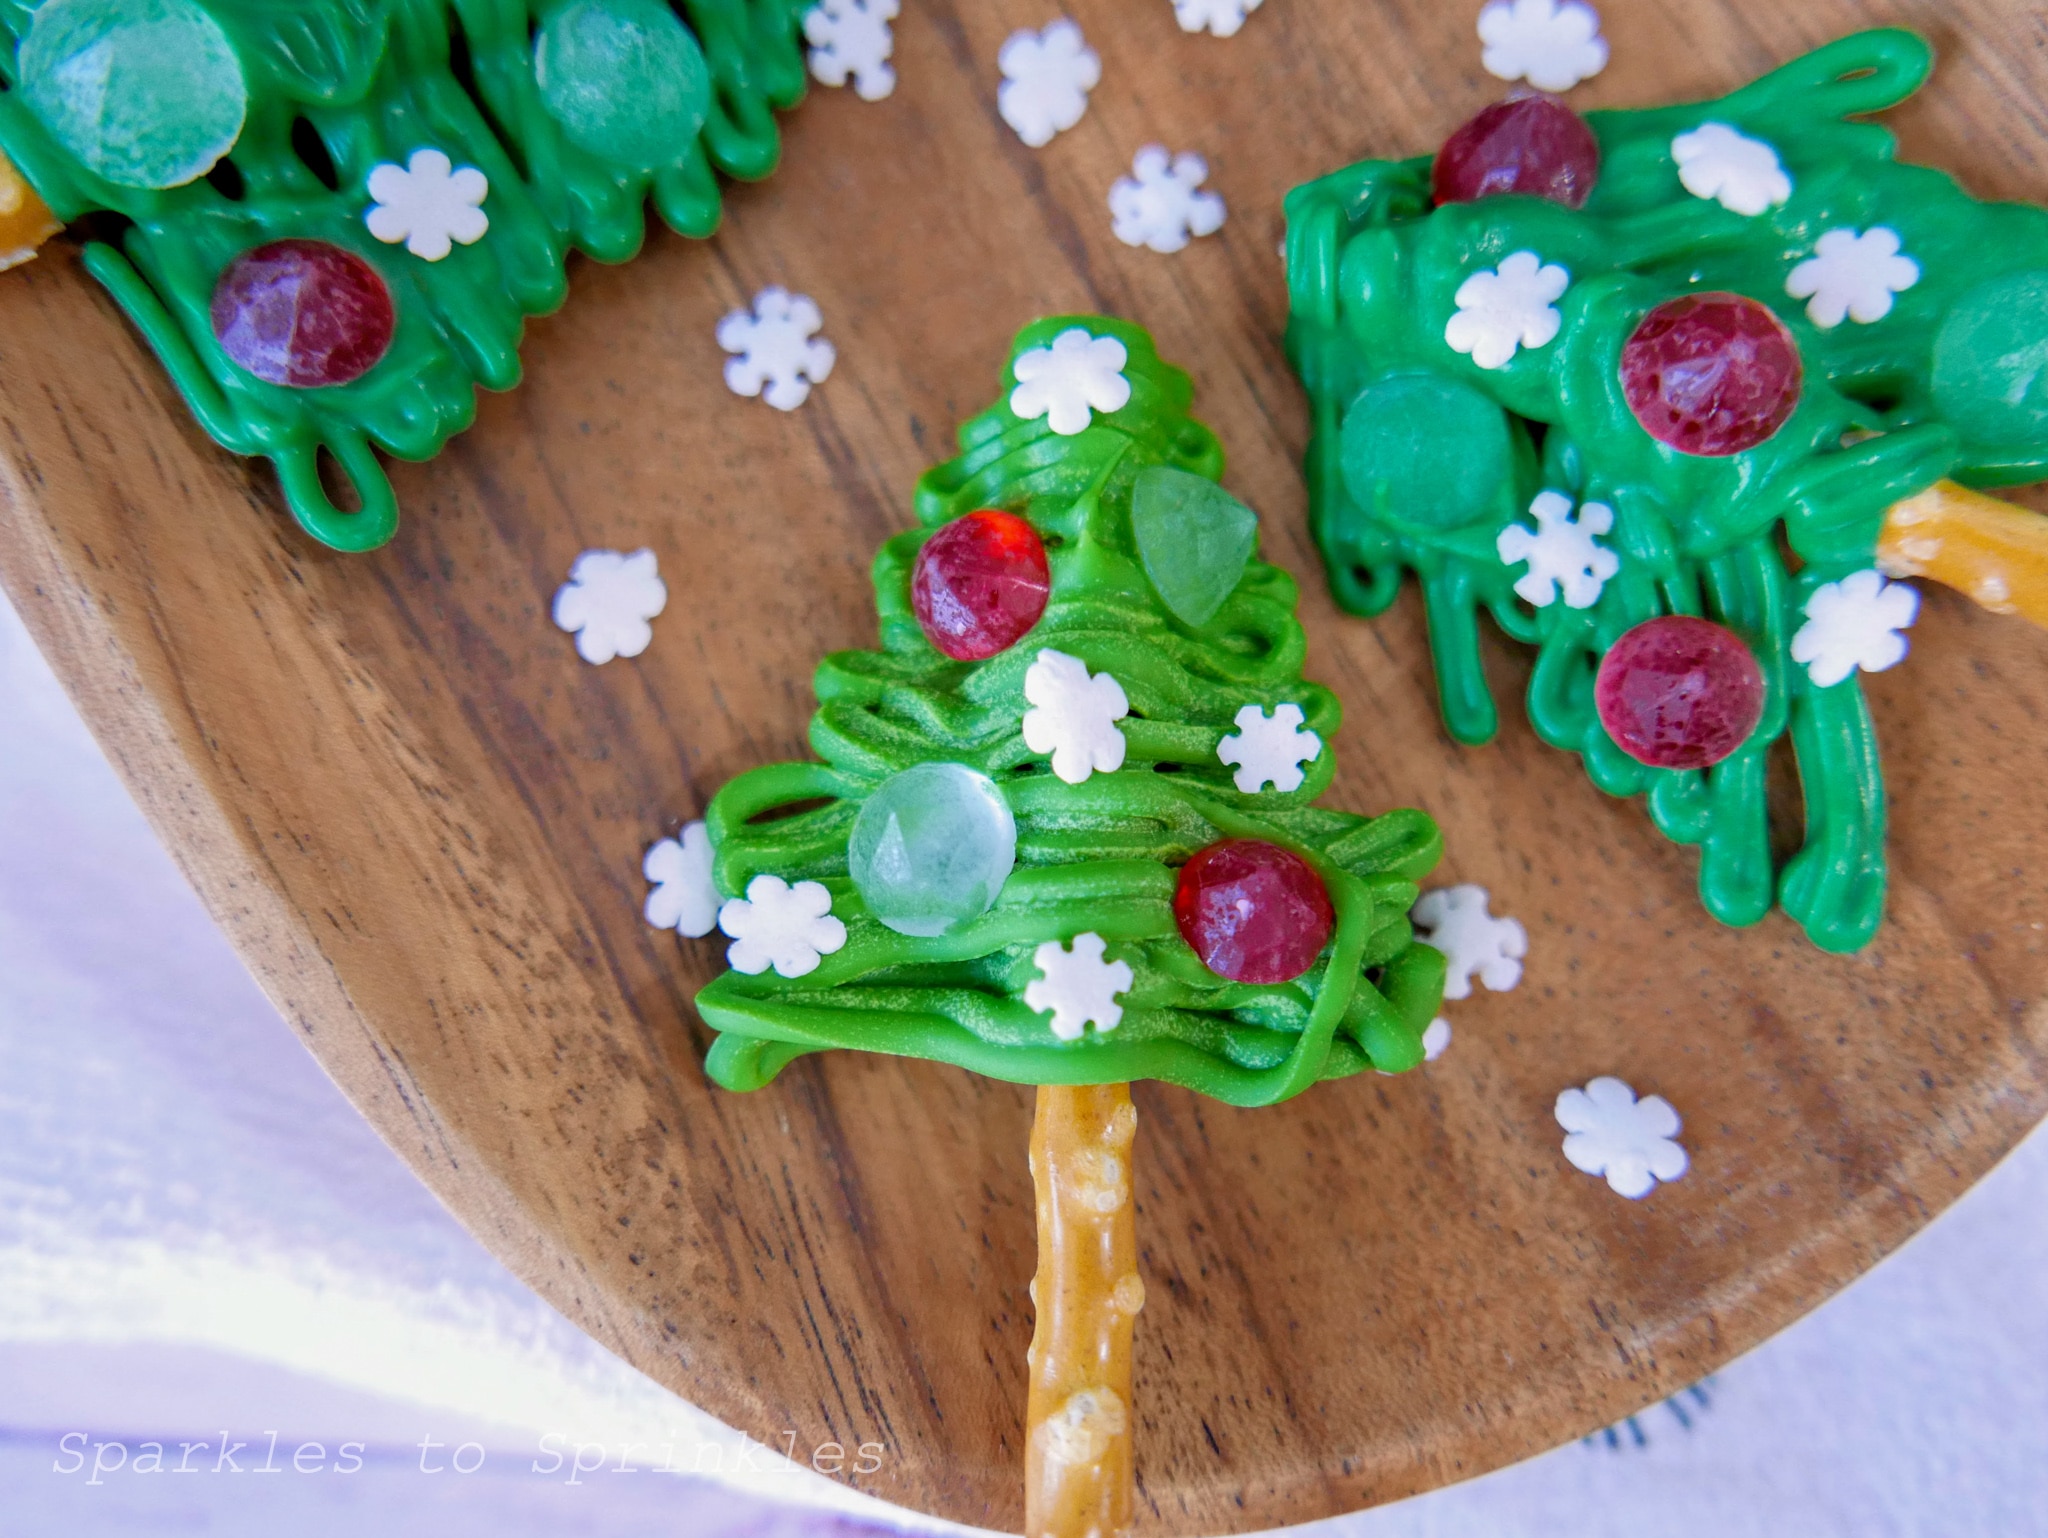
These adorable pretzel trees are a whimsical treat that brings holiday cheer to any table. Their vibrant green branches, “ornament” gems, and snowflake sprinkles make them as much fun to look at as they are to eat!
2. Easy and Kid-Friendly
This recipe is perfect for families. Kids will love helping drizzle the candy melts and decorating the trees with sprinkles. It’s a fun holiday activity that doubles as a delicious snack.
3. No Baking Required
With no oven needed, these pretzel trees are quick and hassle-free. All you need are candy melts, pretzels, and your favorite decorations to whip up this festive treat in no time.
4. Perfect for Gifting
Wrapped in cellophane bags with a festive ribbon, these pretzel trees make a thoughtful homemade gift for teachers, neighbors, or coworkers. They’re a sweet way to spread holiday joy.
5. Great for Parties
Serve them at a holiday party, use them as edible table decorations, or let them be the star of your dessert platter. They’re guaranteed to impress guests of all ages.
How to Make Chocolate Christmas Tree Pretzels
- Melt the dark green candy melts according to package instructions. (You can either melt over a double boiler, or in the microwave. I prefer using my instant pot as a double boiler method. Be careful not to over heat, or the candy melts will become chalky and difficult to use. If this happens, add a small amount of coconut oil, and mix well.) Drape a pastry bag over your hand, fill with the melted candy, and cut the tip of the bag with kitchen shears.

- Place a piece of wax or parchment paper over a flat plate or tray. Place the pretzel sticks on the tray, and drizzle the candy melts back and forth, making the melted candy wider as you go in the shape of a Christmas tree. Immediately add some red and clear sugar gems, and some white snowflake sprinkles. The green candy melts will harden rather quickly, so make sure you get your decorations on before the candy hardens. Try different shapes and designs to make different types of tree shapes.

- Repeat steps 1 and 2 with the bright green candy melts for the remaining pretzel sticks. Once all of your candied trees are decorated, place in the refrigerator to set for approximately 5 minutes. Once set, your trees are ready to be enjoyed.

Tips & Tricks
- Use Quality Candy Melts
For the best results, use high-quality candy melts that melt smoothly. If your candy melts seem too thick, add a small amount of coconut oil to achieve the perfect drizzling consistency. - Work Quickly
Candy melts harden fast! Have all your decorations—sugar gems, snowflakes, and sprinkles—ready to go before you start drizzling the candy onto the pretzel sticks. - Practice Your Drizzle Technique
If you’re new to using pastry bags, practice a few drizzles on parchment paper before working on your pretzel sticks. This will help you get the hang of creating tree shapes. - Keep the Layers Thin
When drizzling the candy melts, use a light hand to avoid overly thick layers. This will keep your trees looking delicate and make them easier to eat. - Experiment with Colors
While green is classic for Christmas trees, you can try other colors like white for snowy trees or even red for a whimsical holiday twist. - Let Them Set Properly
Place your finished pretzels in the refrigerator for about 5 minutes to ensure the candy melts harden completely. This makes them easier to handle and keeps the decorations intact. - Get Creative with Decorations
Try using mini M&Ms, edible glitter, or crushed candy canes for unique tree designs. You can also pipe a small candy star at the top of each tree for extra flair.
FAQs


Chocolate Christmas Tree Pretzels
Chocolate Christmas Tree Pretzels are a simple holiday treat that kids love! With just a few ingredients you will have the perfect treat for class parties or holiday get togethers.
Ingredients
- ½ c dark green candy melts
- ½ c bright green candy melts
- 2 cake decorating pastry bags
- Kitchen shears
- Wax or parchment paper
- 8 pretzel dipping sticks
- Wilton Sweet Isomalt Sugar Gems, red and clear (Available at Walmart, Michael’s and Joann’s Craft Stores)
- White snowflake sprinkles
Instructions
- Melt the dark green candy melts according to package instructions. (You can either melt over a double boiler or in the microwave. I prefer the microwave using a glass bowl. Be careful not to overheat, or the candy melts will become chalky and difficult to use. If this happens, add a small amount of coconut oil, and mix well.) Drape a pastry bag over your hand, fill it with melted candy, and cut the tip of the bag with kitchen shears.
- Place a piece of wax or parchment paper over a flat plate or tray. Place the pretzel sticks on the tray, and drizzle the candy melts back and forth, making the melted candy wider as you go in the shape of a Christmas tree. Immediately add some red and clear sugar gems and some white snowflake sprinkles. The green candy melts will harden rather quickly, so make sure you get your decorations on before the candy hardens. Try different shapes and designs to make different types of tree shapes.
- Repeat steps 1 and 2 with the bright green candy melts for the remaining pretzel sticks. Once all of your candied trees are decorated, place them in the refrigerator to set for approximately 5 minutes. Once set, your trees are ready to be enjoyed.
Nutrition Information:
Yield:
8Serving Size:
1Amount Per Serving: Calories: 295Total Fat: 4gSaturated Fat: 1gTrans Fat: 0gUnsaturated Fat: 2gCholesterol: 12mgSodium: 421mgCarbohydrates: 60gFiber: 1gSugar: 24gProtein: 4g
I’m Melissa, the imaginative force behind Sparkles to Sprinkles, where creativity comes to life, and sprinkles of joy are scattered generously. Melissa is a proud Jersey girl who found love with a New York boy. As a mom to four wonderful boys and a few fur babies, her journey into the world of blogging began after making the life-changing decision to stay home and raise her children. Previously a dedicated workaholic, Melissa’s blog became her creative outlet and passion project. Inspired by her mother-in-law, a masterful cook renowned for her delicious home-cooked meals and legendary holiday feasts (think mouthwatering sausage stuffing), Melissa honed her culinary skills through a combination of family recipes and countless cooking classes. She often attended these classes with her son Michael, who shared her enthusiasm for cooking from a young age. Melissa’s love for learning extends beyond familiar cuisines, as she enjoys exploring international recipes in hands-on cooking classes. Her blog features a diverse array of recipes, showcasing her expertise with various kitchen appliances such as the Instant Pot, air fryer, Slow Cooker, Ninja Foodi, Instant Vortex Plus, and more. Join Melissa on her culinary adventures as she shares tried-and-true family favorites alongside exciting new discoveries!