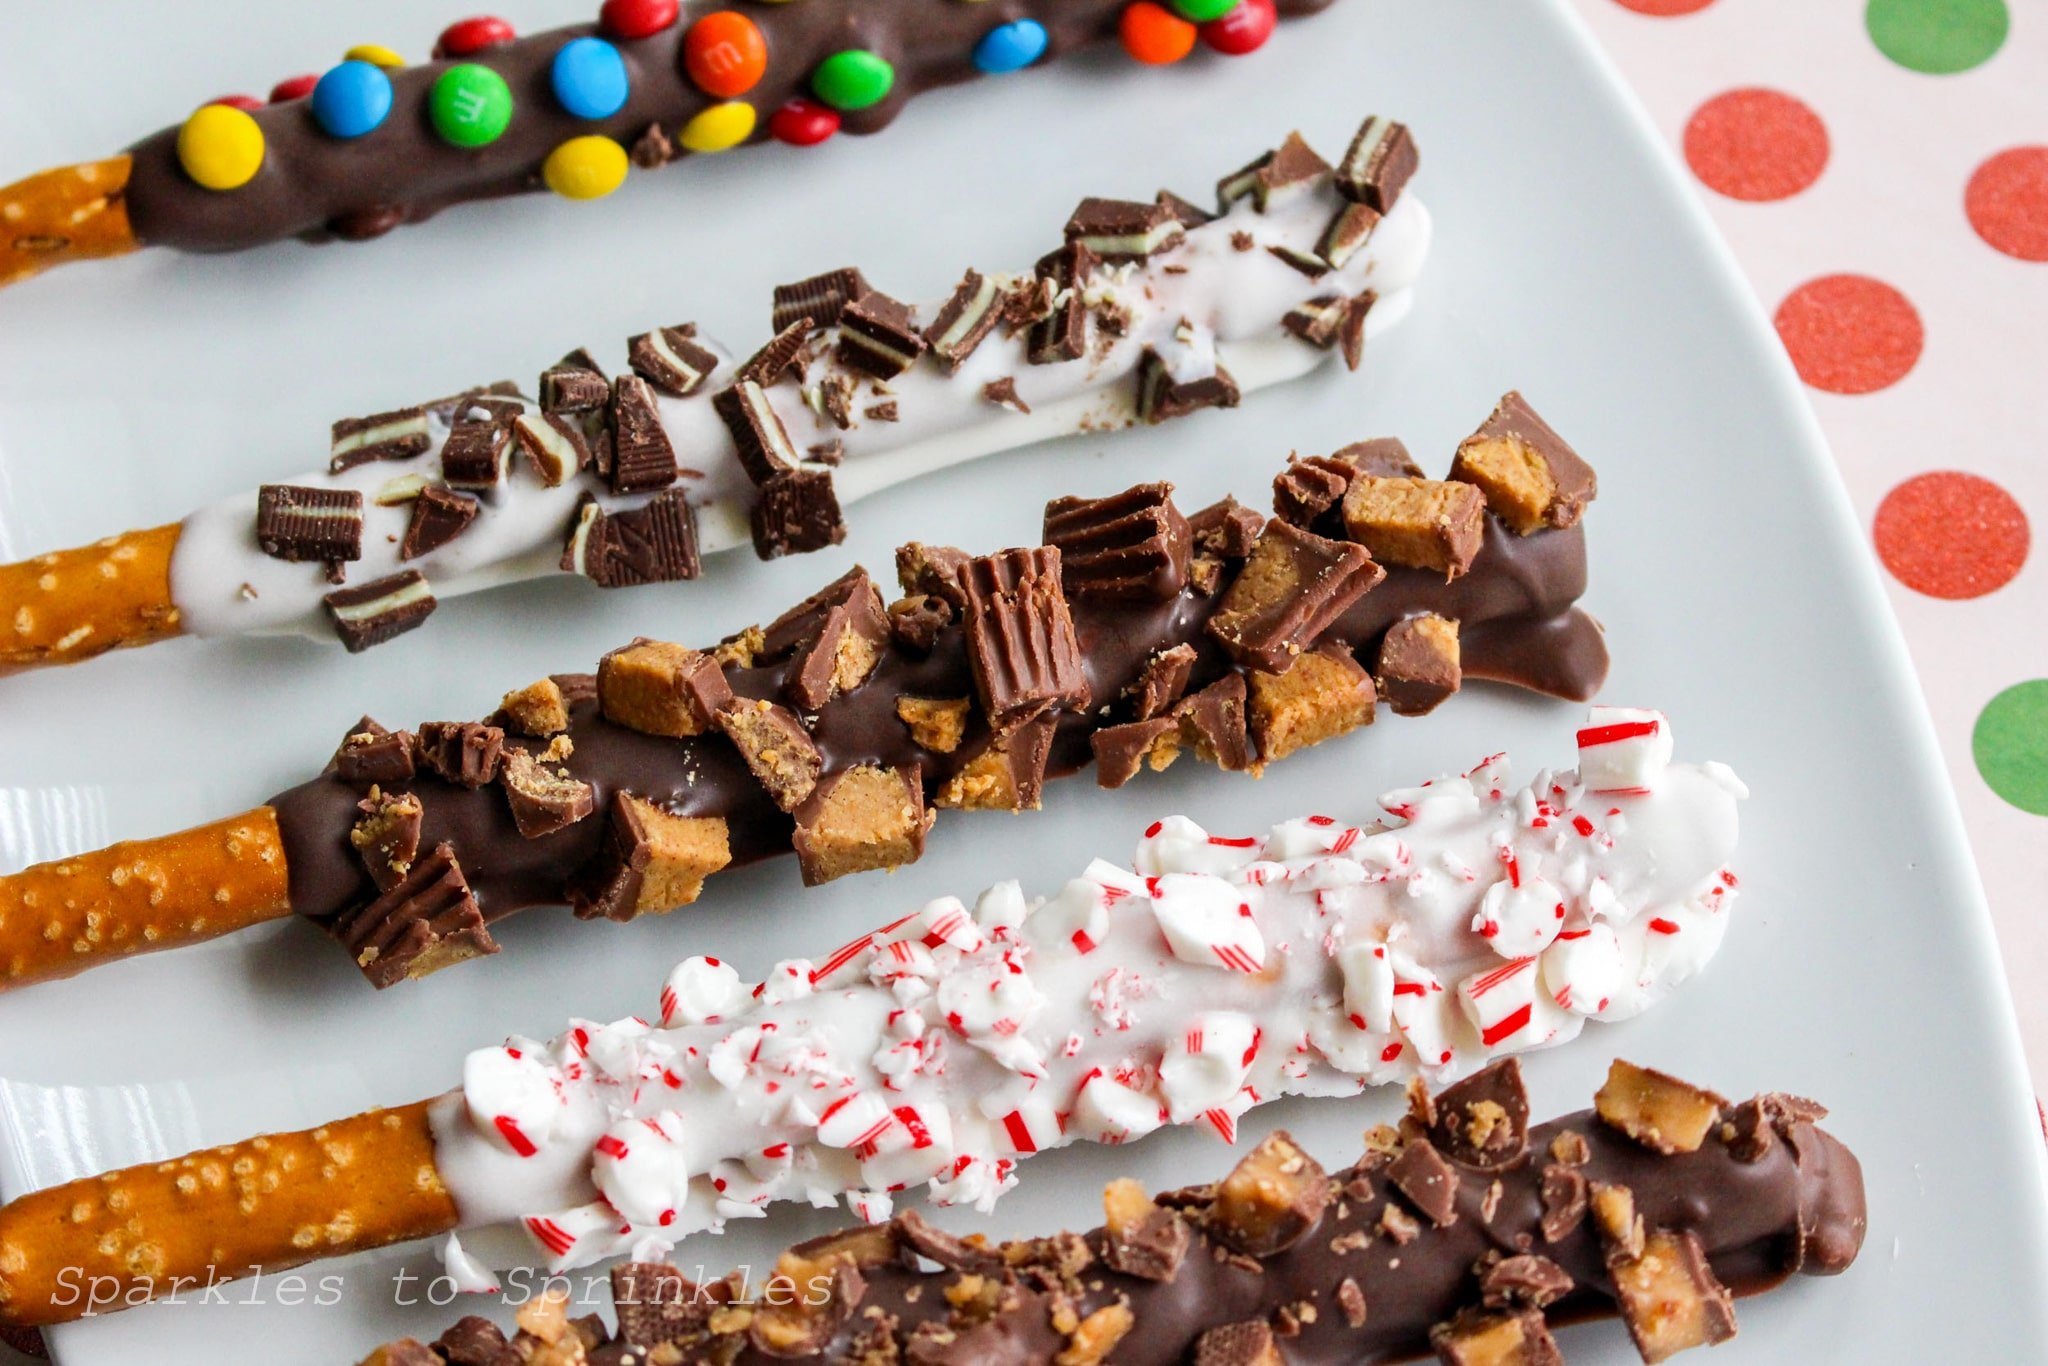
Chocolate Dipped Pretzel Rods
Chocolate-dipped pretzel rods are the perfect combination of sweet and salty, making them an irresistible treat for any occasion. Whether you’re whipping up a quick snack for a party or creating edible gifts for loved ones, these fun and customizable pretzel rods are a guaranteed hit. The best part? They’re easy to make, and you can get as creative as you like with toppings!

Chocolate Dipped Pretzel Rods
This recipe uses simple ingredients like candy melts and pretzel rods, making it ideal for beginners or last-minute treat makers. From colorful sprinkles to crushed candies, the topping possibilities are endless, allowing you to customize each rod to suit any theme or celebration.
So, grab your ingredients and let your creativity run wild! These chocolate-dipped pretzel rods will look just as good on a dessert table as they taste.

What You Will Love About This Recipe
Easy to Make: Minimal ingredients and quick steps make this recipe approachable for all skill levels.
Customizable: Choose from a variety of chocolates, colors, and toppings to match any theme or event.
Perfect for Any Occasion: Great for holidays, parties, gifts, or even as a quick family treat.

How to Make Chocolate Dipped Pretzel Rods
1. Melt the candy coating or morsels in the microwave for 1 minute. Stir vigorously and then reheat in 15 second increments, stirring well between each heating, giving special care not to overheat the candy. If the candy coating is overheated, it will be too thick. You can add 2 teaspoons of vegetable shortening or coconut oil to help thin the candy but do not add any other type of liquid as the candy will seize and harden.

2. Pour candy coating over two-thirds of the pretzel rod and shake gently to remove excess. If applying sprinkles or candy, do so immediately. Larger sprinkles and candy pieces work best if placed individually.

3. Place the pretzel rod on waxed paper or a cooling rack.
4. Let pretzel rods dry completely before packaging or serving.

Tips & Tricks
- Use High-Quality Chocolate: Good-quality candy melts or chocolate will melt smoothly and give you a professional-looking finish.
- Avoid Overheating: Overheating chocolate can make it thick and clumpy. Melt in short bursts, stirring frequently.
- Thin as Needed: If your chocolate is too thick, add a small amount of vegetable shortening or coconut oil to achieve the right consistency.
- Work Quickly: Chocolate hardens fast, so add toppings immediately after dipping.
- Cool Completely: Let pretzel rods dry fully on waxed paper or a cooling rack to avoid smudging the decorations.
FAQs


Chocolate Dipped Pretzel Rods
Ingredients
- Pretzel rods
- White candy melts, white chocolate morsels, or vanilla-flavored almond bark
- Milk chocolate morsels or chocolate-flavored almond bark
- Various candies, cut into small pieces
Instructions
- Melt the candy coating or morsels in the microwave for 1 minute. Stir vigorously and then reheat in 15 second increments, stirring well between each heating, giving special care not to overheat the candy. If the candy coating is overheated, it will be too thick. You can add 2 teaspoons of vegetable shortening or coconut oil to help thin the candy but do not add any other type of liquid as the candy will seize and harden.
- Pour candy coating over two-thirds of the pretzel rod and shake gently to remove excess. If applying sprinkles or candy, do so immediately. Larger sprinkles and candy pieces work best if placed individually.
- Place the pretzel rod on waxed paper or a cooling rack.
- Let pretzel rods dry completely before packaging or serving.
I’m Melissa, the imaginative force behind Sparkles to Sprinkles, where creativity comes to life, and sprinkles of joy are scattered generously. Melissa is a proud Jersey girl who found love with a New York boy. As a mom to four wonderful boys and a few fur babies, her journey into the world of blogging began after making the life-changing decision to stay home and raise her children. Previously a dedicated workaholic, Melissa’s blog became her creative outlet and passion project. Inspired by her mother-in-law, a masterful cook renowned for her delicious home-cooked meals and legendary holiday feasts (think mouthwatering sausage stuffing), Melissa honed her culinary skills through a combination of family recipes and countless cooking classes. She often attended these classes with her son Michael, who shared her enthusiasm for cooking from a young age. Melissa’s love for learning extends beyond familiar cuisines, as she enjoys exploring international recipes in hands-on cooking classes. Her blog features a diverse array of recipes, showcasing her expertise with various kitchen appliances such as the Instant Pot, air fryer, Slow Cooker, Ninja Foodi, Instant Vortex Plus, and more. Join Melissa on her culinary adventures as she shares tried-and-true family favorites alongside exciting new discoveries!