
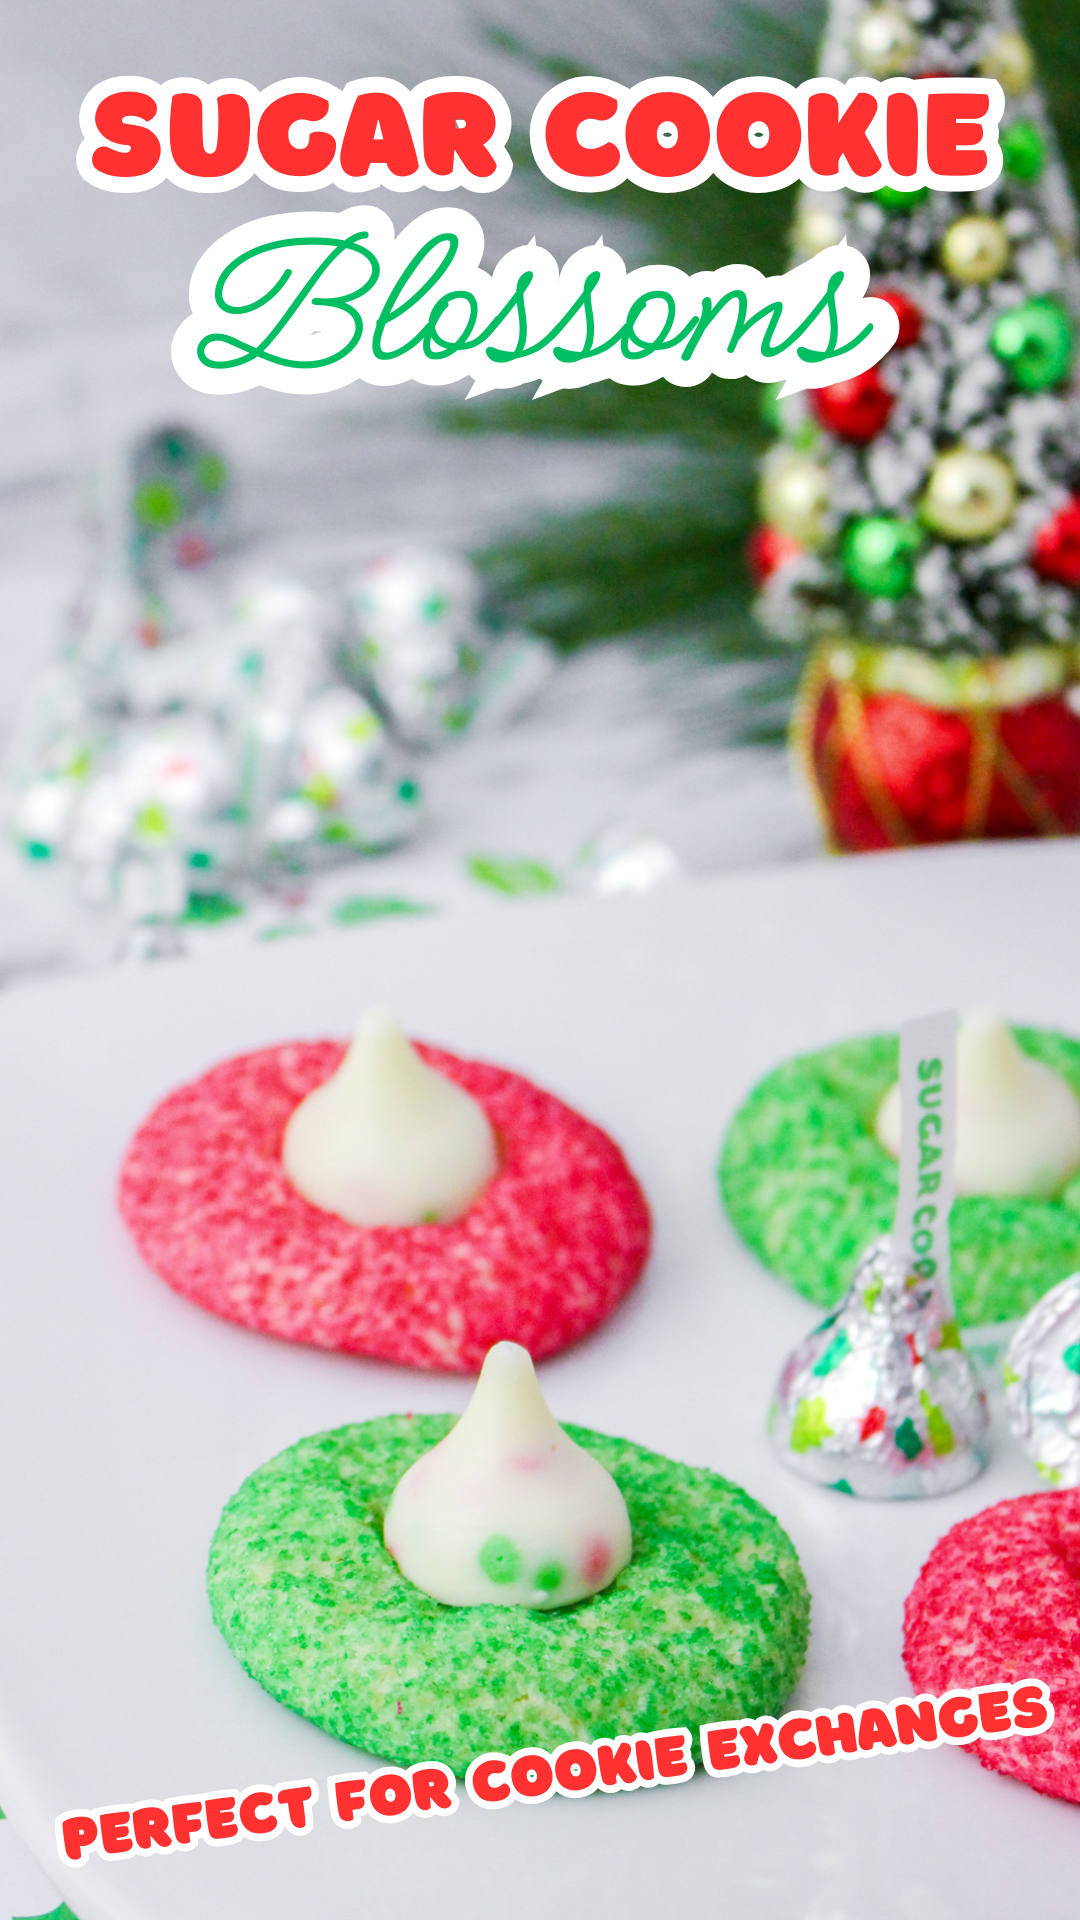
Sugar Cookie Blossoms
When it comes to holiday baking, Sugar Cookie Blossoms are a must-have on any cookie tray! These festive cookies are soft, sweet, and perfectly adorned with a Hershey’s Kiss in the center, adding a delicious and decorative touch. Whether you’re baking for a holiday party or simply whipping up a batch for family and friends, these classic sugar cookies with a twist are bound to be a hit.

Sugar Cookie Blossoms
The recipe for Sugar Cookie Blossoms is incredibly easy to follow, making it ideal for beginner bakers and seasoned pros alike. With just a few pantry staples—like flour, sugar, and butter—and some Hershey’s Kisses, you’ll have a batch of holiday magic ready to go in no time. The cookies are soft and chewy with just the right amount of sweetness, and they pair beautifully with the smooth, chocolatey bite in the center.
What makes these cookies even more fun is the option to roll them in colored sugar before baking. You can go for classic red and green sugar for Christmas, or mix it up with any colors you love! Not only does this add a festive sparkle, but it also gives each cookie a subtle crunch that’s so satisfying with every bite. These Sugar Cookie Blossoms are a true holiday favorite that everyone will want to reach for.

What You Will Love About This Recipe
There’s so much to love about this Sugar Cookie Blossoms recipe! First, the soft, chewy sugar cookie base with that hint of vanilla is truly irresistible. Each bite has just the right balance of sweetness, making it a delightful treat that feels both festive and comforting. And of course, that iconic Hershey’s Kiss in the center gives these cookies their signature look and adds a rich, chocolatey twist that pairs perfectly with the sugar cookie.
Another reason to love this recipe is its simplicity and versatility. You don’t need any fancy ingredients—just basics you probably already have in your kitchen, along with Hershey’s Kisses to complete the look. Plus, it’s easy to customize! Roll the cookies in colored sugar for a holiday-themed look, or keep it classic with regular sugar. These blossoms are also a hit with kids and make a great baking project for the whole family.
Finally, this recipe is perfect for any holiday gathering or cookie swap. The cookies have that festive appearance and crowd-pleasing flavor that make them a standout on any dessert table. Plus, they’re easy to store and transport, so you can make them ahead of time and share them with friends, family, and coworkers. It’s a foolproof recipe that brings joy and holiday cheer with every batch!

How to Make Sugar Cookie Blossom Cookies
- Preheat the oven to 350 degrees. Prepare a large baking sheet with parchment paper.
- Whisk together the flour, baking soda, and salt. Set aside.
- Beat the butter at medium speed for 5 minutes. Scrape down the sides. Add the sugar and continue beating for 5 to 7 minutes or until fluffy.
- Add the egg and vanilla extract, beating until evenly combined. Add the flour mixture and beat until mixed.
- Slowly add the milk to the dough as the mixer runs, adding just enough to soften the dough.

- Using a small (1 tablespoon) cookie scoop, portion the cookie dough and shape into balls. Roll each ball in the colored sugar if desired. Place on the baking sheet about 1 inch apart.

- Bake for 8 to 10 minutes or until the cookies are puffed and the edges are set.

- Cool the cookies on the baking sheet for 2 to 3 minutes before pressing one kiss into the center of each cookie.
- Transfer to a wire rack and allow the cookies to cool completely. The candies will look like they are melting but do not disturb them and they will resolidify in the correct shape.
Tips & Tricks
- Soften Your Butter: For the best cookie texture, make sure your butter is softened to room temperature before you start. This will help create a smooth, creamy dough that mixes easily and produces tender cookies. If you’re in a hurry, cut the butter into smaller pieces to soften it faster.
- Don’t Overbake: These cookies can go from soft and chewy to crispy quite quickly, so keep an eye on them! Bake just until the edges are set and the tops look slightly puffed, about 8–10 minutes. They’ll continue to firm up as they cool, so it’s better to slightly underbake than to overdo it.
- Press the Hershey’s Kiss Gently: Wait a couple of minutes after baking before pressing the Kiss into each cookie. This prevents the candy from melting too quickly and losing its shape. If the kisses start to look like they’re melting, let the cookies sit on the baking sheet a bit longer before moving them.
- Add Milk Gradually: Only add just enough milk to make the dough soft, but not sticky. You want the dough to hold its shape when rolled, so start with one tablespoon of milk and add the second only if needed.
- Chill for Even Baking: If you find the dough too soft, pop it in the fridge for about 15 minutes before baking. This step can also help prevent the cookies from spreading too much and keep them nice and thick.

Can You Make Blossoms with Pillsbury Sugar Cookie Dough
Certainly! Making blossoms with Pillsbury sugar cookie dough is a quick and convenient way to create delicious cookies. Here’s a simplified version of the recipe using Pillsbury sugar cookie dough:
Ingredients:
1 package of Pillsbury sugar cookie dough
Chocolate kisses or any candy of your choice (Hershey’s Kisses work well)
Instructions:
Preheat your oven according to the instructions on the sugar cookie dough package.
Break apart the Pillsbury sugar cookie dough along the pre-scored lines.
Roll the dough into small balls, each about 1 inch in diameter.
Place the cookie dough balls on a baking sheet lined with parchment paper, leaving enough space between each cookie.
Bake the cookies according to the package instructions.
Remove the cookies from the oven a couple of minutes before they are fully baked.
Press a chocolate kiss (or your chosen candy) into the center of each partially baked cookie.
Return the cookies to the oven and continue baking until the edges are golden brown, and the chocolate is slightly softened.
Remove the cookies from the oven and allow them to cool on the baking sheet for a few minutes before transferring them to a wire rack to cool completely.
Once the cookies have cooled, the chocolate should have set, and you’ll have tasty sugar cookie blossoms with a delightful surprise in the center. Enjoy your easy and delicious cookies!
FAQ’s

Sugar Cookie Blossoms
Sugar cookie blossoms are the perfect combination of soft buttery cookies mixed with our favorite Hershey Sugar cookie candy. These cookies are bursting with sugar cookie flavor and ready to enjoy in minutes.
Ingredients
- 2 cups flour
- ¼ teaspoon baking soda
- ¼ teaspoon salt
- ½ cup (1 stick) unsalted butter, room temperature
- 1 cup sugar
- 1 egg
- 1 ½ teaspoon vanilla extract
- 1 to 2 tablespoons milk
- ⅓ cup colored sugar if desired
- 48 Hershey’s Kisses Sugar Cookie candies, unwrapped
Instructions
- Preheat the oven to 350 degrees. Prepare a large baking sheet with parchment paper.
- Whisk together the flour, baking soda, and salt. Set aside.
- Beat the butter and medium speed for 5 minutes. Scrape down the sides. Add the sugar and continue beating for 5 to 7 minutes or until fluffy.
- Add the egg and vanilla extract, beating until evenly combined. Add the flour mixture and beat until mixed.
- Slowly add the milk to the dough as the mixer runs, adding just enough to soften the dough.
- Using a small (1 tablespoon) cookie scoop, portion the cookie dough and shape into balls. Roll each ball in the colored sugar if desired. Place on the baking sheet about 1 inch apart.
- Bake for 8 to 10 minutes or until the cookies are puffed and the edges are set.
- Cool the cookies on the baking sheet for 2 to 3 minutes before pressing one kiss into the center of each cookie.
- Transfer to a wire rack and allow the cookies to cool completely. The candies will look like they are melting but do not disturb them and they will resolidify in the correct shape.
Nutrition Information:
Yield:
48Serving Size:
1Amount Per Serving: Calories: 69Total Fat: 2gSaturated Fat: 1gTrans Fat: 0gUnsaturated Fat: 0gCholesterol: 6mgSodium: 27mgCarbohydrates: 13gFiber: 0gSugar: 8gProtein: 1g
I’m Melissa, the imaginative force behind Sparkles to Sprinkles, where creativity comes to life, and sprinkles of joy are scattered generously. Melissa is a proud Jersey girl who found love with a New York boy. As a mom to four wonderful boys and a few fur babies, her journey into the world of blogging began after making the life-changing decision to stay home and raise her children. Previously a dedicated workaholic, Melissa’s blog became her creative outlet and passion project. Inspired by her mother-in-law, a masterful cook renowned for her delicious home-cooked meals and legendary holiday feasts (think mouthwatering sausage stuffing), Melissa honed her culinary skills through a combination of family recipes and countless cooking classes. She often attended these classes with her son Michael, who shared her enthusiasm for cooking from a young age. Melissa’s love for learning extends beyond familiar cuisines, as she enjoys exploring international recipes in hands-on cooking classes. Her blog features a diverse array of recipes, showcasing her expertise with various kitchen appliances such as the Instant Pot, air fryer, Slow Cooker, Ninja Foodi, Instant Vortex Plus, and more. Join Melissa on her culinary adventures as she shares tried-and-true family favorites alongside exciting new discoveries!


