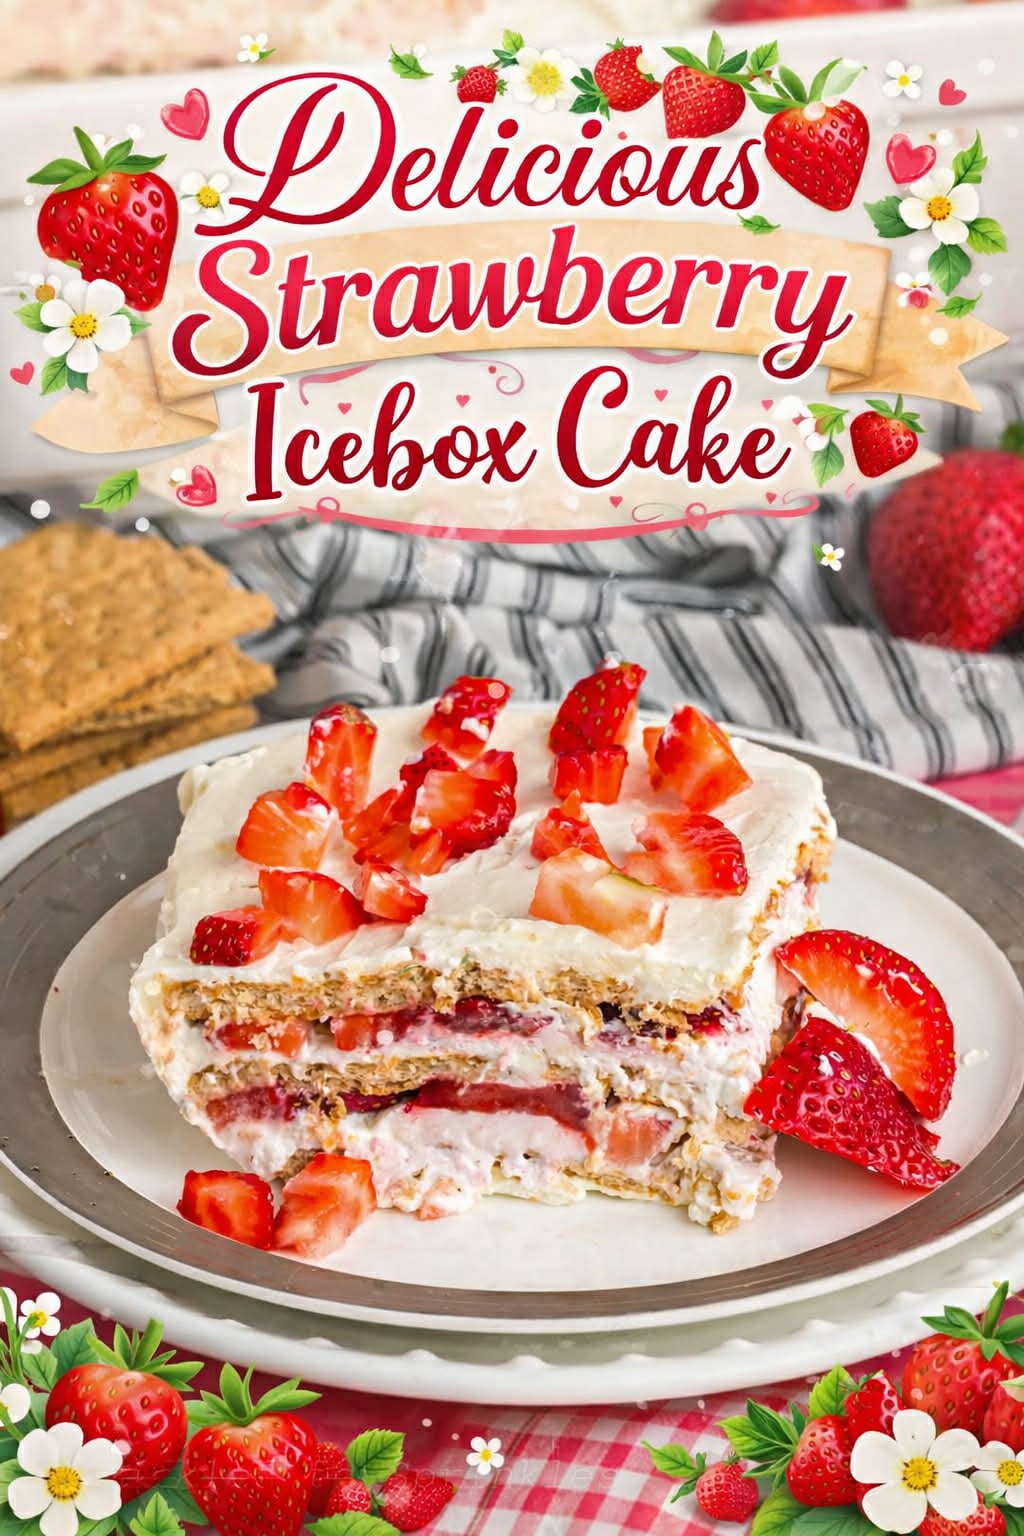
Strawberry Icebox Cake Just Like Grandma Made
Strawberry Icebox Cake is the ultimate easy, no-bake dessert that delivers all the fresh, fruity flavor you want in a summer treat without heating up the kitchen! Made with juicy, fresh strawberries, layers of creamy filling, and graham crackers that soften into a cake-like texture, this dessert is not only refreshing but also incredibly simple to prepare. Plus, it’s perfect for making ahead, as it only gets better the longer it chills in the fridge.

Strawberry Icebox Cake
What makes this Strawberry Icebox Cake so special is the combination of flavors and textures. The creamy filling made from whipped cream and softened cream cheese gives each bite a luxurious, melt-in-your-mouth feel, while the strawberries add the perfect burst of freshness. The graham crackers absorb the cream, transforming into a soft, cake-like layer, which makes for a delightful surprise with every bite.
If you’re looking for a crowd-pleasing dessert for summer picnics, potlucks, or even family gatherings, this recipe has you covered. Not only does it look impressive with its layers of red strawberries, creamy filling, and graham crackers, but it’s also a versatile recipe that you can adapt by adding other berries or toppings. Just a few simple ingredients and some chilling time in the fridge, and you have a dessert that’s bound to be a hit!

What You Will Love About This Recipe
People are going to love this Strawberry Icebox Cake for so many reasons! First, it’s a no-bake dessert, so it’s perfect for hot days when you don’t want to turn on the oven but still crave something sweet. Plus, the combination of fresh strawberries, creamy filling, and softened graham crackers creates a refreshing, melt-in-your-mouth dessert that’s both light and satisfying.
This cake is also super easy to make, making it a great recipe even if you’re short on time. With just a few steps, you’ll have a stunning, layered dessert that looks like it took a lot more effort than it did. And because it only gets better the longer it sits, you can make it ahead, making it ideal for entertaining or a convenient treat for family and friends.
It’s also a customizable recipe that lets you get creative—swap in other fruits, use flavored graham crackers, or even add a drizzle of chocolate or caramel for an extra-special twist. It’s truly a recipe that’s easy to love!

What is the history of Icebox Cake, I remember my Grandmother making them
Icebox cakes are a nostalgic treat with roots in the early 20th century, when refrigerators—or “iceboxes” as they were called—were just starting to become common in American households. Originally inspired by European charlottes and trifles, American brands promoted these cakes as an easy, no-bake dessert. Companies like Nabisco began sharing recipes on graham cracker and wafer packaging in the 1920s and 1930s, encouraging home cooks to use their products to create layered, chilled desserts.
Icebox cakes became especially popular during the mid-century as a convenient way to make a show-stopping dessert without the need for an oven, which was ideal during warm weather. For many people, including your grandmother, these cakes became a go-to dessert for family gatherings and special occasions. The beauty of icebox cakes lies in their simplicity and versatility—layers of cookies or graham crackers, whipped cream or pudding, and fruits or chocolate meld together in the fridge to create a dessert that’s as nostalgic as it is delicious.
The concept has evolved over the years, with countless flavor variations and ingredient combinations to match changing tastes, but the basic idea remains the same. It’s an enduring dessert that brings generations together and is especially cherished by those who have fond memories of it being served by family members, just like your grandmother did.
Ingredients:
- 1 Pound Fresh Strawberries, Hulled and Sliced
- 2 Cups Heavy Cream, Chilled
- 8 Ounces Cream Cheese, Softened
- 1 Cup Powdered Sugar
- 1 Teaspoon Vanilla Extract or Vanilla Bean Paste
- 16-20 Graham Crackers

How to Make Strawberry Icebox Cake
- In a large mixing bowl, whip the heavy cream until stiff peaks form. Set aside.


- In another mixing bowl, beat the softened cream cheese until smooth.


- Add the powdered sugar and vanilla extract to the cream cheese. Mix until well combined and creamy.


- Gently fold the whipped cream into the cream cheese mixture until fully incorporated. This will create a light and fluffy filling.


- Spread a thin layer of the cream cheese mixture on the bottom of a 9×13-inch baking dish or similar-sized dish.
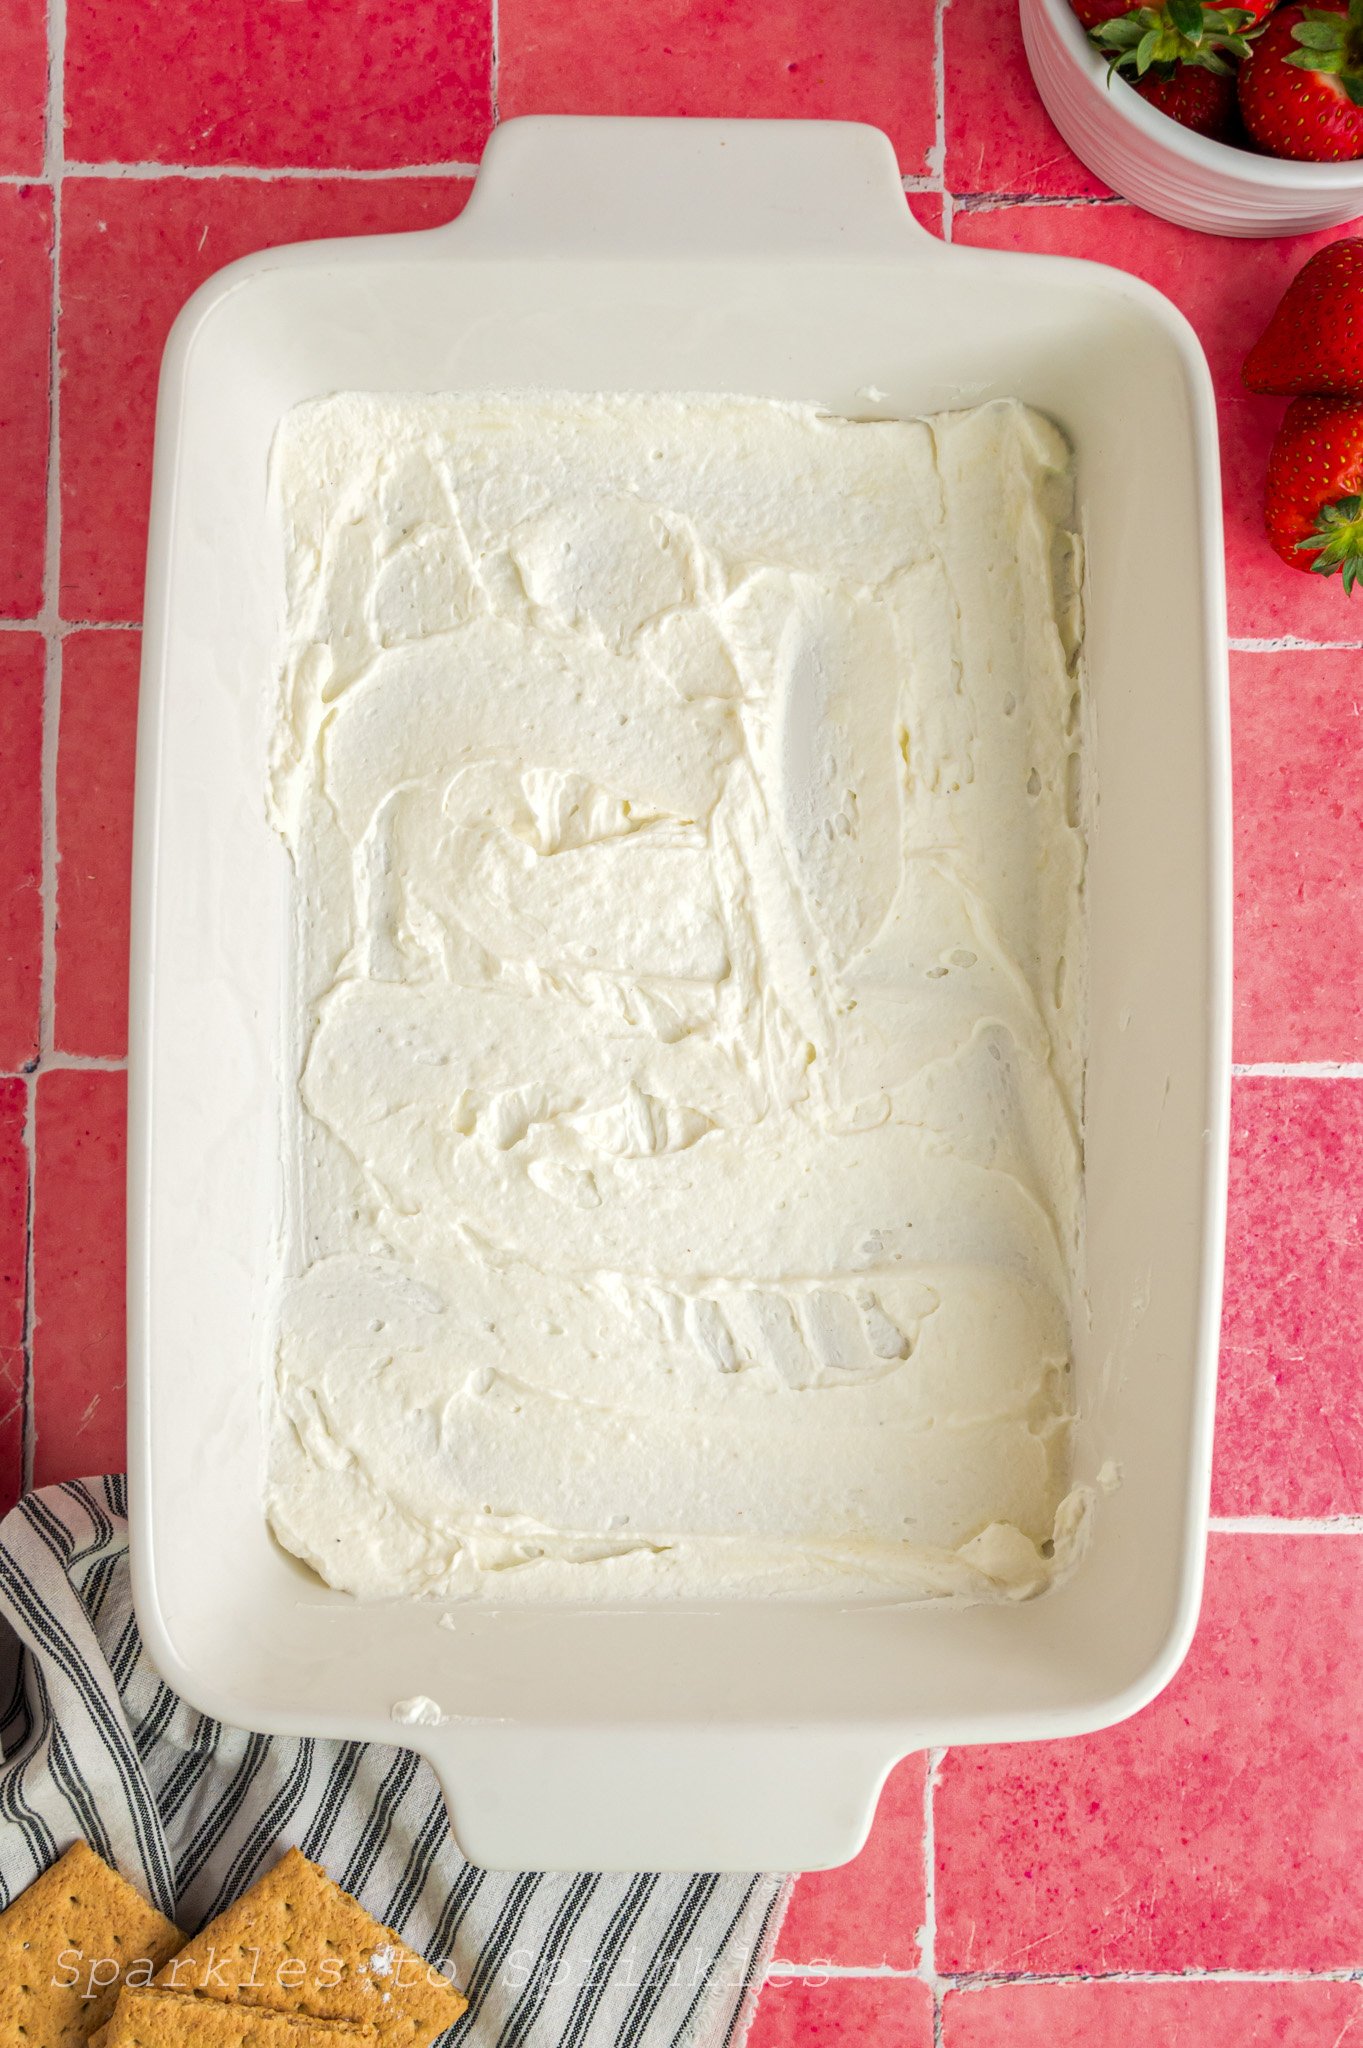
- Arrange a single layer of graham crackers on top of the cream cheese mixture, breaking them if necessary to fit.

- Spread a generous layer of the cream cheese mixture over the graham crackers.

- Place a layer of the sliced strawberries on top of the cream cheese mixture, covering it evenly.


- Repeat the layers with graham crackers, cream cheese, and strawberries, alternating until you run out of ingredients. The final layer should be the cream cheese mixture.


- Cover with plastic wrap and refrigerate for at least 4 hours or overnight to allow the graham crackers to soften and the flavors to meld together.
- Garnish with additional sliced strawberries if desired. Slice and serve the Strawberry IceBox Cake. Enjoy!

Tips & Tricks
- Chill Time is Key: Letting your icebox cake chill for at least 4 hours (or ideally overnight) is essential. This gives the graham crackers or wafers time to soften and absorb the flavors, resulting in that irresistible, cake-like texture.
- Smooth Cream Cheese: For a creamy filling without lumps, let the cream cheese soften at room temperature for 30–45 minutes before whipping. This ensures a smooth, easy-to-fold filling that blends perfectly with whipped cream.
- Layer Generously: When layering, don’t be shy with the cream cheese mixture. A good, even layer helps soften the graham crackers and holds the cake together beautifully when sliced.
- Stabilize the Whipped Cream: If you want a firmer filling, consider adding 1 tablespoon of powdered sugar when whipping the cream to stabilize it. This helps the cake hold up longer, especially if it’ll be stored for a day or two.
- Get Creative with Flavors: Icebox cakes are easy to customize! Swap out strawberries for other fruits like blueberries, raspberries, or even peaches for a different twist, or add a layer of jam for extra flavor.
- Perfect Presentation: For clean slices, chill the cake well, and use a sharp knife wiped clean between each cut. You can garnish with extra strawberries, crushed graham crackers, or even a drizzle of chocolate before serving.

FAQs

What Other Flavor Icebox Cakes Can I Make
There are countless flavor variations you can explore when making icebox cakes. Here are some ideas to get you started:
- Chocolate Icebox Cake: Use chocolate wafers or chocolate graham crackers layered with chocolate whipped cream or a chocolate pudding filling. You can also add layers of chocolate ganache for extra richness.
- Lemon Icebox Cake: Alternate layers of lemon-flavored cookies or graham crackers with lemon curd and whipped cream flavored with lemon zest. Garnish with fresh lemon slices or lemon zest for a refreshing touch.
- Oreo Icebox Cake: Use Oreo cookies layered with a mixture of whipped cream and crushed Oreo crumbs. You can also add layers of chocolate pudding for extra indulgence.
- Banana Pudding Icebox Cake: Layer vanilla wafers with sliced bananas and vanilla pudding or banana pudding. Top with whipped cream and additional banana slices for garnish.
- Coconut Icebox Cake: Alternate layers of coconut-flavored cookies or graham crackers with coconut whipped cream and shredded coconut. You can also add a layer of coconut custard or pudding for extra coconut flavor.
- Mocha Icebox Cake: Layer chocolate wafers or graham crackers with coffee-flavored whipped cream and chocolate ganache. You can also add a hint of coffee liqueur for an extra kick.
- Peanut Butter Chocolate Icebox Cake: Alternate layers of peanut butter cookies with chocolate whipped cream or pudding. Drizzle layers with melted peanut butter for extra flavor.
- Raspberry Almond Icebox Cake: Layer almond-flavored cookies with raspberry preserves and whipped cream flavored with almond extract. Top with sliced almonds and fresh raspberries for garnish.
- Tiramisu Icebox Cake: Layer ladyfinger cookies with a mixture of coffee-flavored whipped cream and mascarpone cheese. Dust each layer with cocoa powder for an authentic tiramisu flavor.
- Banana Split Icebox Cake: When I think of summer, sunshine and banana splits are the two things that come to mind. This Banana Split Icebox Cake is what dreams are made of! This is a no-bake Banana Split Icebox Cake that has perfectly sweet layers of graham crackers, bananas, a creamy spread, and more.
Feel free to mix and match flavors or create your own unique combinations based on your preferences and available ingredients!


Strawberry Icebox Cake
Strawberry icebox cake is the perfect no-bake dessert that is super refreshing and always a huge hit! With minimal ingredients and only 20 minutes of prep, your friends and family will be raving about this delicious strawberry dessert every time you make it!
Ingredients
- 1 Pound Fresh Strawberries, Hulled and Sliced
- 2 Cups Heavy Cream, Chilled
- 8 Ounces Cream Cheese, Softened
- 1 Cup Powdered Sugar
- 1 Teaspoon Vanilla Extract or Vanilla Bean Paste
- 16-20 Graham Crackers
Instructions
- In a large mixing bowl, whip the heavy cream until stiff peaks form. Set aside.
- In another mixing bowl, beat the softened cream cheese until smooth.
- Add the powdered sugar and vanilla extract to the cream cheese. Mix until well combined and creamy.
- Gently fold the whipped cream into the cream cheese mixture until fully incorporated. This will create a light and fluffy filling.
- Spread a thin layer of the cream cheese mixture on the bottom of a 9x13-inch baking dish or similar-sized dish.
- Arrange a single layer of graham crackers on top of the cream cheese mixture, breaking them if necessary to fit.
- Spread a generous layer of the cream cheese mixture over the graham crackers.
- Place a layer of the sliced strawberries on top of the cream cheese mixture, covering it evenly.
- Repeat the layers with graham crackers, cream cheese, and strawberries, alternating until you run out of ingredients. The final layer should be the cream cheese mixture.
- Cover with plastic wrap and refrigerate for at least 4 hours or overnight to allow the graham crackers to soften and the flavors to meld together.
- Garnish with additional sliced strawberries if desired. Slice and serve the Strawberry IceBox Cake. Enjoy!
Notes
Prep time: 20 Minutes
Refrigeration time: 4 hour or overnight
Total time: Approximately 4 hour and 20 minutes
Yields: 8-10 servings
Nutrition Information:
Yield:
10Serving Size:
1Amount Per Serving: Calories: 429Total Fat: 28gSaturated Fat: 16gTrans Fat: 1gUnsaturated Fat: 10gCholesterol: 77mgSodium: 222mgCarbohydrates: 40gFiber: 2gSugar: 23gProtein: 5g
I’m Melissa, the imaginative force behind Sparkles to Sprinkles, where creativity comes to life, and sprinkles of joy are scattered generously. Melissa is a proud Jersey girl who found love with a New York boy. As a mom to four wonderful boys and a few fur babies, her journey into the world of blogging began after making the life-changing decision to stay home and raise her children. Previously a dedicated workaholic, Melissa’s blog became her creative outlet and passion project. Inspired by her mother-in-law, a masterful cook renowned for her delicious home-cooked meals and legendary holiday feasts (think mouthwatering sausage stuffing), Melissa honed her culinary skills through a combination of family recipes and countless cooking classes. She often attended these classes with her son Michael, who shared her enthusiasm for cooking from a young age. Melissa’s love for learning extends beyond familiar cuisines, as she enjoys exploring international recipes in hands-on cooking classes. Her blog features a diverse array of recipes, showcasing her expertise with various kitchen appliances such as the Instant Pot, air fryer, Slow Cooker, Ninja Foodi, Instant Vortex Plus, and more. Join Melissa on her culinary adventures as she shares tried-and-true family favorites alongside exciting new discoveries!