Red White and Blue No-Bake Cheesecake In A Jar
Looking for a festive and easy dessert to celebrate summer holidays? This Red, White, and Blue No-Bake Cheesecake in a Jar is just what you need! With layers of creamy cheesecake, fresh berries, and a buttery graham cracker crust, this dessert is not only delicious but also visually stunning. Plus, it’s an incredibly easy red white and blue desserts to make and requires no baking, making it perfect for those hot summer days when you want to avoid turning on the oven.

Red White and Blue No-Bake Cheesecake In A Jar
One of the best things about this recipe is its simplicity. By combining a few basic ingredients, you can create a show-stopping dessert that will impress your family and friends. The rich, creamy texture of the cheesecake pairs perfectly with the sweet and tart flavors of the strawberries and blueberries. And the graham cracker crust adds a delightful crunch that complements the smoothness of the cheesecake.
Another great aspect of this Red, White, and Blue No-Bake Cheesecake in a Jar is its versatility. You can easily customize it to suit your taste or dietary preferences. Whether you want to use different fruits, add a splash of lemon zest for extra zing, or make it gluten-free by using gluten-free graham crackers, the possibilities are endless. Plus, serving the cheesecake in individual jars makes it easy to transport and serve, making it an ideal dessert for picnics, barbecues, and potlucks.

Everyone that reads my blog knows that I love an easy dessert that requires no trips to the grocery store especially ones where I don’t need to turn on my oven at all! Try my Cherry Delight for another no-bake dessert recipe.
What You Will Love About This Recipe
There’s so much to love about this Red, White, and Blue No-Bake Cheesecake in a Jar! First, it’s incredibly easy to make, requiring no baking and minimal prep time. This makes it perfect for busy schedules or for those who want a quick yet impressive dessert.
The flavor combination is another highlight. The creamy, tangy cheesecake filling pairs beautifully with the sweet and juicy strawberries and blueberries, creating a refreshing and delicious treat. The graham cracker crust adds a lovely crunch and a buttery richness that complements the creamy layers.
Additionally, the presentation is a major plus. Serving the cheesecake in individual jars not only looks adorable but also makes it convenient for picnics, barbecues, and gatherings. Each person gets their own perfectly portioned dessert, making it easy to serve and enjoy. This dessert is sure to be a hit at any summer celebration!

What do I need to get started?
For the graham cracker crust:
- 2 cups graham cracker crumbs. I used the ones that already come as crumbs in a box, but you can take graham cracker sheets and blitz them in the blender or smash them up with a rolling pin!
- Brown sugar.
- Melted butter.
For the Cheesecake filling:
- Heavy cream. This must be heavy cream or whipping cream and it cannot be replaced – this is what will give the cheesecake its structure.
- Powdered sugar.
- Full fat cream cheese softened to room temperature. You want the blocks of cream cheese, not the whipped stuff that goes on bagels.
- Granulated sugar.
- Sour cream. This adds a creamy lightness to the cheesecake!
- Vanilla extract. I always use pure vanilla.
- Blueberries and strawberries. You can use raspberries or blackberries as well, as long as they’re red and blue!
- Whipped cream and more graham cracker crumbs, for topping.
How to make No-Bake Mason Jar Cheesecakes
Start off with the graham cracker crust. In a small bowl, mix together the crumbs, the brown sugar, and the melted butter. The mixture should resemble wet sand.
Take a spoon of the graham cracker mixture and place it in the bottom of the mason jar. Gently press down to flatten it (I used the bottom of a wooden spoon to do this).
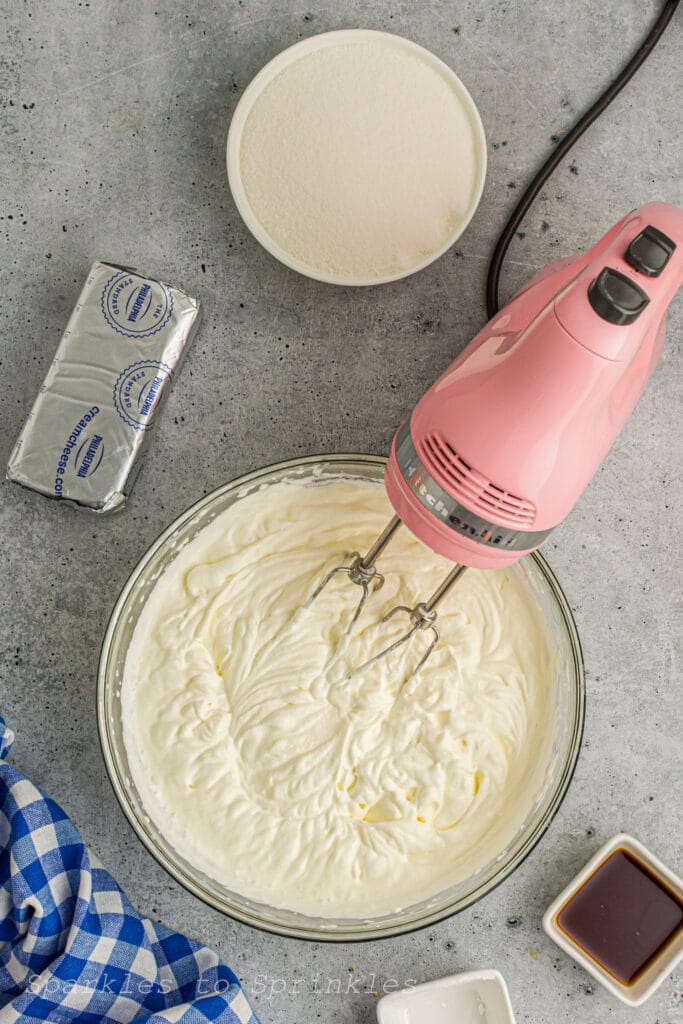
Then you whip up your heavy whipping cream and powdered sugar. I used a handheld electric mixer for this, but you can use a stand mixer as well. I do not recommend doing it by hand unless you have a LOT of elbow grease :). Mix until stiff peaks form and then set aside.
Again using an electric mixer, beat together the cream cheese and granulated sugar until it is smooth and lump free. This will take about 2-3 minutes.
Add the sour cream and vanilla and mix until just incorporated.
Take the whipped cream and gently fold half of it into the cream cheese mixture. Once that is fully incorporated, fold in the remaining half.
Using a spoon or a piping bag, layer ¼ cup of the cheesecake mixture onto the graham cracker crust.
Add a layer of blueberries on top of the cheesecake mixture.
Pipe another ¼ cup of the cheesecake mixture on top of the blueberries. Take chopped strawberries and top the cheesecake mixture.
You can decorate with more freshly whipped cream and graham cracker crumbs or serve as is. These only need one hour in the fridge to fully set up and then they are ready to enjoy!


Tips & Tricks
- Use Cold Ingredients: Ensure your cream cheese is softened to room temperature, but keep your heavy cream cold before whipping. This helps achieve the perfect texture for both the cheesecake and whipped cream layers.
- Prep Ahead of Time: You can make the cheesecake mixture and the graham cracker crust a day in advance. Assemble them in jars when you’re ready to serve or a few hours beforehand to let the flavors meld.
- Layering Tips: Use a piping bag or a resealable plastic bag with a corner cut off to layer the cheesecake mixture neatly in the jars. This helps achieve clean layers and an appealing presentation.
- Chill Well: Make sure to chill the assembled jars for at least an hour before serving. This helps the cheesecake set and makes it easier to serve.
- Add a Twist: Customize the flavors by adding a bit of lemon zest to the cheesecake mixture for a citrusy kick. You can also switch up the berries based on what’s in season or your personal preference.
- Decoration Ideas: For an extra festive touch, top with whipped cream, more berries, and a sprinkle of graham cracker crumbs. You can also add some patriotic sprinkles for a fun twist.
- Portion Control: If you don’t have mason jars, you can use any small glass or dessert cups. Adjust the amount of each layer to fit the size of your containers.

FAQs

Red White and Blue No-Bake Cheesecake In A Jar
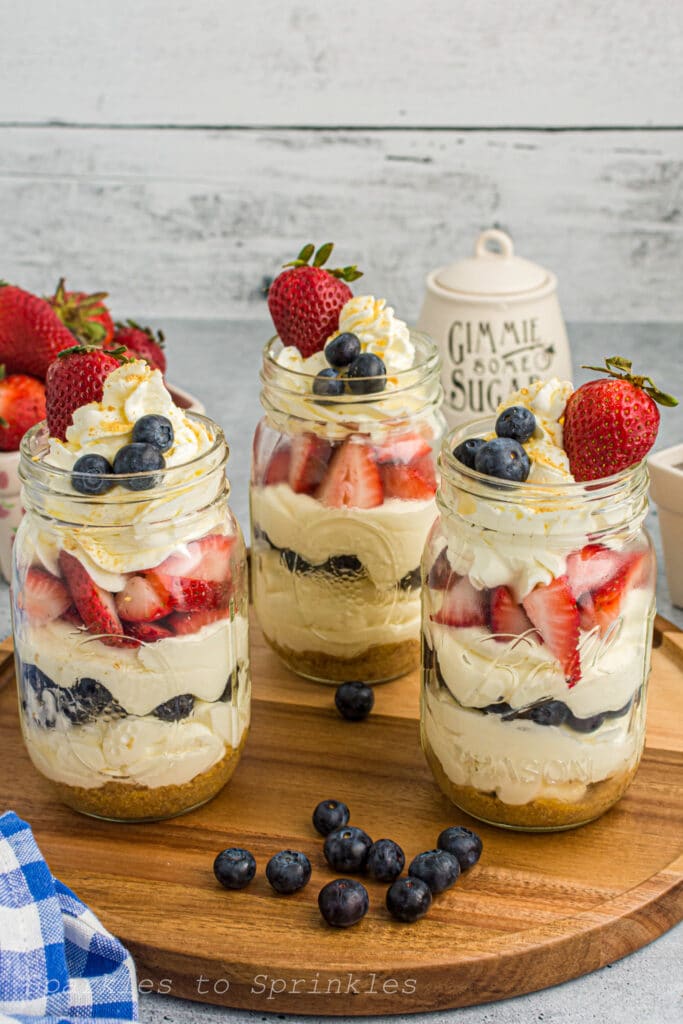
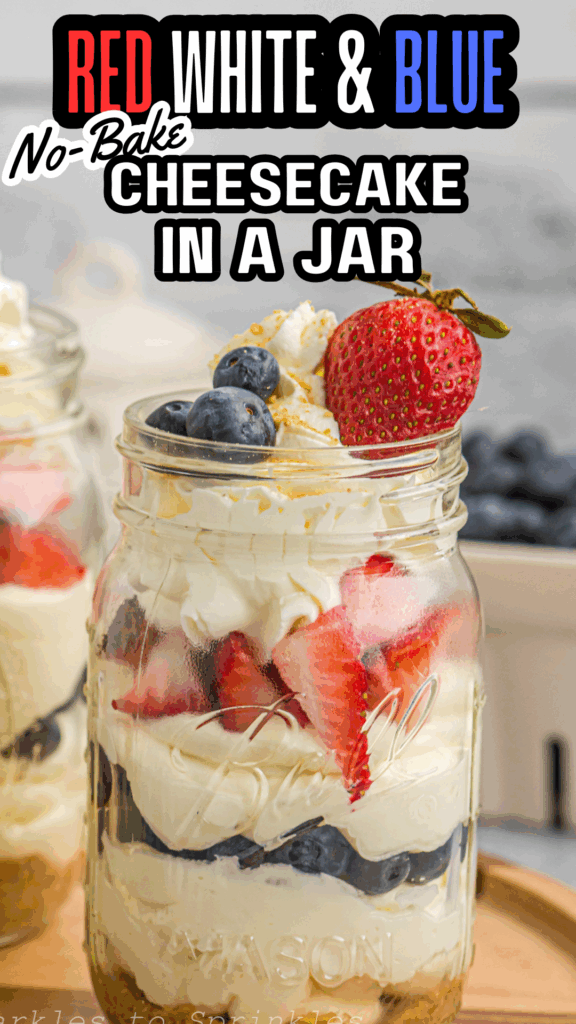
These adorable Red White and Blue No-Bake Cheesecake In A Jar are layered with strawberries, blueberries, and a creamy vanilla no-bake cheesecake, topped with whipped cream, more berries, and graham cracker crumbs! These are not only adorable looking they are delicious. Who doesn't love a good red white and blue dessert?!
Ingredients
- For the cheesecake base:
- 2 ½ cups heavy cream
- 4 tbsp powdered sugar
- 4 8oz blocks full fat cream cheese, softened
- 1 cup granulated sugar
- ½ cup sour cream
- 1 tsp vanilla extract
- 3/4 cup blueberries
- 3/4 cup strawberries, hulled and quartered
- Optional topping: whipped cream and graham cracker crumbs
- For the graham cracker crust:
- 2 cups graham cracker crumbs
- ¼ cup brown sugar
- ½ cup butter, melted
Instructions
For the cheesecake:
- Using an electric mixer or stand mixer, whisk together the heavy cream and powdered sugar until stiff peaks form. Set aside.
- Using an electric mixer or stand mixer, beat the cream cheese and granulated sugar until it is smooth and lump free. Add the sour cream and vanilla and beat until the mixture is fully incorporated.
- Take half of the whipped cream mixture and fold it into the cream cheese mixture until it is fully incorporated. Take the remaining half of the whipped cream mixture and fold that in as well.
For the graham cracker crust:
- In a medium bowl, mix together the graham cracker crumbs, brown sugar, and melted butter until it resembles the consistency of wet sand.
To assemble cheesecakes:
- Take a tbsp of the graham cracker mixture and place it in the bottom of a mason jar. Lightly press so a crust forms.
- Using a spoon or a piping bag, layer ¼ cup of the cheesecake mixture onto the graham cracker crust. Add a layer of blueberries on top of the cheesecake mixture. Pipe another ¼ cup of the cheesecake mixture on top of the blueberries. Take chopped strawberries and top the cheesecake mixture.
- Let set up in the fridge for at least 1 hour.
- Optional: Swirl some whipped cream on top, and top with more strawberries and blueberries. Sprinkle on some crushed graham crackers. Serve chilled.
Notes
Yields: 12 standard mason jar cheesecakes
Assembled cheesecakes can be stored in the fridge for up to 2 days. Cheesecakes can be frozen in a freezer-safe container for up to 3 months. Set on the counter overnight to thaw before serving.
This recipe can easily be halved or doubled to adjust for your serving needs.
You can change out the fruits used to make these mason jar cheesecakes for any season.
Nutrition Information:
Yield:
12Serving Size:
1Amount Per Serving: Calories: 730Total Fat: 58gSaturated Fat: 34gTrans Fat: 1gUnsaturated Fat: 18gCholesterol: 164mgSodium: 444mgCarbohydrates: 48gFiber: 1gSugar: 36gProtein: 8g
I’m Melissa, the imaginative force behind Sparkles to Sprinkles, where creativity comes to life, and sprinkles of joy are scattered generously. Melissa is a proud Jersey girl who found love with a New York boy. As a mom to four wonderful boys and a few fur babies, her journey into the world of blogging began after making the life-changing decision to stay home and raise her children. Previously a dedicated workaholic, Melissa’s blog became her creative outlet and passion project. Inspired by her mother-in-law, a masterful cook renowned for her delicious home-cooked meals and legendary holiday feasts (think mouthwatering sausage stuffing), Melissa honed her culinary skills through a combination of family recipes and countless cooking classes. She often attended these classes with her son Michael, who shared her enthusiasm for cooking from a young age. Melissa’s love for learning extends beyond familiar cuisines, as she enjoys exploring international recipes in hands-on cooking classes. Her blog features a diverse array of recipes, showcasing her expertise with various kitchen appliances such as the Instant Pot, air fryer, Slow Cooker, Ninja Foodi, Instant Vortex Plus, and more. Join Melissa on her culinary adventures as she shares tried-and-true family favorites alongside exciting new discoveries!


Melissa. It looks like you used PINT mason jars. you might indicate that, if so.
Looks good. We will be attending a 4th birthday party so think I will make these. I will do a few Sugar free as it will be needed for a few. thanks.
Yes, they are pint sized mason jars. I hope you have a wonderful time at the party!