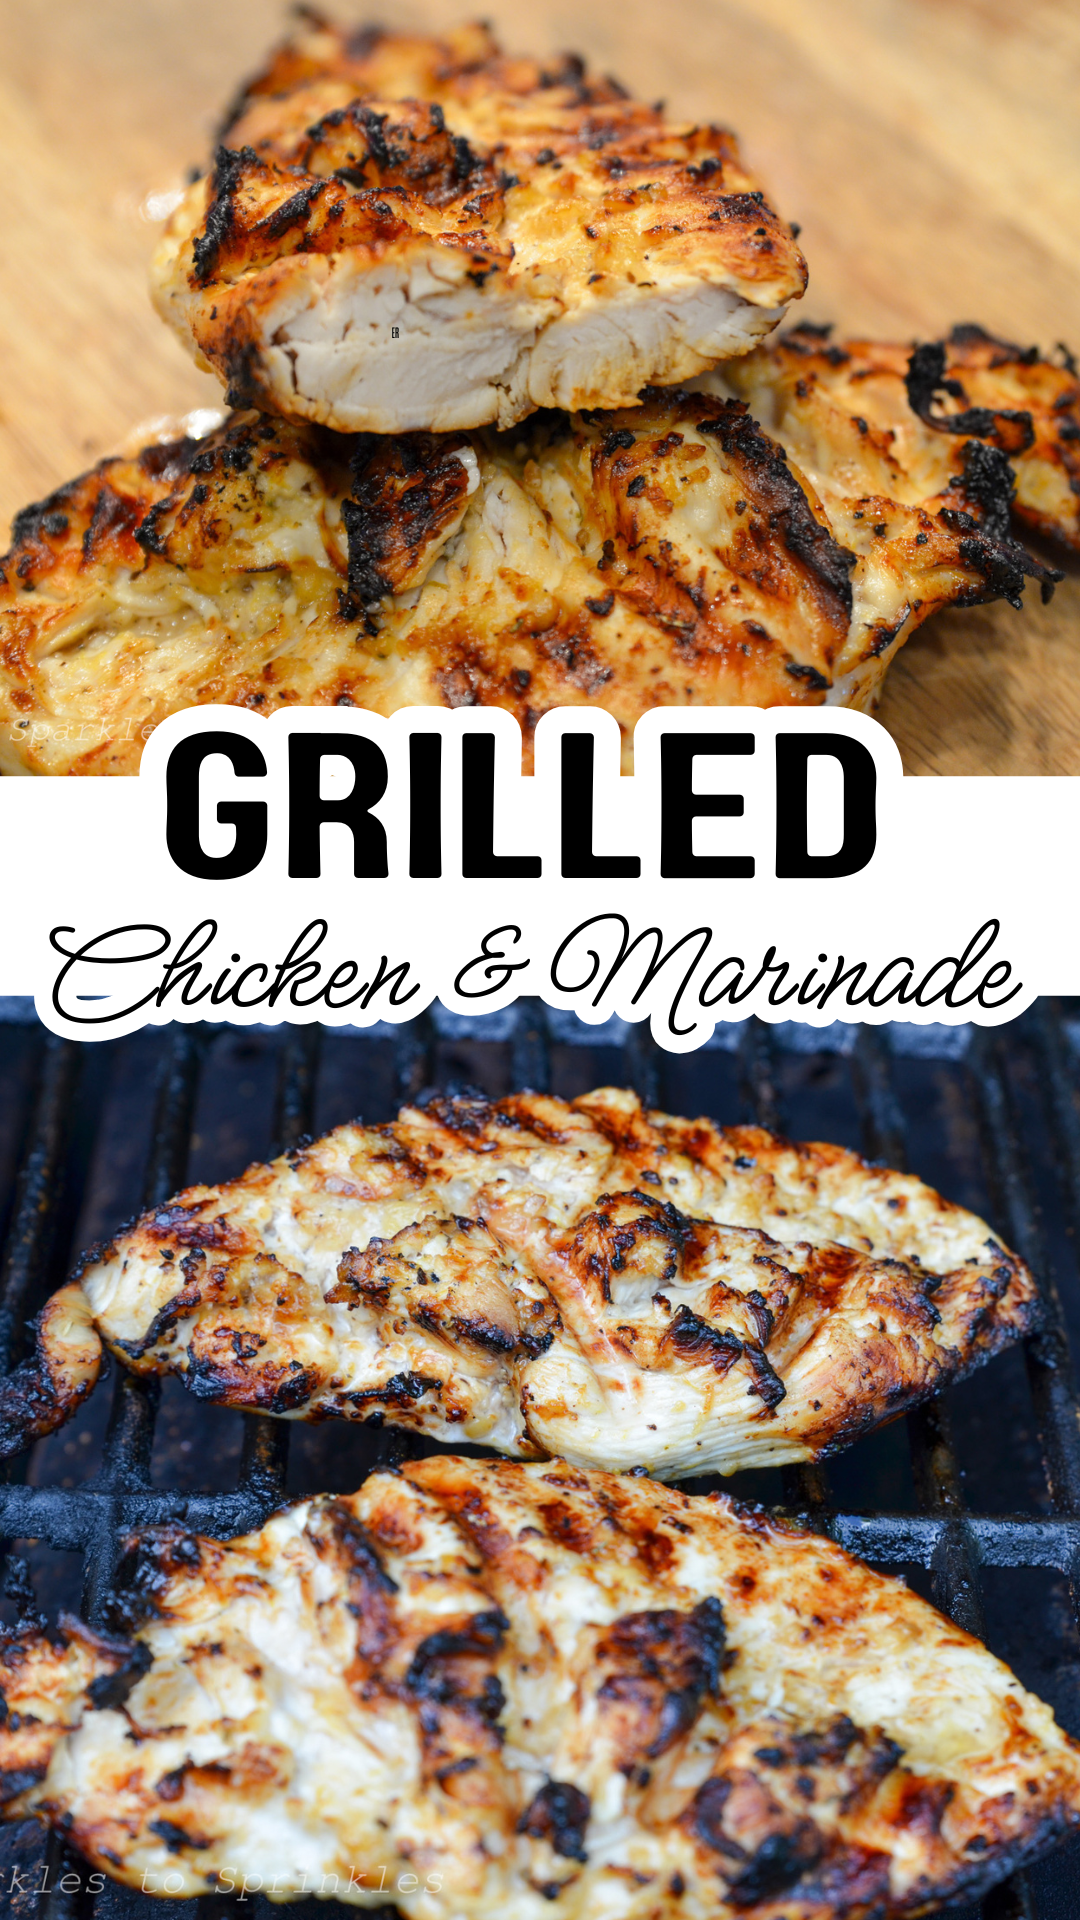
Grilled Chicken And Marinade
If you’re looking for a go-to grilled chicken and marinade recipe that’s bursting with flavor, this one is a must-try. The marinade is rich, sweet, tangy, and savory all at once, and it transforms plain chicken breasts into something you’ll actually look forward to eating. Whether you’re grilling for your family or a casual backyard cookout, this is the kind of recipe that gets asked for again and again.
Grilled Chicken And Marinade
What makes this grilled chicken stand out is the marinade. It uses a simple mix of pantry staples like balsamic vinegar, soy sauce, garlic, and brown sugar to create layers of bold flavor. It pairs perfectly with fresh summer sides like Italian pasta salad, air fryer vegetables, or even a light cucumber salad. It also makes fantastic leftovers — slice it over salad, tuck it into wraps, or serve it with rice or potatoes.
The best part is how easy it is to prep. Just mix the marinade, let the chicken soak up all that goodness, and then grill it up in just a few minutes. It’s simple, it’s delicious, and it works whether you’re using a gas grill, charcoal, or even a Ninja Foodi Grill.

What You Will Love About This Recipe
This grilled chicken recipe is a game-changer for anyone looking for a quick, easy, and incredibly flavorful meal. Here are a few reasons why you’ll fall in love with it:
- Simple Ingredients, Big Flavor: With just a handful of pantry staples like olive oil, balsamic vinegar, and Dijon mustard, you can create a marinade that infuses the chicken with a tangy, savory, and slightly sweet flavor that’s absolutely irresistible.
- Quick and Easy: Whether you’re a seasoned grill master or a beginner, this recipe is straightforward and foolproof. The prep work is minimal, and the cooking time is short, making it perfect for busy weeknights or impromptu BBQs.
- Versatile and Healthy: This grilled chicken pairs well with virtually any side dish, from salads and veggies to rice and potatoes. Plus, it’s a healthy option that doesn’t compromise on taste, making it a great choice for anyone watching their diet.
- Perfectly Juicy Every Time: Marinating the chicken ensures it stays juicy and tender, while the high-heat grilling gives it a beautiful, slightly charred exterior. You’ll get that perfect bite every time.

How to Make
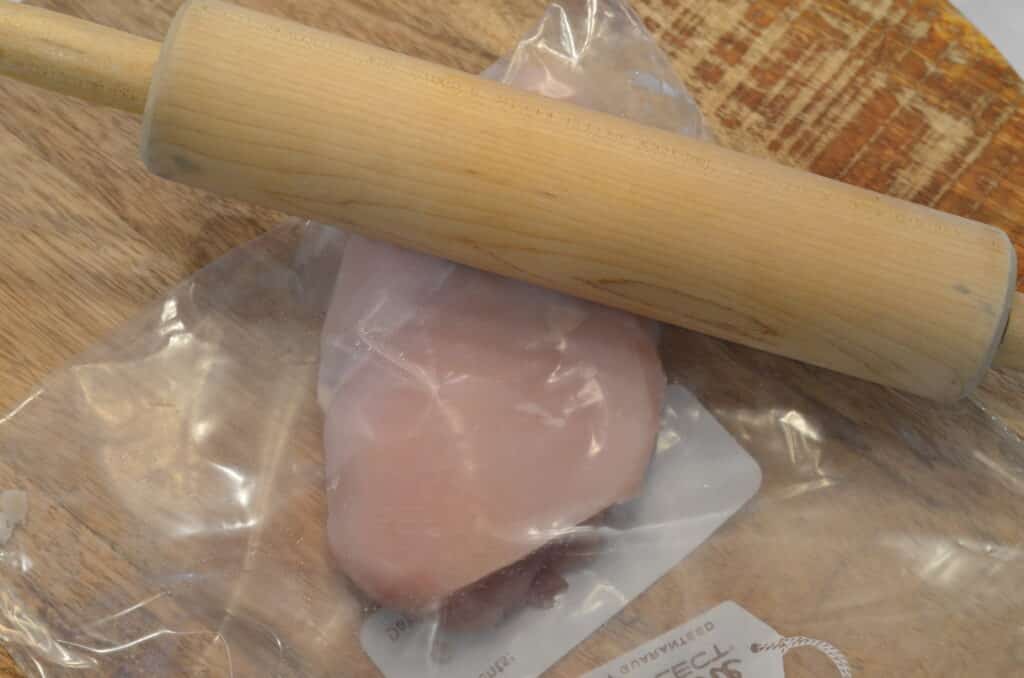
Step 1: Start by prepping your chicken & pound them down if they are very thick. You can cut off any parts that need to be removed.
Put your marinade ingredients into a Ziploc bag, (you can reuse the one you just used to pound your breasts). Seal it and give the bag a good squishing to mix the ingredients. Pour a little out into a bowl so you can baste some while cooking.

Add your chicken breasts into the Ziploc bag. Seal the bag. Massage the chicken in the bag, to fully coat with marinade. Marinade anywhere from 30 minutes to overnight in the fridge. (If using a Ninja Foodi Grill, see the notes section)
Preheat your grill to medium to high heat. Carefully put some oil on your grates.
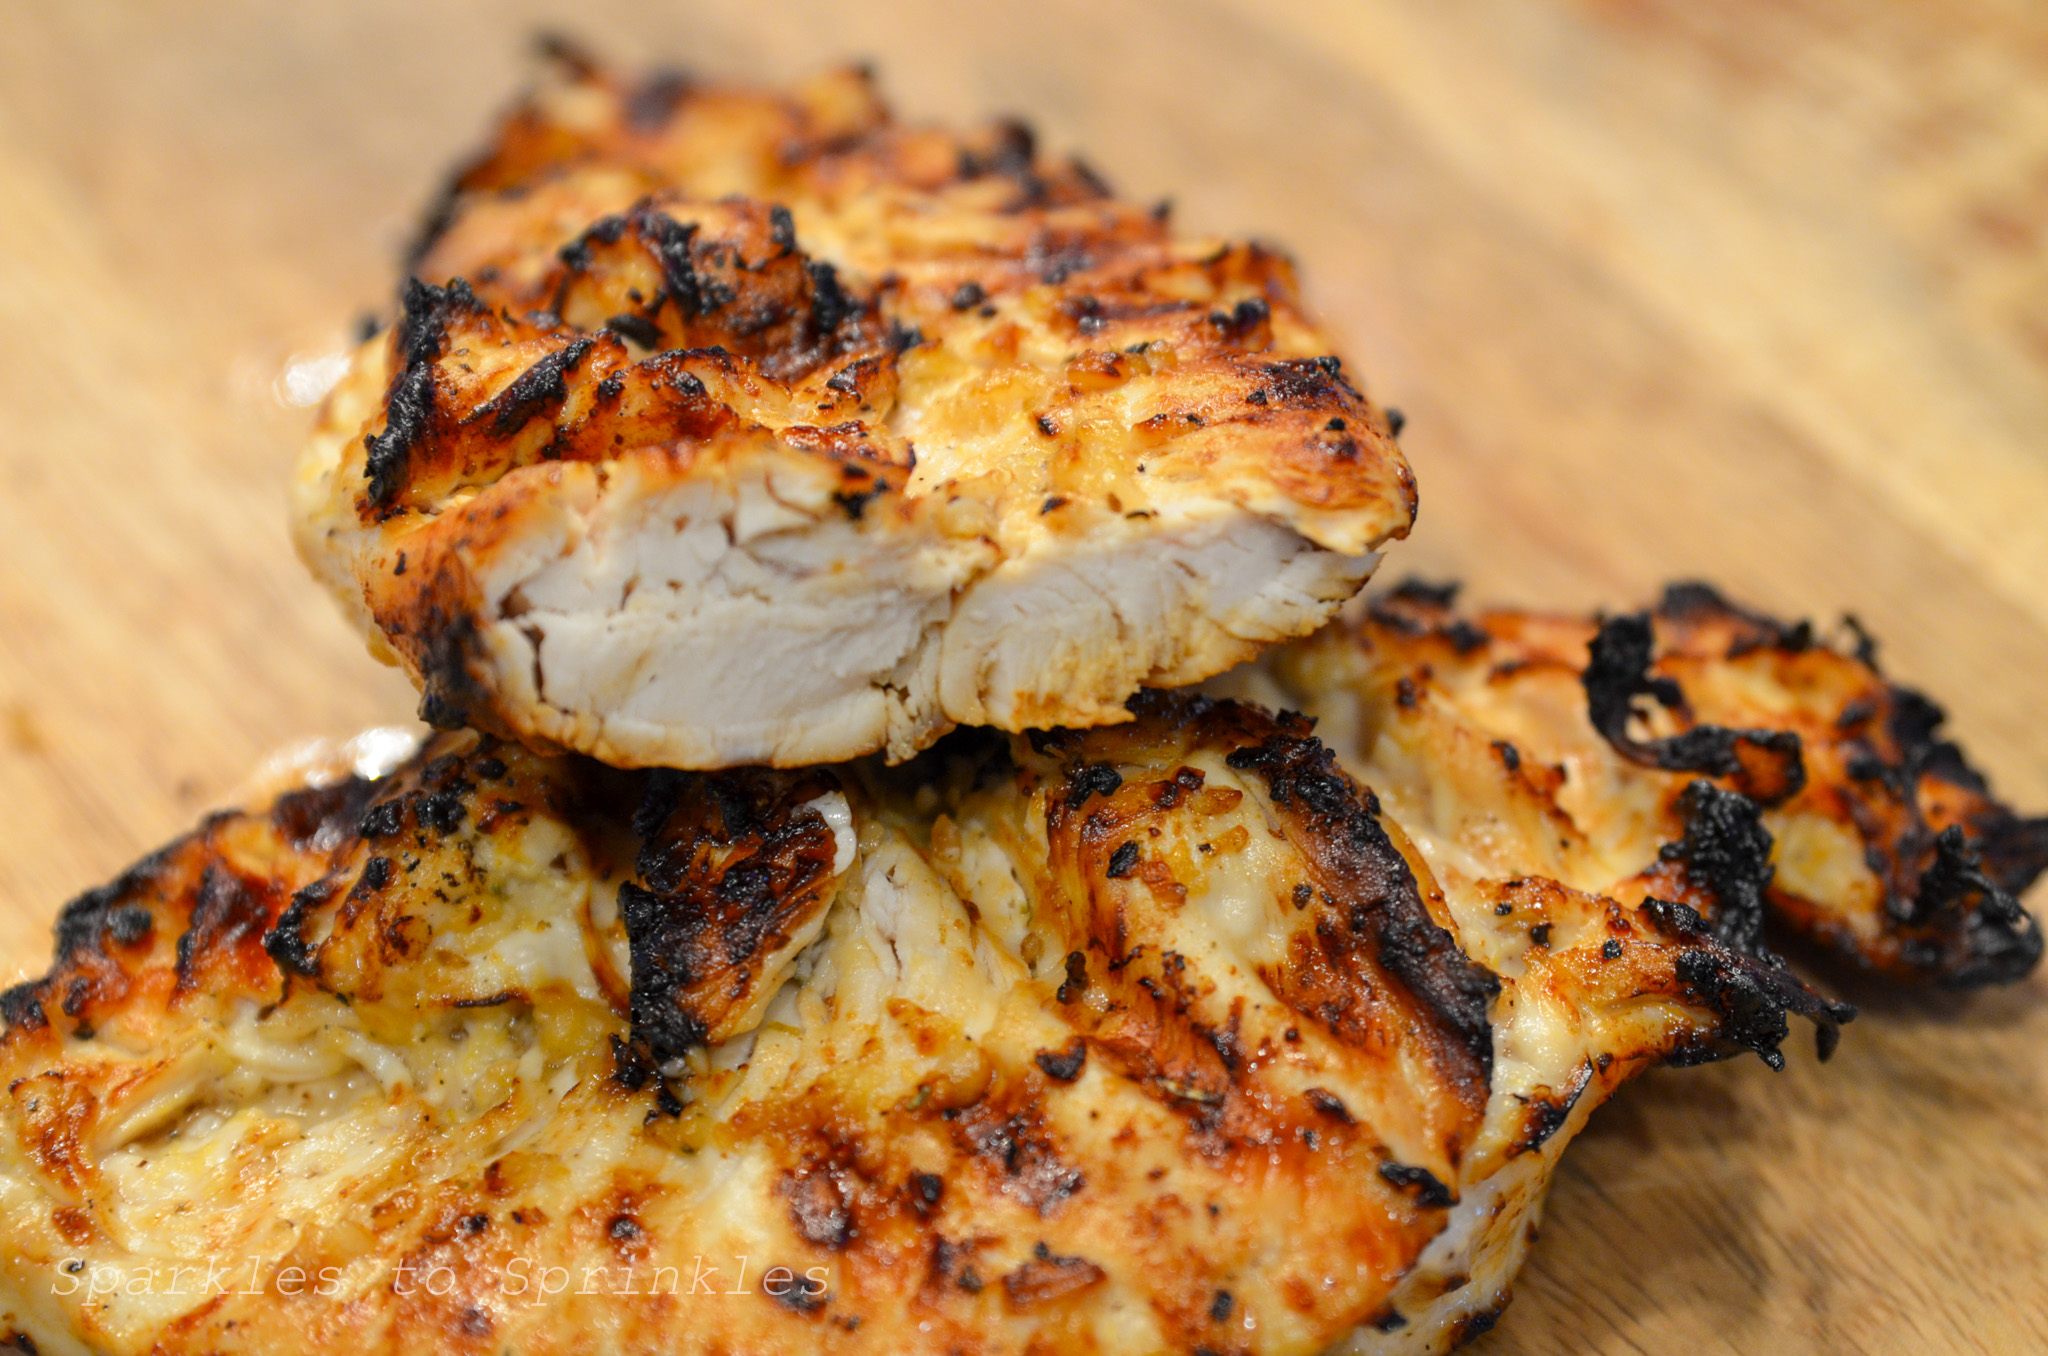
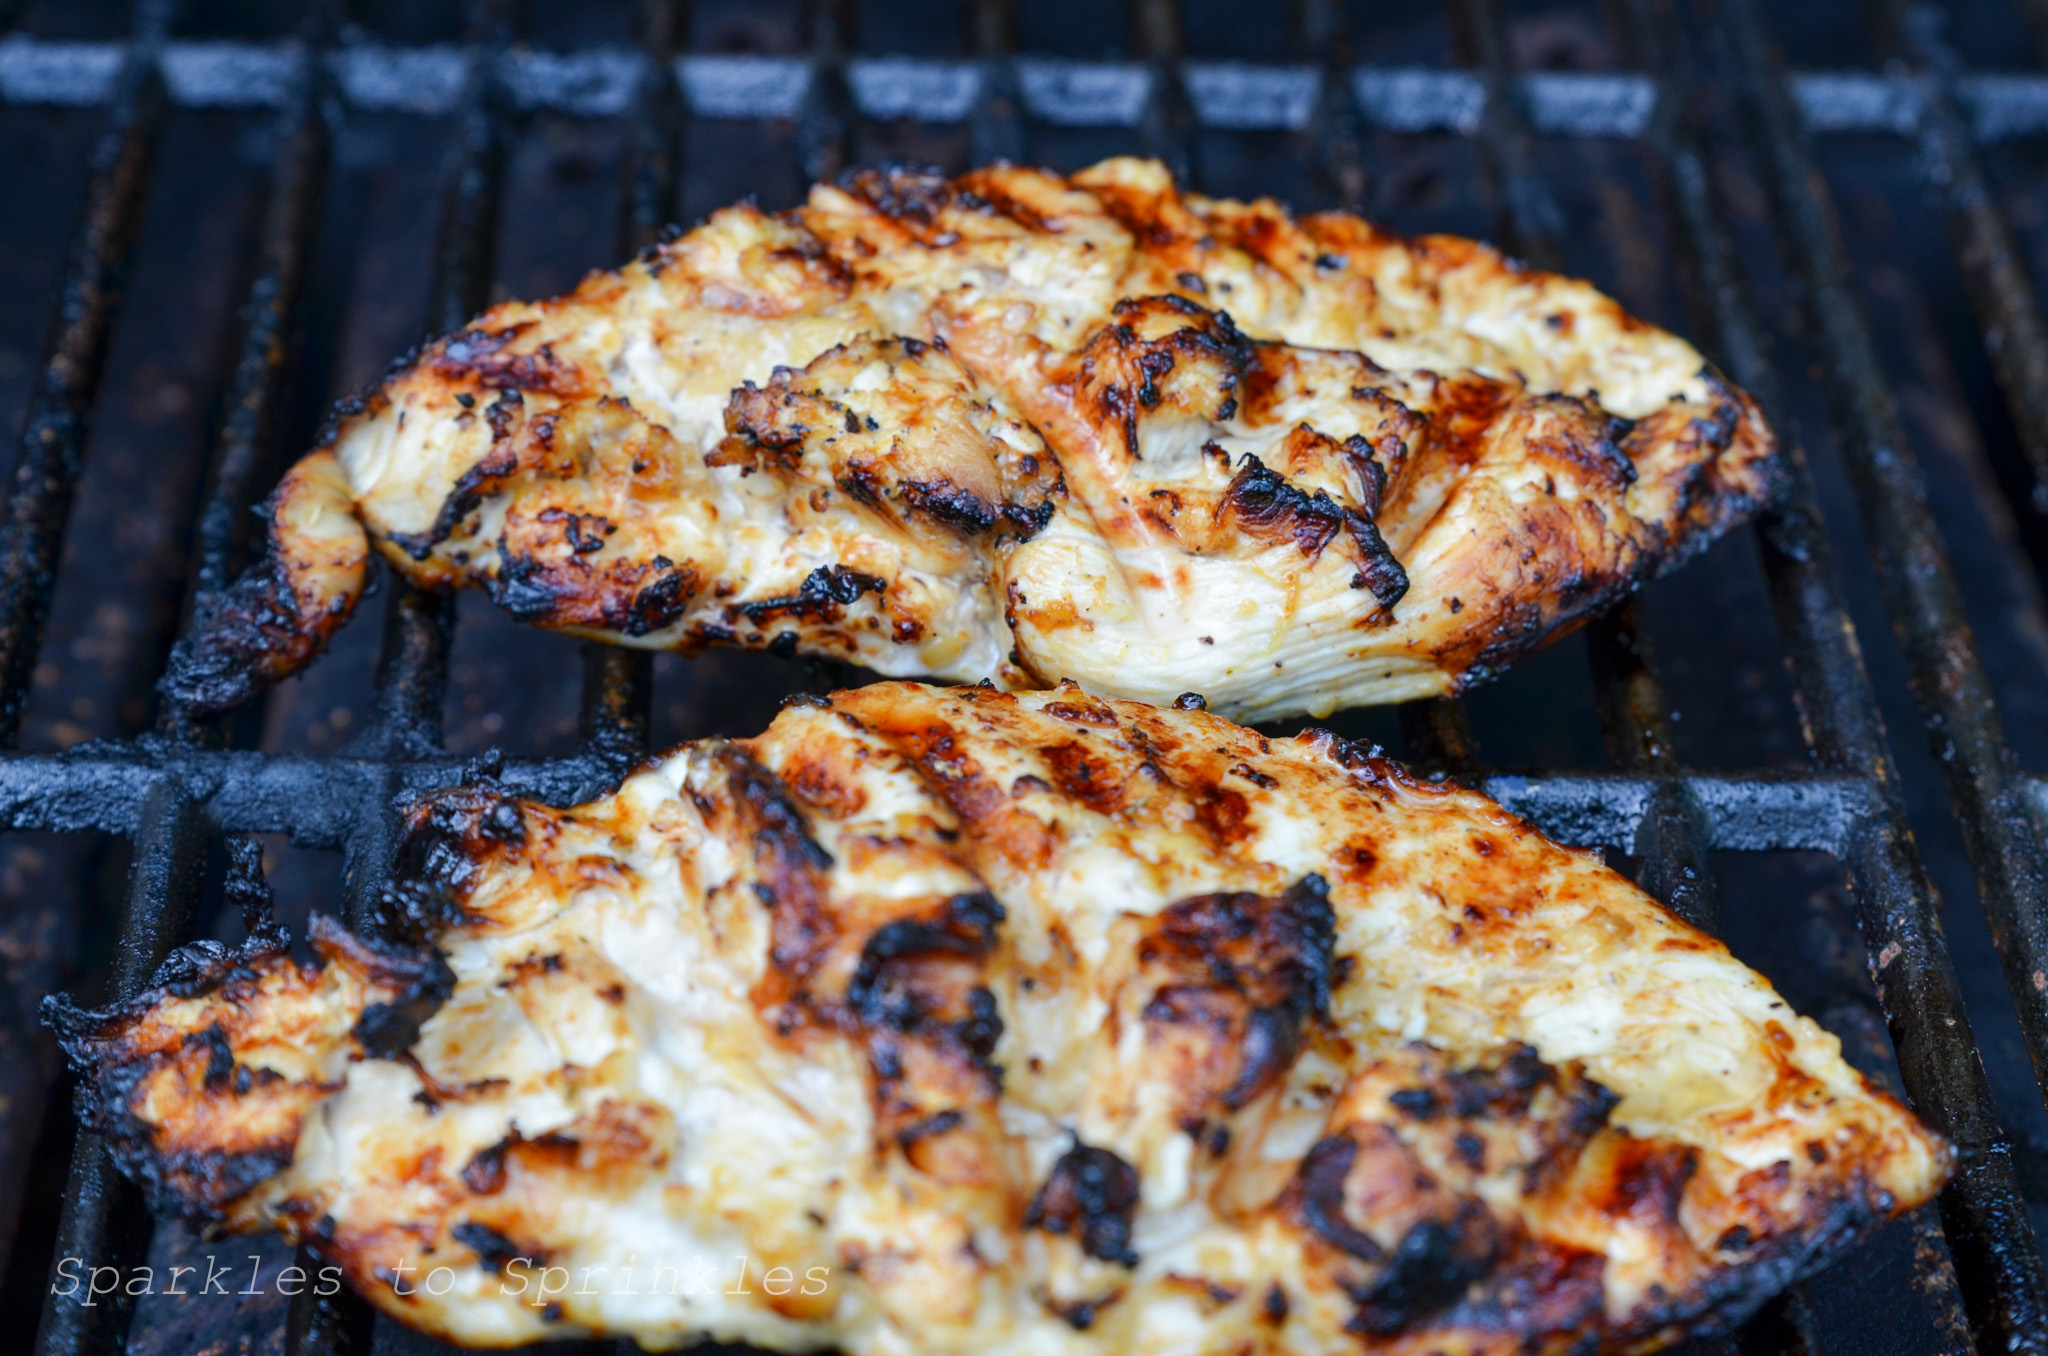
Place your chicken breasts on your grill. Cook on each side for 3-4 minutes.Baste with addtional marinade while cooking.
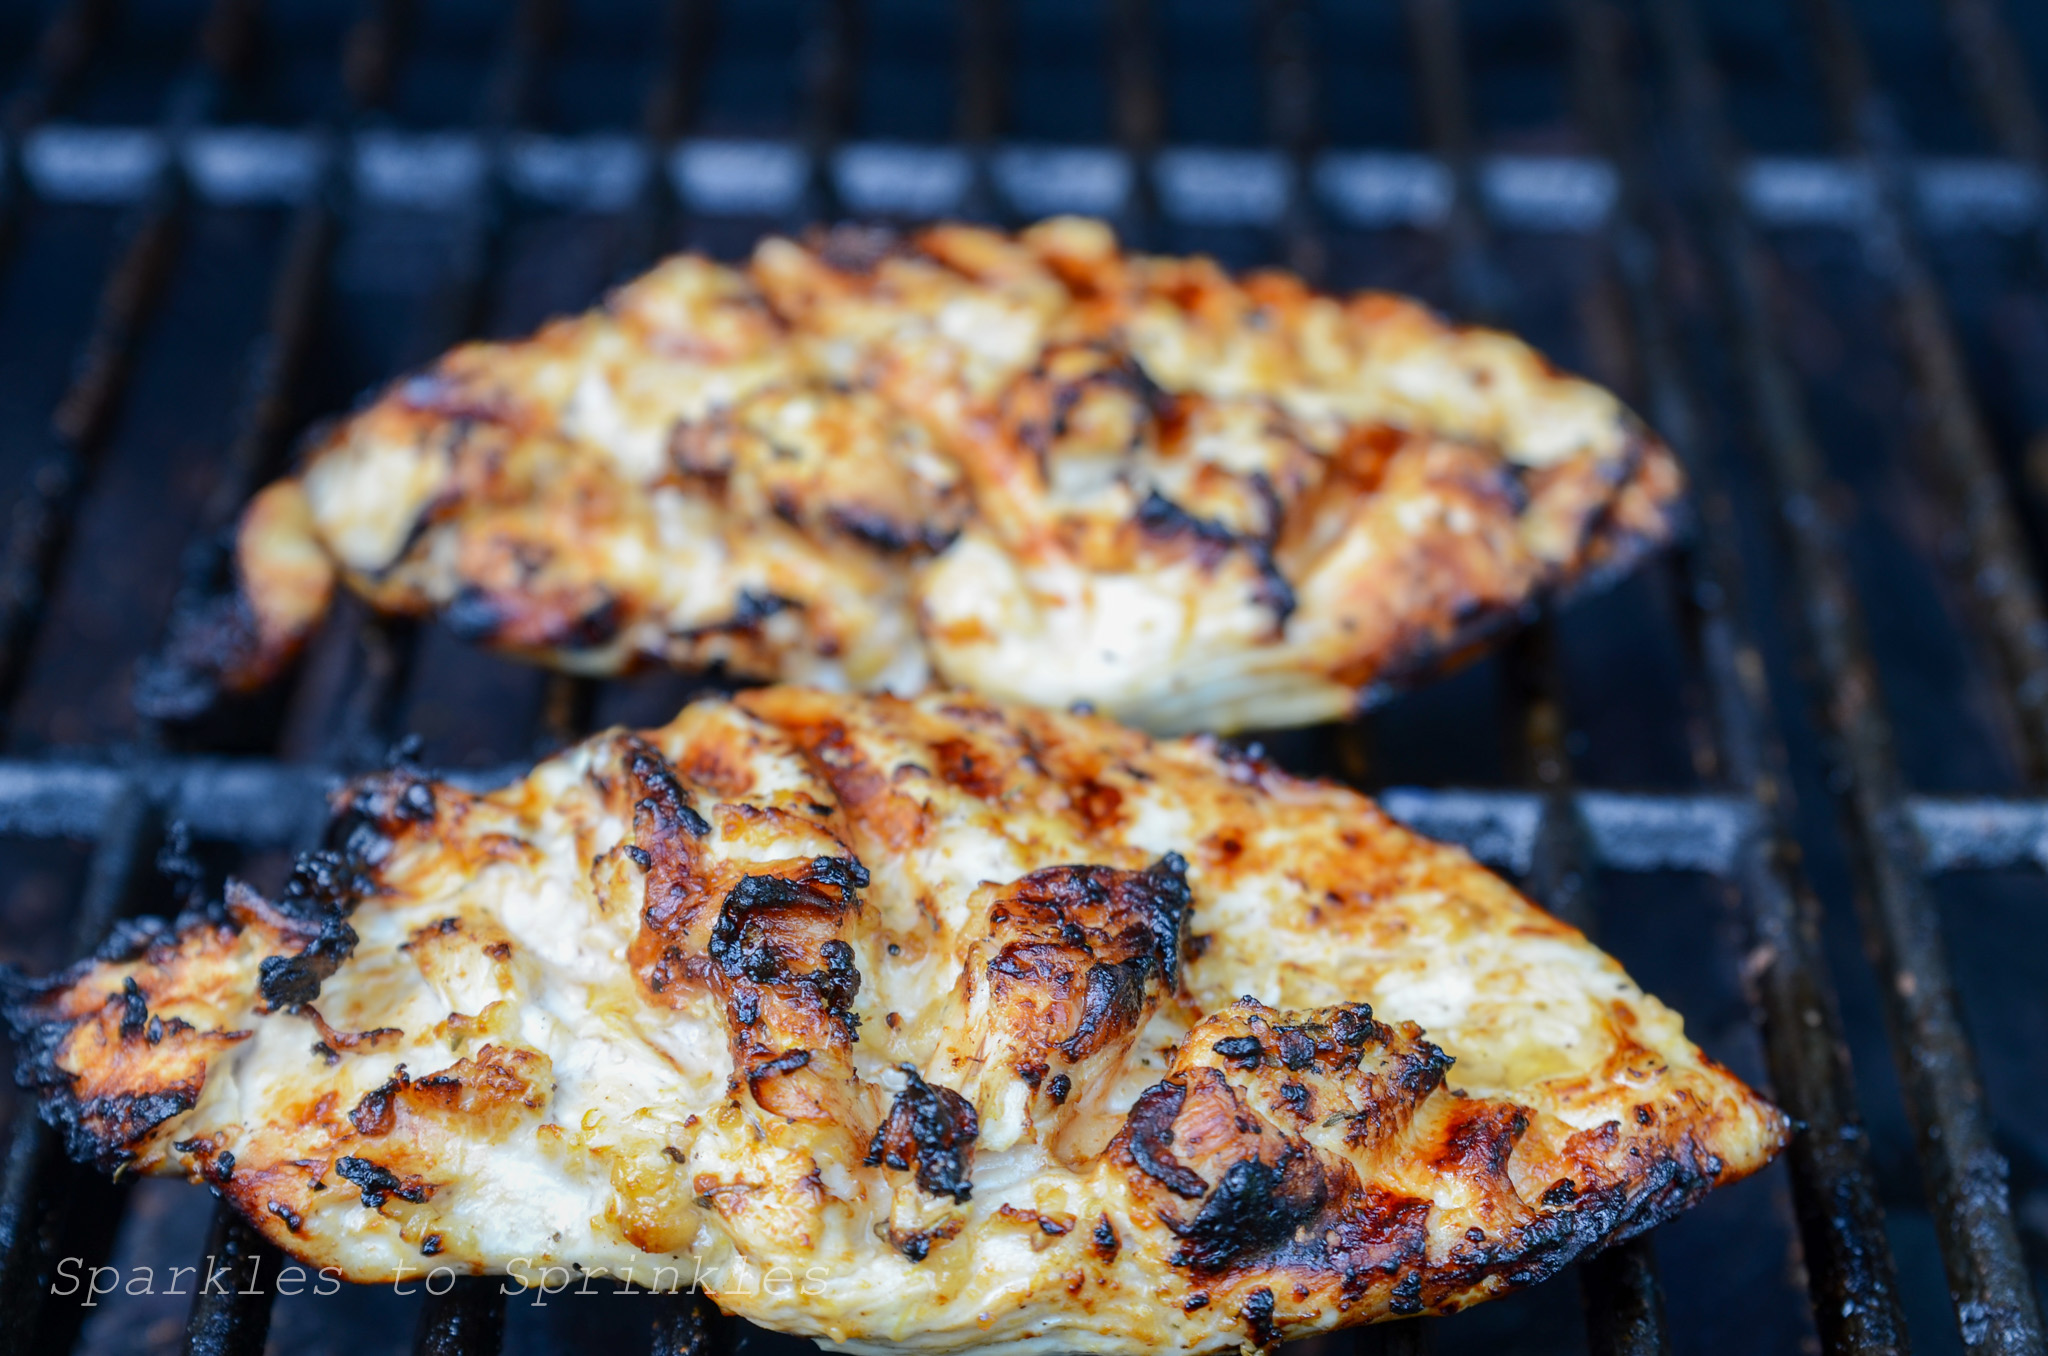
Make sure the internal temperature reaches 165 degrees.
Let the chicken rest for 3 to 5 minutes after cooking.
Serve & Enjoy!

How To Grill Without A Grill
1. Use a Grill Pan
A cast iron grill pan is the closest alternative to an outdoor grill.
Preheat it over medium-high heat, oil it lightly, and cook your chicken just like you would on a grill.
You’ll still get nice grill marks and good browning.
2. Use a Cast Iron or Heavy Skillet
If you don’t have a grill pan, a regular cast iron skillet works great.
Cook over medium-high heat and press the chicken down slightly to create a good sear.
Flip halfway through and cover with a lid to help it cook evenly.
3. Use Your Oven’s Broiler
Place chicken on a foil-lined baking sheet with a wire rack on top.
Set the oven to broil on high and place the pan 4 to 6 inches from the heat source.
Flip halfway through for even cooking and browning.
4. Use an Air Fryer
While it doesn’t give grill marks, it does give a crisp, slightly charred finish.
Great for boneless pieces or thinner cuts.
5. Use a Stovetop Griddle
A flat griddle pan heats evenly and works well for thin chicken breasts or cutlets.
Cook over high heat for a quick sear.

Do you let chicken rest after grilling
Yes, it is essential to let chicken rest after grilling. Here’s why and how to do it properly:
Why Resting is Important:
- Juicier Chicken: Resting allows the juices, which move towards the surface during cooking, to redistribute throughout the meat. This results in juicier and more flavorful chicken.
- Easier to Slice: Resting makes the chicken firmer and easier to slice. If you cut into the chicken immediately, the juices will run out, making the meat dry and tough.
- Continued Cooking: During the resting period, the chicken will continue to cook slightly due to residual heat. This can help ensure the internal temperature reaches a safe level without overcooking.
How to Properly Rest Chicken:
- Remove from Heat: Once your chicken reaches the desired internal temperature (165°F), remove it from the grill.
- Tent with Foil: Place the chicken on a cutting board or plate and loosely tent it with aluminum foil. This keeps it warm while allowing air to circulate, preventing the chicken from becoming soggy.
- Resting Time: Let the chicken rest for about 5-10 minutes. For larger pieces like whole breasts or thighs, aim for the longer end of this range.
Tips for Resting Chicken:
- Avoid Tight Wrapping: Don’t wrap the chicken tightly in foil, as this can trap steam and make the exterior less crispy.
- Use a Warm Plate: Rest the chicken on a warm plate to help maintain its temperature.
By allowing your grilled chicken to rest, you ensure it remains juicy, flavorful, and perfectly cooked. This simple step can make a significant difference in the quality of your meal.

Tips & Tricks
- Pound the Chicken Evenly: To ensure even cooking, place your chicken breasts in a Ziploc bag and pound them to a uniform thickness of about 1/2 inch. This step helps the chicken cook evenly and prevents dry, overcooked edges.
- Marinate for Maximum Flavor: While a couple of hours will do the trick, letting your chicken marinate overnight will maximize the flavor. The longer the chicken soaks in the marinade, the more tender and flavorful it becomes.
- Use Fresh Ingredients: For the best taste, use fresh garlic and freshly squeezed lemon juice. These ingredients add a vibrant flavor that really makes a difference.
- Oil the Grill Grates: To prevent the chicken from sticking, make sure to lightly oil your grill grates before cooking. You can do this by dipping a paper towel in oil and using tongs to rub it over the grates.
- High Heat for a Good Sear: Preheat your grill to high heat before adding the chicken. This ensures a nice sear and helps lock in the juices.
- Don’t Overcook: Chicken can dry out quickly on the grill. Cook each side for 3-4 minutes and use a meat thermometer to check that the internal temperature reaches 165°F. Remove the chicken from the grill as soon as it hits the right temperature.
- Let it Rest: After grilling, let the chicken rest for a few minutes before slicing. This allows the juices to redistribute throughout the meat, keeping it moist and flavorful.
- Experiment with Sides and Toppings: Grilled chicken is incredibly versatile. Serve it with a fresh salad, roasted vegetables, or even sliced over a bed of quinoa or rice. Top with fresh herbs, a squeeze of lemon, or a drizzle of extra marinade for an extra burst of flavor.

FAQs

Easy Grilled Chicken
Whip up this easy grilled chicken for dinner tonight. Juicy, flavorful chicken that is bursting with flavor. Toss this chicken on your grill and serve up.
Ingredients
- 4-6 Boneless Chicken Breasts
- 1/2 Cup Extra Virgin Olive Oil
- 1/2 Cup Balsamic Vinegar
- 1/4 Cup Soy Sauce
- 1/4 Cup Worcestershire
- 2 TBSP Dijon Mustard
- 3/4 Cup Brown Sugar
- 1/8 Cup Lemon Juice
- 2 TBSP Garlic, minced (you can replace with 2 tsp of garlic powder)
- Salt & Pepper to taste
- 1 TBSP Dried Italian Seasoning
Instructions
- If your chicken breasts are pretty thick, you want to put them in a Ziploc bag and give them a good pounding. You want them to be about 1/2" thick.
- Put your marinade ingredients into a Ziploc bag, (you can reuse the one you just used to pound your breasts). Seal it and give the bag a good squishing to mix the ingredients. Pour a little out into a bowl so you can baste some while cooking.
- Add your chicken breasts into the Ziploc bag. Seal the bag. Massage the chicken in the bag, to fully coat with marinade. Marinade anywhere from 30 minutes to overnight in the fridge. (If using a Ninja Foodi Grill, see the notes section)
- Preheat your grill to high heat. Carefully put some oil on your grates.
- Place your chicken breasts on to your grill once preheated to a nice high heat. Cook each side for 3-4 minutes. You do not want to over cook. Baste with additional marinade while cooking.
- Make sure the internal temperature reaches 165 degrees.
- Let the chicken rest for 3 to 5 minutes after cooking.
- Serve & Enjoy!
Notes
Ninja Foodi Grill directions
4. Insert removable cooking pot. Insert grill grate into your pot.
5. Press grill button, set to MED, set time to 16 minutes. Allow to preheat.
6. Once "Add Food" flashes, add chicken onto grill, close lid.and grill for 8-10 minutes, than flip the meat, closing grill once again. Cook for another 5-7 minutes and check internal temperature to see if has reached 165 degrees.
Nutrition Information:
Yield:
4Serving Size:
1Amount Per Serving: Calories: 585Total Fat: 56gSaturated Fat: 8gTrans Fat: 0gUnsaturated Fat: 46gCholesterol: 51mgSodium: 120mgCarbohydrates: 2gFiber: 0gSugar: 0gProtein: 19g
I’m Melissa, the imaginative force behind Sparkles to Sprinkles, where creativity comes to life, and sprinkles of joy are scattered generously. Melissa is a proud Jersey girl who found love with a New York boy. As a mom to four wonderful boys and a few fur babies, her journey into the world of blogging began after making the life-changing decision to stay home and raise her children. Previously a dedicated workaholic, Melissa’s blog became her creative outlet and passion project. Inspired by her mother-in-law, a masterful cook renowned for her delicious home-cooked meals and legendary holiday feasts (think mouthwatering sausage stuffing), Melissa honed her culinary skills through a combination of family recipes and countless cooking classes. She often attended these classes with her son Michael, who shared her enthusiasm for cooking from a young age. Melissa’s love for learning extends beyond familiar cuisines, as she enjoys exploring international recipes in hands-on cooking classes. Her blog features a diverse array of recipes, showcasing her expertise with various kitchen appliances such as the Instant Pot, air fryer, Slow Cooker, Ninja Foodi, Instant Vortex Plus, and more. Join Melissa on her culinary adventures as she shares tried-and-true family favorites alongside exciting new discoveries!