
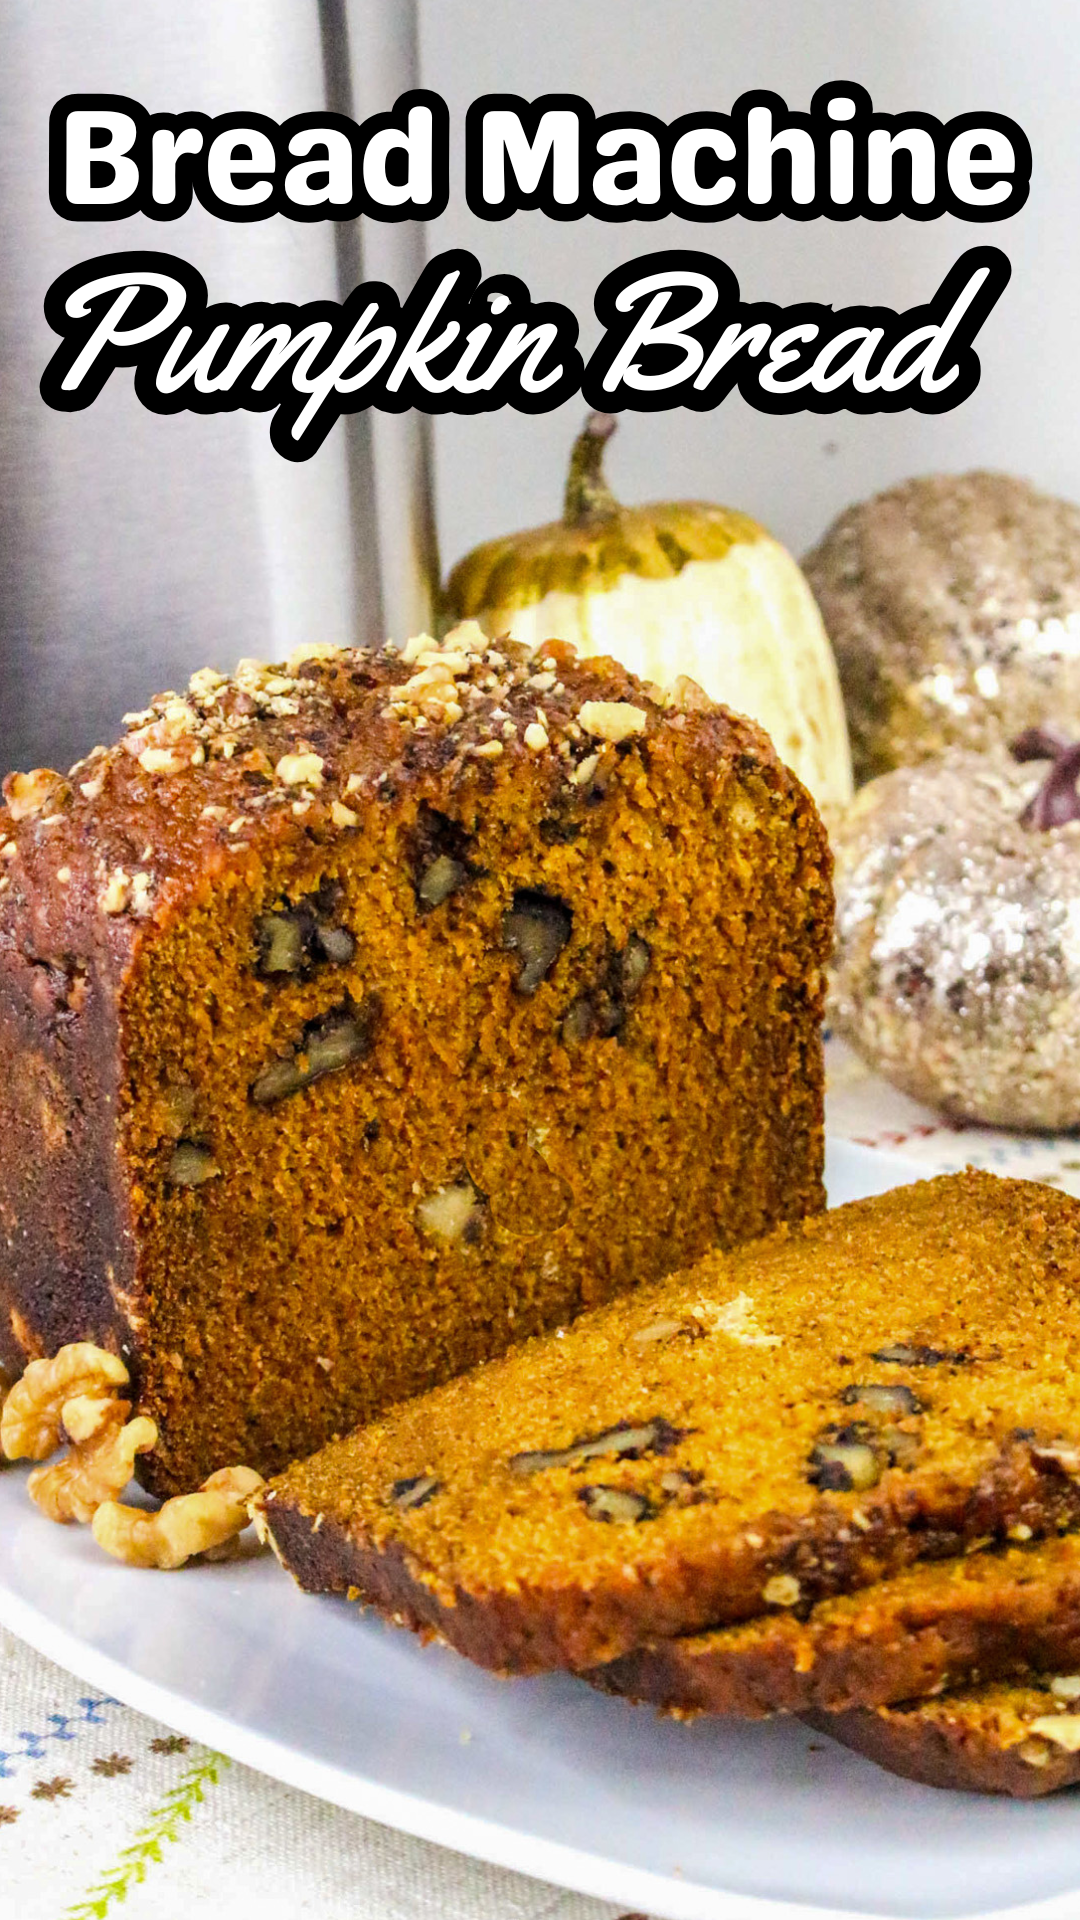
Pumpkin Bread in the Bread Machine: Cozy Fall Flavors Made Easy
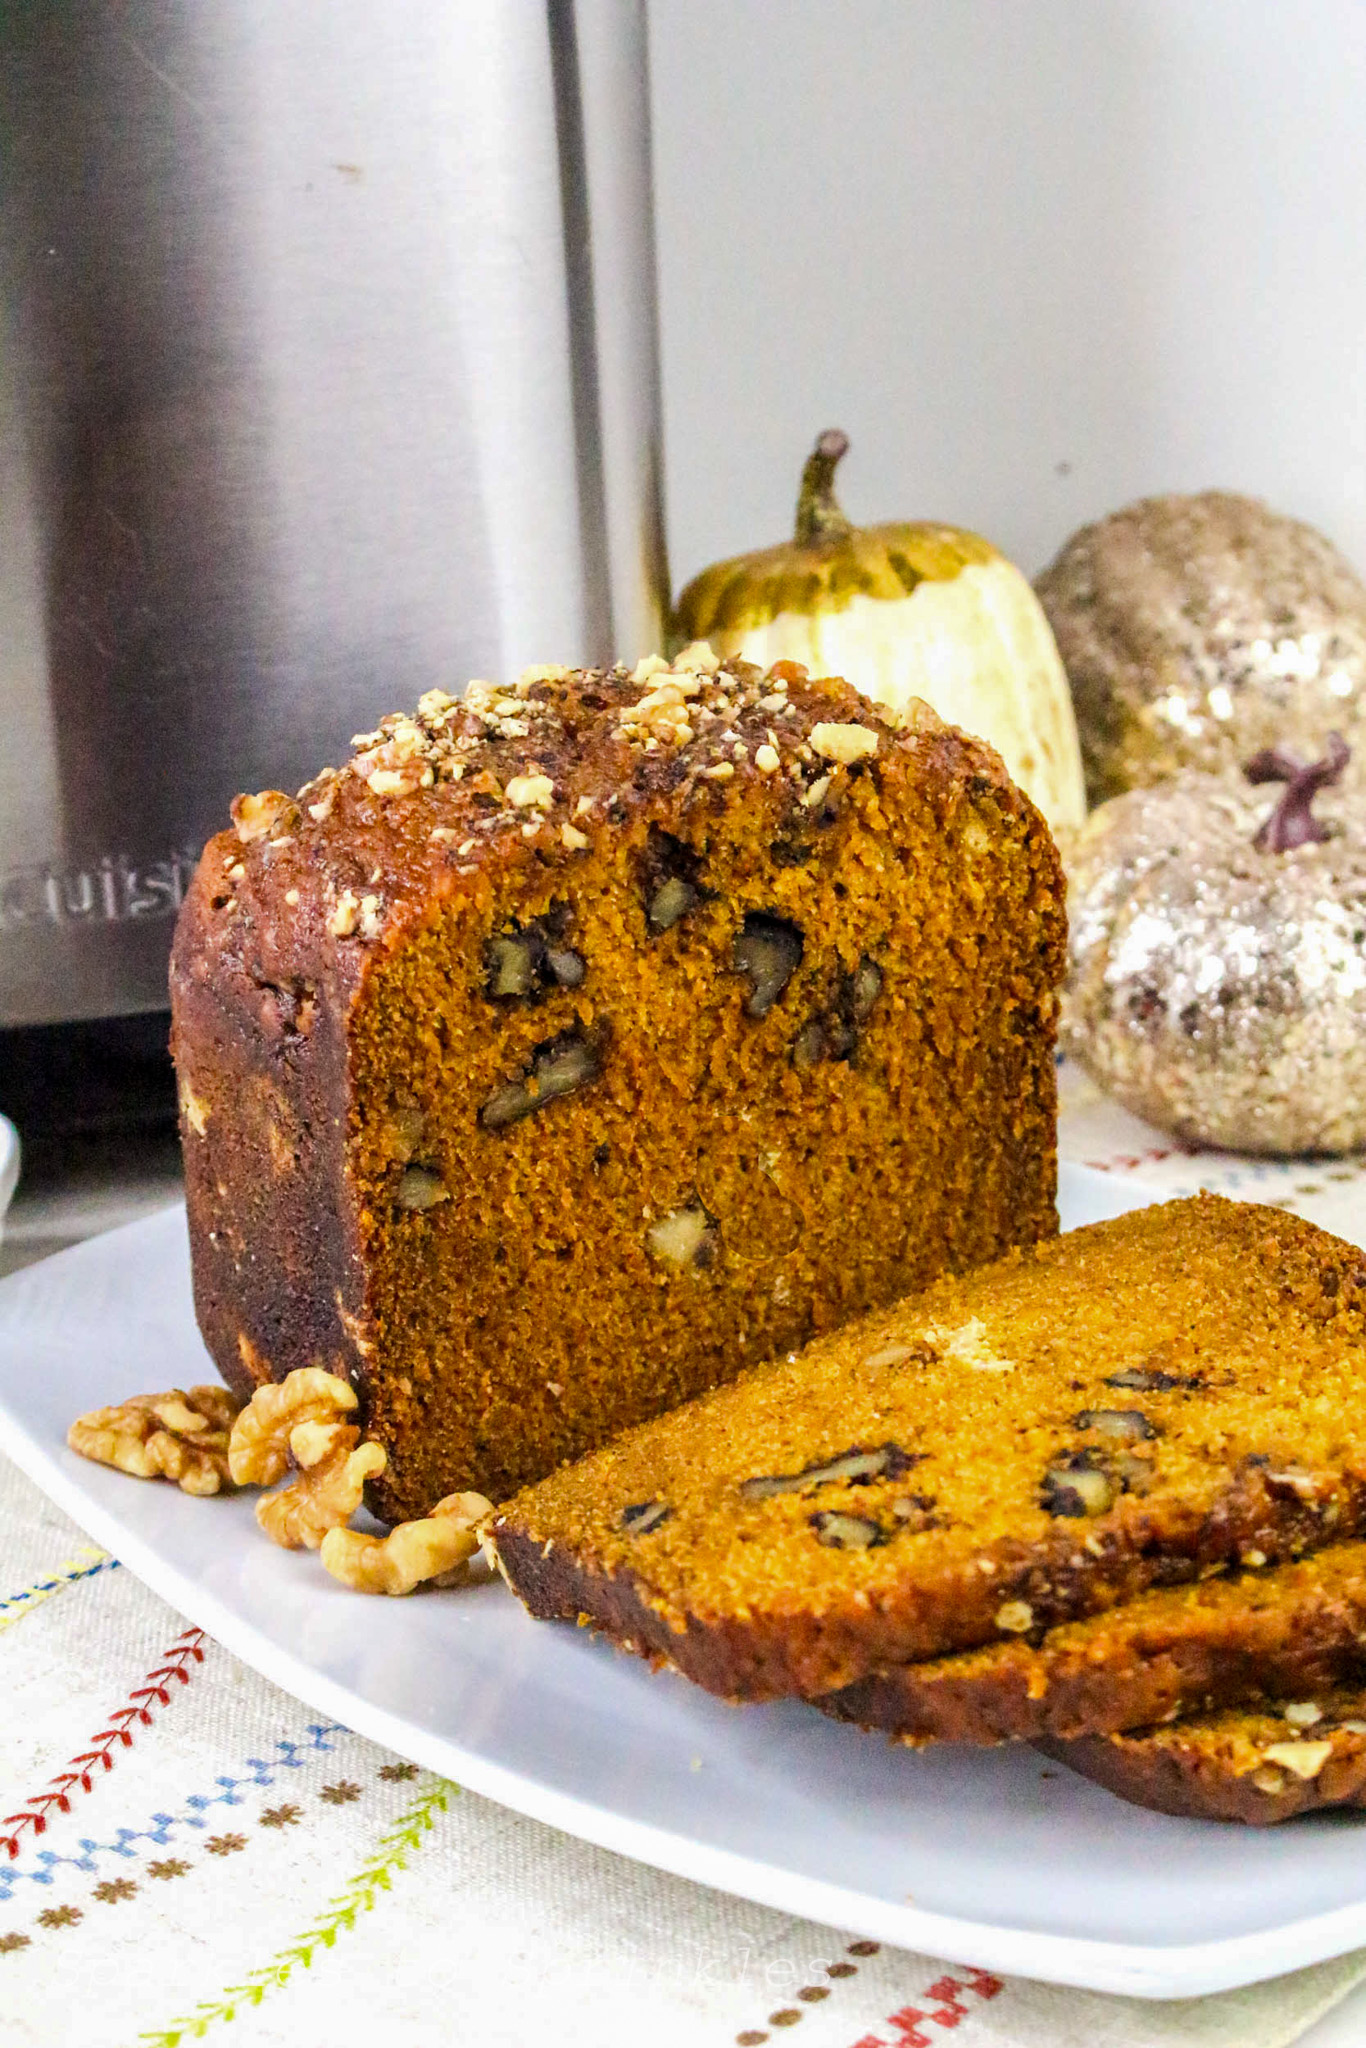
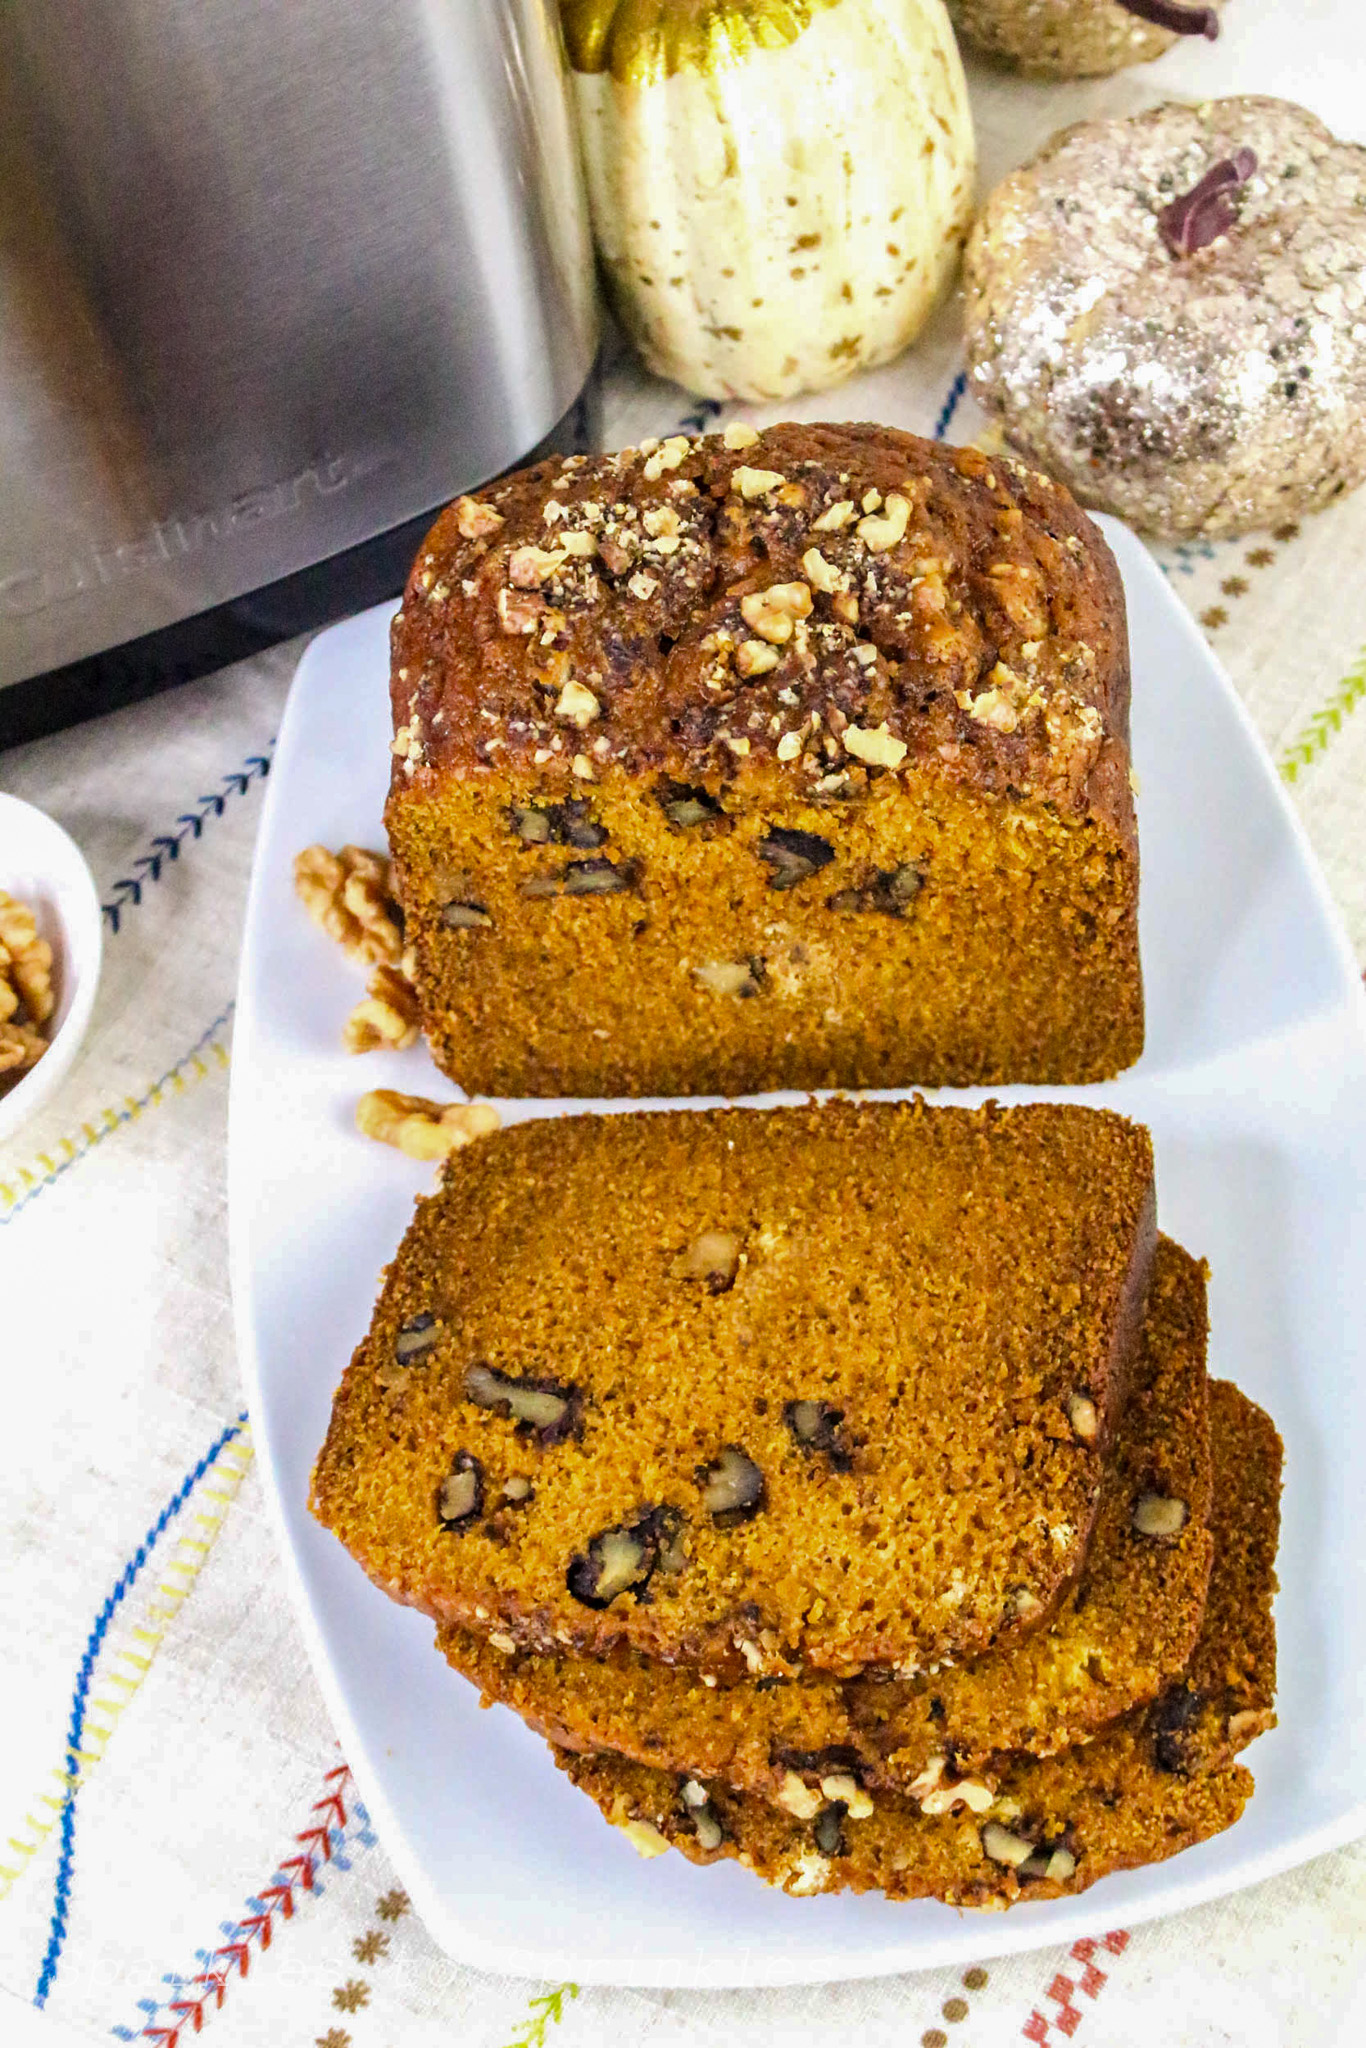
If you’re craving cozy fall flavors but want a hands-off recipe, this bread machine pumpkin bread is the answer. It’s moist, warmly spiced, and couldn’t be easier to make. Just toss the ingredients into your bread machine, hit a button, and come back to the smell of fresh-baked pumpkin bread filling your kitchen.
Bread Machine Pumpkin Bread
What I love most about this recipe is that it uses simple pantry staples and no yeast. That means no kneading, no rising time, and no fuss. It’s perfect for busy days when you want a sweet treat without the extra work. If you love recipes like pumpkin dump cake, pumpkin muffins, or apple pie bread, you’ll want to add this one to your regular fall baking rotation.
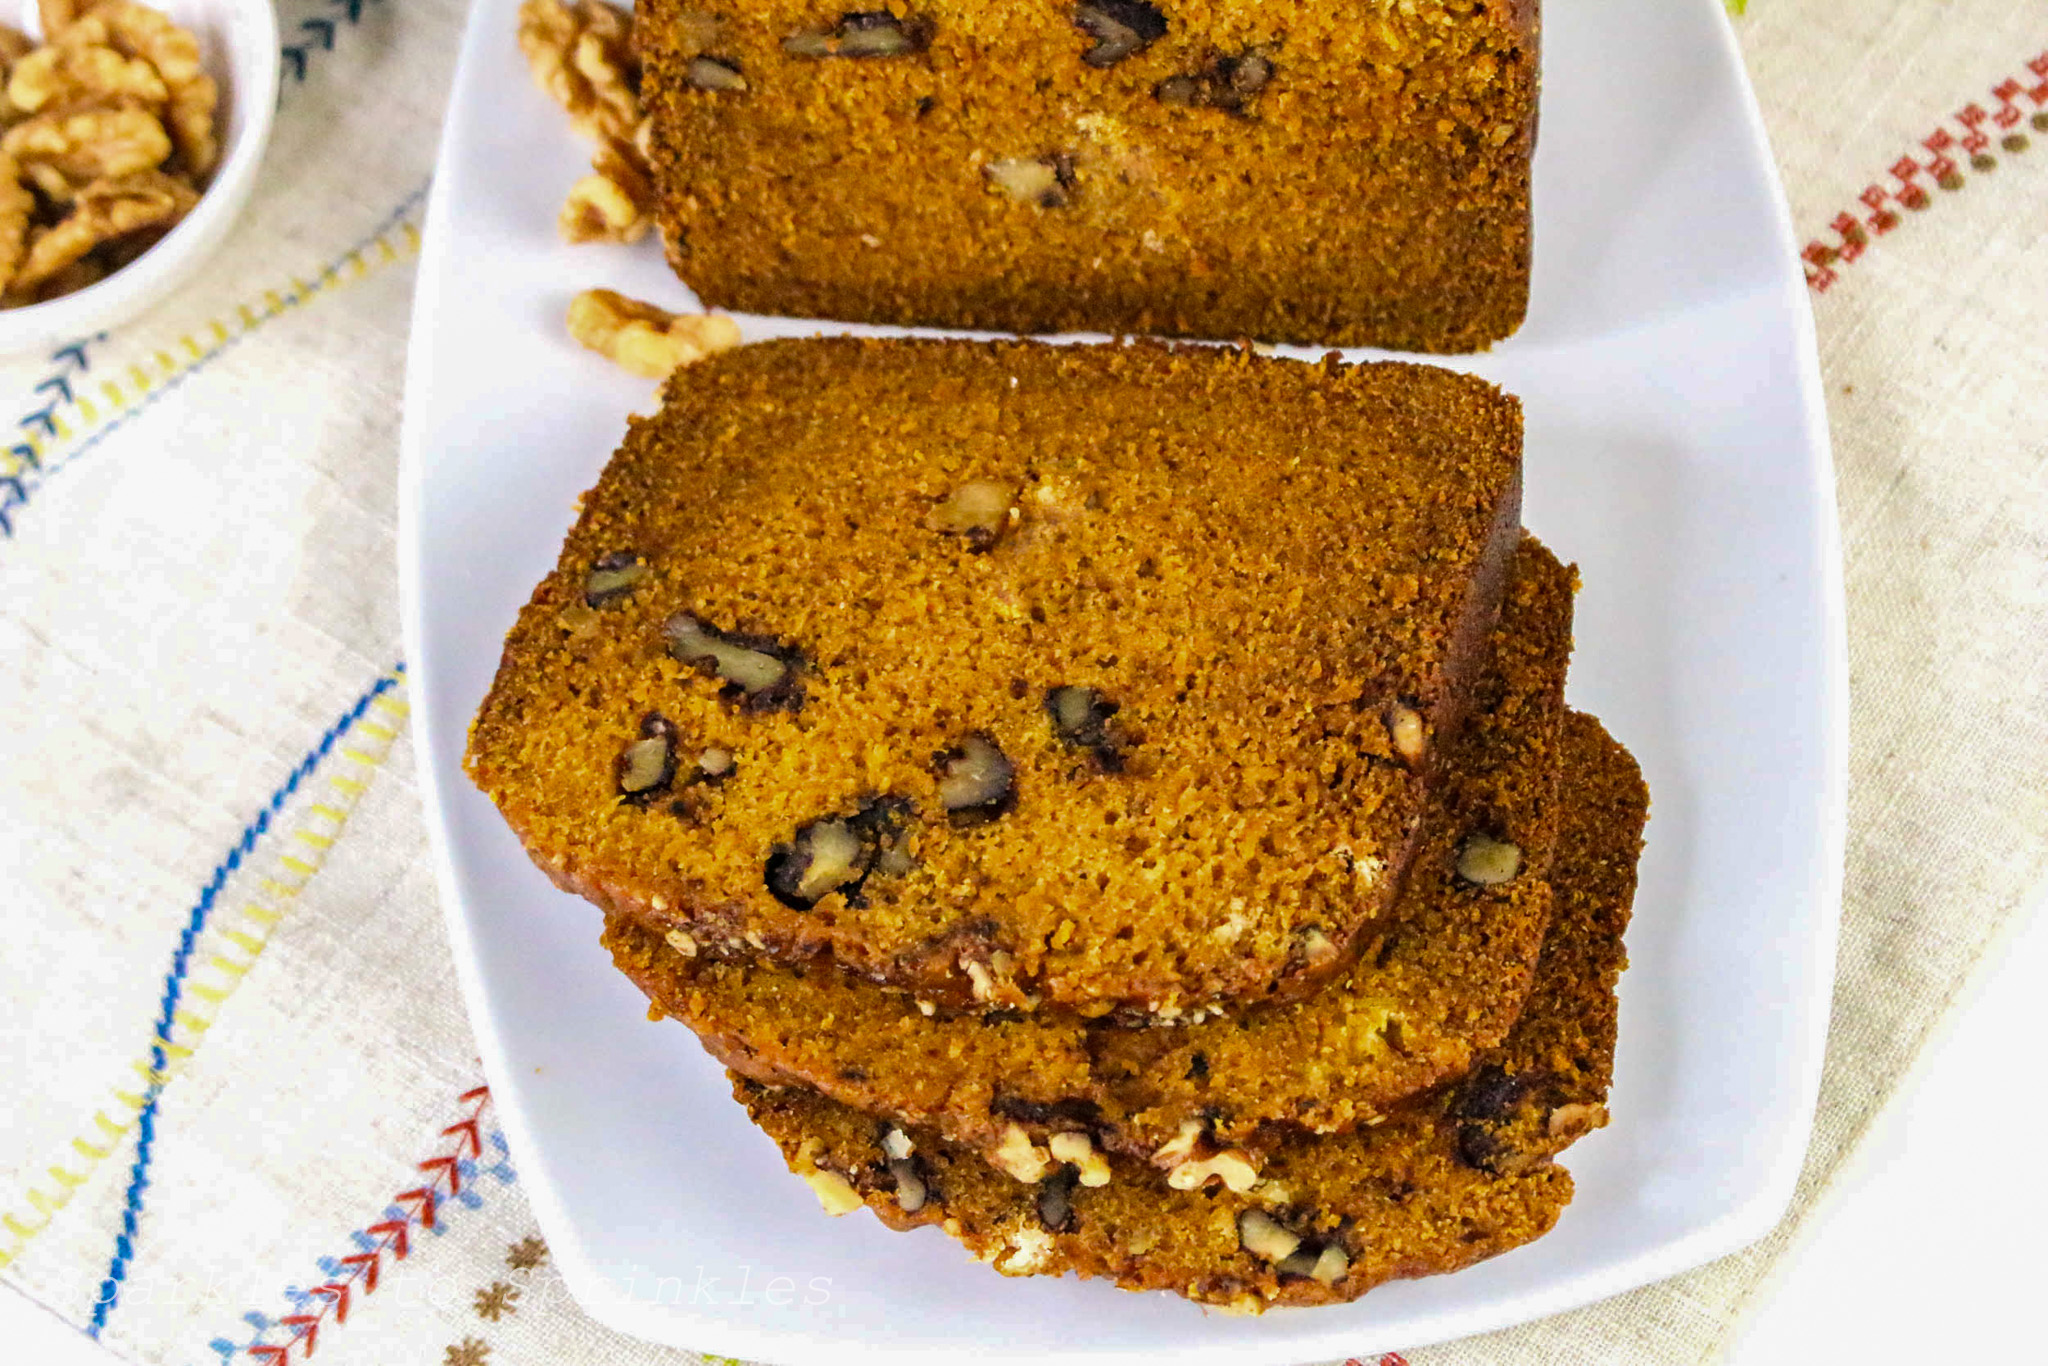
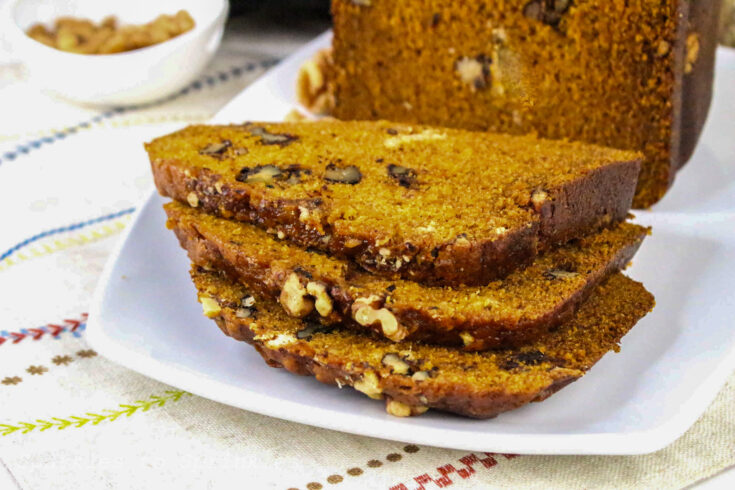
You can enjoy a slice warm with a cup of coffee, serve it as a brunch treat, or even wrap it up for a sweet homemade gift. Whether you go with chopped walnuts, chocolate chips, or leave it plain, this pumpkin bread turns out soft, flavorful, and always crowd-pleasing.

What You Will Love About This Recipe
No yeast, no kneading, no stress
Done entirely in the bread machine
Full of cozy fall spices and sweet pumpkin flavor
Makes your house smell amazing
Great for breakfast, dessert, or snacking
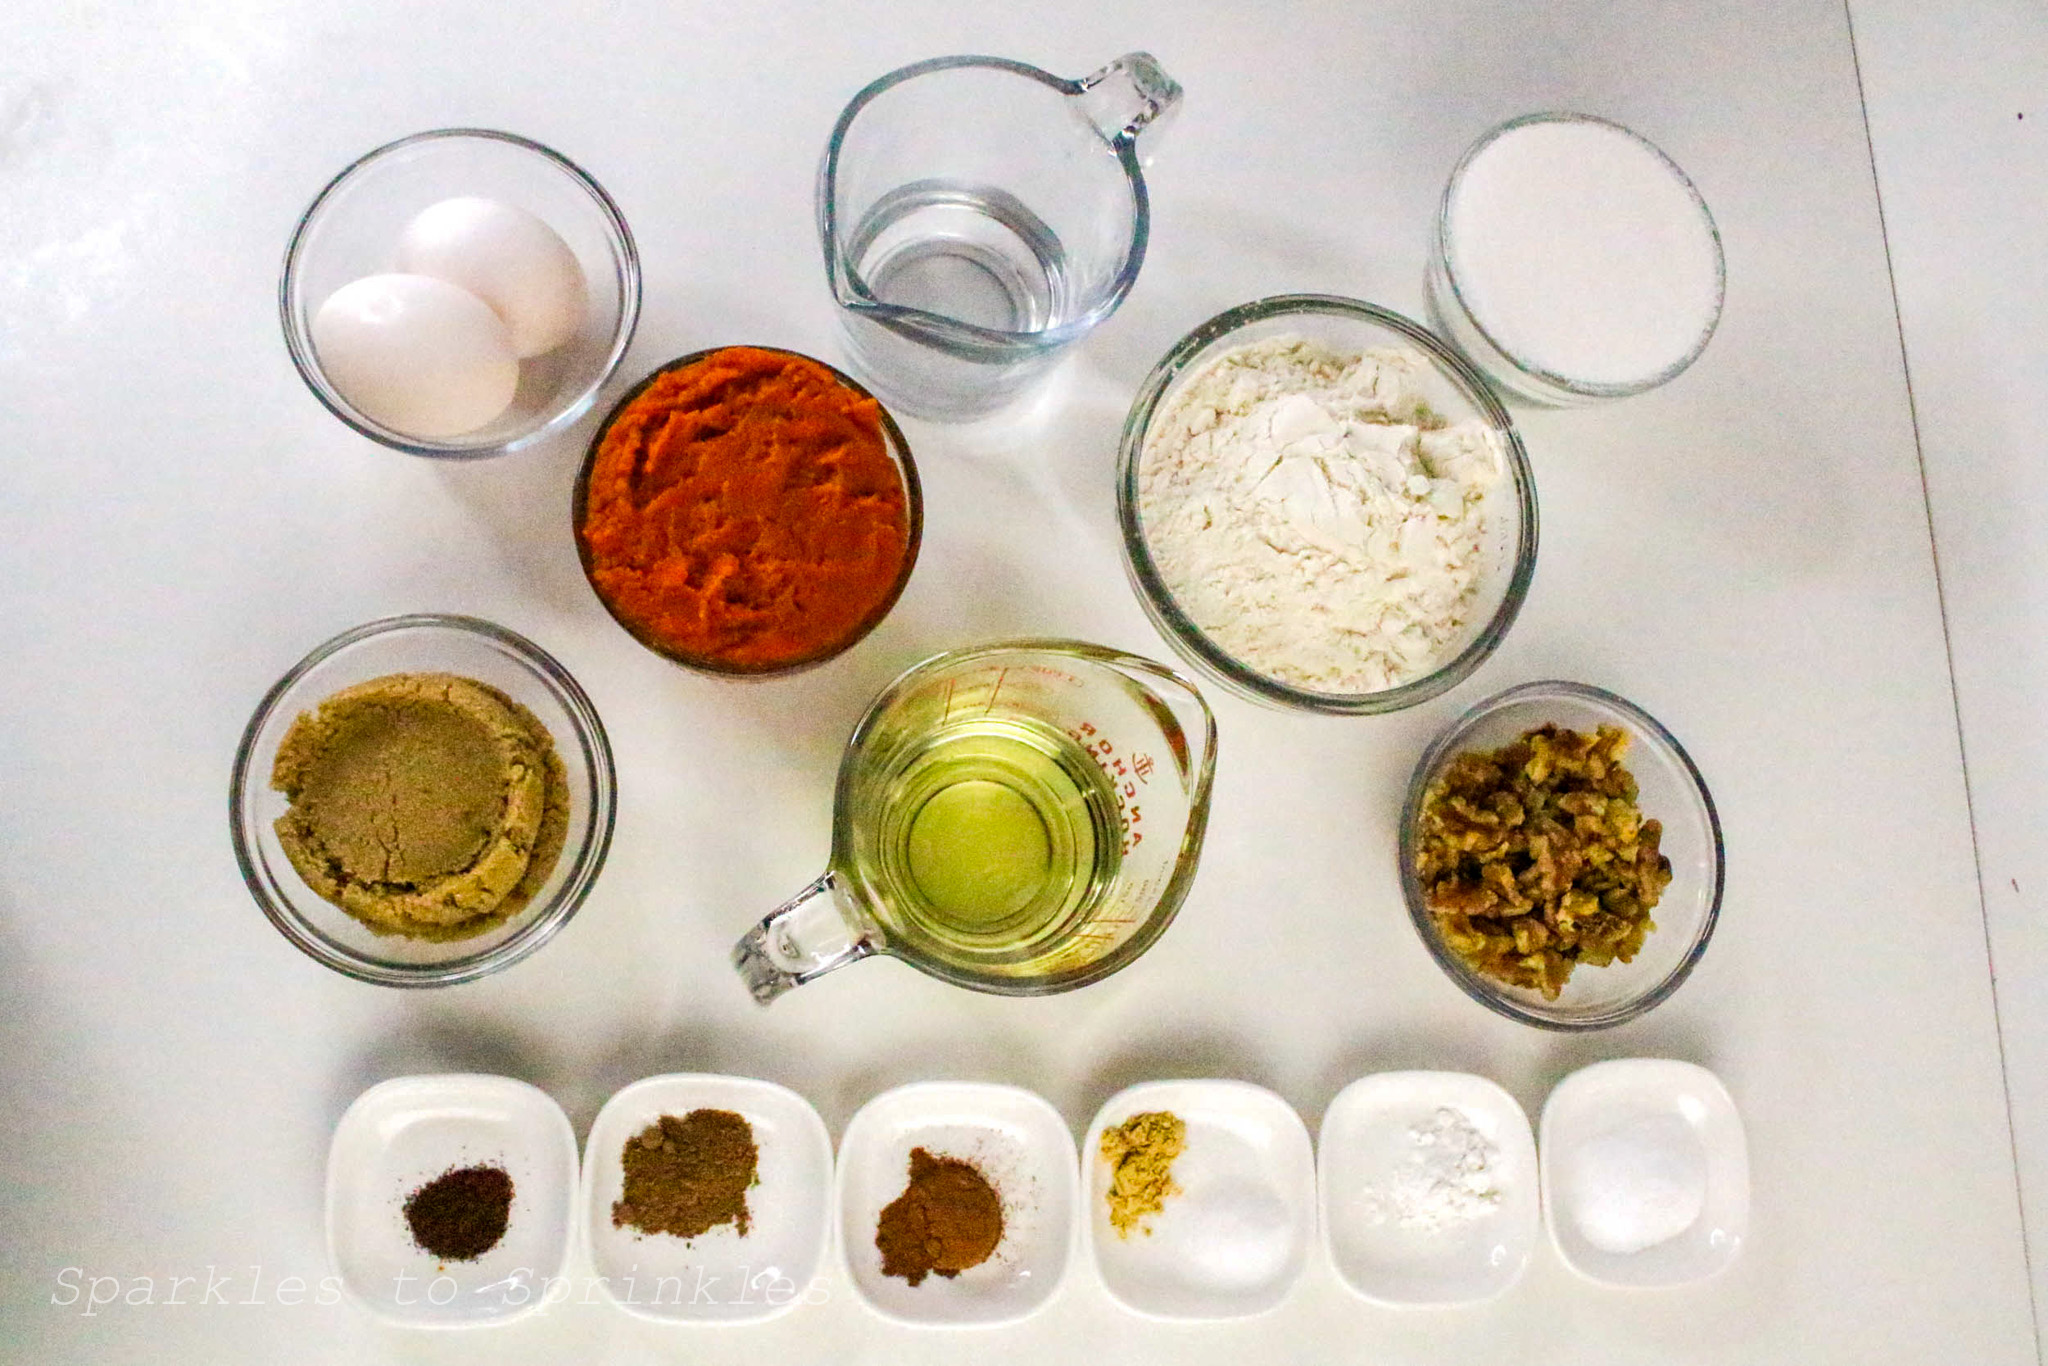
Ingredients
2 large eggs
1 cup canned pumpkin puree
1/2 cup vegetable oil
1/3 cup water
1 cup granulated sugar
1/2 cup brown sugar, packed
1 3/4 cups all-purpose flour
1/2 teaspoon baking powder
1 teaspoon baking soda
1/2 teaspoon salt
1 teaspoon ground cinnamon
1/2 teaspoon ground nutmeg
1/4 teaspoon ground cloves
1/4 teaspoon ground ginger
Optional: 1/2 cup chopped walnuts or chocolate chips
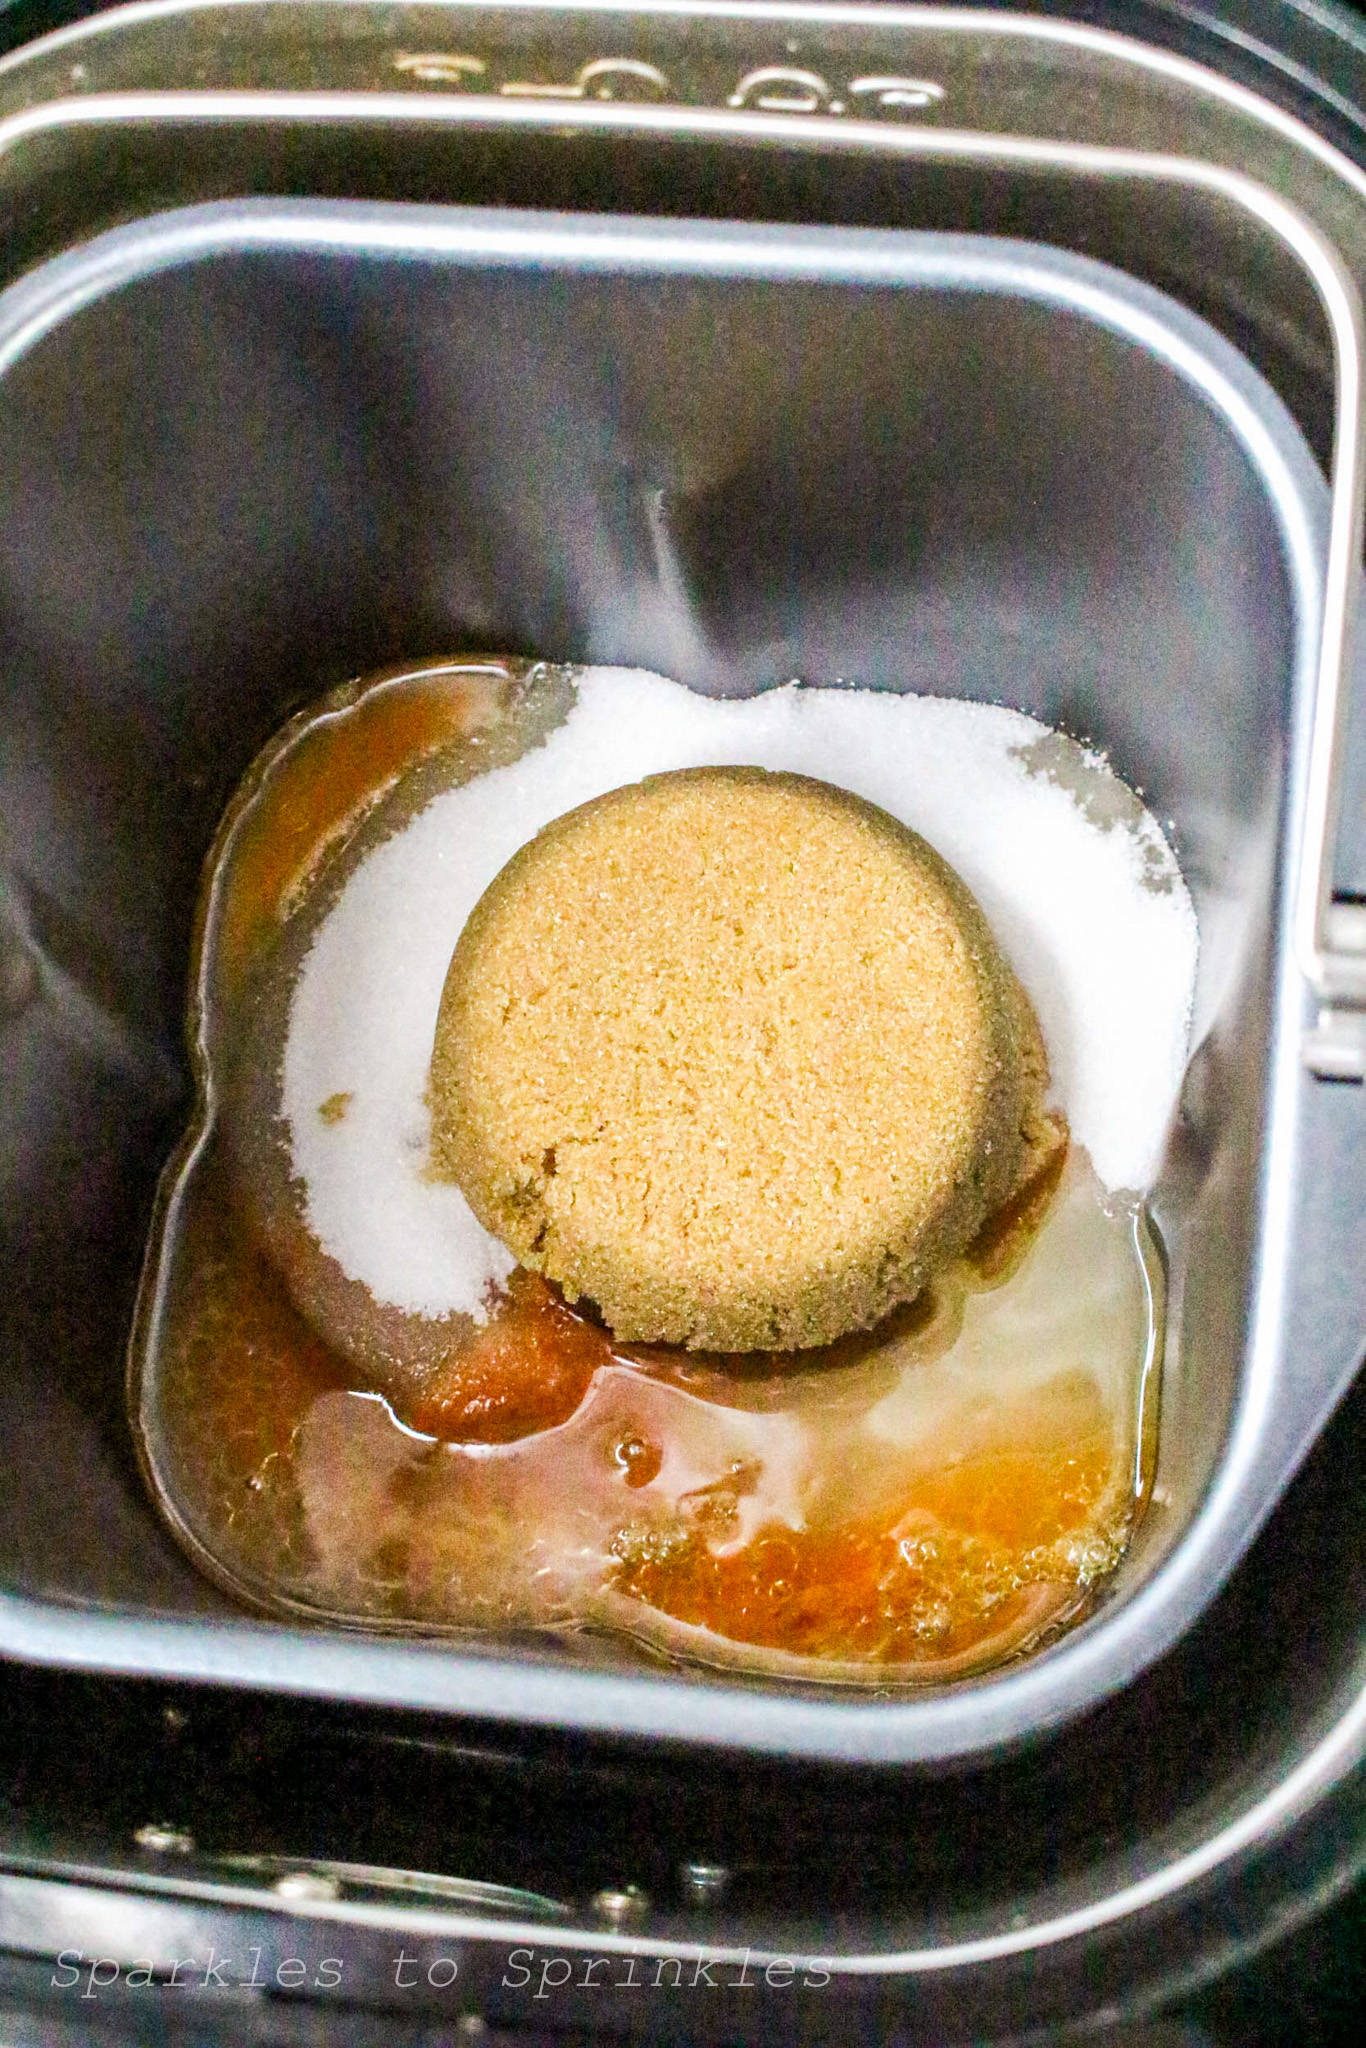
Add all wet ingredients to the bread pan in this order: eggs, pumpkin puree, vegetable oil, and water.
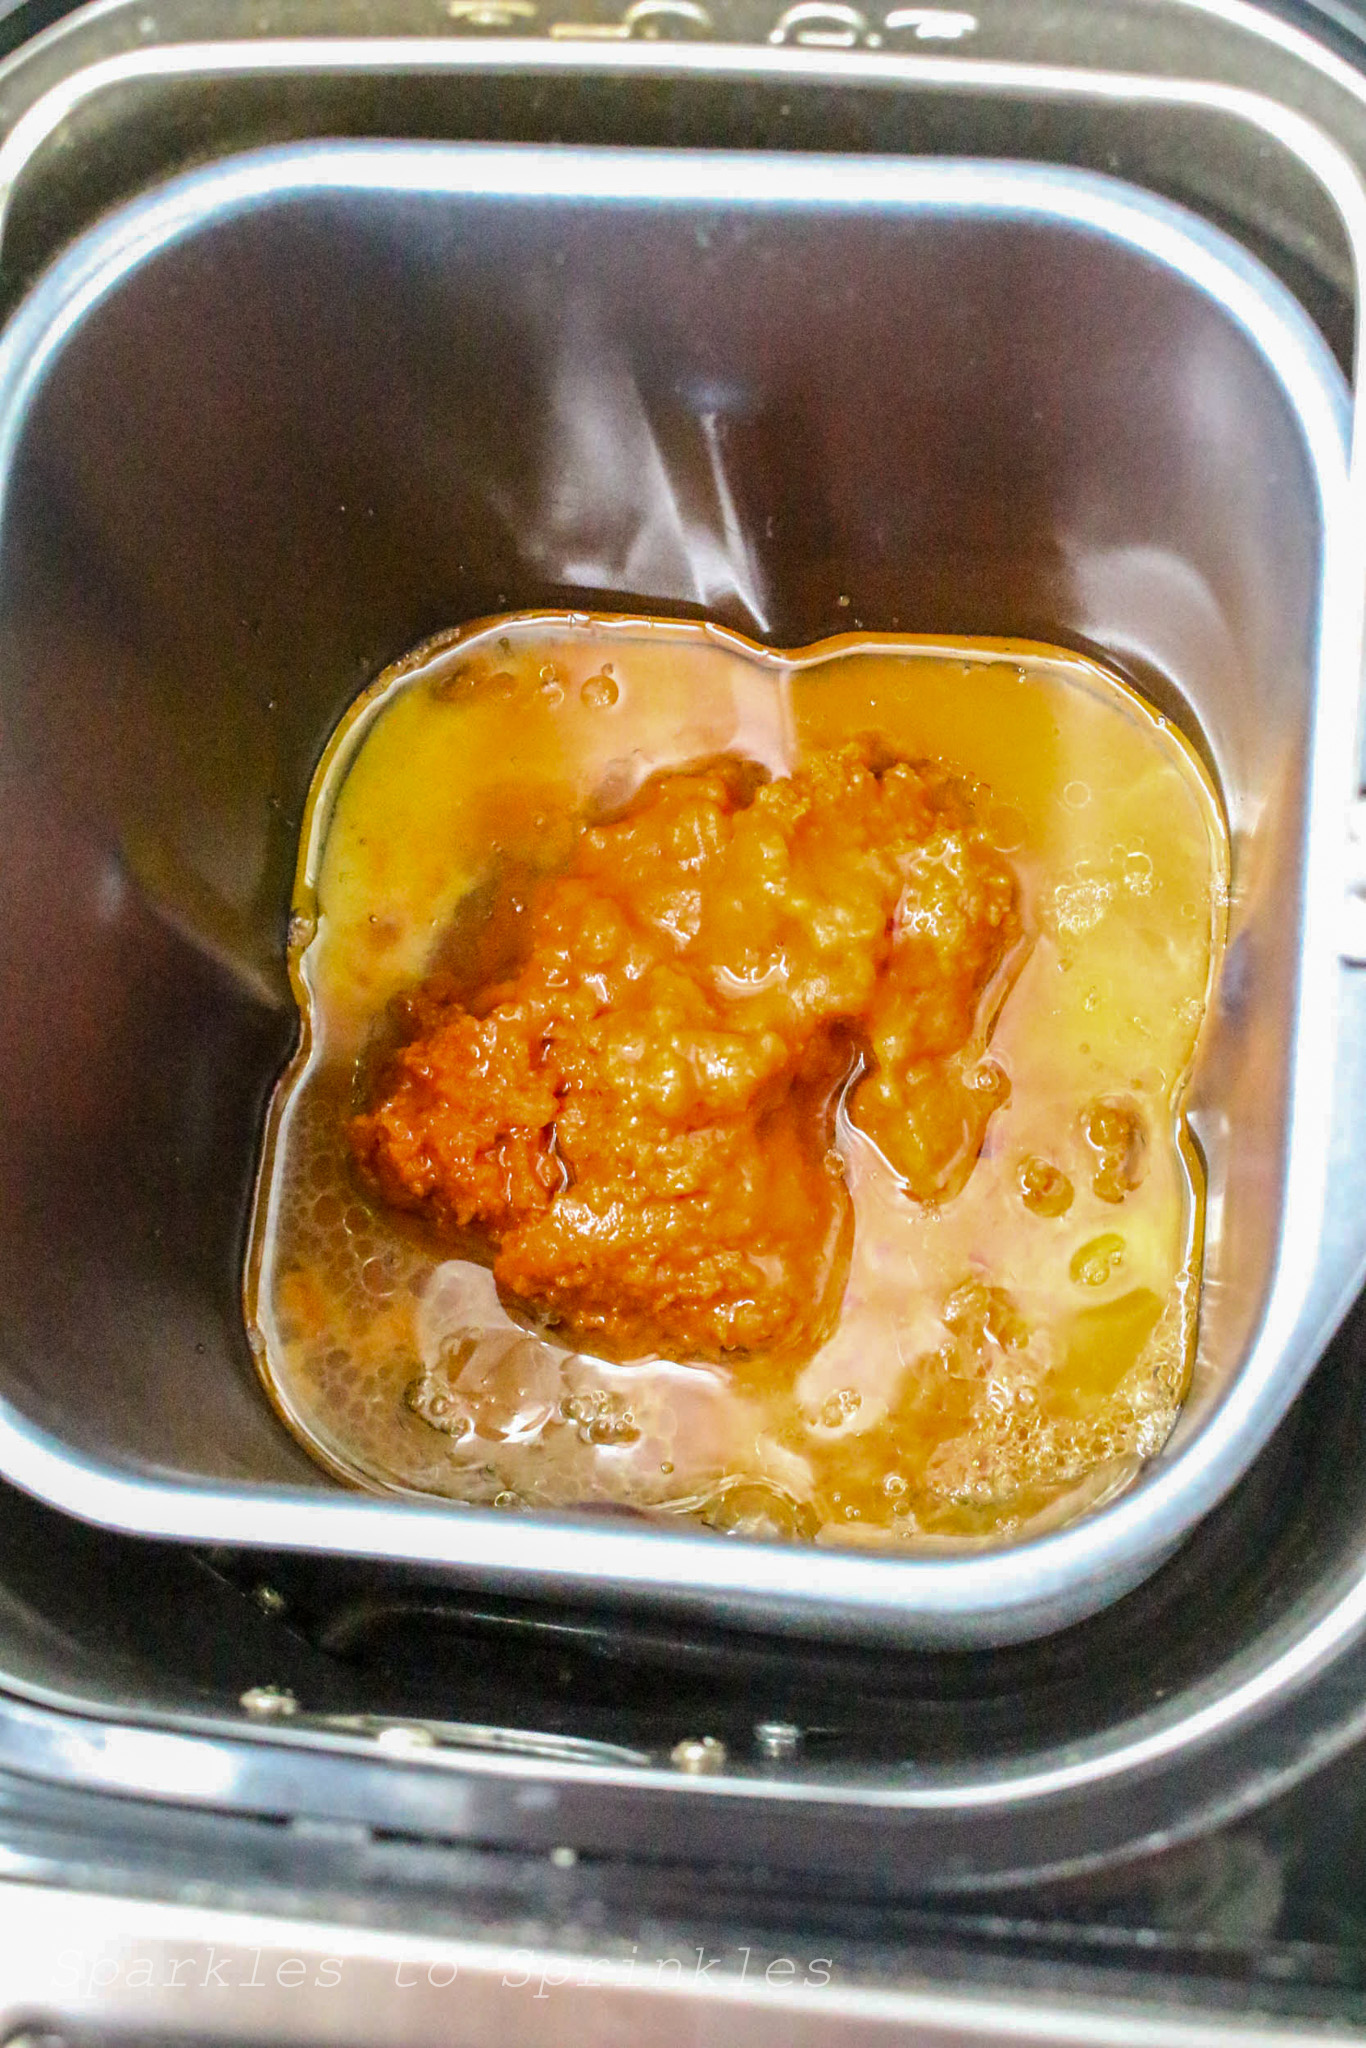
Add sugar and brown sugar.
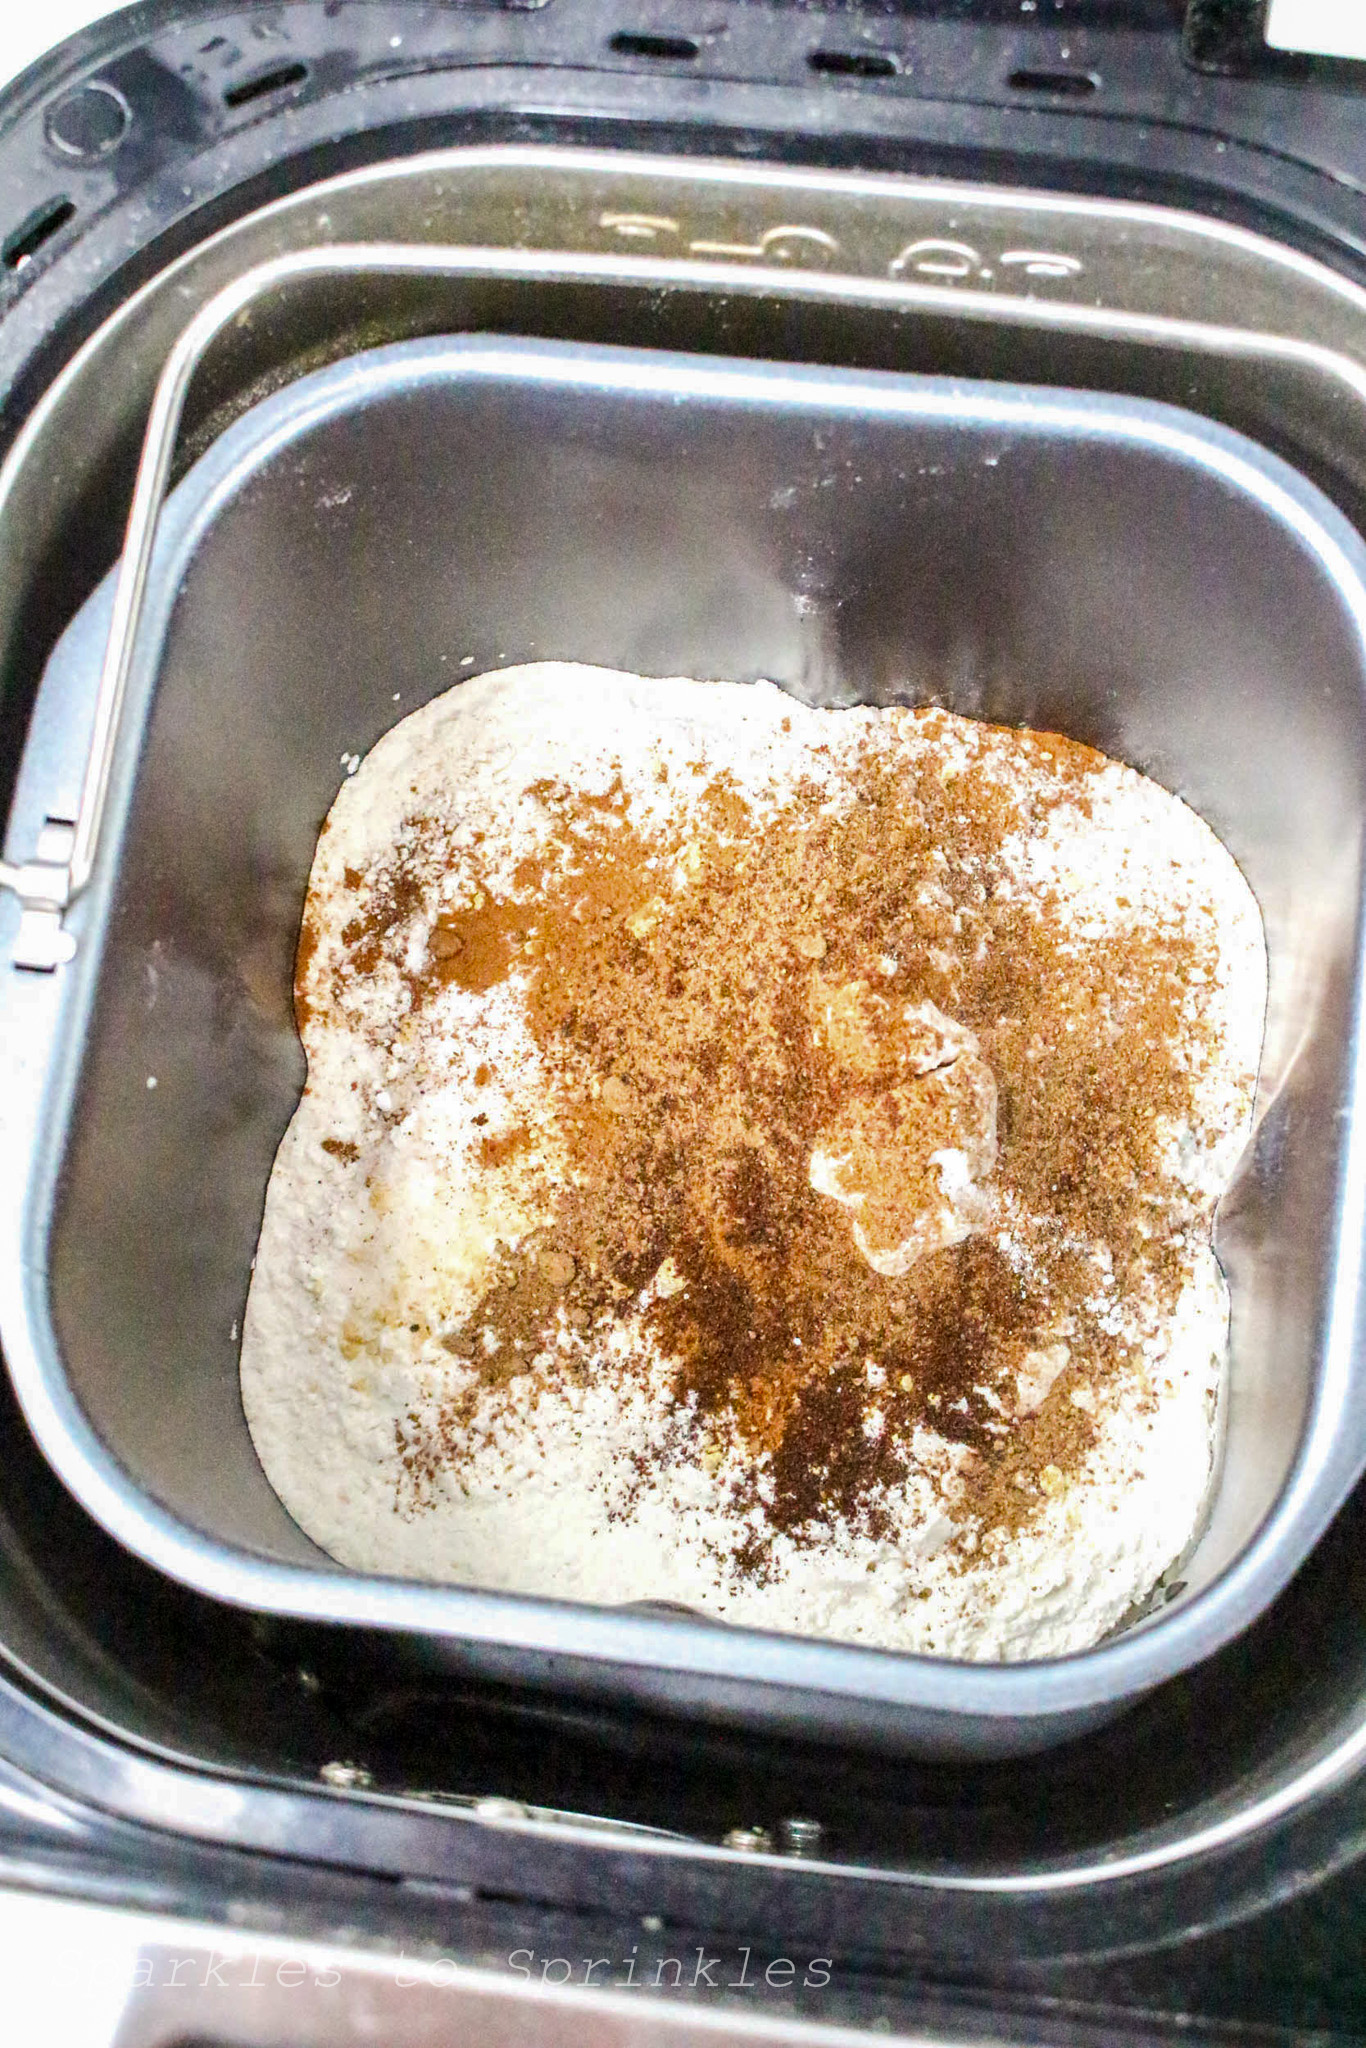
Add flour, then sprinkle baking powder, baking soda, salt, and spices over the flour.
Select the “Quick Bread” or “Cake” cycle (not a yeast bread setting).
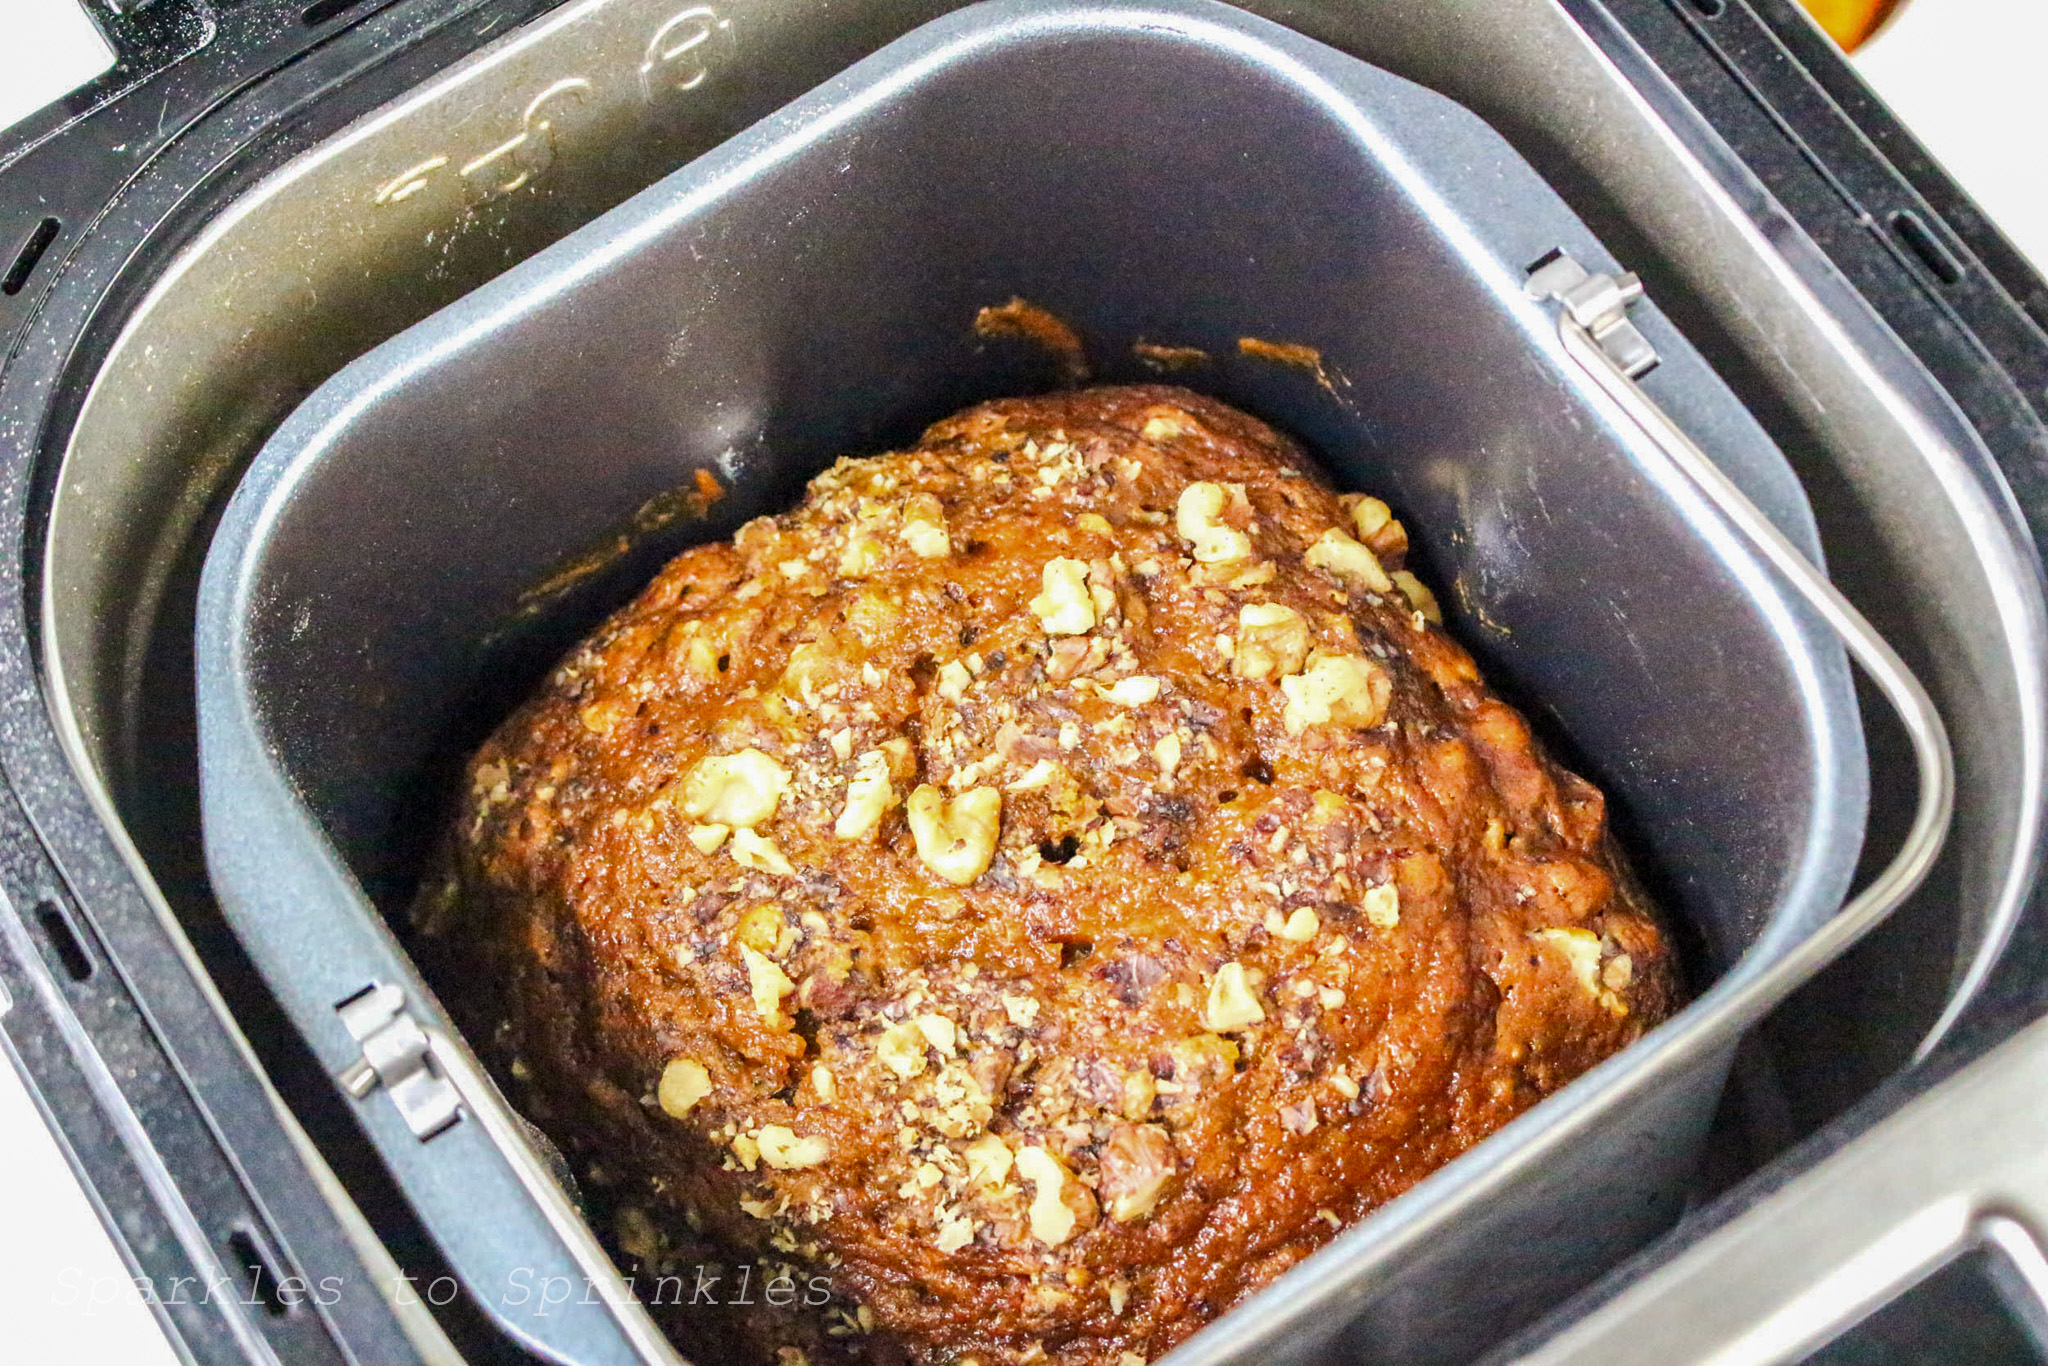
Add optional mix-ins (walnuts or chocolate chips) when your machine signals or about 5 minutes into mixing.
When the cycle completes, let the bread cool in the pan for 10 minutes, then transfer to a wire rack.
Tips & Tricks
- Use canned pumpkin purée, not pumpkin pie filling
- Add wet ingredients first, then dry ingredients, as recommended by most bread machines
- Use the “Quick Bread” or “Cake” setting—not the yeast bread setting
- Try folding in chocolate chips, walnuts, or dried cranberries for a tasty twist
- Let the bread cool before slicing for best texture
FAQs
Bread Machine Banana Bread
Ingredients
- 2 large eggs
- 1 cup canned pumpkin puree
- 1/2 cup vegetable oil
- 1/3 cup water
- 1 cup granulated sugar
- 1/2 cup brown sugar, packed
- 1 3/4 cups all-purpose flour
- 1/2 teaspoon baking powder
- 1 teaspoon baking soda
- 1/2 teaspoon salt
- 1 teaspoon ground cinnamon
- 1/2 teaspoon ground nutmeg
- 1/4 teaspoon ground cloves
- 1/4 teaspoon ground ginger
- Optional: 1/2 cup chopped walnuts or chocolate chips
Instructions
- Add all wet ingredients to the bread pan in this order: eggs, pumpkin puree, vegetable oil, and water.
- Add sugar and brown sugar.
- Add flour, then sprinkle baking powder, baking soda, salt, and spices over the flour.
- Select the “Quick Bread” or “Cake” cycle (not a yeast bread setting).
- Add optional mix-ins (walnuts or chocolate chips) when your machine signals or about 5 minutes into mixing.
- When the cycle completes, let the bread cool in the pan for 10 minutes, then transfer to a wire rack.
Notes
Yield: 1 loaf (about 8–10 slices)
Nutrition Information:
Yield:
10Serving Size:
1Amount Per Serving: Calories: 372Total Fat: 17gSaturated Fat: 3gTrans Fat: 0gUnsaturated Fat: 13gCholesterol: 37mgSodium: 276mgCarbohydrates: 52gFiber: 2gSugar: 32gProtein: 5g
I’m Melissa, the imaginative force behind Sparkles to Sprinkles, where creativity comes to life, and sprinkles of joy are scattered generously. Melissa is a proud Jersey girl who found love with a New York boy. As a mom to four wonderful boys and a few fur babies, her journey into the world of blogging began after making the life-changing decision to stay home and raise her children. Previously a dedicated workaholic, Melissa’s blog became her creative outlet and passion project. Inspired by her mother-in-law, a masterful cook renowned for her delicious home-cooked meals and legendary holiday feasts (think mouthwatering sausage stuffing), Melissa honed her culinary skills through a combination of family recipes and countless cooking classes. She often attended these classes with her son Michael, who shared her enthusiasm for cooking from a young age. Melissa’s love for learning extends beyond familiar cuisines, as she enjoys exploring international recipes in hands-on cooking classes. Her blog features a diverse array of recipes, showcasing her expertise with various kitchen appliances such as the Instant Pot, air fryer, Slow Cooker, Ninja Foodi, Instant Vortex Plus, and more. Join Melissa on her culinary adventures as she shares tried-and-true family favorites alongside exciting new discoveries!


One Comment