
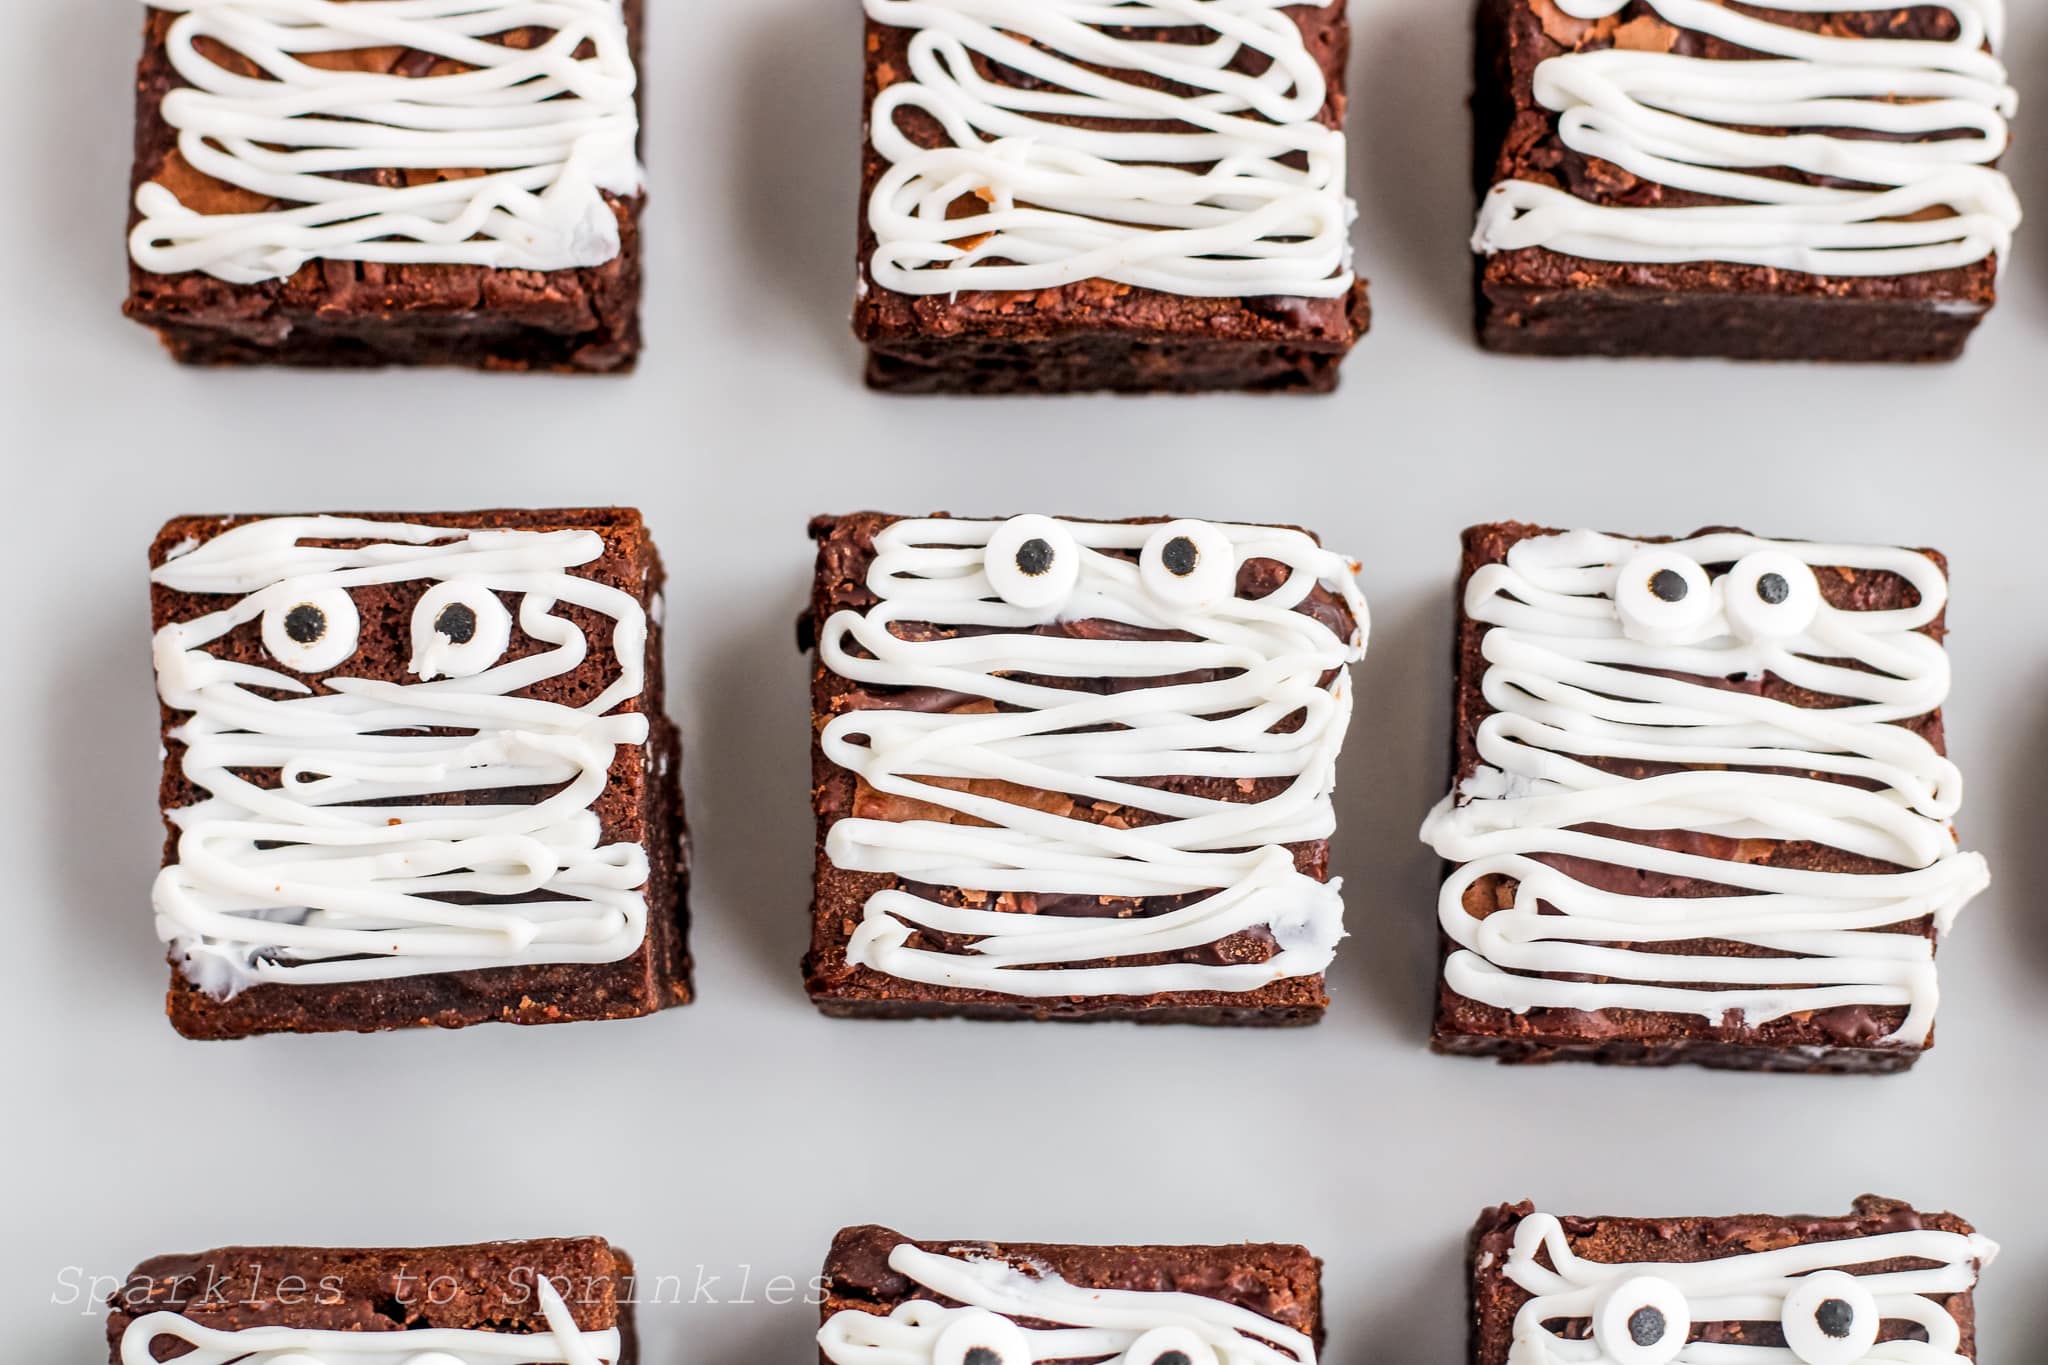
Mummy Brownies
Ready for another fun kid-approved Halloween treats to make with the kids this year? Look no further than these super delicious and festive Mummy brownies. In just a few minutes turn your favorite store-bought brownies (or favorite boxed brownie mix) into these fun mummies that you can easily make with the kids.
Mummy Brownies
Pair these with other fun Halloween treats for the kids like our mummy cookies, Candy Corn Pudding Cups, and our Halloween cookies. The kids are sure to go crazy with excitement with all the fun treats they can choose from!

Ingredients
- 1 package of store-bought bakery brownies (12 brownies)
- 4 tablespoon white icing
- 24 candy eyeballs

How to Make Mummy Brownies
- Spoon the melted chocolate carefully into a plastic storage bag. Cut a small hole or poke a hole in the corner of the bag depending on how thick you want your mummy stripes to be.
- Use a zigzag pattern over the cookies with the white chocolate to create the look of a mummy.

- Add two candy eyes to complete the mummy cookies.

- Allow your brownies to sit for 20 minutes so the icing hardens.

Tips Tricks and FAQs
- These can also be made with a store-bought brownie mix or from your favorite homemade brownie mix. Just be sure to spray your pan with cooking spray and line it with parchment paper so that you can easily remove your brownies from the pan.
- When piping your brownies, start with a small hole in your piping bag first. I like to practice piping them on a plate before piping my brownies.

- I prefer to be a little messy when it comes to piping the icing onto the brownies. This gives it a realistic mummy look!
- If you want nice clean cut brownies, you want to make sure that you let your brownies completely cool first.
Storage
You will want to store your brownies in an airtight container at room temperature. These will last up to 3 days.
If you prefer you can store your brownies in the fridge. These will last about 1 week. If you choose to store them in the fridge just beware that they will harden quicker because the fridge removes moisture from them.
You can store these mummy brownies in a freezer-safe container for up to 3 months. Let them completely cool prior to freezing. I recommend not piping the icing on the brownies until you are ready to serve. When you are ready to enjoy, thaw at room temperature.


Mummy Brownies
Ready for another fun kid-approved Halloween treat to make with the kids this year? Look no further than these super delicious and festive Mummy brownies. In just a few minutes turn your favorite store-bought brownies (or favorite boxed brownie mix) into these fun mummies that you can easily make with the kids.
Ingredients
- 1 package of store-bought bakery brownies (12 brownies)
- 4 tablespoon white icing
- 24 candy eyeballs
Instructions
- Spoon the melted chocolate carefully into a plastic storage bag. Cut a small hole or poke a hole in the corner of the bag depending on how thick you want your mummy stripes to be.
- Use a zigzag pattern over the cookies with the white chocolate to create the look of a mummy.
- Add two candy eyes to complete the mummy cookies.
- Allow your brownies to sit for 20 minutes so the icing hardens.
Nutrition Information:
Yield:
12Serving Size:
1Amount Per Serving: Calories: 94Total Fat: 2gSaturated Fat: 1gTrans Fat: 0gUnsaturated Fat: 2gCholesterol: 3mgSodium: 31mgCarbohydrates: 18gFiber: 0gSugar: 11gProtein: 0g
I’m Melissa, the imaginative force behind Sparkles to Sprinkles, where creativity comes to life, and sprinkles of joy are scattered generously. Melissa is a proud Jersey girl who found love with a New York boy. As a mom to four wonderful boys and a few fur babies, her journey into the world of blogging began after making the life-changing decision to stay home and raise her children. Previously a dedicated workaholic, Melissa’s blog became her creative outlet and passion project. Inspired by her mother-in-law, a masterful cook renowned for her delicious home-cooked meals and legendary holiday feasts (think mouthwatering sausage stuffing), Melissa honed her culinary skills through a combination of family recipes and countless cooking classes. She often attended these classes with her son Michael, who shared her enthusiasm for cooking from a young age. Melissa’s love for learning extends beyond familiar cuisines, as she enjoys exploring international recipes in hands-on cooking classes. Her blog features a diverse array of recipes, showcasing her expertise with various kitchen appliances such as the Instant Pot, air fryer, Slow Cooker, Ninja Foodi, Instant Vortex Plus, and more. Join Melissa on her culinary adventures as she shares tried-and-true family favorites alongside exciting new discoveries!


