
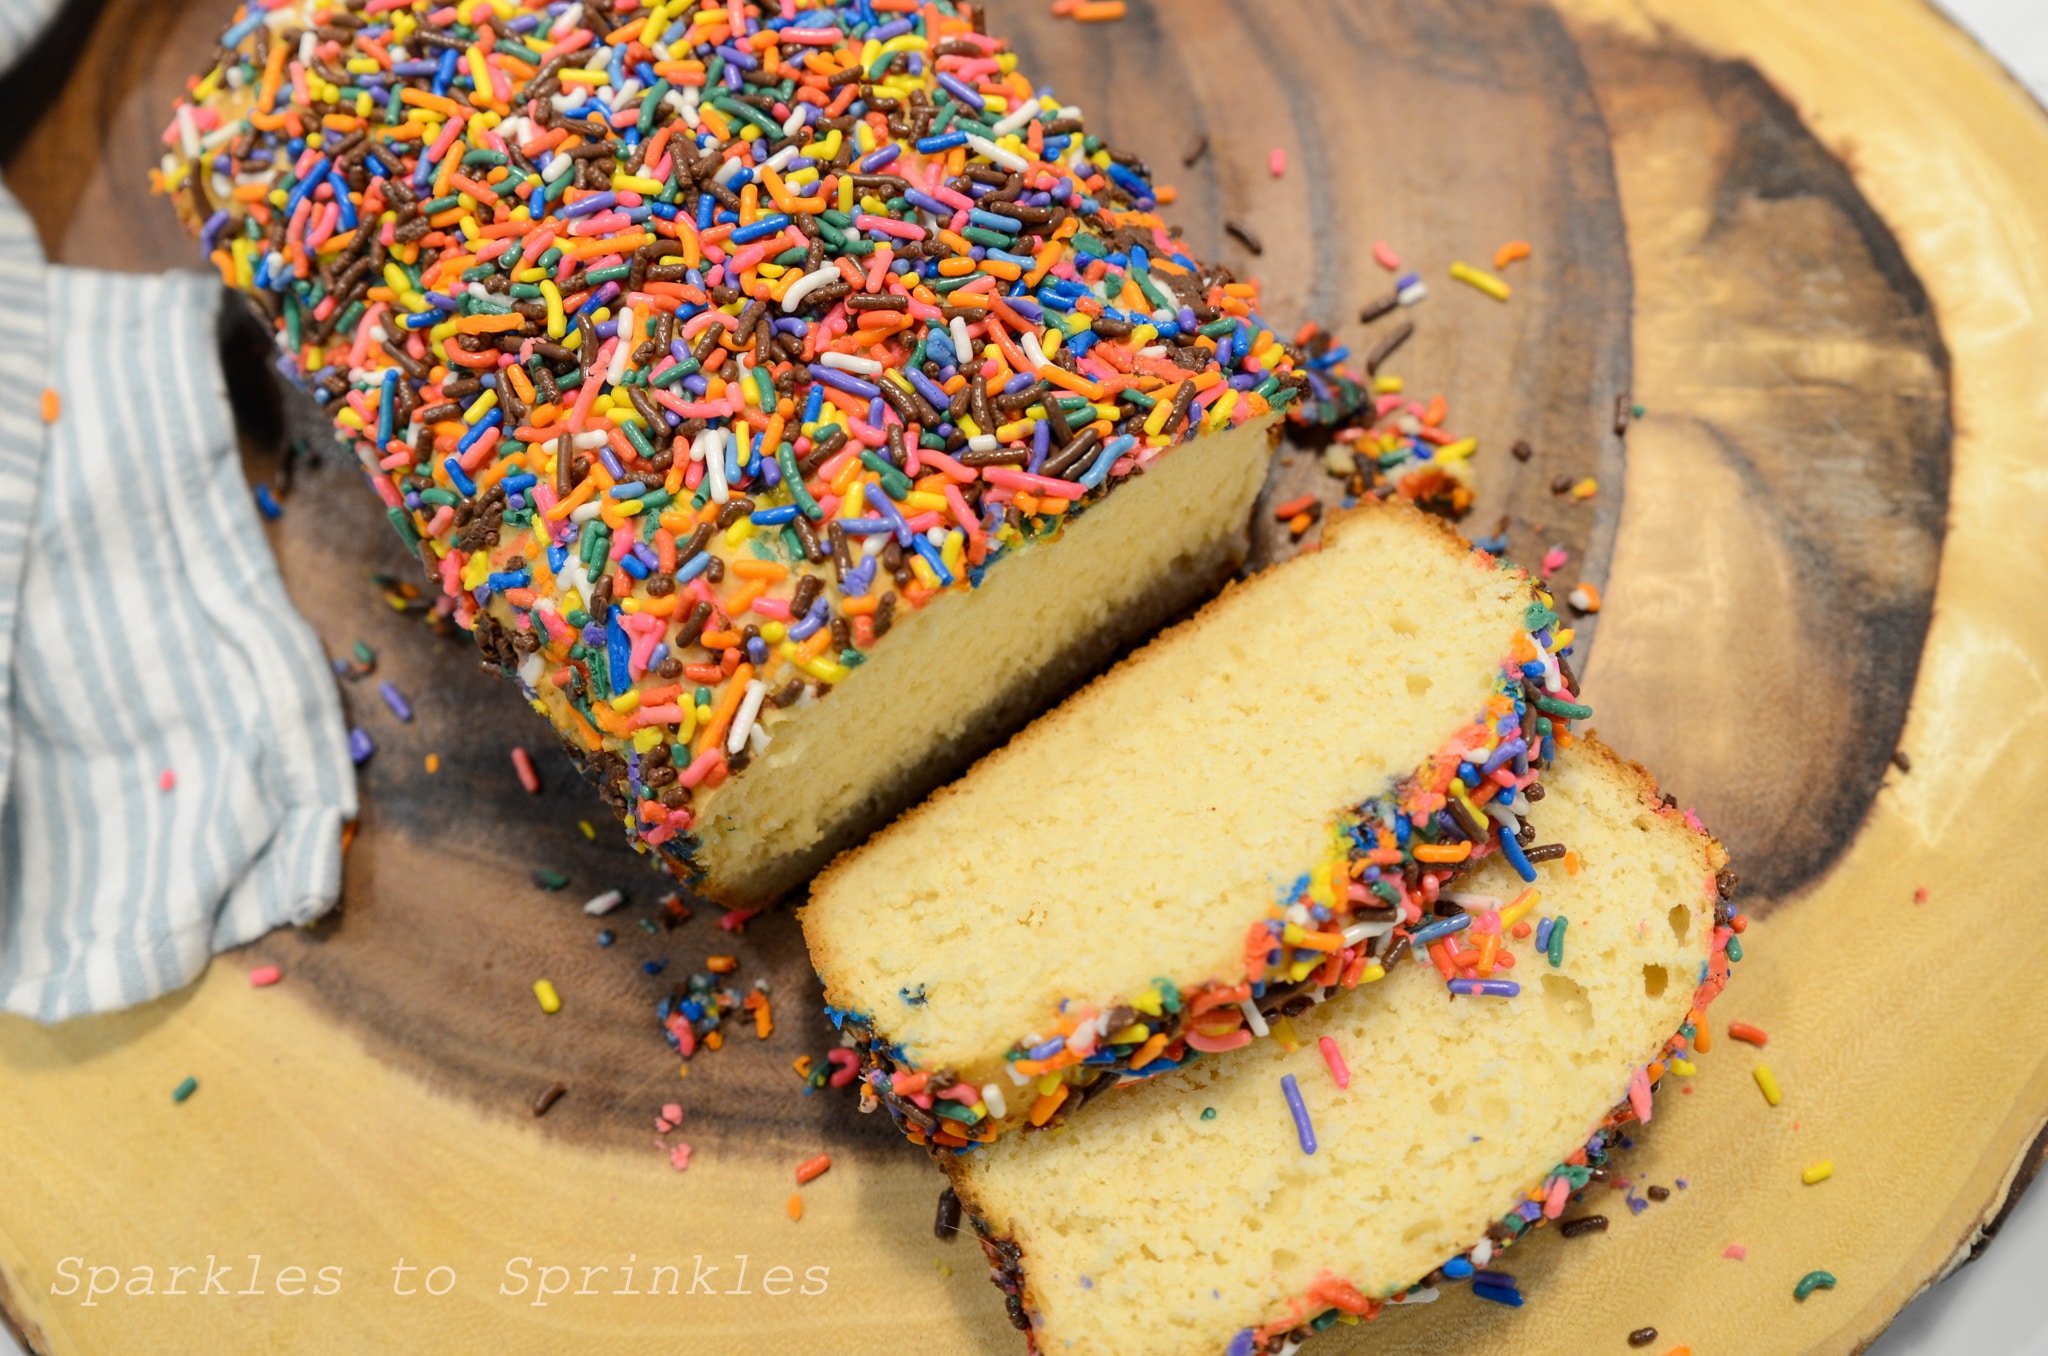
Ice Cream Bread
If you’ve ever dreamed of turning ice cream into bread, this recipe will blow your mind! Ice cream bread is the ultimate in simple baking, requiring just two main ingredients and minimal effort. The result is a slightly sweet, tender loaf that’s perfect for a quick dessert, a fun snack, or even as a conversation starter at parties.
Ice Cream Bread
This recipe uses full-fat ice cream for the best results, paired with self-rising flour to create a magical transformation. Top it off with rainbow sprinkles for a pop of color and whimsy, and you’ve got a treat that’s as fun to eat as it is to make. No fancy baking skills are required—if you can stir, you can bake!
Whether you’re a seasoned baker or just starting out, ice cream bread is one of those recipes that’s impossible to mess up. It’s versatile, fun, and sure to be a hit with both kids and adults alike.

A Brief History of Ice Cream Bread
Ice cream bread has been delighting home bakers for decades. While its exact origins are a bit murky, this quirky dessert became a viral sensation thanks to its simplicity and the sheer joy of turning a childhood favorite into a baked good. It’s thought to have originated in the U.S., where resourceful home cooks often experiment with pantry staples to create something unique. The recipe’s charm lies in its adaptability—any flavor of full-fat ice cream works, making it a customizable treat for every occasion.

What You Will Love About This Recipe
Only Two Ingredients: All you need is full-fat ice cream and self-rising flour. The sprinkles are optional but highly recommended for extra fun.
Customizable: Use any flavor of full-fat ice cream to create your own unique loaf.
Chocolate chip, strawberry, or even cookies and cream—the possibilities are endless!
No Fancy Equipment: No mixer or special tools required. Just a bowl, a spoon, and a loaf pan.

Tips & Tricks
- Choose the Right Ice Cream: Stick to full-fat varieties for the best texture. Low-fat or dairy-free options may not yield the same results.
- Don’t Overmix: Stir the batter just until the flour is incorporated. Overmixing can make the bread dense.
- Let the Ice Cream Soften: Ensure the ice cream is fully melted or very soft before mixing for a smoother batter.
- Sprinkle Generously: Add plenty of sprinkles on top before baking for a festive finish.
- Cool Before Slicing: Let the bread cool in the pan for about 10 minutes before transferring it to a rack to cool completely. This helps it firm up for easier slicing.

FAQs


Ice Cream Bread
Ice Cream Bread is a fun and crazy simple bread to make that you can slice and serve up for any and every occasion. Self rising flour and ice cream join together to make a fun and tasty quick bread.
Ingredients
- 2 Cups Full Fat Ice Cream, low-fat and dairy-free ice cream do not work well. Melted
- 1 1/2 Cups Self-rising Flour *
- Rainbow Sprinkles
Instructions
- Preheat oven to 350 degrees. Spray 9 X 5 loaf pan with non stick spray.
- Place 2 Cups of Ice Cream (i used vanilla) into a large bowl. Allow it to melt until very softened and you can mix it easily with a spoon.
- Add in the flour and stir until well combined but not over stir.
- Pour batter into your sprayed loaf pan.
- Add sprinkles on top. Cover the whole top.
- Bake for 40-45 minutes. Remove once a toothpick comes out clean when inserted.
Notes
* You can use all purpose flour, just add 1 TBSP Baking Powder & 3/4 TSP Salt to your flour.
Nutrition Information:
Yield:
8Serving Size:
1Amount Per Serving: Calories: 187Total Fat: 5gSaturated Fat: 3gTrans Fat: 0gUnsaturated Fat: 2gCholesterol: 15mgSodium: 312mgCarbohydrates: 30gFiber: 1gSugar: 12gProtein: 4g
I’m Melissa, the imaginative force behind Sparkles to Sprinkles, where creativity comes to life, and sprinkles of joy are scattered generously. Melissa is a proud Jersey girl who found love with a New York boy. As a mom to four wonderful boys and a few fur babies, her journey into the world of blogging began after making the life-changing decision to stay home and raise her children. Previously a dedicated workaholic, Melissa’s blog became her creative outlet and passion project. Inspired by her mother-in-law, a masterful cook renowned for her delicious home-cooked meals and legendary holiday feasts (think mouthwatering sausage stuffing), Melissa honed her culinary skills through a combination of family recipes and countless cooking classes. She often attended these classes with her son Michael, who shared her enthusiasm for cooking from a young age. Melissa’s love for learning extends beyond familiar cuisines, as she enjoys exploring international recipes in hands-on cooking classes. Her blog features a diverse array of recipes, showcasing her expertise with various kitchen appliances such as the Instant Pot, air fryer, Slow Cooker, Ninja Foodi, Instant Vortex Plus, and more. Join Melissa on her culinary adventures as she shares tried-and-true family favorites alongside exciting new discoveries!


