
Dark Chocolate Peppermint Hot Cocoa Bombs
Get ready to add a festive and decadent touch to your holiday season with these Dark Chocolate Peppermint Hot Cocoa Bombs! These treats are not only delightful to watch as they melt into a steaming cup of milk, but they also deliver the perfect combination of rich dark chocolate, refreshing peppermint, and fluffy marshmallows. Whether you’re making these for cozy family nights, as a special gift, or just for yourself (we won’t tell), they’re guaranteed to bring a little extra magic to your winter.

Dark Chocolate Peppermint Hot Cocoa Bombs
This recipe is surprisingly simple, even for beginners, and it’s a fantastic way to impress friends and family. The step-by-step process is fun and creative, and you can customize the flavors and decorations to suit your style. From the crisp peppermint flavor of Hershey’s Candy Cane Kisses to the velvety richness of 72% dark chocolate, these cocoa bombs are pure indulgence.
Not only are these bombs a treat for your taste buds, but they also make stunning holiday gifts. Packaged in clear bags or festive boxes, they’re a thoughtful homemade gesture that will wow anyone lucky enough to receive them. Plus, the experience of watching the chocolate sphere melt and reveal marshmallows and cocoa mix never gets old!

What You Will Love About This Recipe
Festive & Fun: Perfect for holiday gatherings or gifting, these cocoa bombs bring a sense of wonder to every mug of hot cocoa.
Decadent & Customizable: Use your favorite dark chocolate and hot cocoa mix, and get creative with sprinkles, candy melts, or fillings.
Beginner-Friendly: You don’t need to be a pro chocolatier to make these—just follow the steps, and you’ll have impressive results.
If you love the fun of cocoa bombs be sure to try our Pumpkin Spice Latte Bomb.
How to Make Dark Chocolate Peppermint Hot Cocoa Bombs
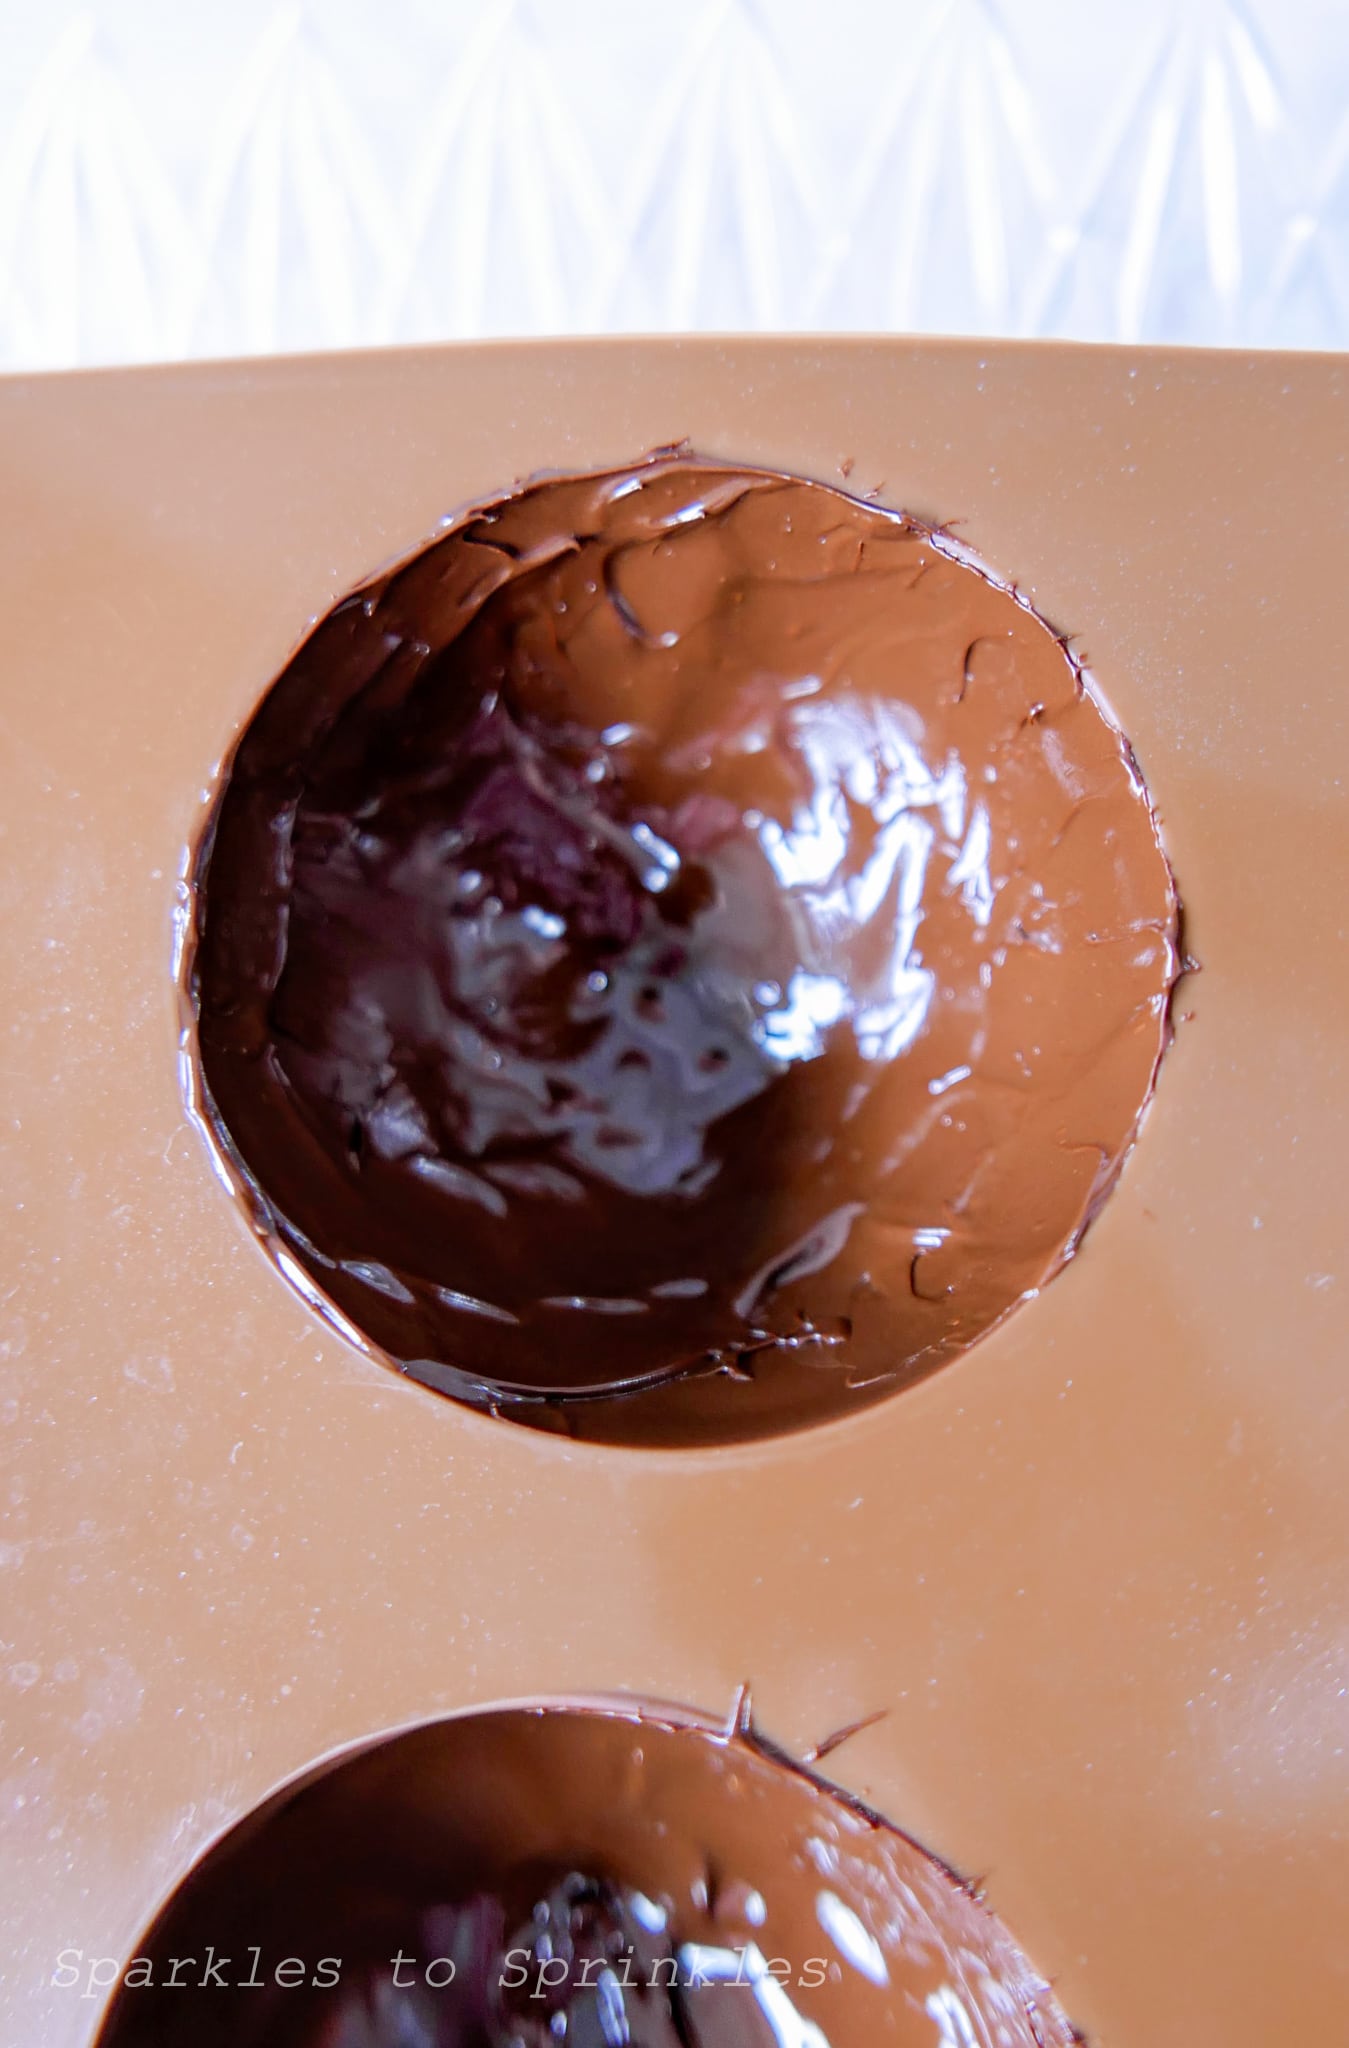
- Start by breaking one chocolate bar into small pieces, and place in a glass bowl. Microwave for 30 seconds at 50% power. Stir, and then return it to the microwave, heat another 15 seconds, and then stir again. Once it begins to look melted with a few chunks of chocolate left, insert your candy thermometer into the chocolate. You want your dark chocolate to be no higher than 90℉, or the chocolate will be untempered and will have a chalky appearance with possible streaks of white. Once you reach your desired temperature, continue stirring until all chocolate is smooth and creamy with no lumps.

- Place the silicone mold on a tray or flat baking sheet, and spoon approximately a tbsp of the melted dark chocolate into the molds. Thoroughly coat the inside of the molds with a small silicone spatula or the back of a spoon. Make sure to make the edges a little thicker, so that they don’t break when melding together. If the chocolate is pooled at the bottom, spread again to evenly coat all sides, or your sphere will be less circular, and more flat on the bottoms from the pooled chocolate. Cool in the refrigerator for 1-2 minutes to set, and then remove. Heat the remaining chocolate per step 1, and repeat this process again to make a second layer of dark chocolate, again paying special attention to the edges. Place back in the refrigerator for another 2 minutes.
- While the chocolate is setting, roughly chop approximately 15 candy cane Hershey Kisses.

- Remove the chocolate from the refrigerator, and slowly pull the mold away from the chocolate, pushing up from the bottom to release.

- I prefer to wear food safe gloves when handling the chocolate to avoid fingerprints/smudges. Heat a small plate in the microwave for 15-20 seconds. Place a sphere open side down on the plate, and lightly twist to melt the edges.

- Immediately fill with a couple heaping tablespoons of hot cocoa mix, approximately 10 miniature marshmallows, and a tsp or more of chopped Hershey Kisses. Place another chocolate sphere on the plate, and melt the edges, and place on top of the filled sphere.

- Next, melt the white candy melts per package instructions. Drape a sandwich bag or pastry bag over your hand, and fill with the melted candy. Cut the tip with kitchen shears, and pipe back and forth over the chocolate bomb. Add candy cane sprinkles.

- Melt the red candy melts per package instructions, and repeat step 5 to fill a sandwich bag/pastry bag. Cut the tip, and pipe over the white candy melts, and sprinkle the chopped Hershey Kisses on top. Repeat with the remaining cocoa bombs.

- When you’re ready to enjoy your cocoa bomb, heat the milk of your choice, place a cocoa bomb in a mug, and pour the milk over it and watch the hot cocoa mix and marshmallows explode in the milk!

Tips & Tricks
- Temper Your Chocolate: Be sure to heat your chocolate carefully, keeping the temperature below 90℉ to ensure a glossy finish without streaks or chalkiness.
- Work Quickly: Chocolate sets fast, so have all your tools and ingredients ready before you start.
- Perfect Edges: Melting the edges of your chocolate spheres on a warm plate ensures a clean seal when assembling.
- Decoration Tips: Use a piping bag or a food storage bag with a small corner snipped off for precise drizzles of candy melts.
- Storage: Store the finished cocoa bombs in an airtight container in a cool, dry place for up to two weeks.

FAQs
How To Enjoy A Hot Chocolate Bomb
Heat Your Milk: Start by warming up your favorite milk (whole milk, almond milk, oat milk, etc.) until it’s steaming but not boiling. You’ll need about 1 to 1 ½ cups per cocoa bomb, depending on how rich you like your hot cocoa.
Prepare Your Mug: Choose a large, cozy mug—big enough to give the cocoa bomb plenty of space to melt and “explode.”
Place the Cocoa Bomb in the Mug: Gently set the cocoa bomb into the mug, flat side down.
Pour the Milk: Slowly pour the hot milk over the cocoa bomb, making sure to focus the stream on the top of the bomb. As the chocolate begins to melt, it will burst open, releasing the marshmallows, cocoa mix, and any other goodies inside.
Stir & Enjoy: Use a spoon to stir the melted chocolate and cocoa mix into the milk until everything is smooth and creamy. Sip, savor, and enjoy your festive, delicious hot cocoa!
💡 Pro Tip: For an extra indulgent treat, top your cocoa with whipped cream, a drizzle of chocolate syrup, or a sprinkle of crushed peppermint candies. Perfect for cozy evenings or sharing holiday cheer!


Dark Chocolate Peppermint Hot Cocoa Bombs
Dark Chocolate Peppermint Hot Chocolate bombs are a fun way to enjoy hot chocolate this holiday season. They are simple to make and rich in flavor as it combines dark chocolate, peppermint candies, hot cocoa mix, and mini marshmallows for a festive magical way to enjoy hot chocolate this year.
Ingredients
- 1 ½ 3.5oz dark chocolate bars (I used 72% cocoa. You can use any dark chocolate, just make sure it contains cocoa butter)
- Candy thermometer
- Hershey’s Candy Cane Kisses
- Silicone half-sphere mold (Amazon doesn’t currently carry the ones I used, but these appear to be comparable to my mold. Just make sure the mold is close to 1.37” deep.
- Hot Cocoa Mix (approximately 9 tbsp)
- Miniature marshmallows
- ½ c white candy melts
- 2 Sandwich size food storage bags or cake decorating pastry bags
- Candy cane sprinkles
- ½ c red candy melts
Instructions
- Start by breaking one chocolate bar into small pieces, and place in a glass bowl. Microwave for 30 seconds at 50% power. Stir, and then return it to the microwave, heat another 15 seconds, and then stir again. Once it begins to look melted with a few chunks of chocolate left, insert your candy thermometer into the chocolate. You want your dark chocolate to be no higher than 90℉, or the chocolate will be untempered and will have a chalky appearance with possible streaks of white. Once you reach your desired temperature, continue stirring until all chocolate is smooth and creamy with no lumps.
- Place the silicone mold on a tray or flat baking sheet, and spoon approximately a tbsp of the melted dark chocolate into the molds. Thoroughly coat the inside of the molds with a small silicone spatula or the back of a spoon. Make sure to make the edges a little thicker, so that they don’t break when melding together. If the chocolate is pooled at the bottom, spread again to evenly coat all sides, or your sphere will be less circular, and more flat on the bottoms from the pooled chocolate. Cool in the refrigerator for 1-2 minutes to set, and then remove. Heat the remaining chocolate per step 1, and repeat this process again to make a second layer of dark chocolate, again paying special attention to the edges. Place back in the refrigerator for another 2 minutes.
- While the chocolate is setting, roughly chop approximately 15 candy cane Hershey Kisses.
- Remove the chocolate from the refrigerator, and slowly pull the mold away from the chocolate, pushing up from the bottom to release. I prefer to wear food safe gloves when handling the chocolate to avoid fingerprints/smudges. Heat a small plate in the microwave for 15-20 seconds. Place a sphere open side down on the plate, and lightly twist to melt the edges. Immediately fill with a couple heaping tablespoons of hot cocoa mix, approximately 10 miniature marshmallows, and a tsp or more of chopped Hershey Kisses. Place another chocolate sphere on the plate, and melt the edges, and place on top of the filled sphere.
- Next, melt the white candy melts per package instructions. Drape a sandwich bag or pastry bag over your hand, and fill with the melted candy. Cut the tip with kitchen shears, and pipe back and forth over the chocolate bomb. Add candy cane sprinkles.
- Melt the red candy melts per package instructions, and repeat step 5 to fill a sandwich bag/pastry bag. Cut the tip, and pipe over the white candy melts, and sprinkle the chopped Hershey Kisses on top. Repeat with the remaining cocoa bombs. When you’re ready to enjoy your cocoa bomb, heat the milk of your choice, place a cocoa bomb in a mug, and pour the milk over it and watch the hot cocoa mix and marshmallows explode in the milk!
I’m Melissa, the imaginative force behind Sparkles to Sprinkles, where creativity comes to life, and sprinkles of joy are scattered generously. Melissa is a proud Jersey girl who found love with a New York boy. As a mom to four wonderful boys and a few fur babies, her journey into the world of blogging began after making the life-changing decision to stay home and raise her children. Previously a dedicated workaholic, Melissa’s blog became her creative outlet and passion project. Inspired by her mother-in-law, a masterful cook renowned for her delicious home-cooked meals and legendary holiday feasts (think mouthwatering sausage stuffing), Melissa honed her culinary skills through a combination of family recipes and countless cooking classes. She often attended these classes with her son Michael, who shared her enthusiasm for cooking from a young age. Melissa’s love for learning extends beyond familiar cuisines, as she enjoys exploring international recipes in hands-on cooking classes. Her blog features a diverse array of recipes, showcasing her expertise with various kitchen appliances such as the Instant Pot, air fryer, Slow Cooker, Ninja Foodi, Instant Vortex Plus, and more. Join Melissa on her culinary adventures as she shares tried-and-true family favorites alongside exciting new discoveries!


One Comment