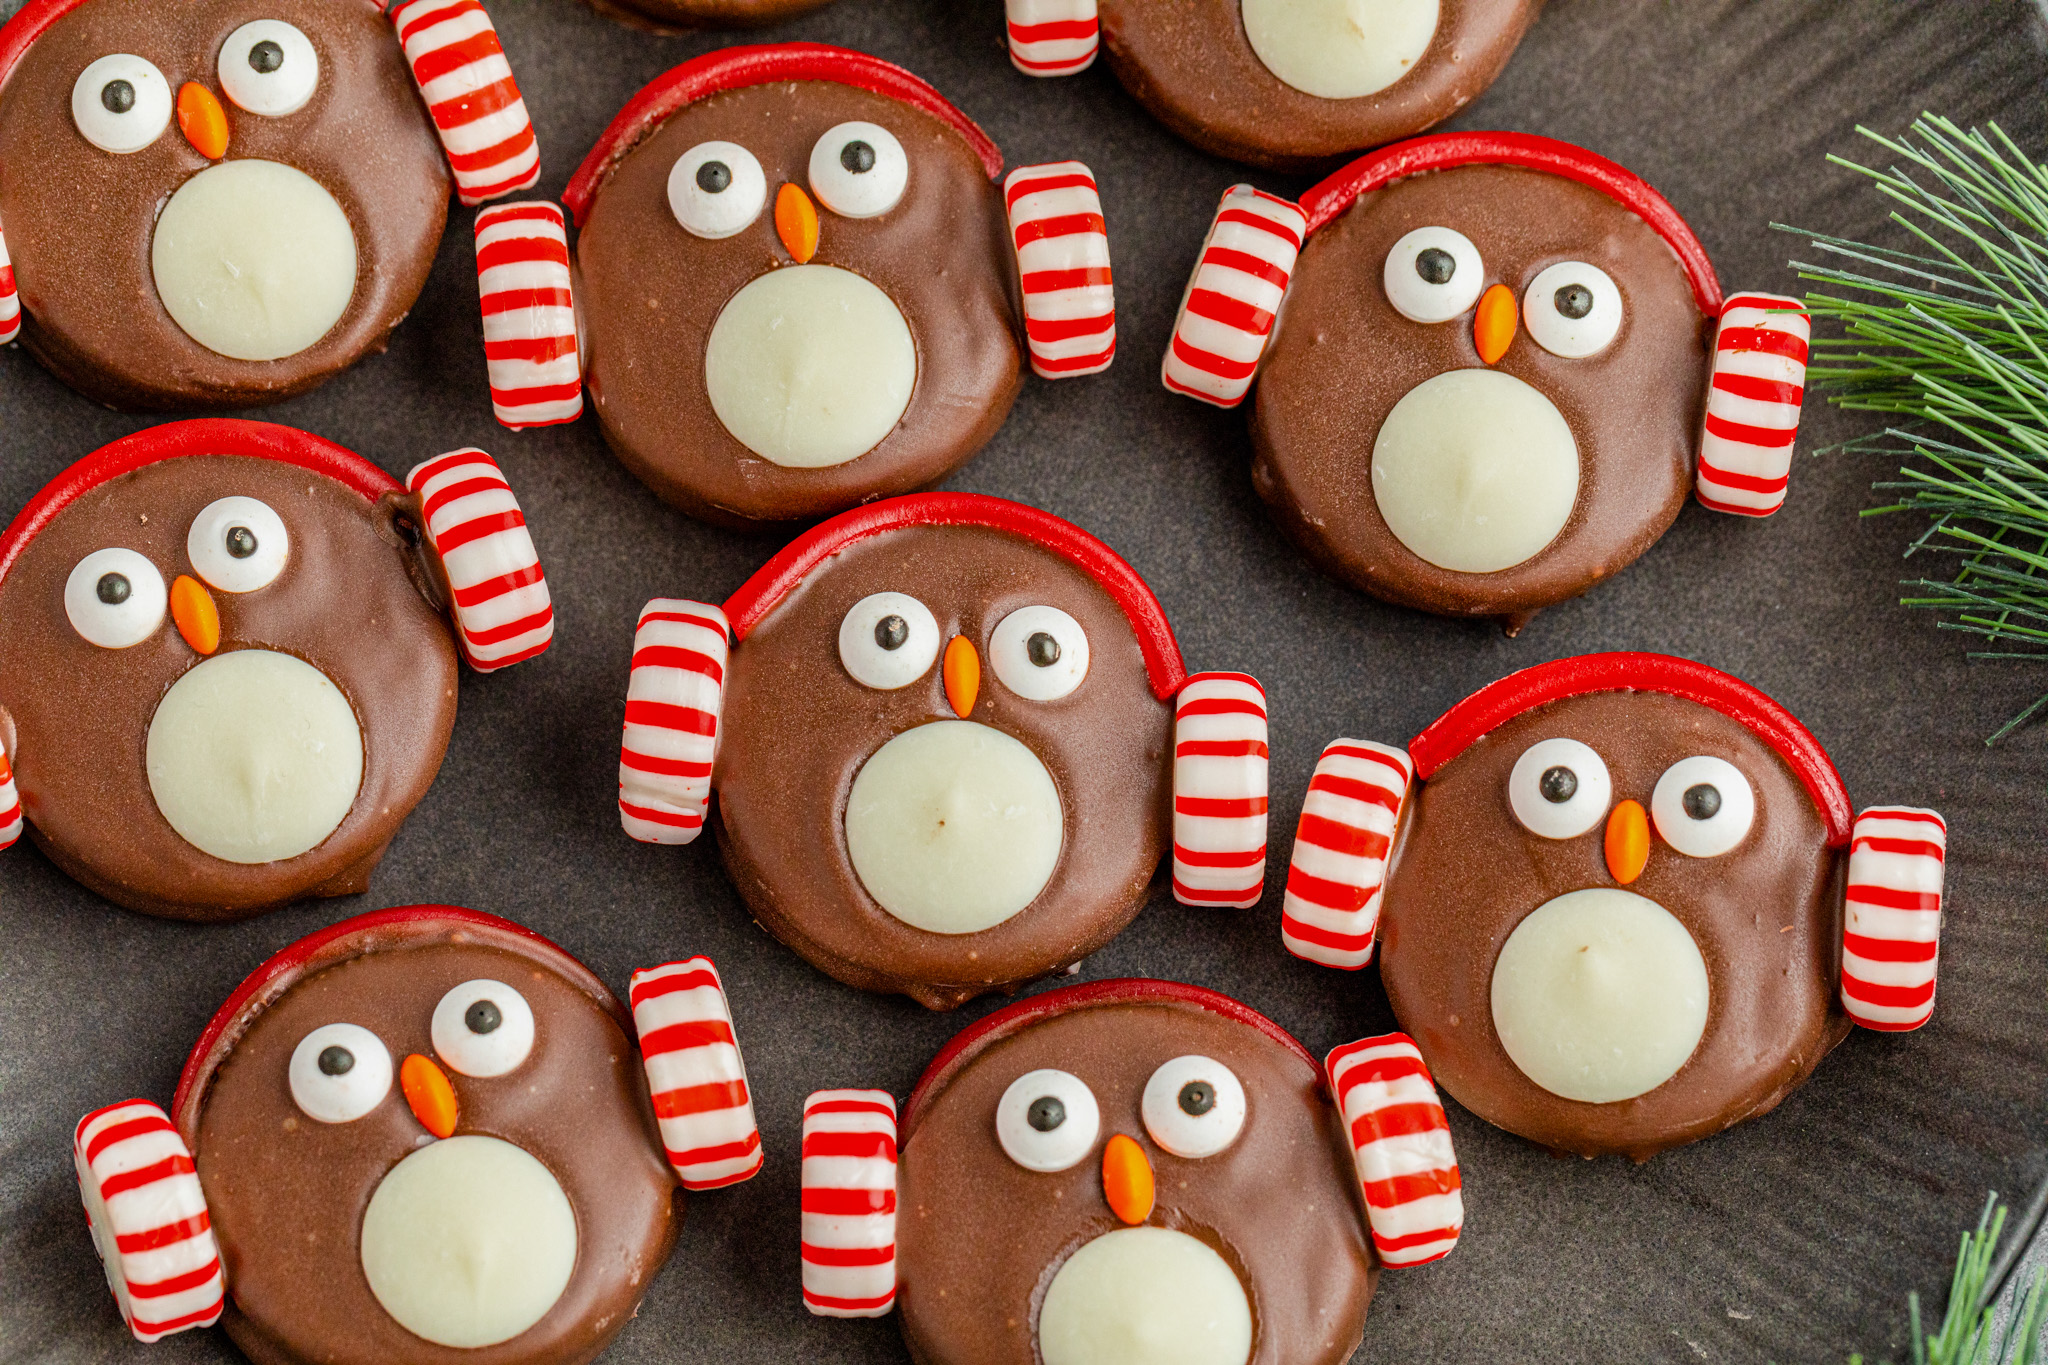
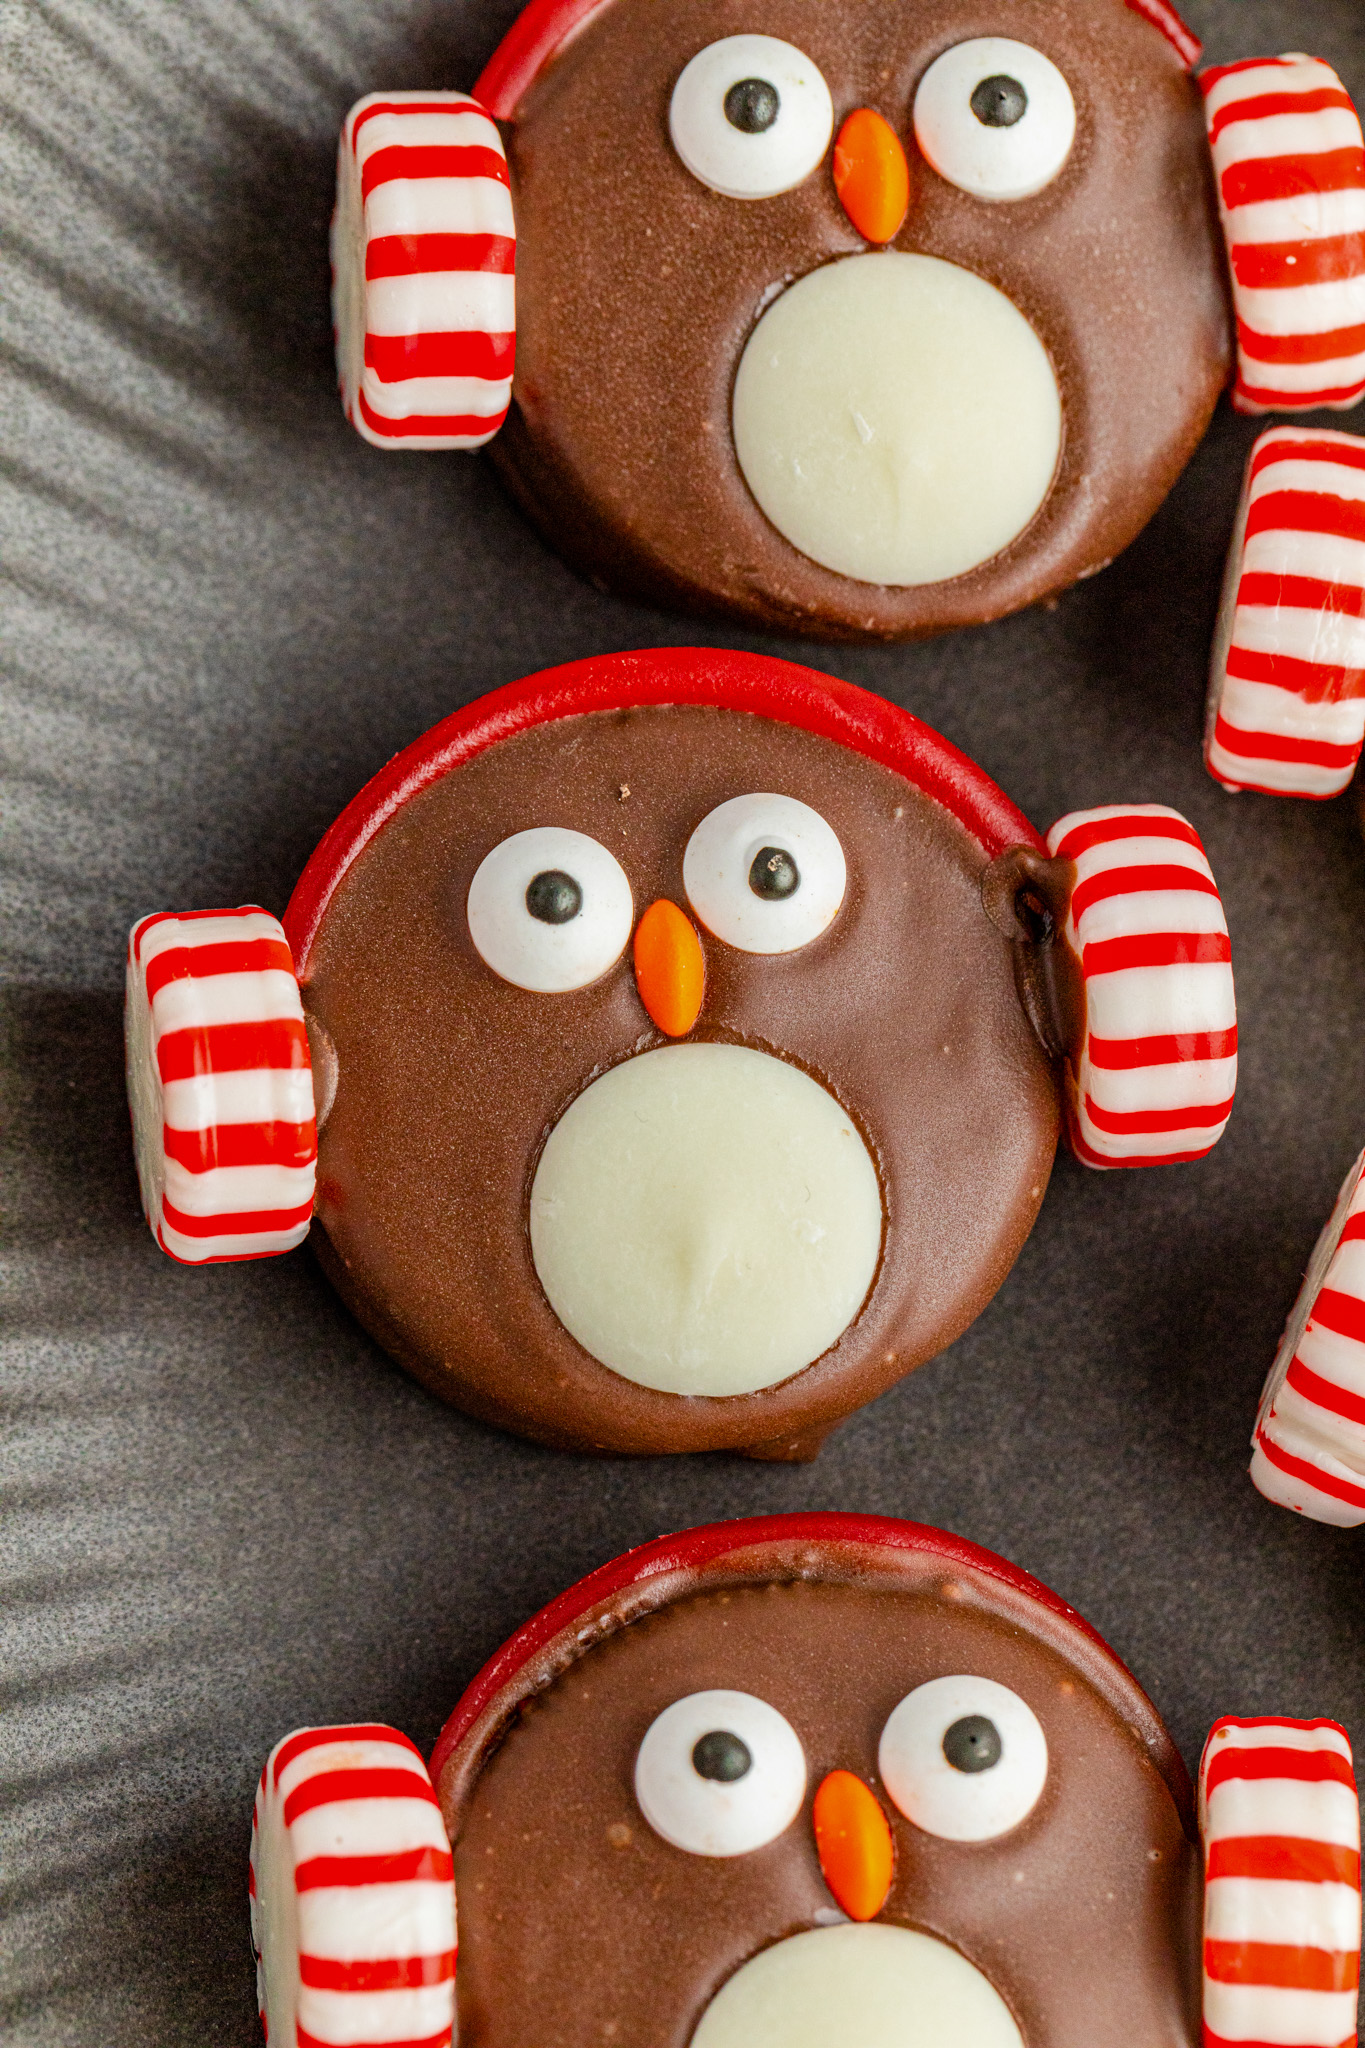
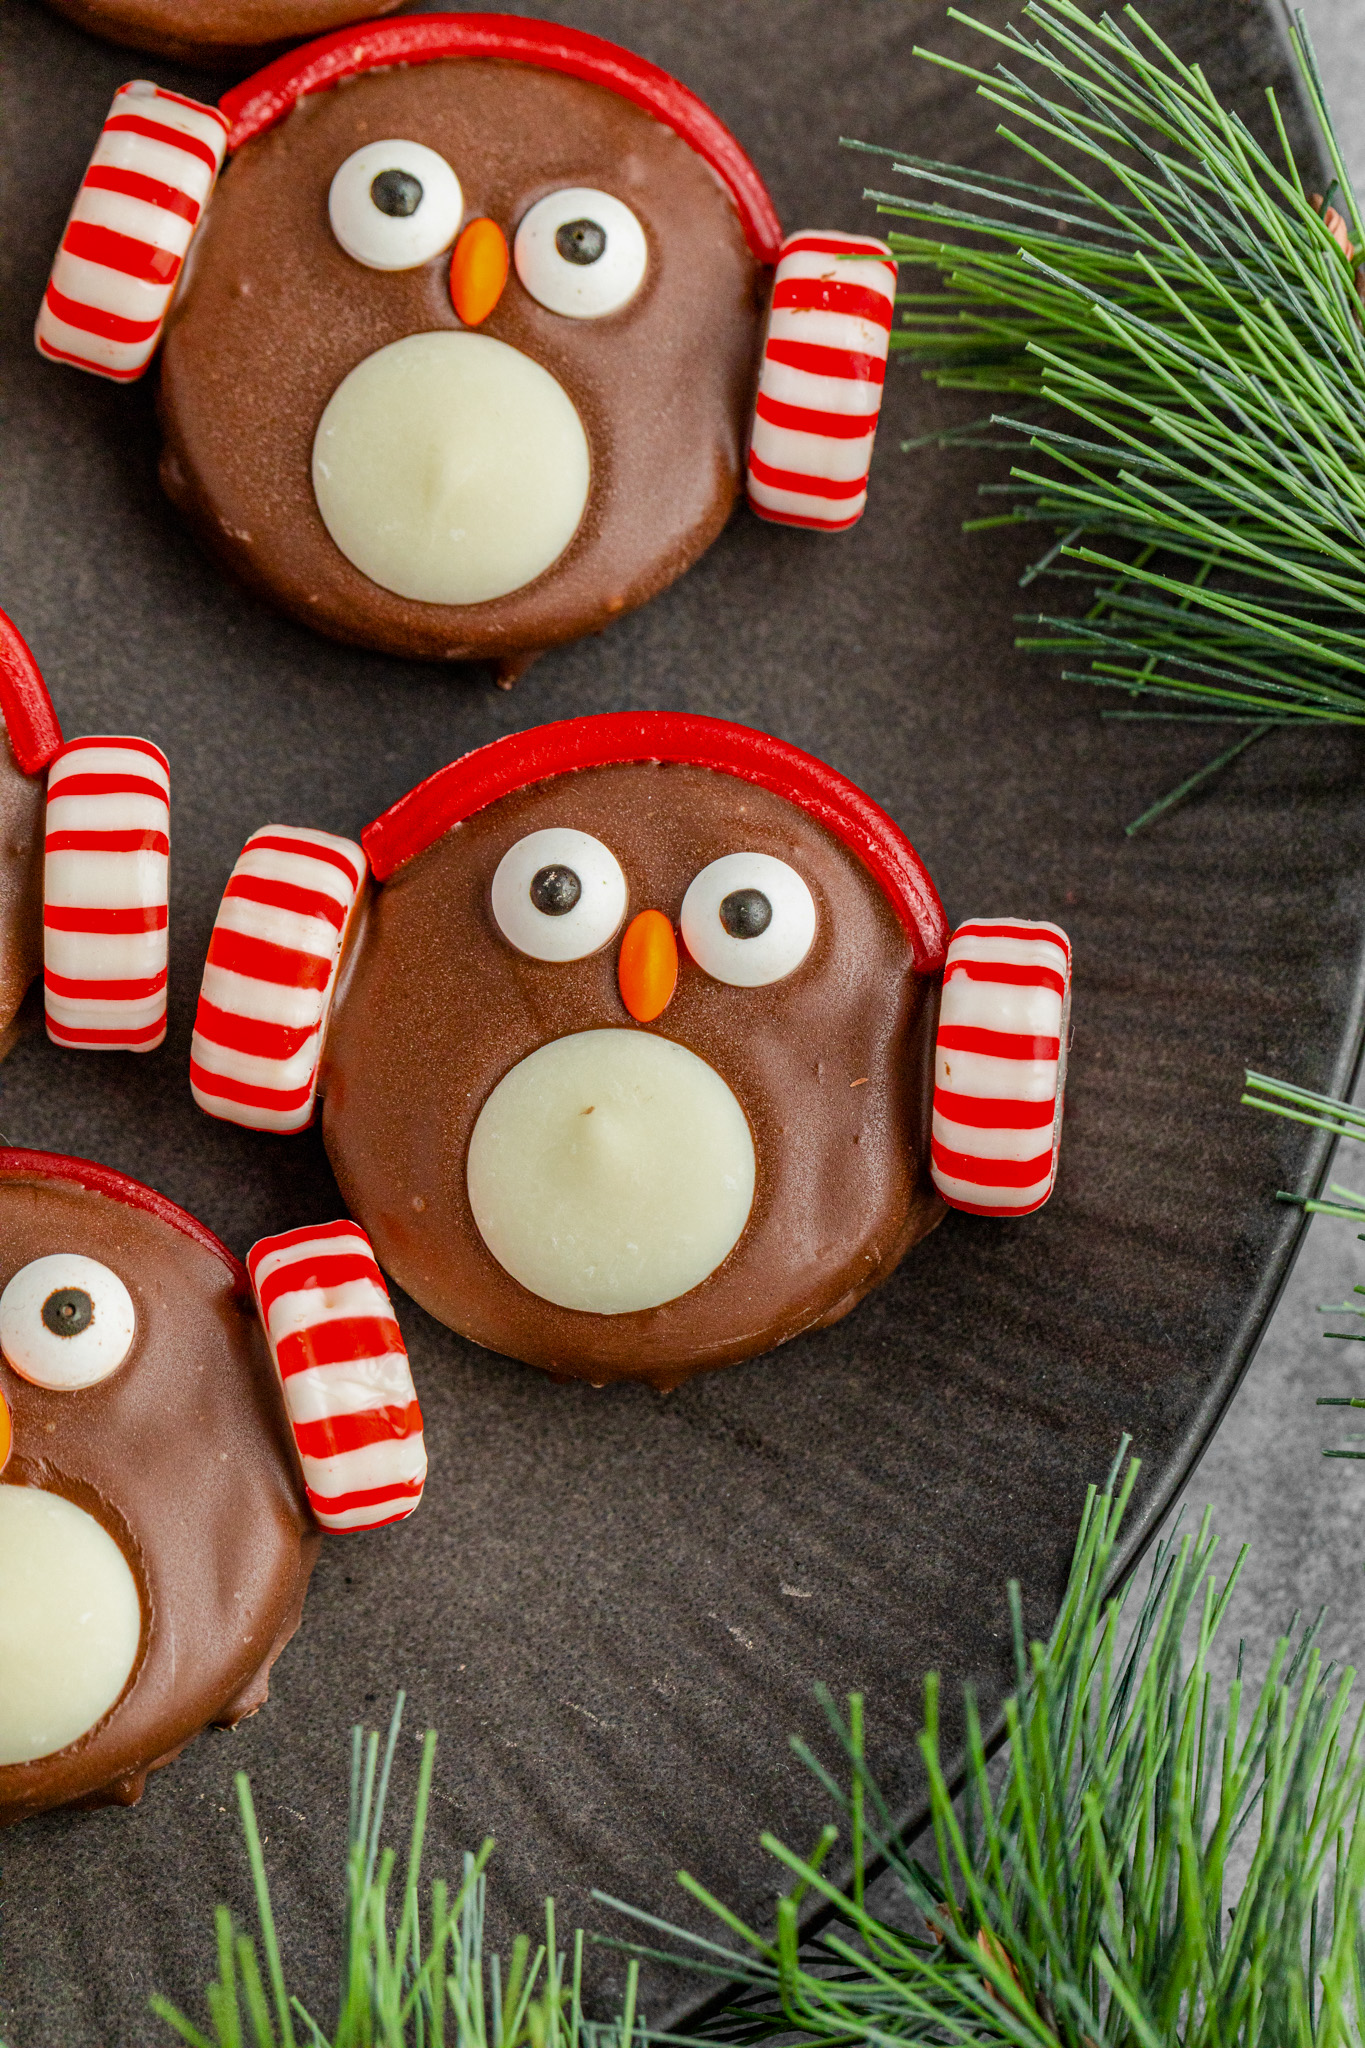
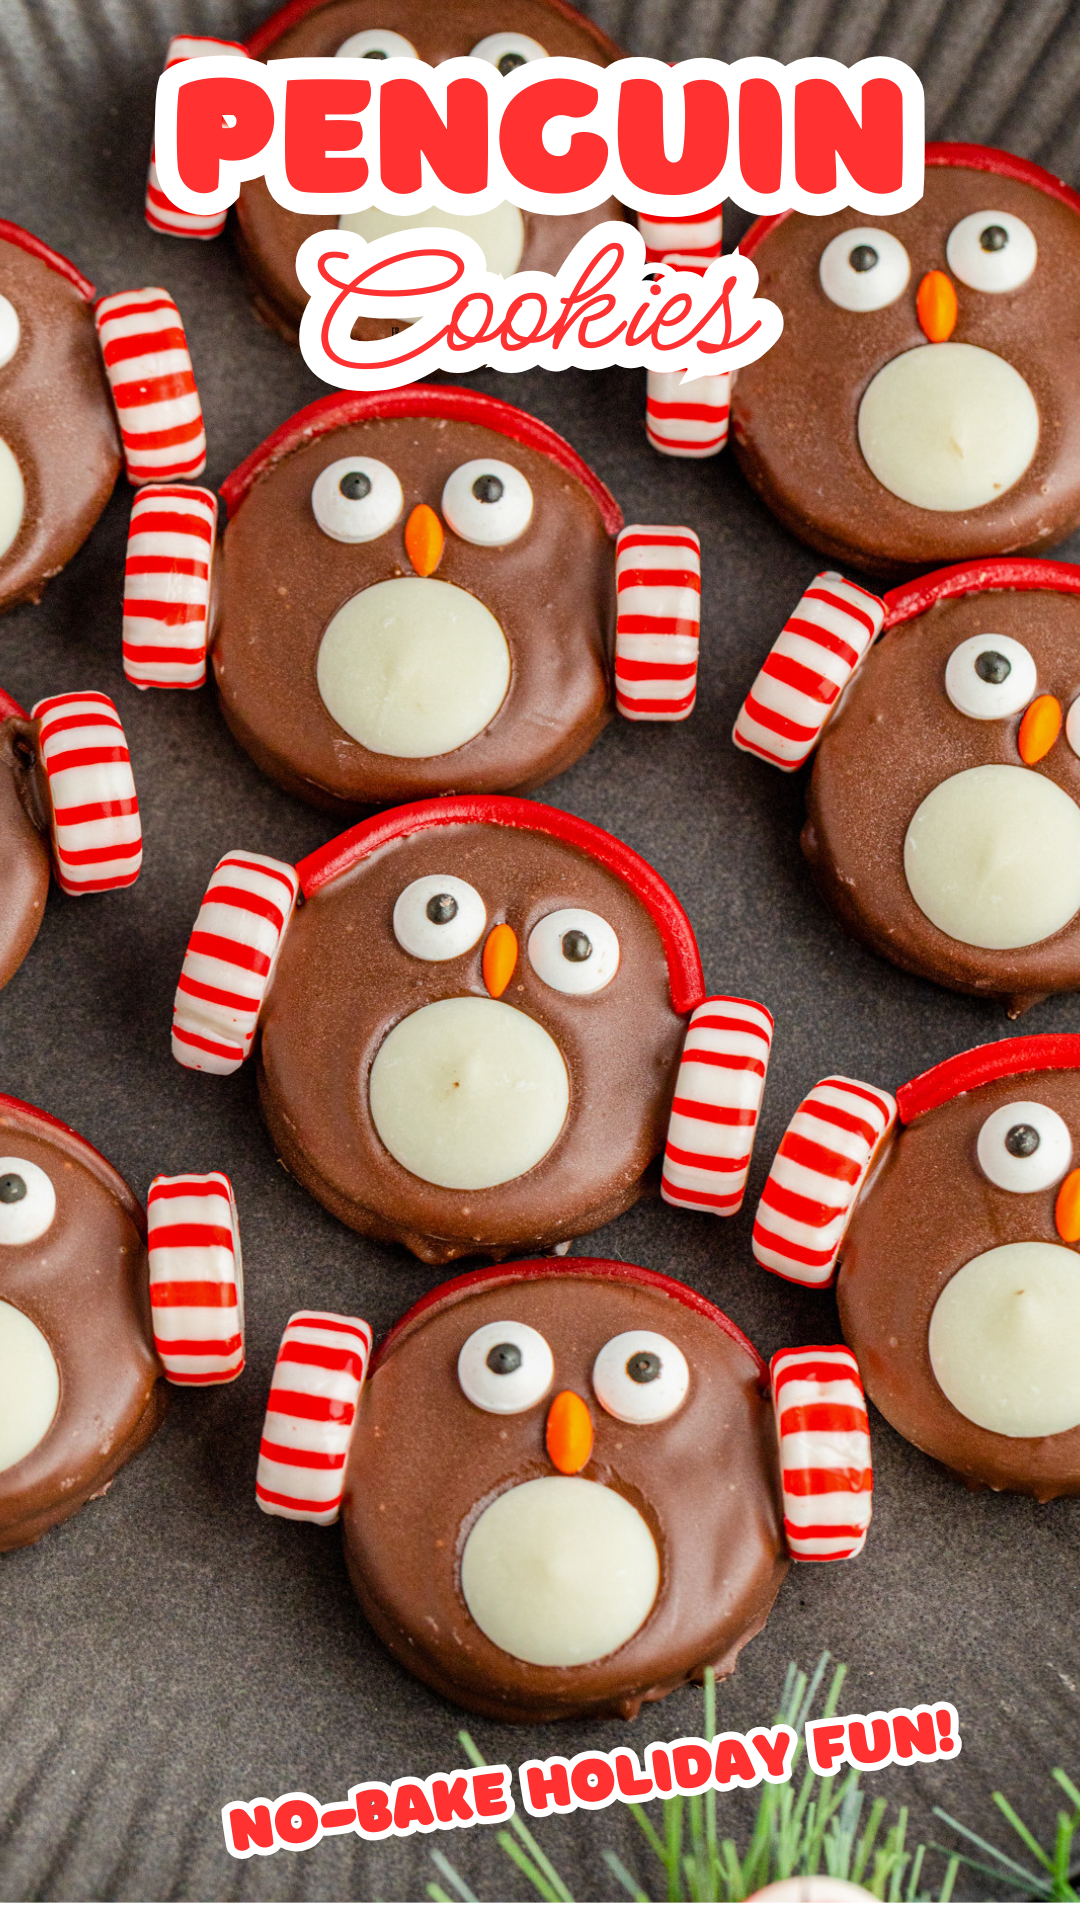
Winter Wonderland Penguin Cookies
These penguin cookies are one of those holiday treats that instantly make people smile. Made with chocolate covered Oreos and decorated to look like adorable little penguins with peppermint earmuffs, they are just as fun to make as they are to eat. This is the kind of festive dessert that looks impressive on a holiday dessert table but is still approachable enough to make with kids or family.
Penguin Cookies
If you love no bake Christmas cookies and edible crafts, this recipe is a must try. It uses simple store bought ingredients and turns them into something truly special with a little creativity. These penguin cookies pair perfectly with other fun holiday treats like [link related recipe here], [link related recipe here], or even [link related recipe here] to create a colorful and playful holiday spread.
While these Oreo penguins do take a bit of patience, the process is part of the fun. Decorating each cookie is like creating a tiny piece of edible art, and the end result is worth every minute. They are perfect for cookie exchanges, holiday parties, classroom treats, or gifting to friends and neighbors during the Christmas season.
What You Will Love About This Recipe
No bake and no oven required
Super cute and festive holiday design
Uses inexpensive and easy to find ingredients
Fun edible craft to make with kids or family
Perfect for parties, cookie trays, and gift boxes
INGREDIENTS
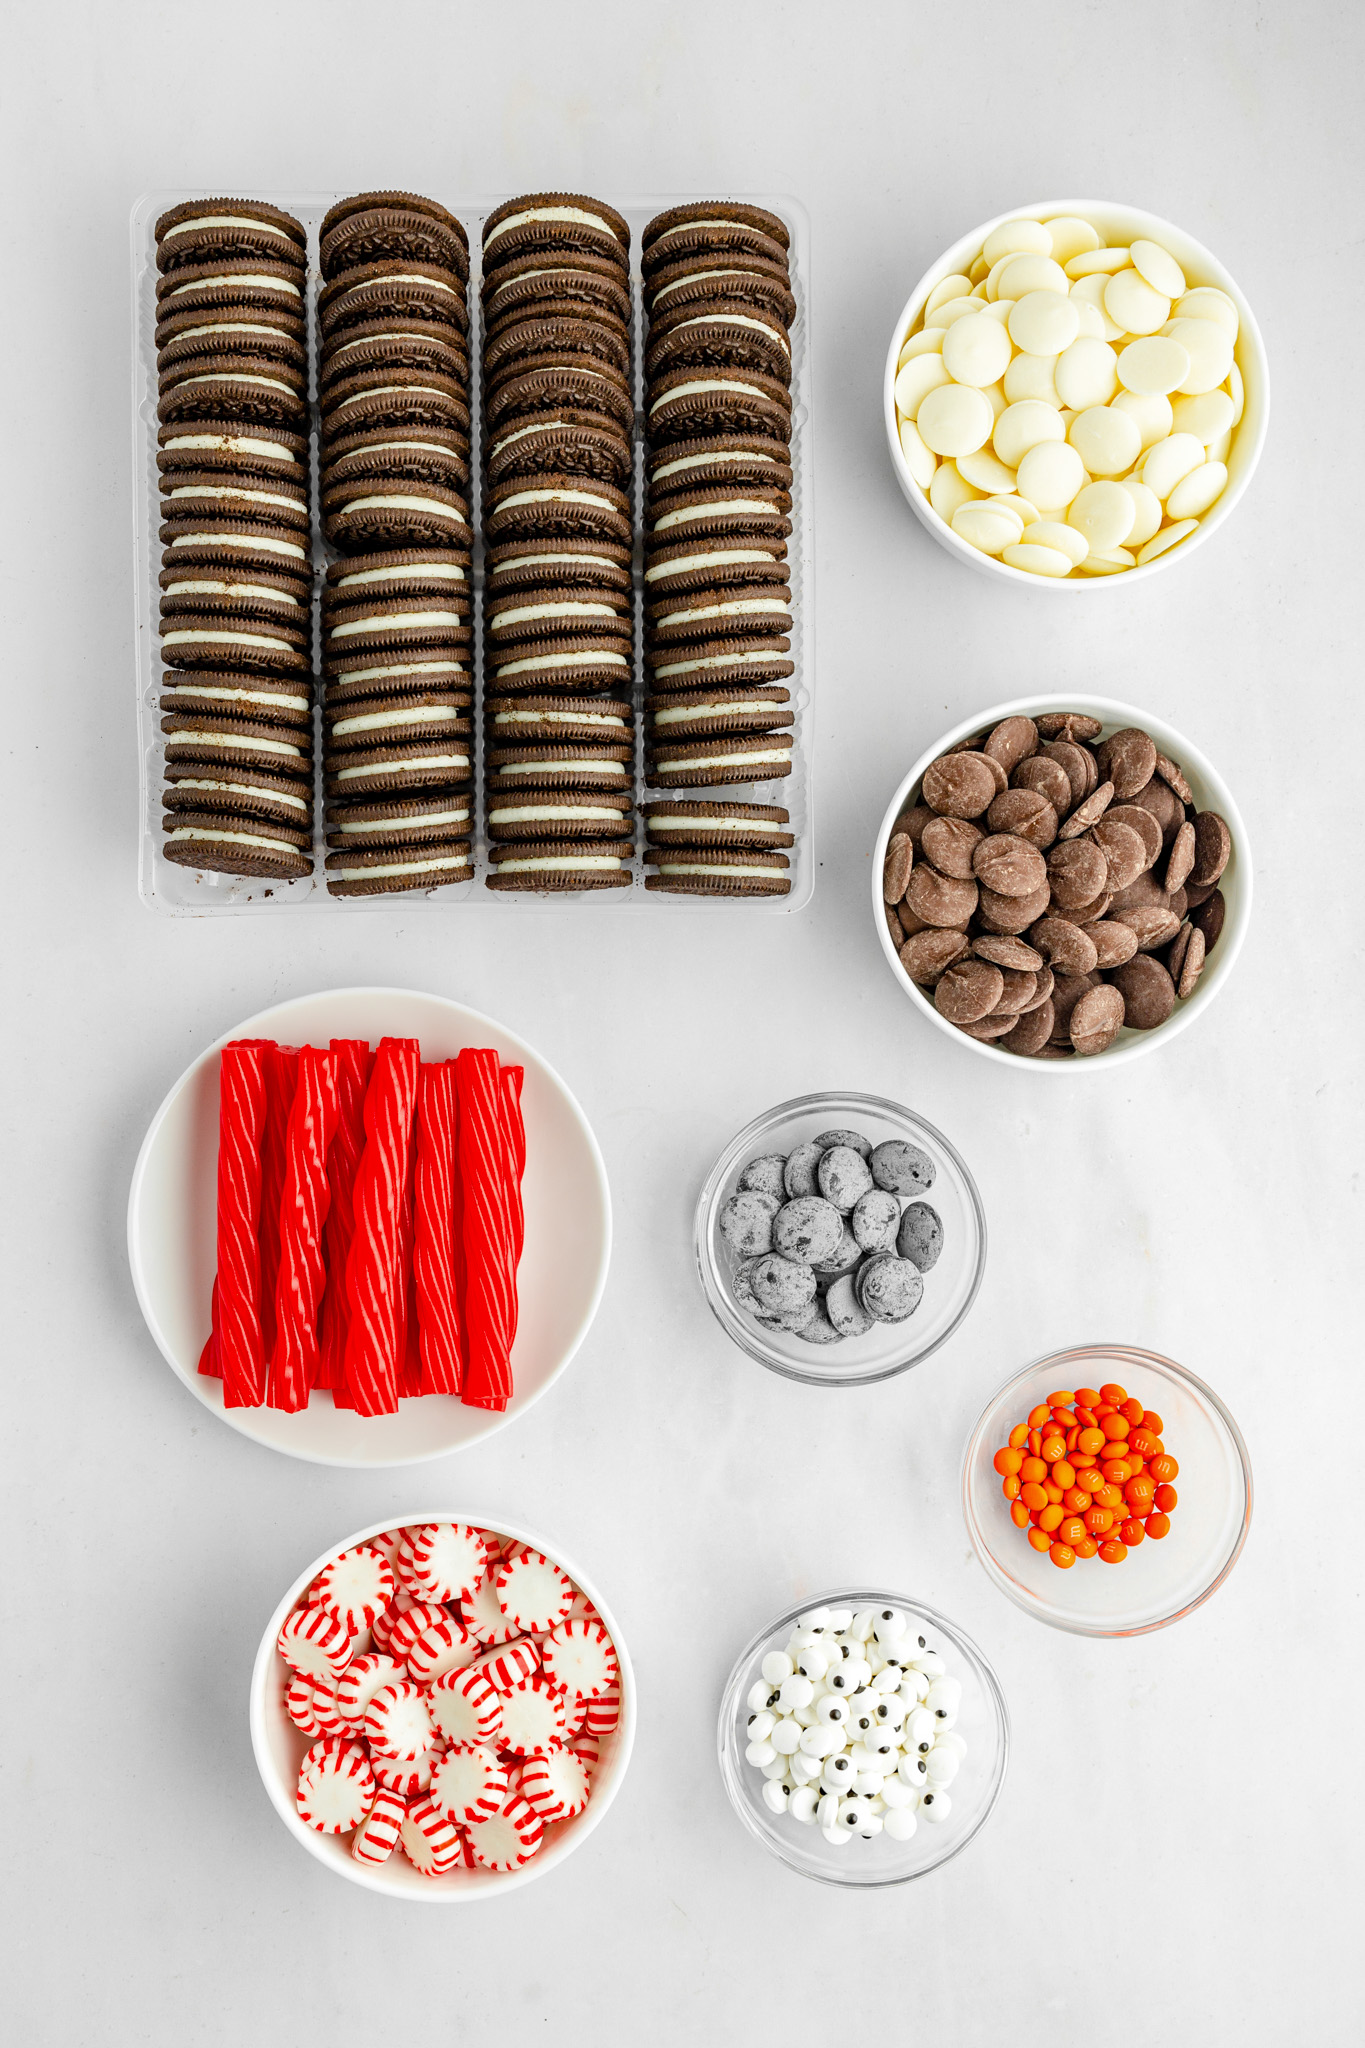
- 24 Double Stuff Oreos
- 2 – 10 oz packages ghirardelli dark chocolate melting wafers
- 24 pieces white melting wafers
- 12 orange M&M minis, cut in half
- 0.88 oz package candy eyes
- 2 pieces Pull n Peel Twizzlers, pulled apart and cut into 2” long pieces
- Black melting wafers optional for drawing bow ties and buttons
EQUIPMENT
Two baking sheets
Parchment paper
DIRECTIONS
- Gather your ingredients, then prepare two baking sheets with parchment paper and set it aside.
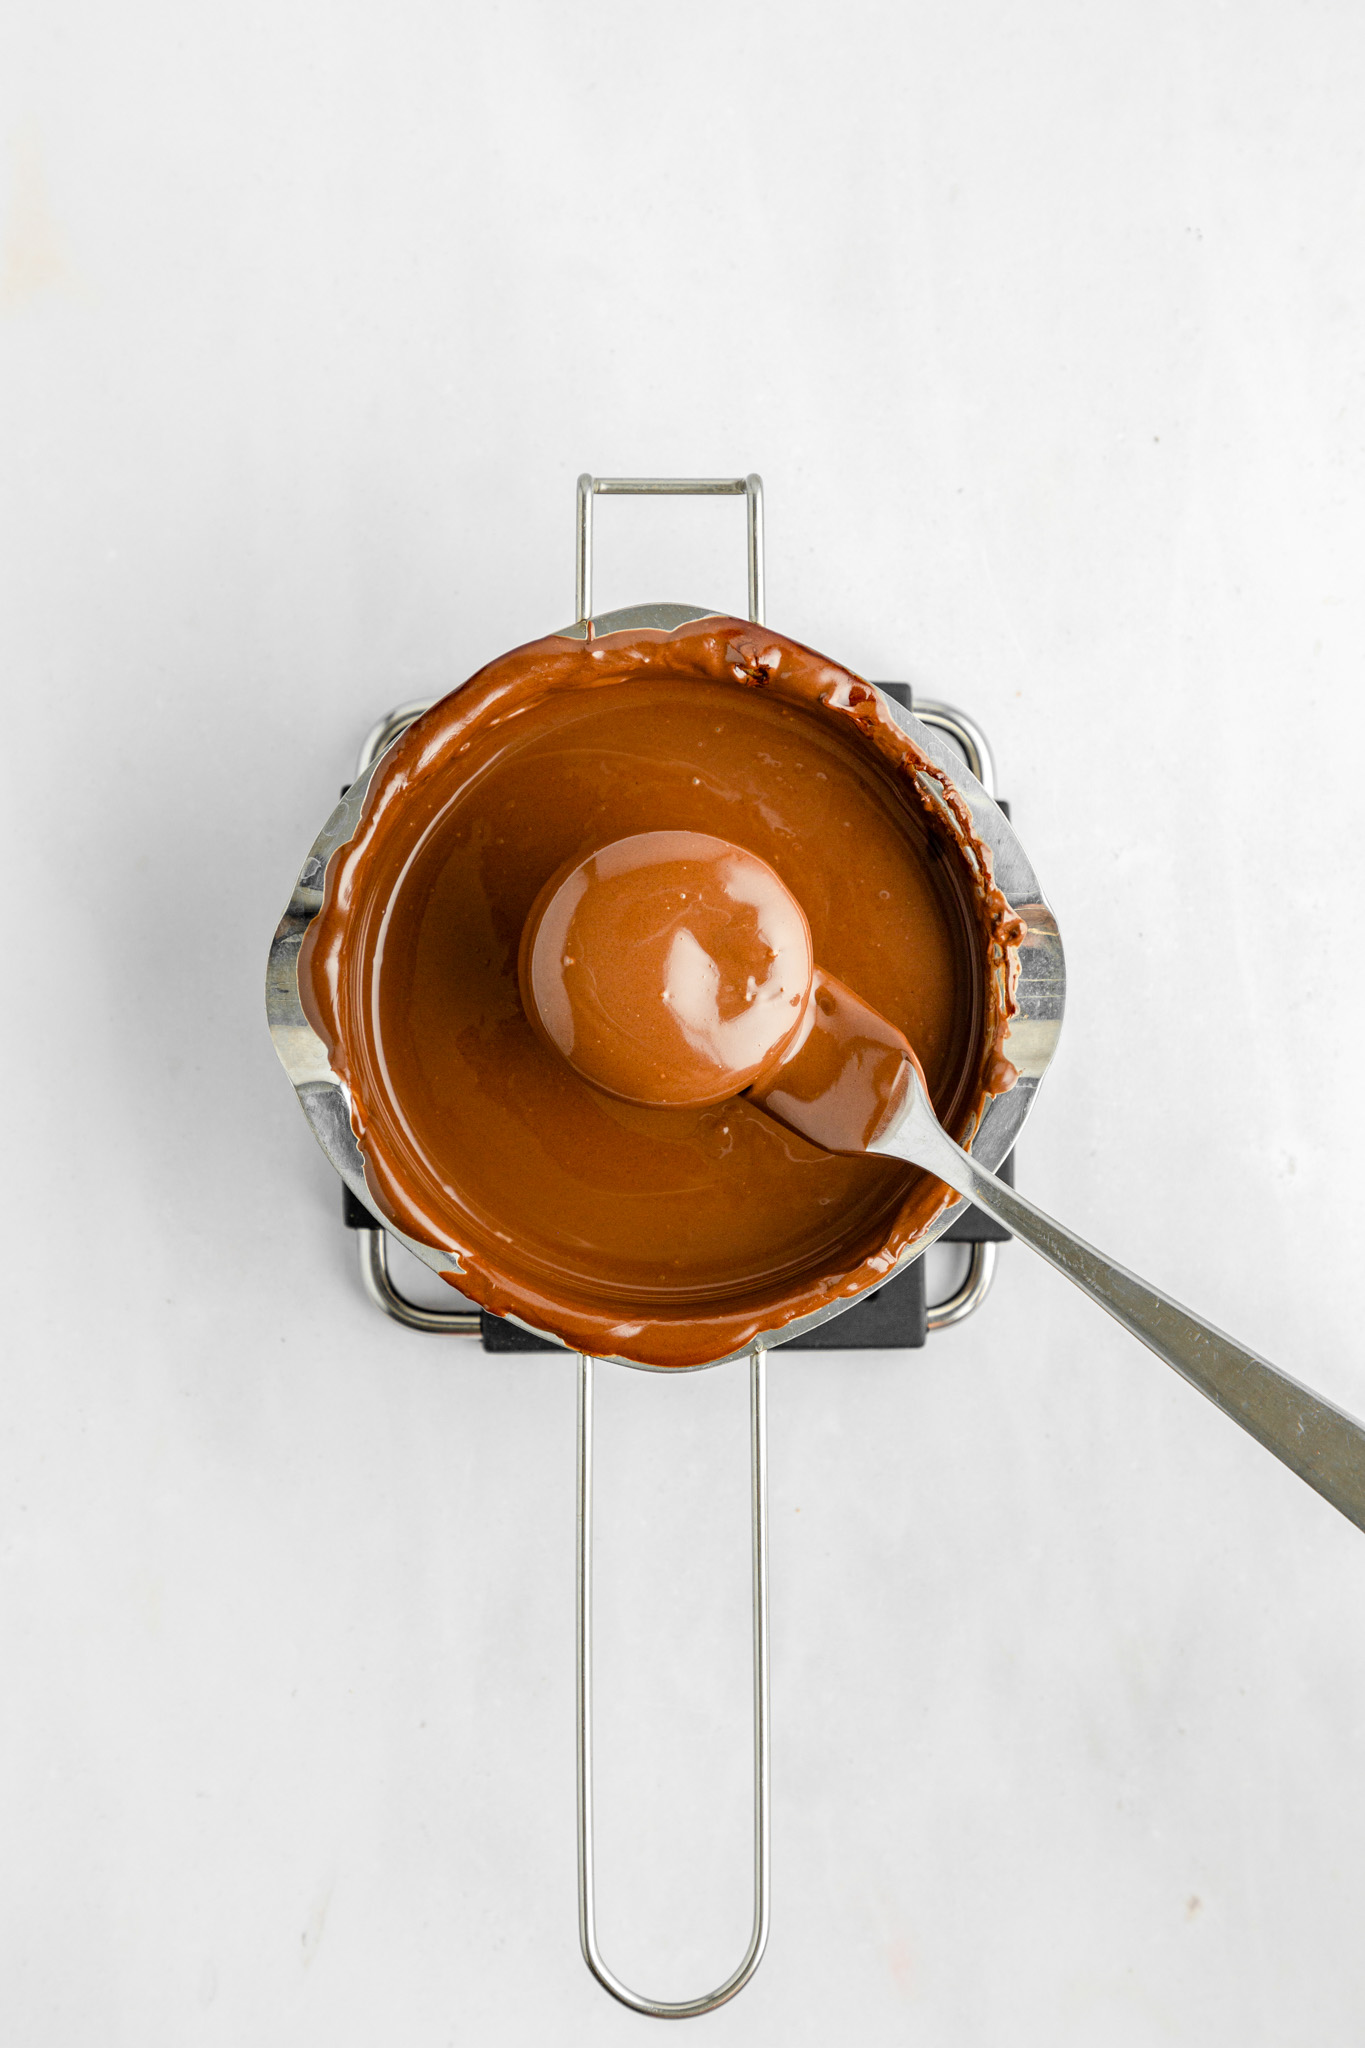
- Using a double boiler, melt the dark chocolate melting wafers until smooth.
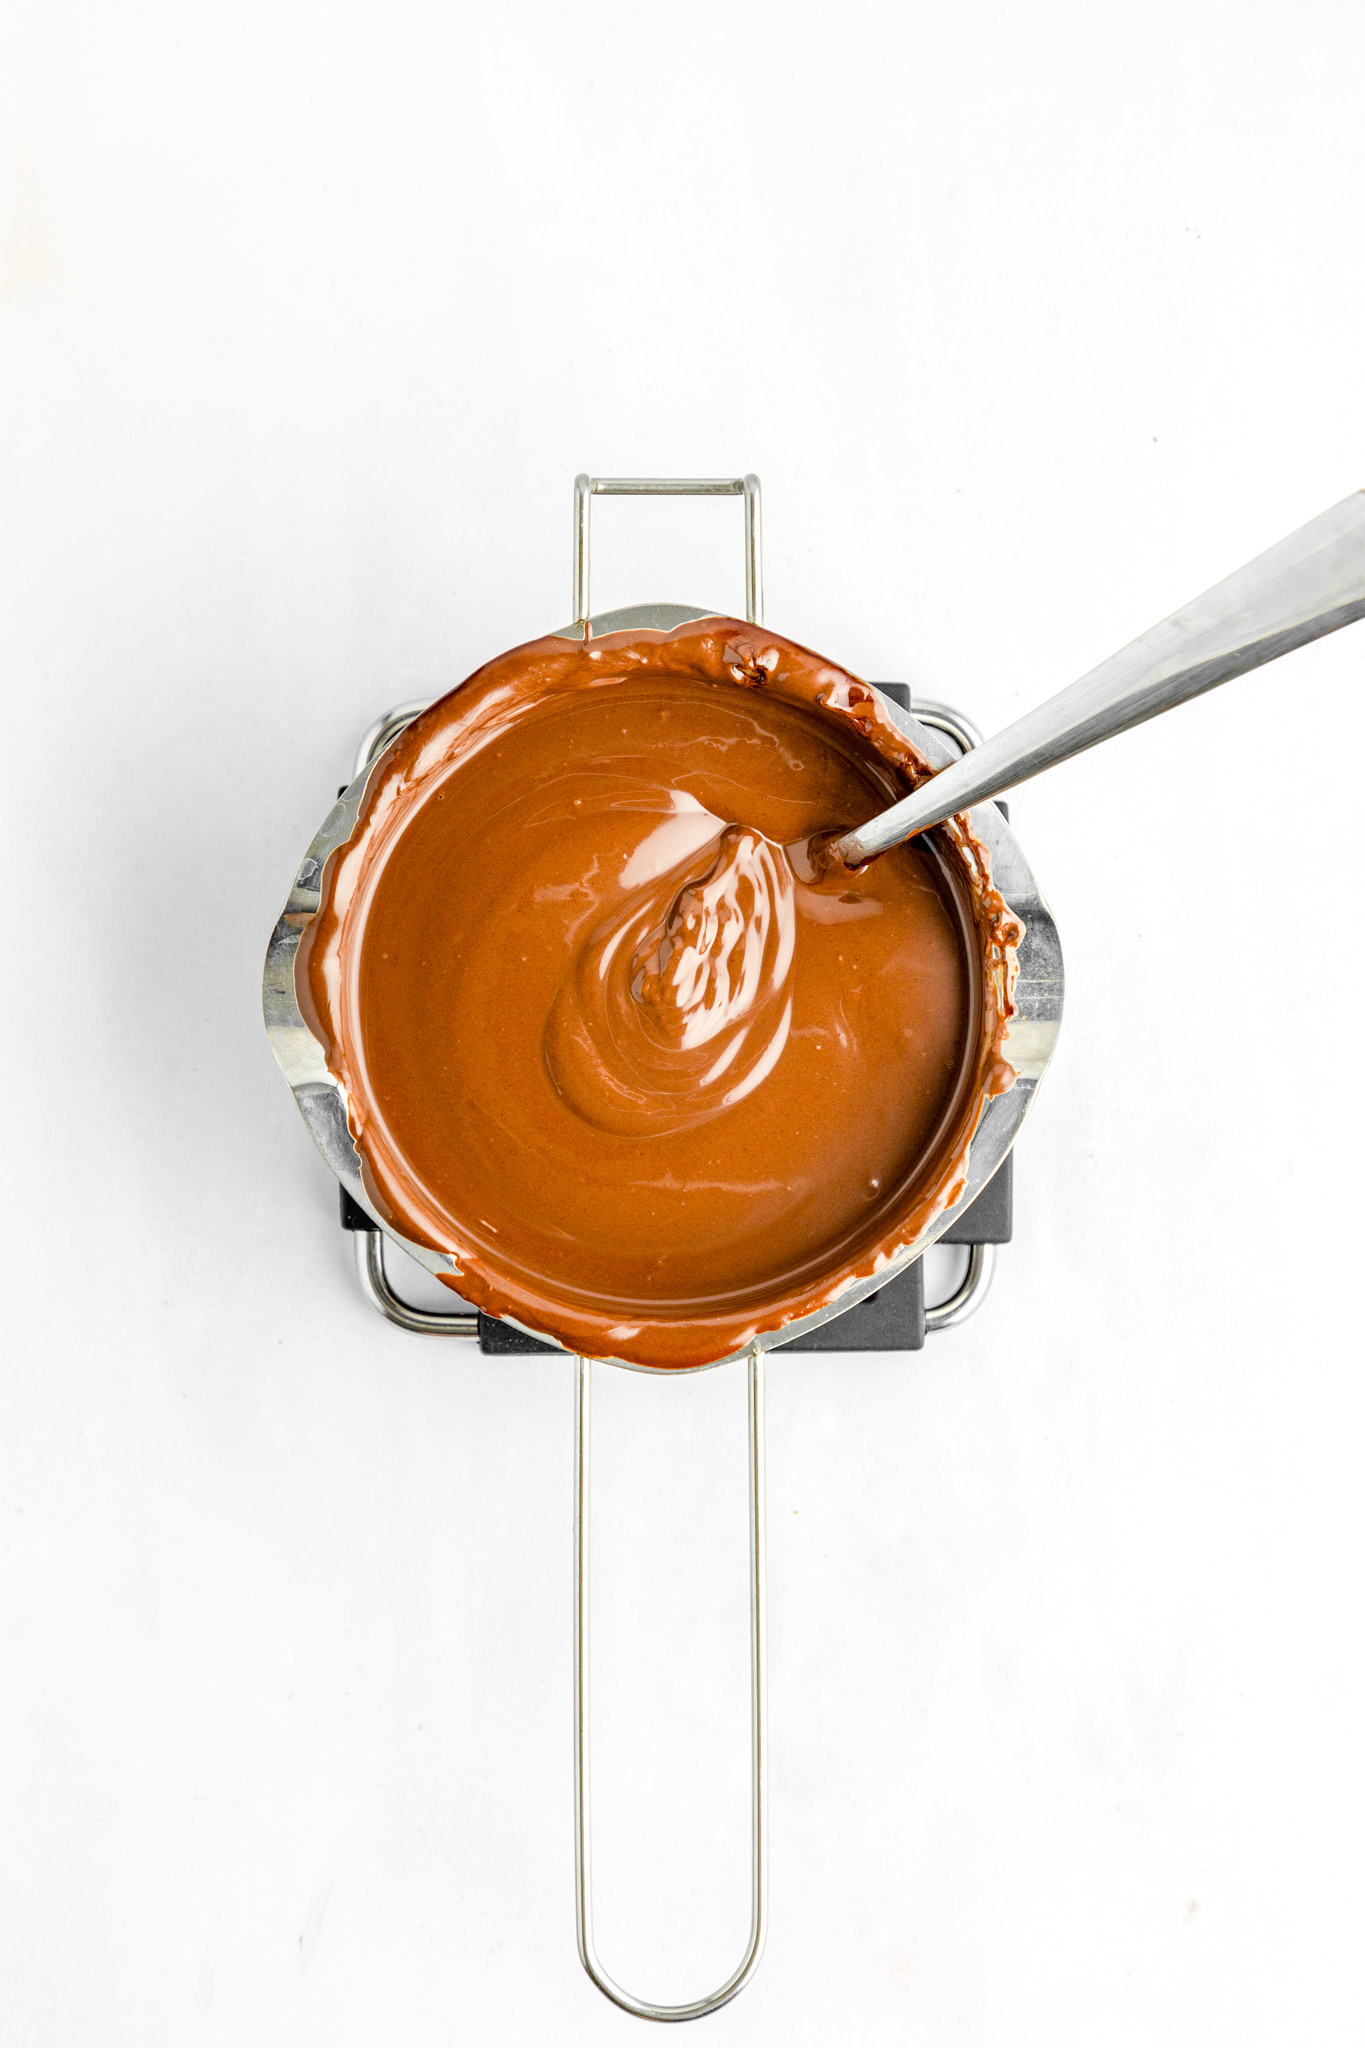
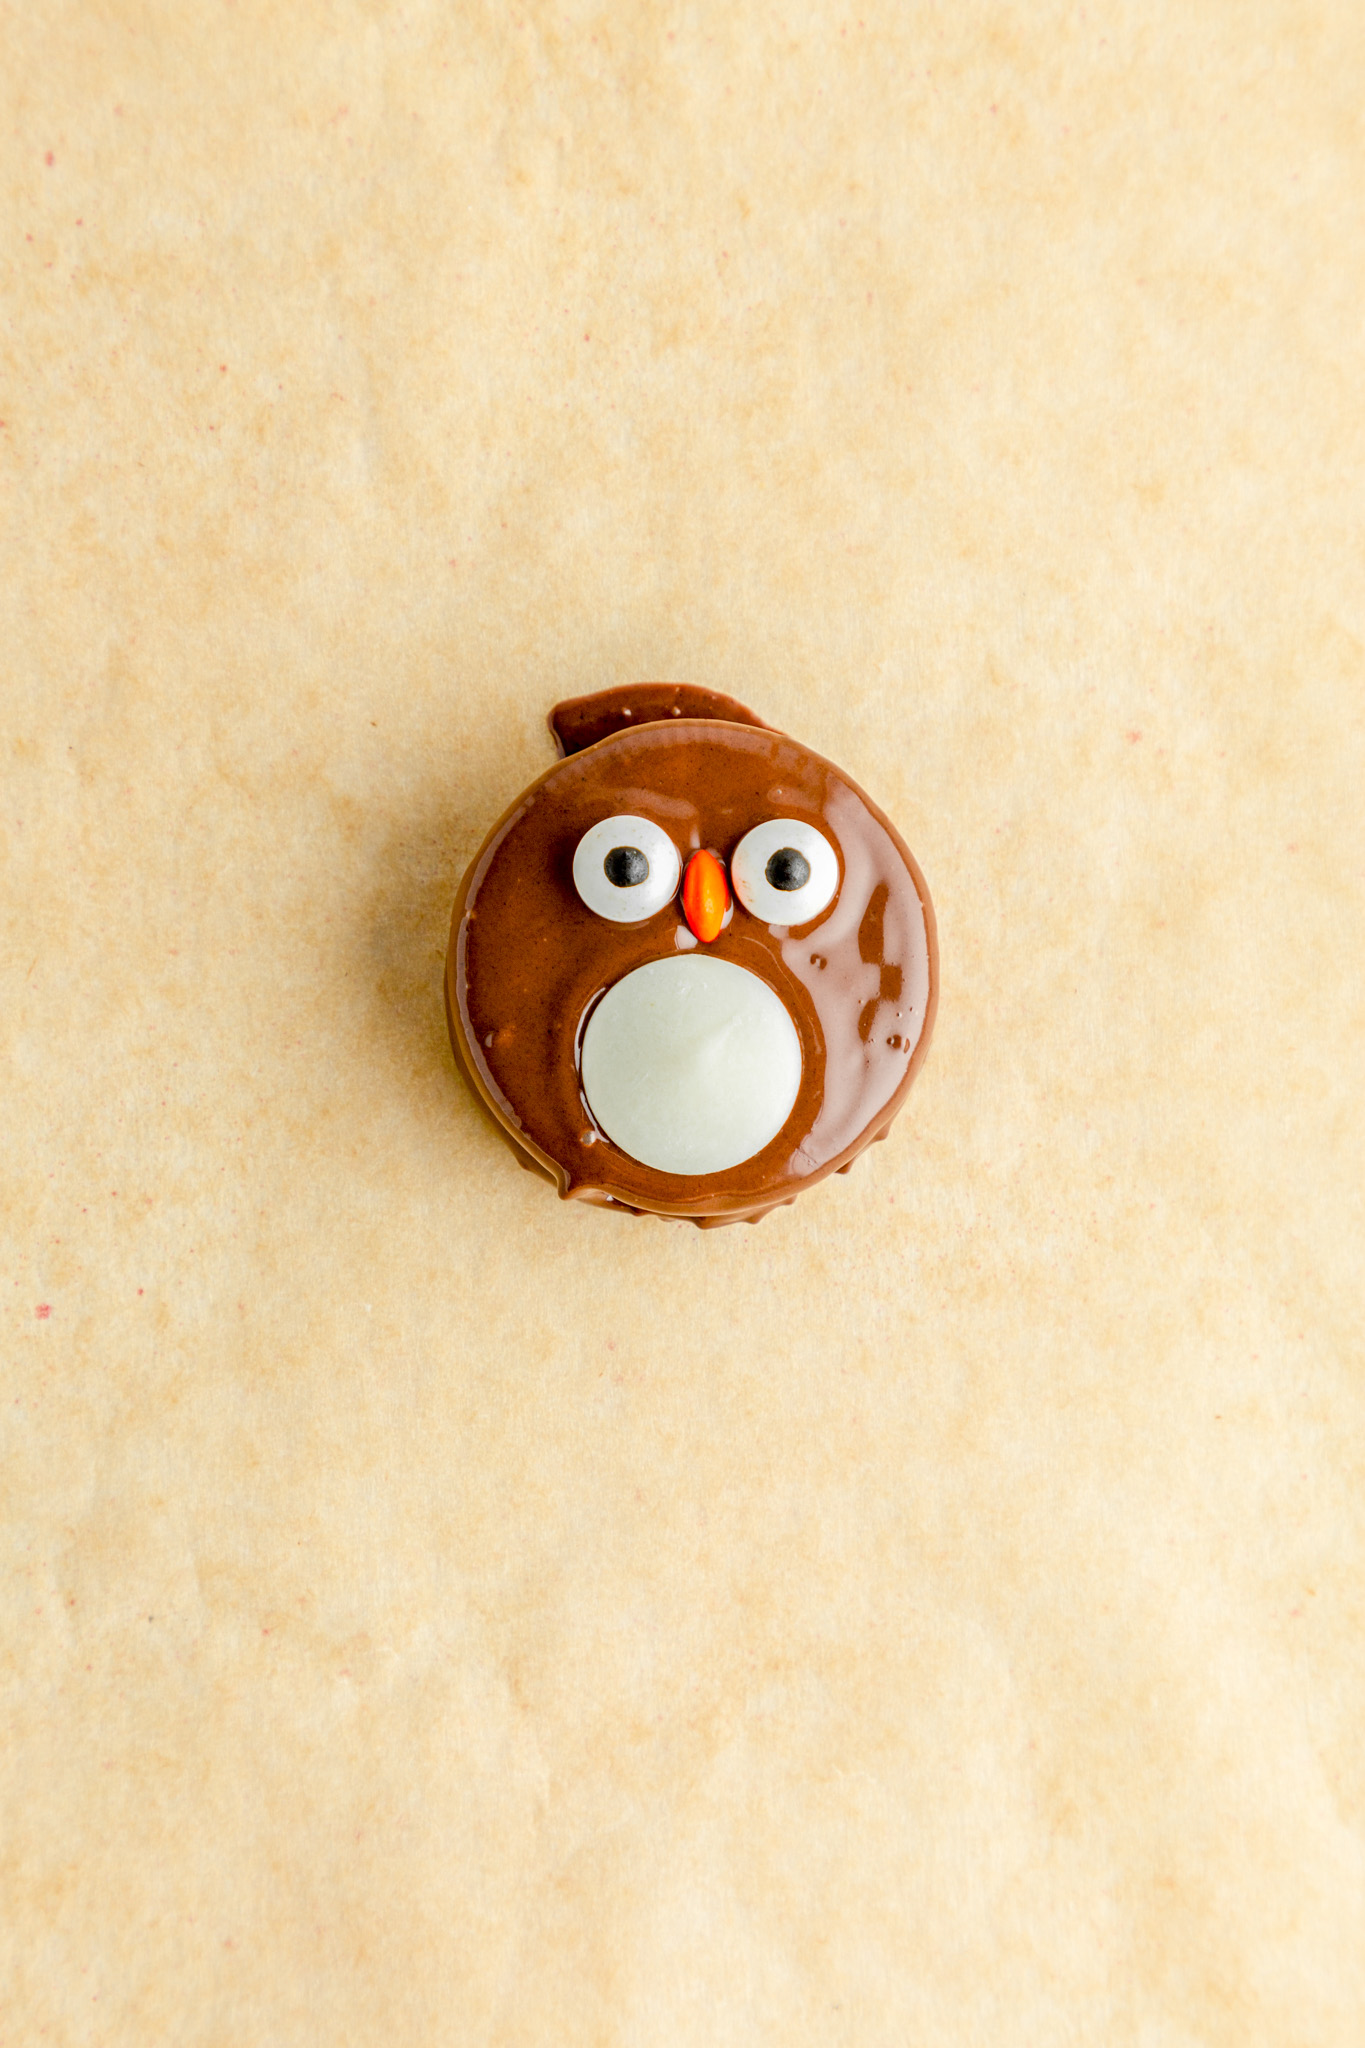
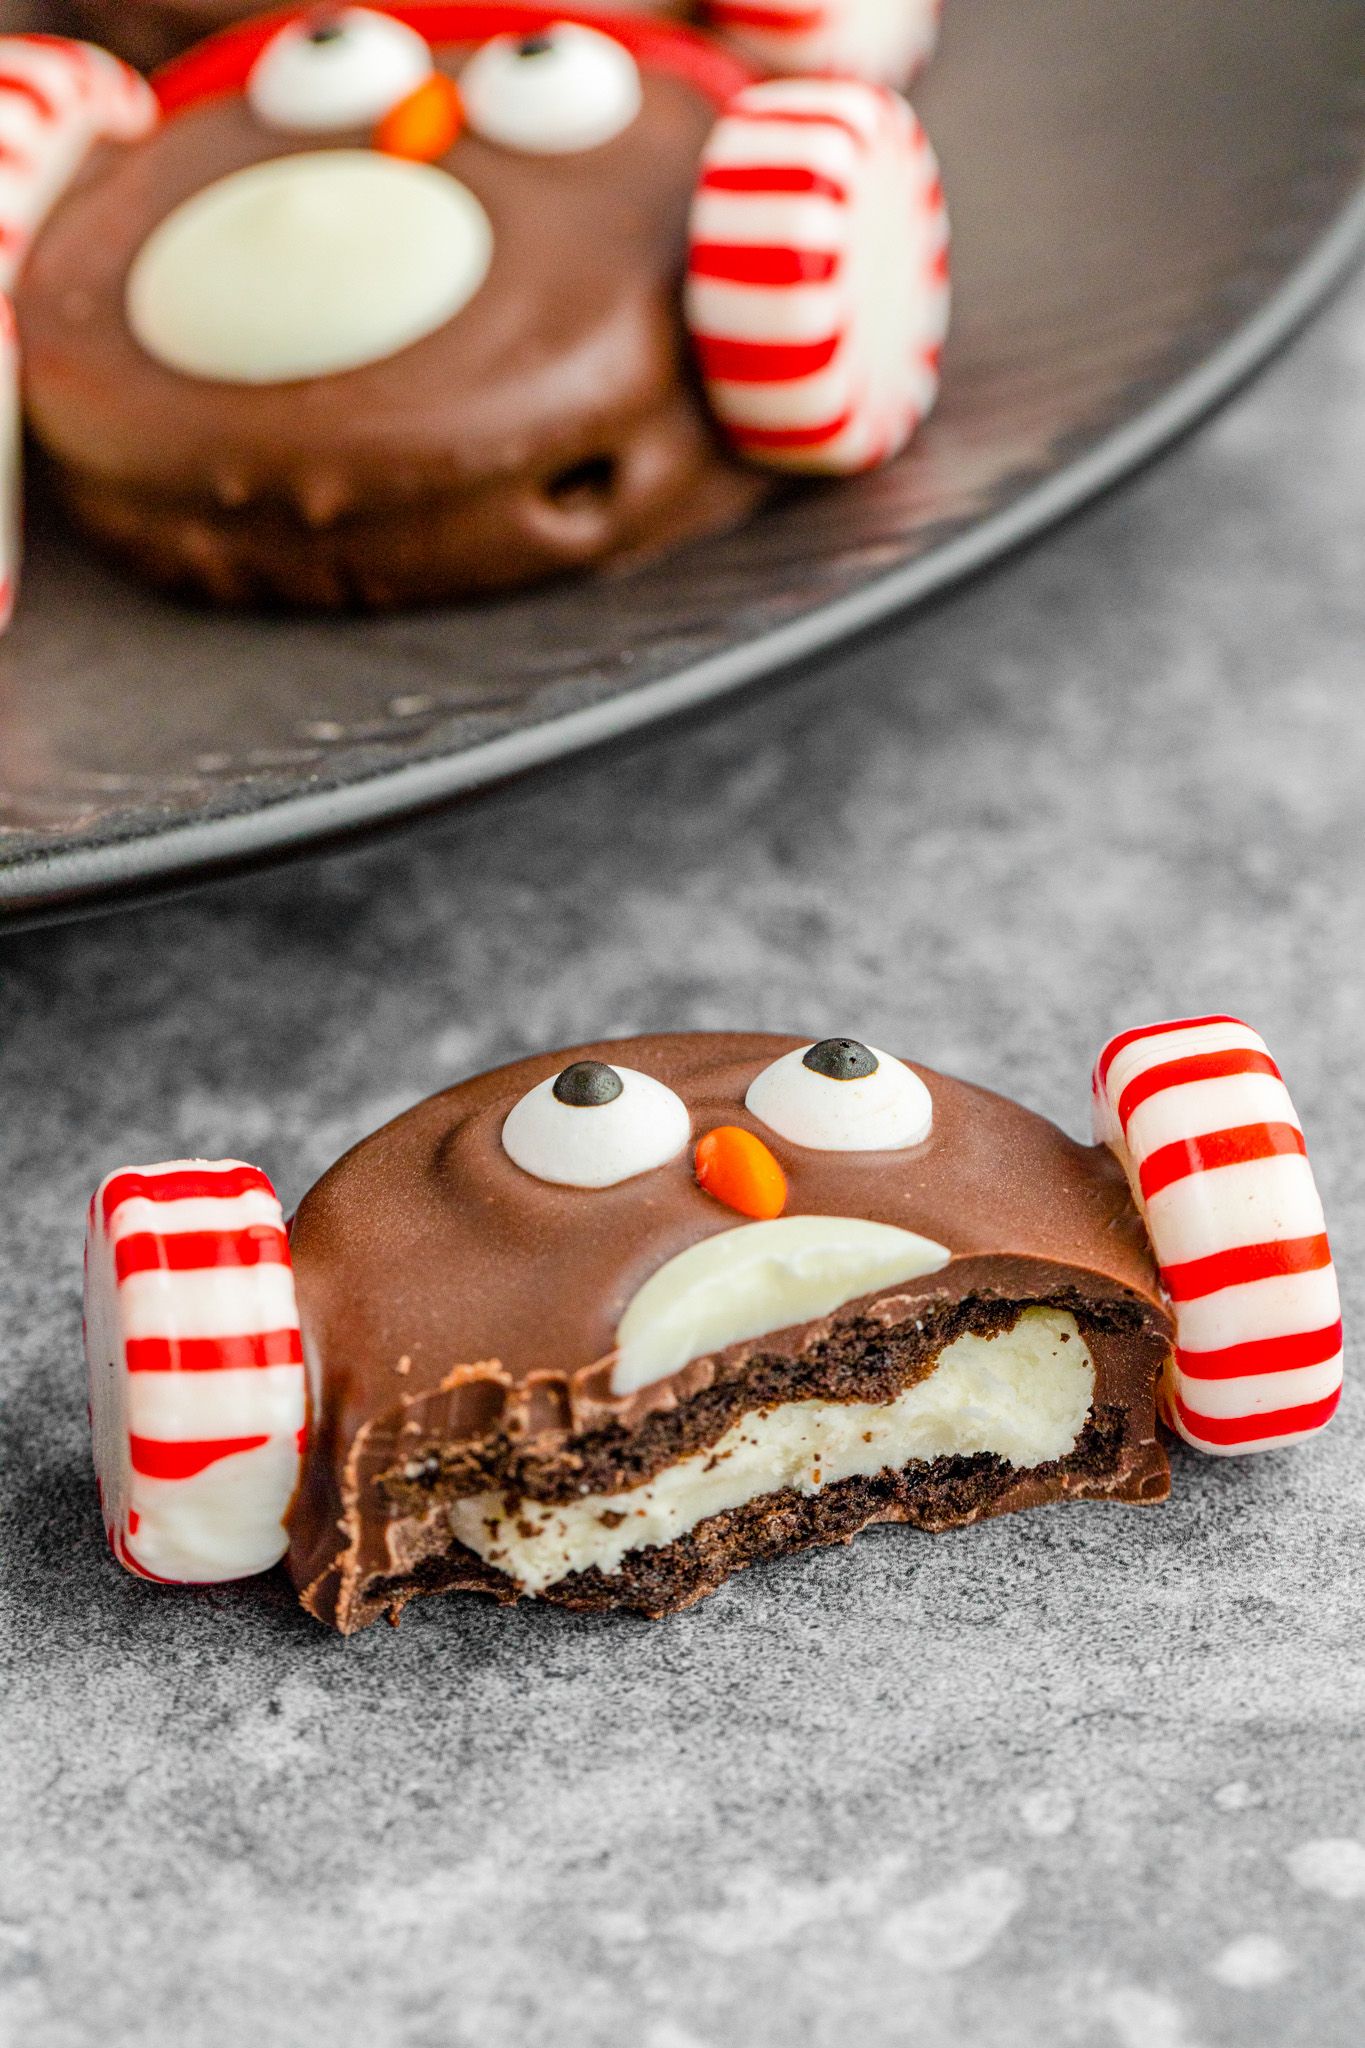
- Take one oreo cookie and fully submerge it into the dark chocolate and make sure it is evenly coated. Lift it out with a fork and lightly tap it on the edge of the pot a few times to remove the excess chocolate. Transfer it to the lined baking sheet.
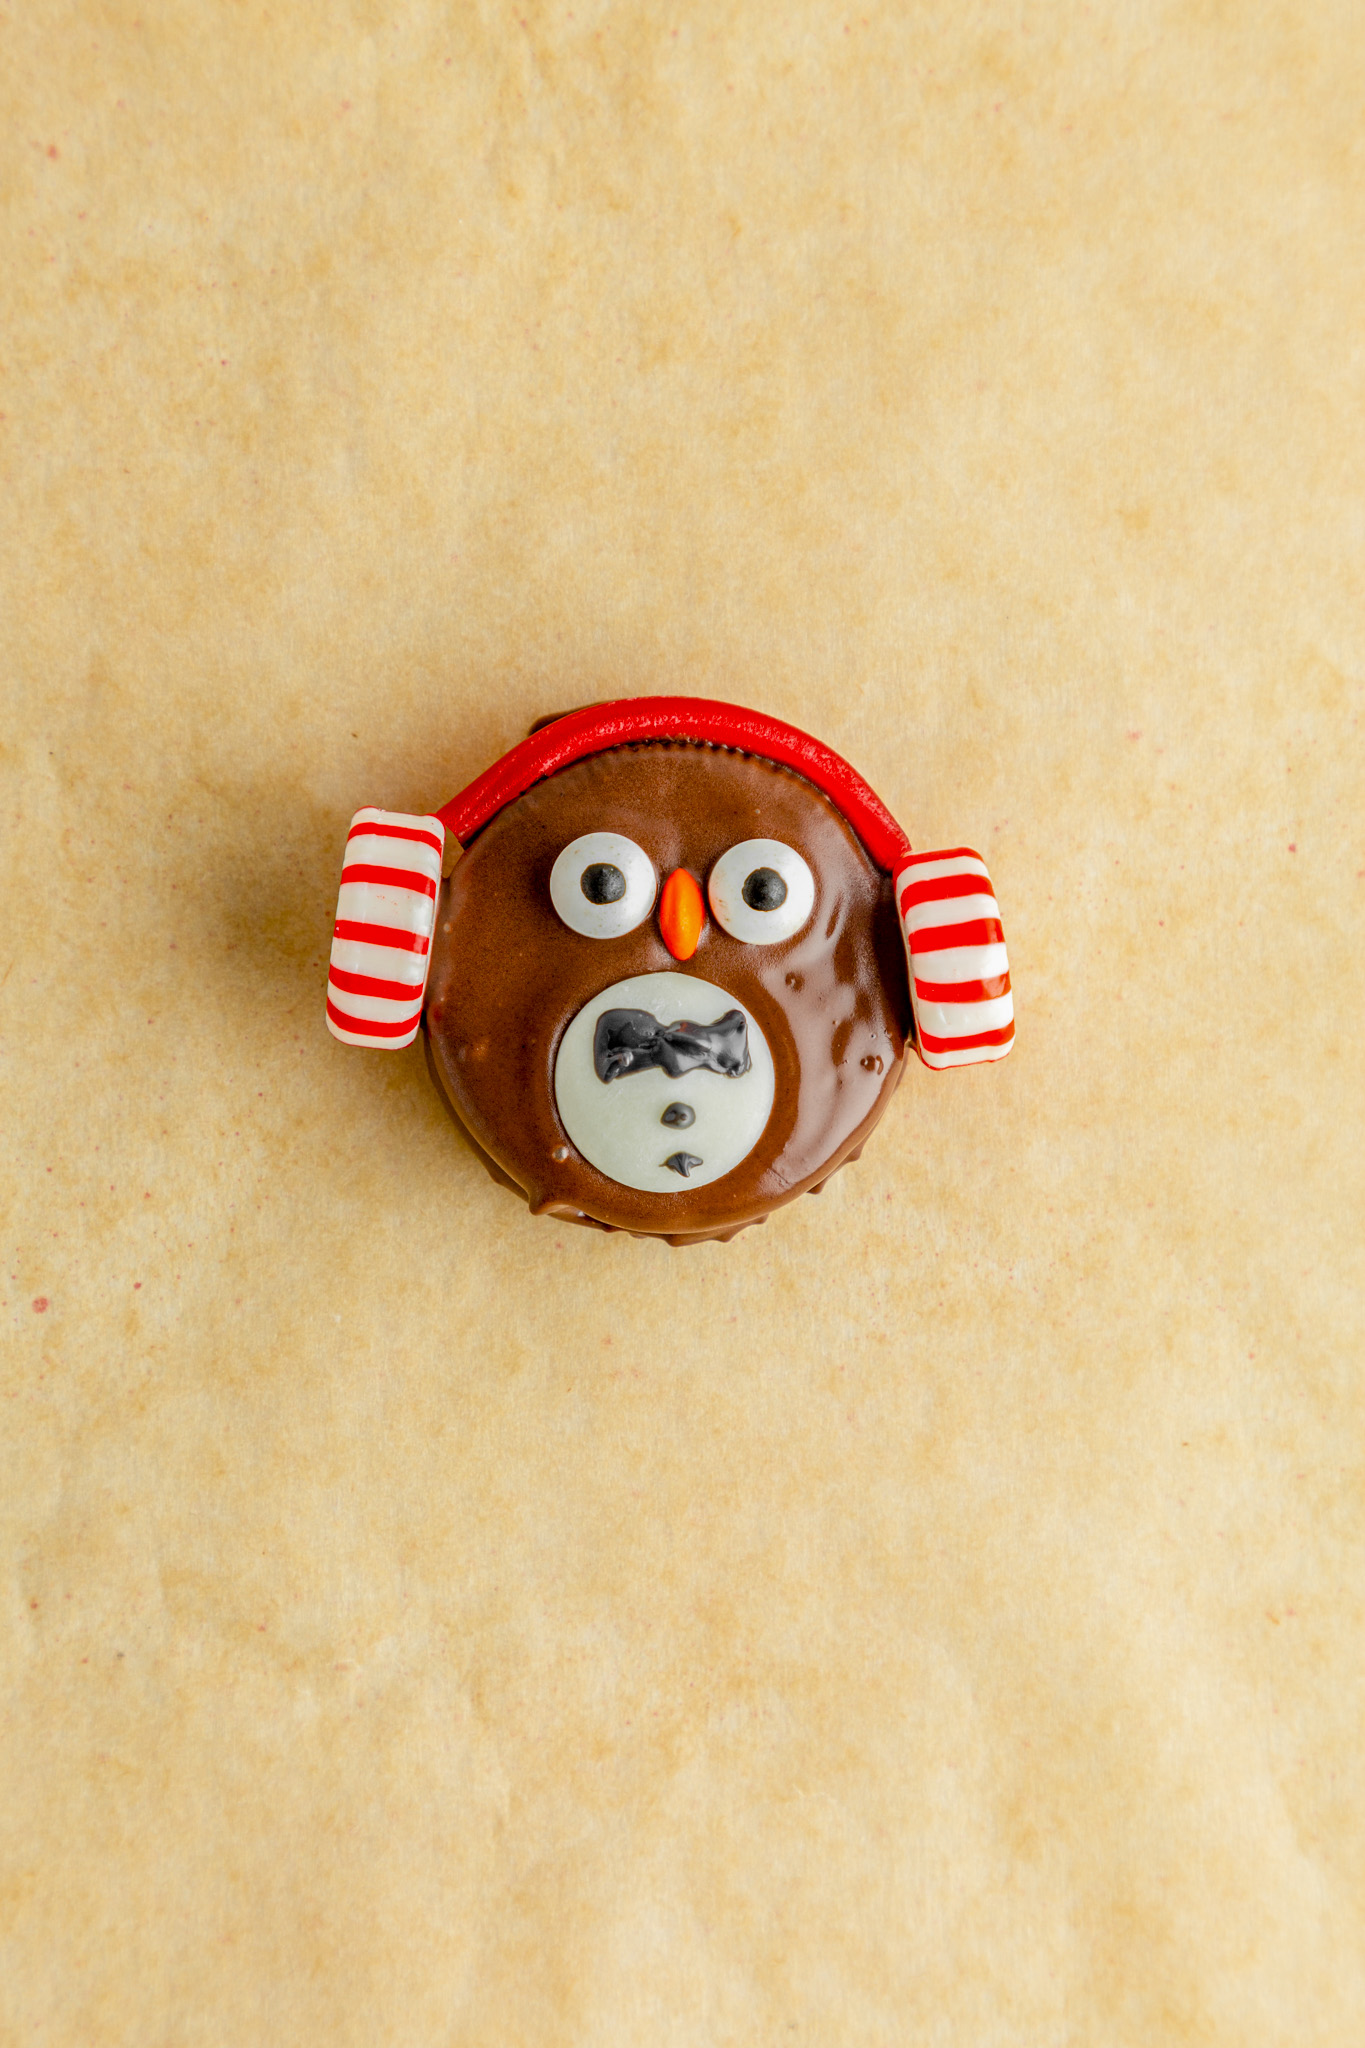
- Now it is time to decorate the penguins. Add one white melting wafer on the bottom half of the oreo. Add the orange M&M centered right above it. Then add the two candy eyes.
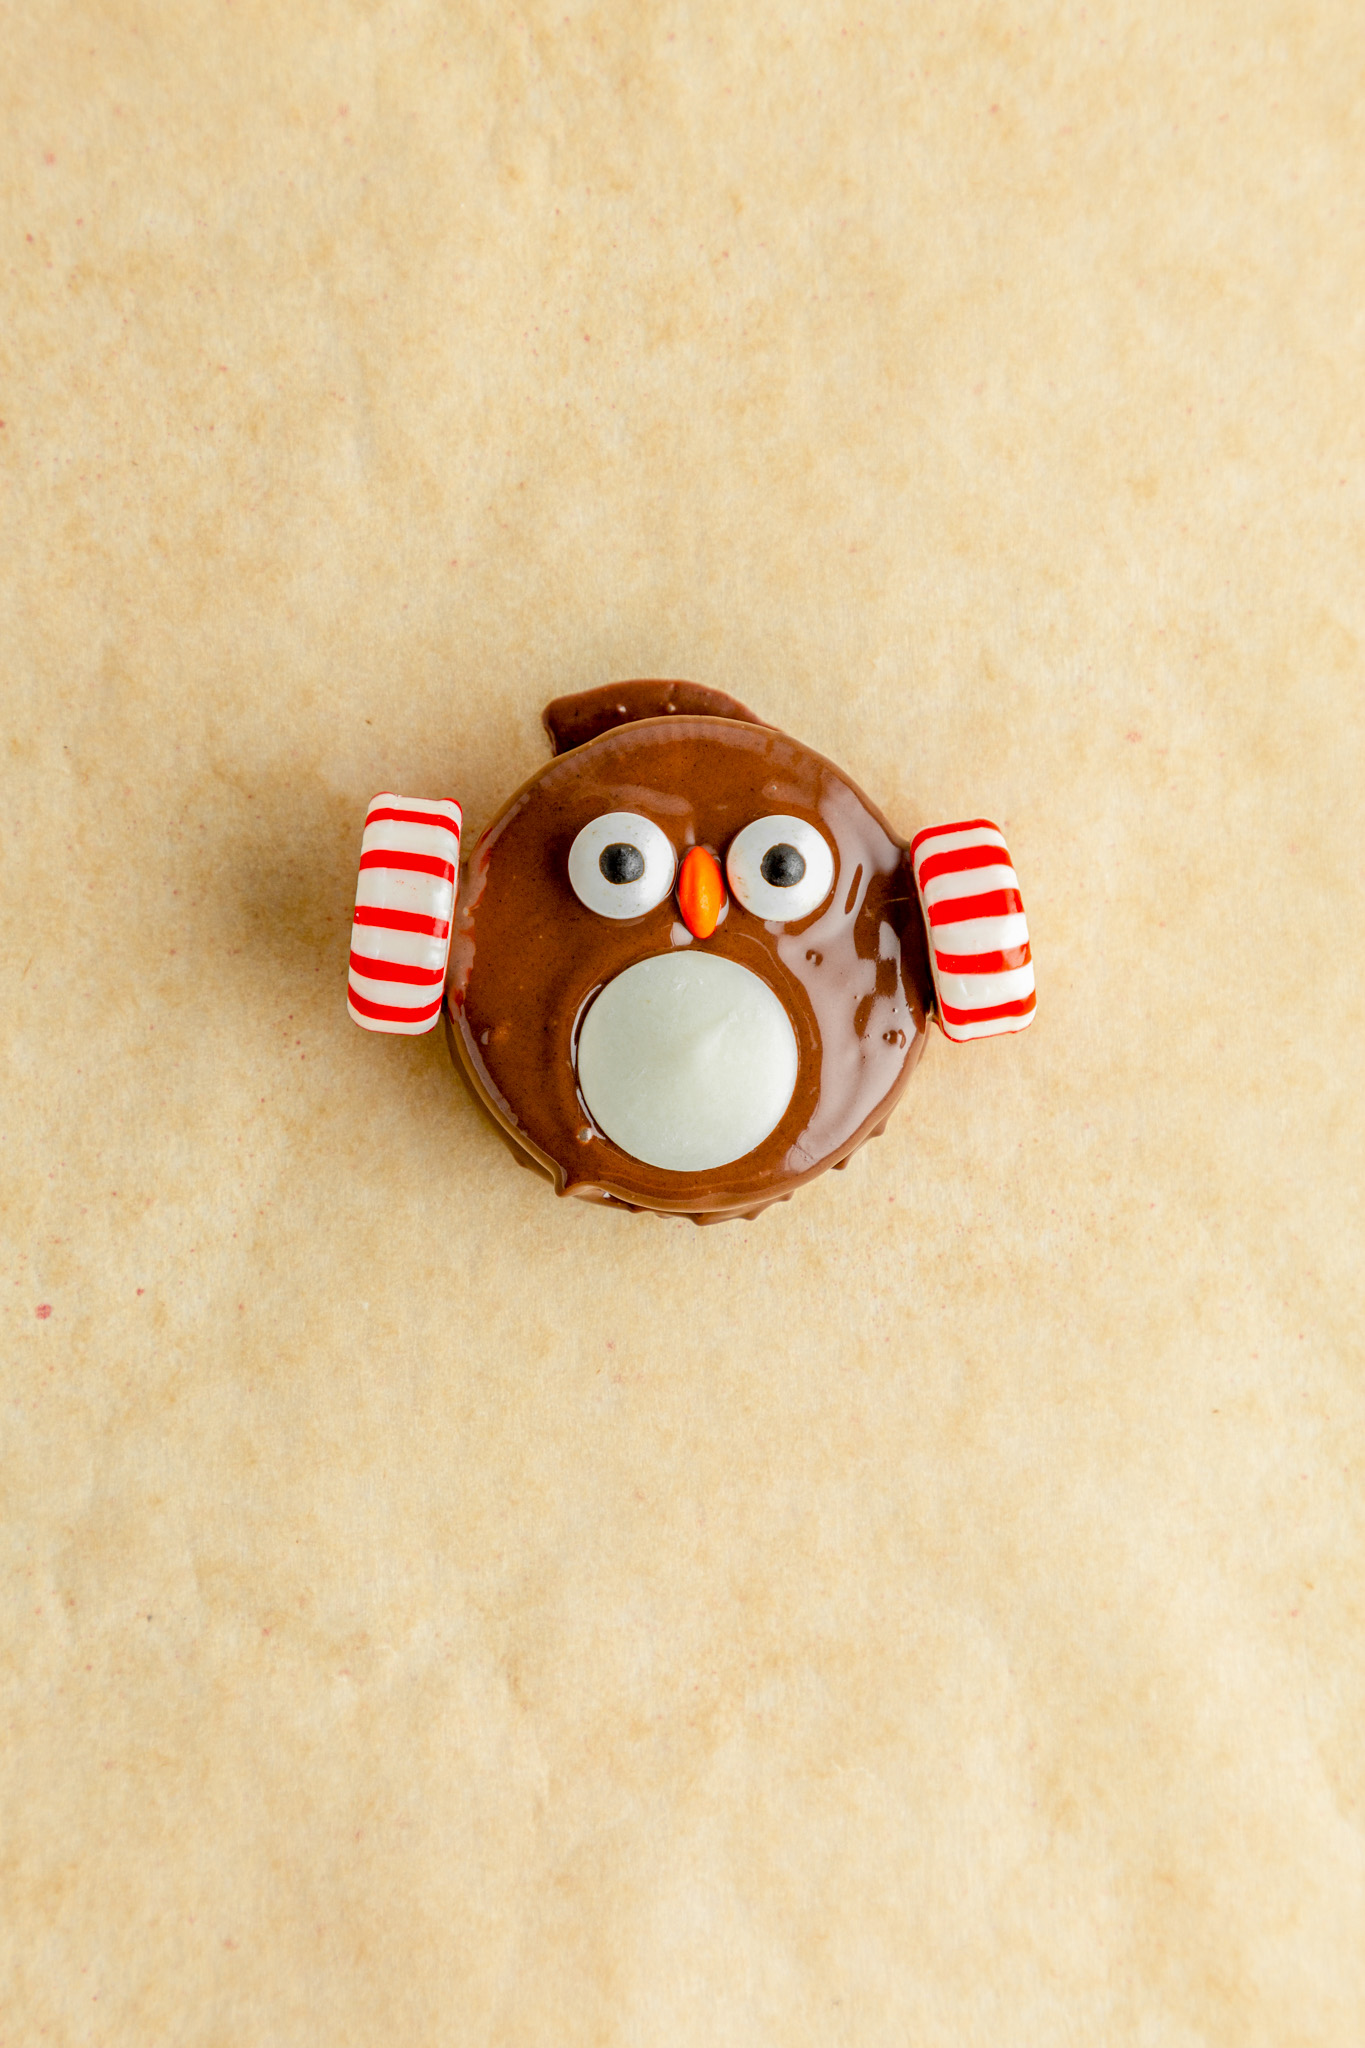
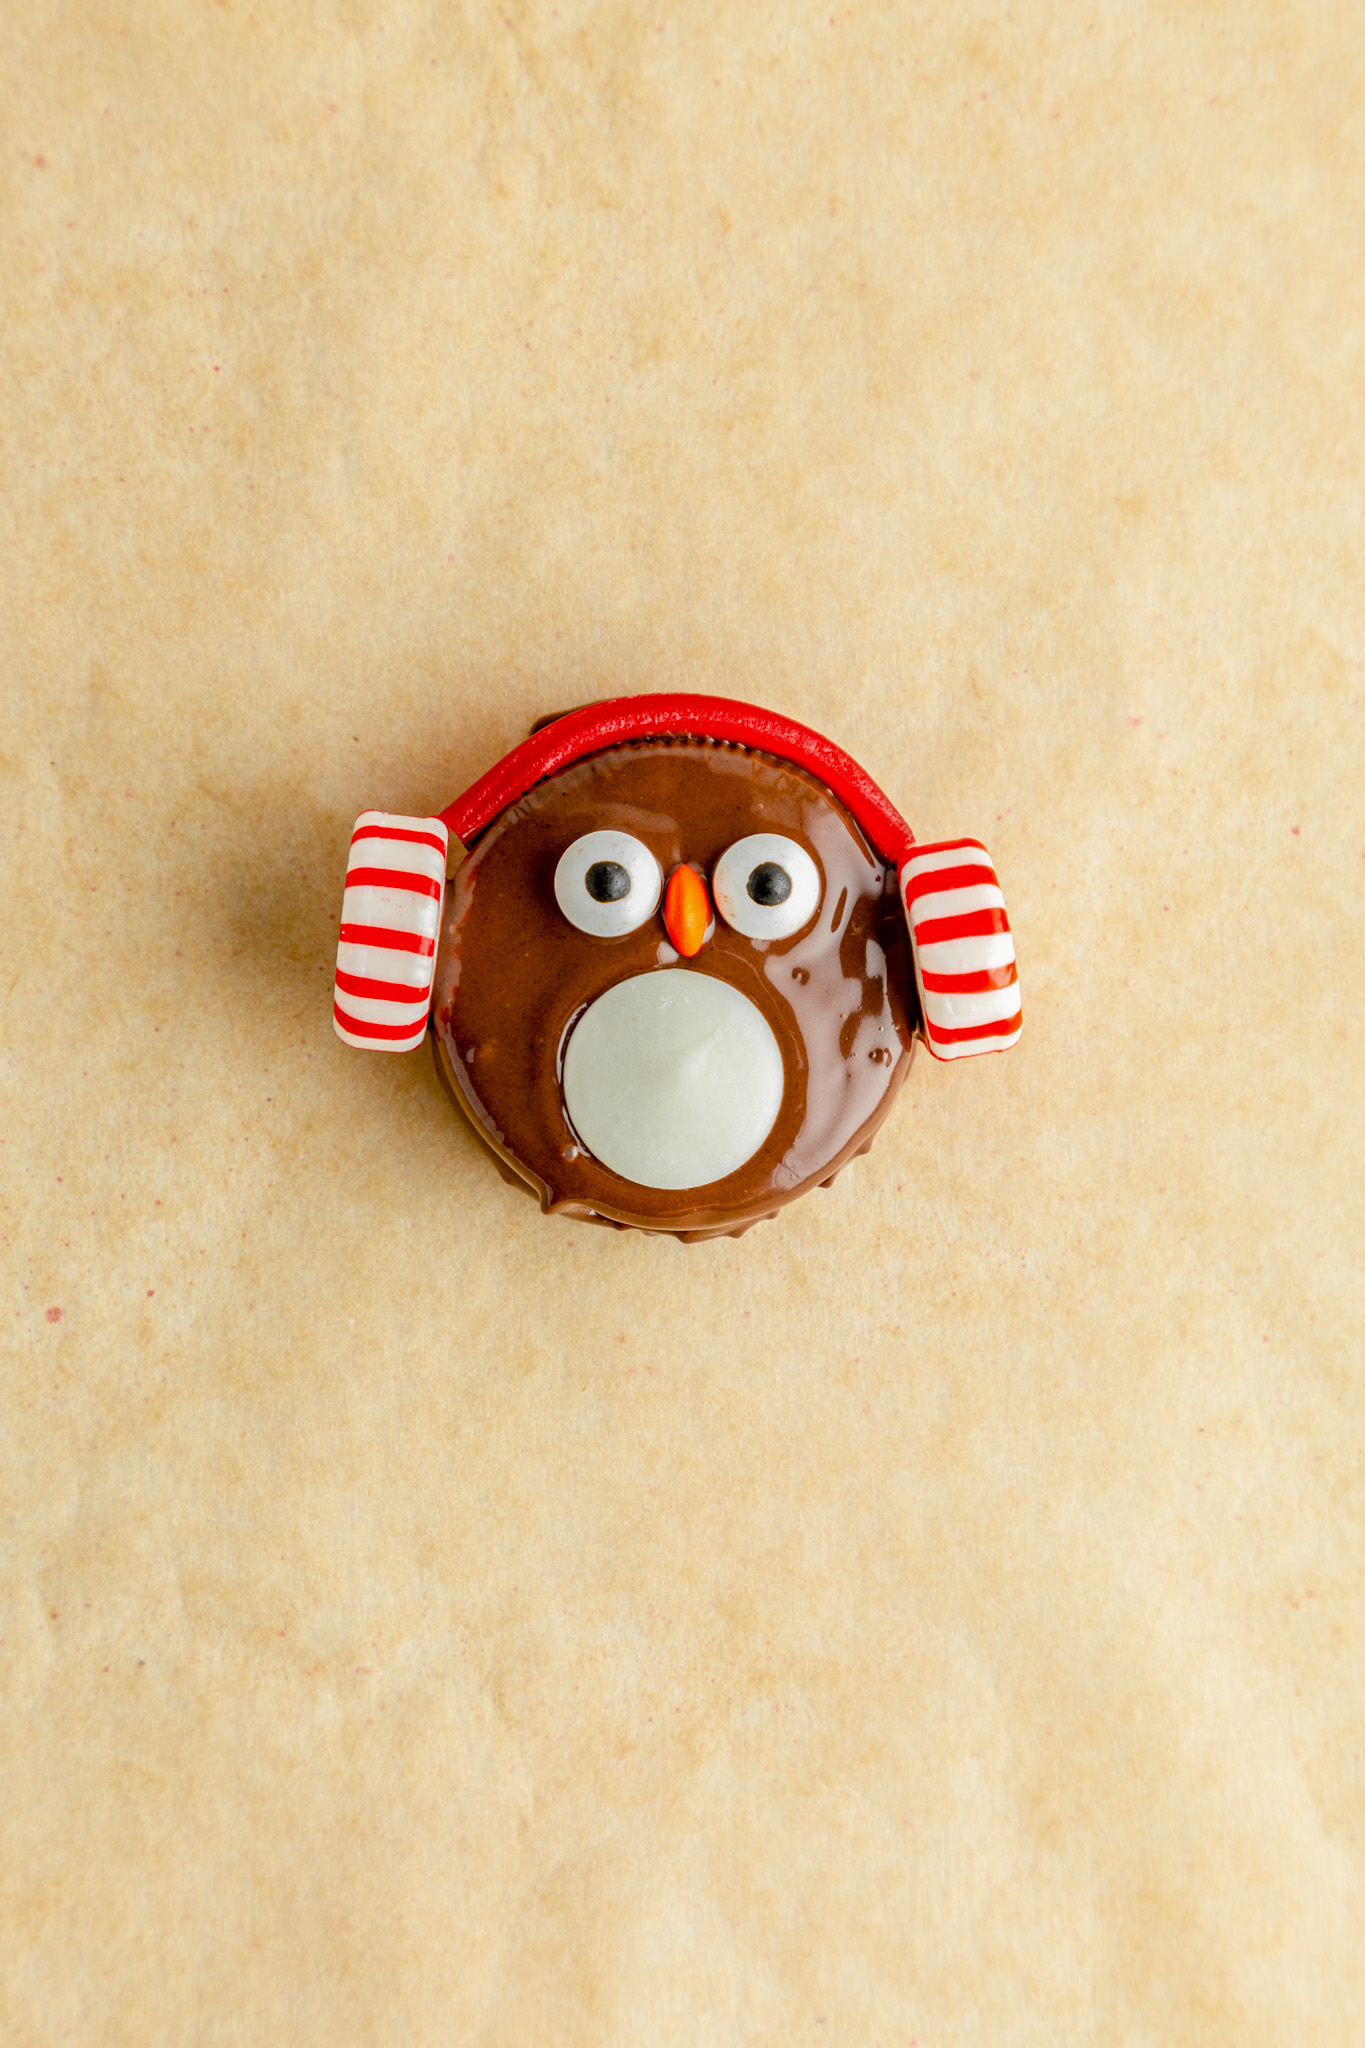
- For the earmuffs, add two peppermint candies, one on each side of the penguin. Then attach a 2-inch piece of twizzler for the strap. It’s best to do the twizzler part last after adding the rest of the decorations. This allows the chocolate to set a bit and will help the twizzler stay in place.
- Repeat the steps with the rest of the oreos. Then place the penguins on the baking sheets into the fridge for 10 minutes or until chocolate is set.
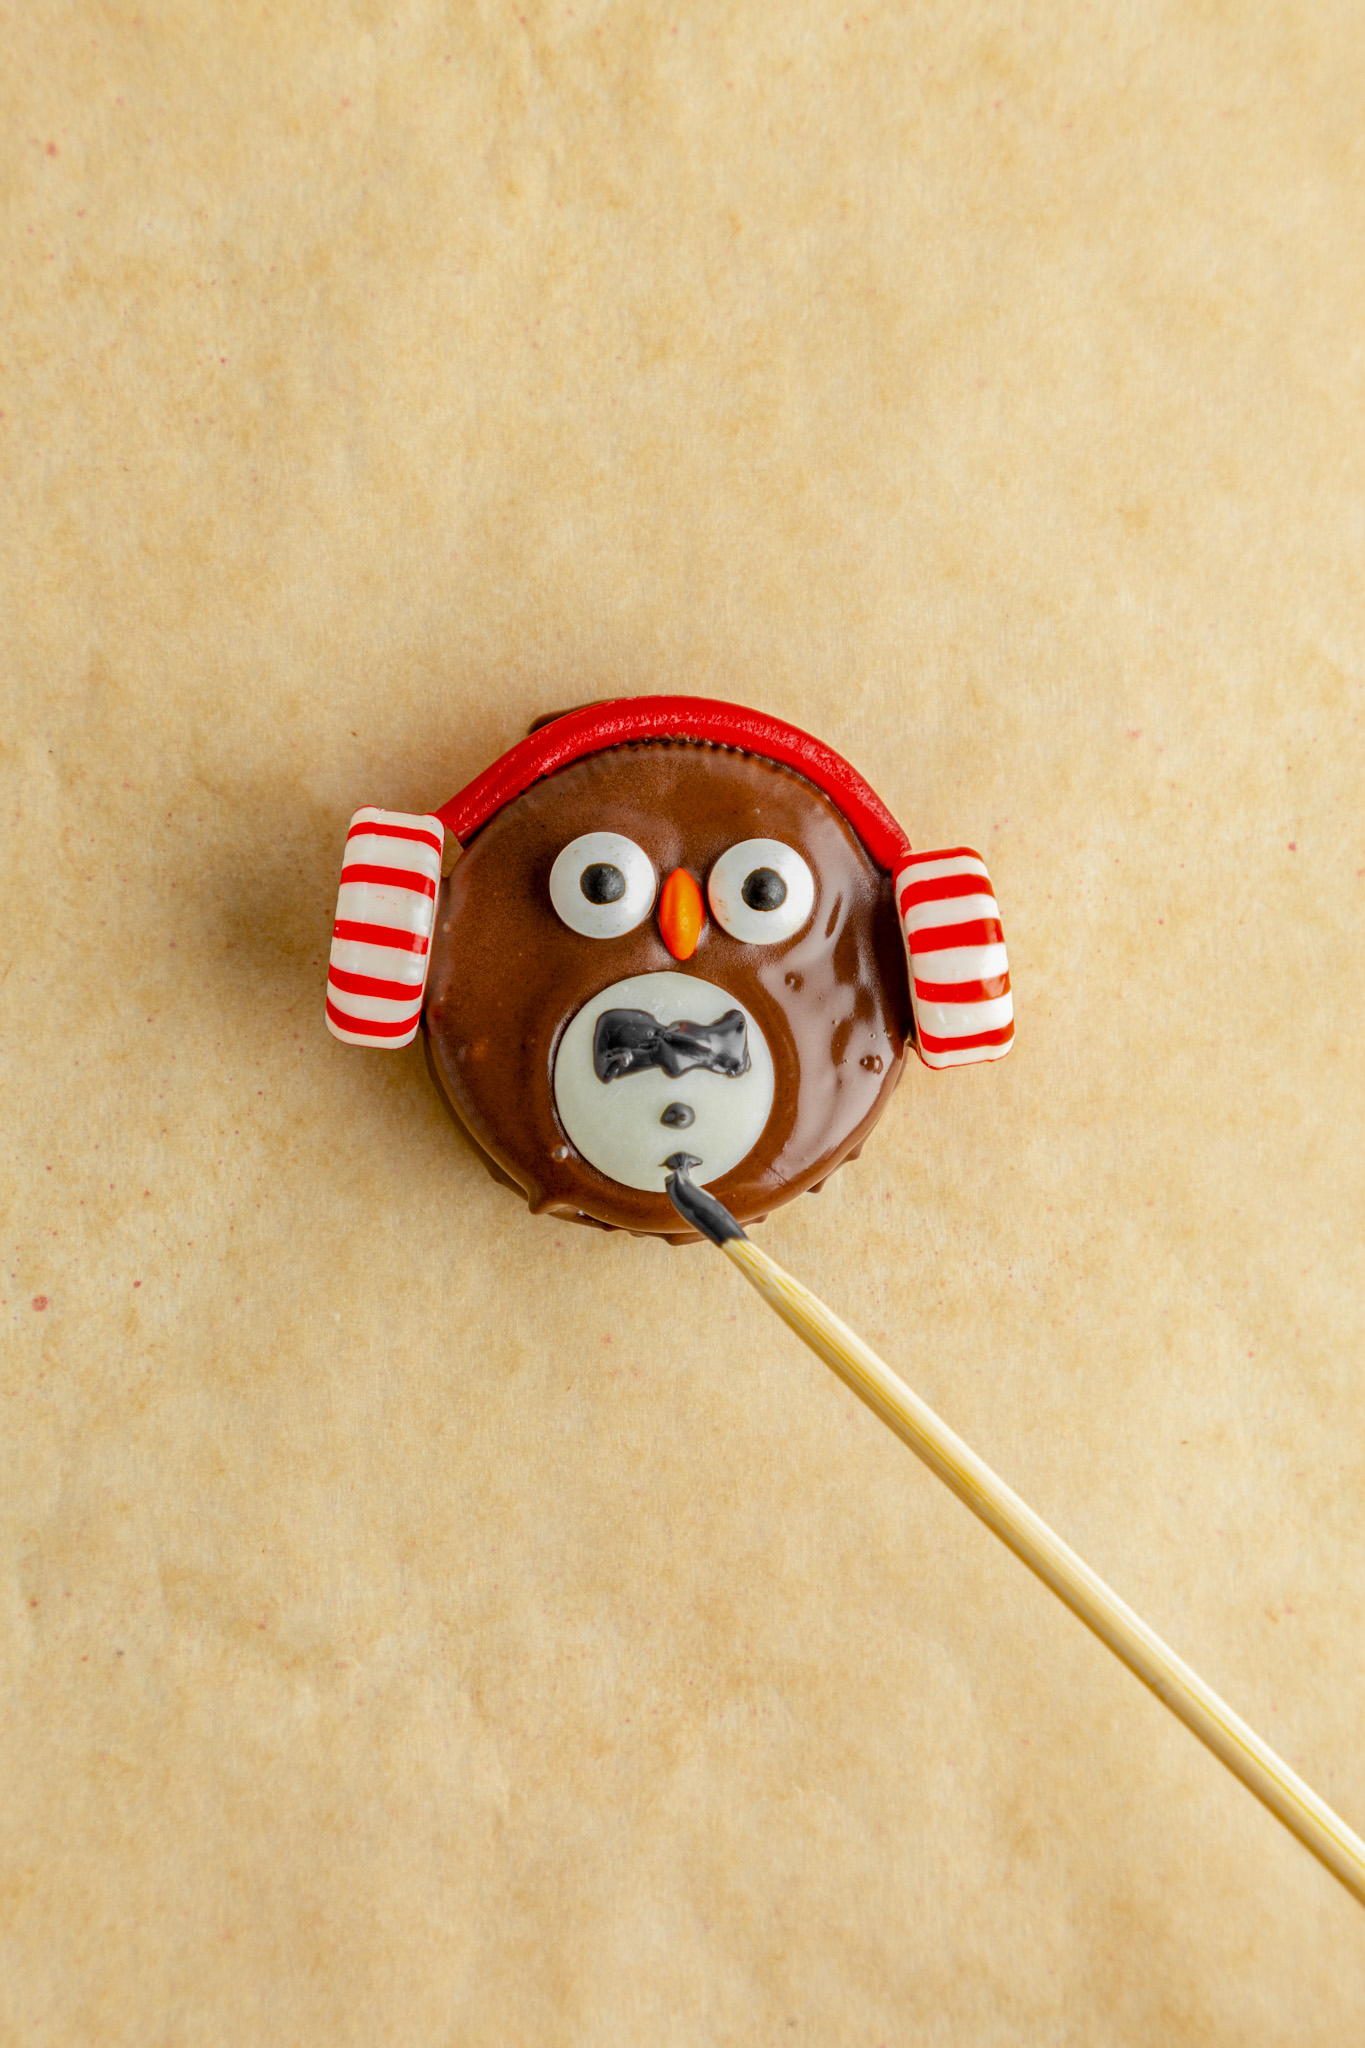
- An optional step is to melt some black melting wafers and draw on little bow ties and buttons onto the penguin’s belly.
Tips & Tricks
- Work in small batches when dipping the Oreos to prevent the chocolate from thickening too quickly.
- Allow the chocolate to set slightly before adding the Twizzler strap so it stays in place better.
- Use ready-made chocolate-covered Oreos if short on time; they save a step and still look adorable.
- Keep a toothpick nearby to help position small decorations like eyes and noses.
FAQs

Penguin Cookies
Ingredients
- 24 Double Stuff Oreos
- 2 - 10 oz packages ghirardelli dark chocolate melting wafers
- 24 pieces white melting wafers
- 12 orange M&M minis, cut in half
- 0.88 oz package candy eyes
- 2 pieces Pull n Peel Twizzlers, pulled apart and cut into 2” long pieces
- Black melting wafers optional for drawing bow ties and buttons
- EQUIPMENT
- Two baking sheets
- Parchment paper
Instructions
- Gather your ingredients then prepare two baking sheets with parchment paper and set it aside.
- Using a double boiler, melt the dark chocolate melting wafers until smooth.
- Take one oreo cookie and fully submerge it into the dark chocolate and make sure it is evenly coated. Lift it out with a fork and lightly tap it on the edge of the pot a few times to remove the excess chocolate. Transfer it to the lined baking sheet.
- Now it is time to decorate the penguins. Add one white melting wafer on the bottom half of the oreo. Add the orange M&M centered right above it. Then add the two candy eyes.
- For the earmuffs, add two peppermint candies, one on each side of the penguin. Then attach a 2-inch piece of twizzler for the strap. It’s best to do the twizzler part last after adding the rest of the decorations. This allows the chocolate to set a bit and will help the twizzler stay in place.
- Repeat the steps with the rest of the oreos. Then place the penguins on the baking sheets into the fridge for 10 minutes or until chocolate is set.
- An optional step is to melt some black melting wafers and draw on little bow ties and buttons onto the penguin’s belly.
Notes
You can use the smaller sized candy eyes if you have it.
Instead of peppermint candies for the earmuffs, you can use regular sized M&M’s. Instead of twizzlers for the straps, you can use sour punch straws and just cut to size
Substitute the double stuff oreos for mega stuff or another flavor like hazelnut, chocolate, or peppermint.
Instead of using a double boiler, you can alternatively microwave the dark chocolate melting wafers according to package instructions.
Nutrition Information:
Yield:
24Serving Size:
1Amount Per Serving: Calories: 227Total Fat: 9gSaturated Fat: 3gUnsaturated Fat: 6gCholesterol: 0mgSodium: 154mgCarbohydrates: 39gFiber: 3gSugar: 23gProtein: 2g
I’m Melissa, the imaginative force behind Sparkles to Sprinkles, where creativity comes to life, and sprinkles of joy are scattered generously. Melissa is a proud Jersey girl who found love with a New York boy. As a mom to four wonderful boys and a few fur babies, her journey into the world of blogging began after making the life-changing decision to stay home and raise her children. Previously a dedicated workaholic, Melissa’s blog became her creative outlet and passion project. Inspired by her mother-in-law, a masterful cook renowned for her delicious home-cooked meals and legendary holiday feasts (think mouthwatering sausage stuffing), Melissa honed her culinary skills through a combination of family recipes and countless cooking classes. She often attended these classes with her son Michael, who shared her enthusiasm for cooking from a young age. Melissa’s love for learning extends beyond familiar cuisines, as she enjoys exploring international recipes in hands-on cooking classes. Her blog features a diverse array of recipes, showcasing her expertise with various kitchen appliances such as the Instant Pot, air fryer, Slow Cooker, Ninja Foodi, Instant Vortex Plus, and more. Join Melissa on her culinary adventures as she shares tried-and-true family favorites alongside exciting new discoveries!