Dog Paw Balm
If your dog’s paws are becoming dry and rough, it’s time to make your very own Dog Paw Balm. This homemade dog paw balm balm is crafted with safe, dog-friendly ingredients that are highly beneficial for maintaining paw health. Restore softness and promote overall paw well-being with this easy-to-use, natural remedy specifically formulated for your furry friend.
Dog Paw Balm
With so many pets in our house, I find myself always buying paw balm until now. This all-natural dog paw balm is so easy to make and uses all natural ingredients perfect for your furry friends. In just 20 minutes, you can make your very own dog paw balm at home. Not only are you saving money by making your own, but you are also giving your dog the very best dog paw palm.

Ingredients:
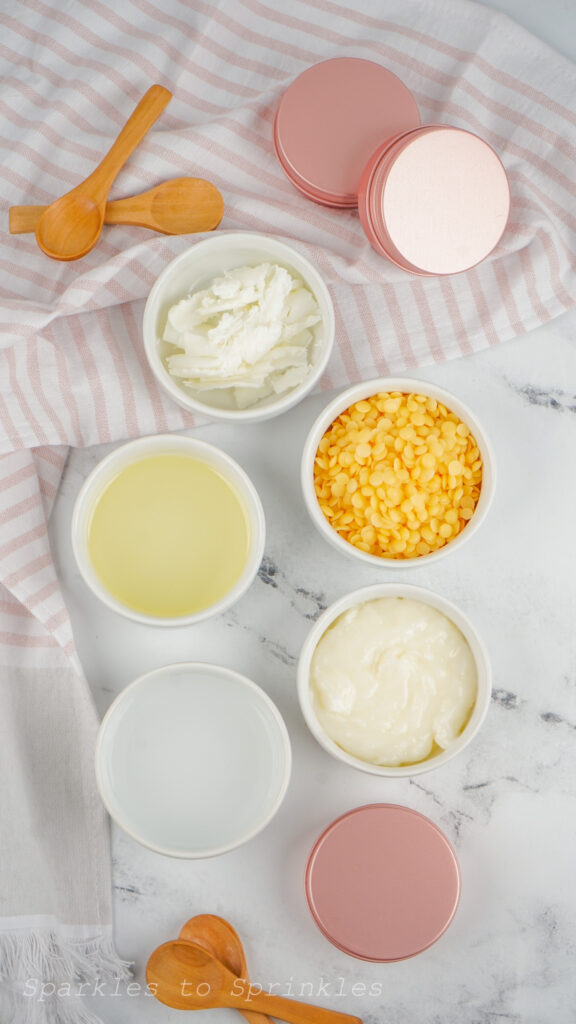
- 2 ½ Cups Water
- 2 Tablespoons Vitamin E Oil
- 2 Tablespoons Coconut Oil
- 1 ½ Tablespoons Beeswax
- 1 Tablespoon Raw Shea Butter
Items Needed:
- 2-Quart Saucepan
- 2-Cup Heat-Proof Glass Measuring Cup
- Rubber Spatula
- Measuring Spoons
- Two 2-Ounce Tin Containers (or one 4 ounce)
How to Make Dog Paw Balm
- Be sure to set up the container you’re using in the spot you want it to rest for the four hours it needs to harden before starting. The contents of the measuring glass will be very hot once they’re ready to pour into the container, so you won’t want to have to handle it once they’re poured in.
- Add the water to a 2-quart saucepan.
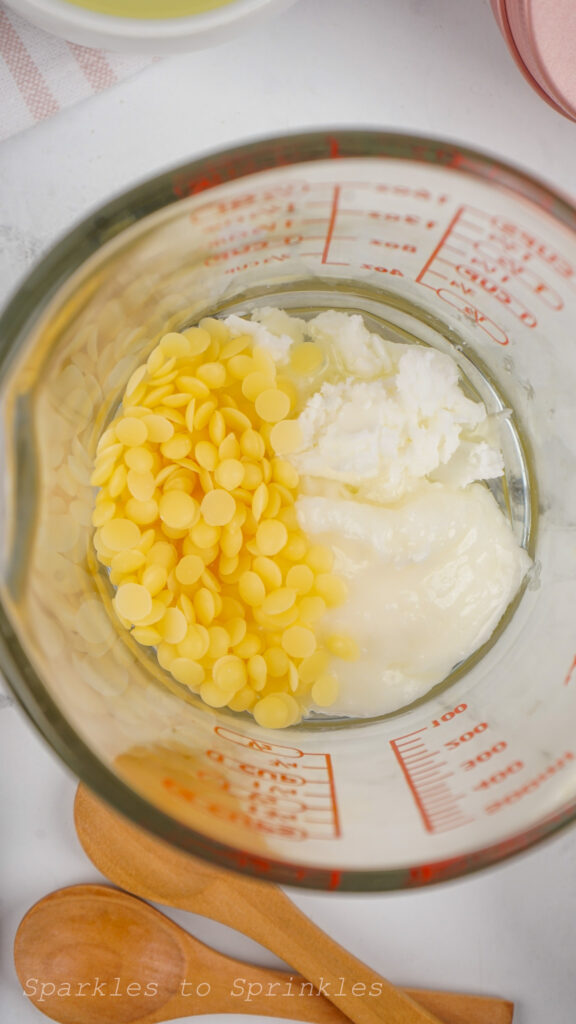
- Add all the ingredients to a 2-cup heat-proof glass measuring cup and place the cup in the saucepan and water, with the handle outside the pan.
- Heat the pan on the stove over medium heat, do not go any hotter.
- The ingredients will slowly start to simmer. Stir randomly to keep ingredients moved around, but it doesn’t have to be stirred constantly.
- Simmer until all ingredients are melted (this usually takes about 10 minutes to achieve).
- The handle of the measuring cup should remain cool enough to handle, if not, be sure to use an oven mitt.
- Pour the contents of the measuring cup, slowly and gently, into the containers of your choosing. Be sure these containers can handle the hot ingredients before using them. I tend to use two 2-ounce tins so drying time is lessened.
- Only fill the tin or container ¾ of the way full then leave your containers to sit for at least 4 hours or until fully set.
- Keep covered and stored in a cool area for up to 2 months.
- To use on your dog, simply take a bit on your fingers (a little goes a long way) and rub it into their paw pads that have been freshly cleaned and dried. Best if used once a day for rougher pads, or 1-2 times a week for maintenance.
Tips, Tricks and FAQs
- We recommend not adding any essential oils to your dog paw balm. Many oils are not safe for pets, and this paw balm works great without it.
- All the ingredients are safe for dogs from the advice of a vet. If your dog has an allergy or medical condition, it is best to ask your vet if this product is safe for them to use. Just because a product is all-natural doesn’t mean your furry friend can’t have a reaction to it.
- If you have dog socks or booties, it is best to put them on your dog after applying the dog balm. Without them, you will notice that your dog may try to lick it all off.
- Raw shea butter is the best option for both the consistency of the balm and the efficacy of the ingredient itself. Although this balm has a pretty long shelf life, it’s shorter than it could be because of the raw shea butter, but it’s worth it for the benefit.
- It is important to use pure ingredients when making this. Ingredients with extra added in may not be safe for dogs.
- This salve works great for hotspots and itchy skin as well, but if your pet is having issues with this, you want to take them to the vet to diagnose the underlying problem. In the meantime, this will help soothe those spots.
- Jojoba oil can be used in place of vitamin E oil if desired.
- You can also use this on cats.
Do Dogs Need Paw Balm
Whether or not dogs need paw balm depends on various factors such as the climate, the surfaces they walk on, and the individual dog’s paw health. Here are some considerations:
- Climate: In extreme weather conditions, such as very hot pavement or icy sidewalks, a dog’s paw pads can be sensitive and may benefit from protection. Paw balm can help moisturize and create a barrier between the paw pads and harsh weather elements.
- Terrain: If your dog frequently walks on rough or abrasive surfaces like gravel, concrete, or hot asphalt, their paw pads may become dry or cracked. Paw balm can provide a protective layer and prevent the pads from becoming too rough.
- Indoor vs. Outdoor Living: Indoor dogs may not need paw balm as much as outdoor dogs. Outdoor dogs are exposed to more varied surfaces and weather conditions that can impact the health of their paw pads.
- Breed and Size: Certain dog breeds, especially those with sensitive or hairless paw pads, may benefit more from paw balm. Additionally, smaller dogs may be more susceptible to environmental factors due to the smaller surface area of their paw pads.
- Existing Paw Conditions: If your dog already has dry or cracked paw pads, a paw balm with moisturizing properties may be helpful in promoting healing and preventing further damage.
It’s essential to note that not all dogs will require paw balm, and some may naturally have more resilient paw pads. Regularly inspect your dog’s paws for signs of dryness, cracking, or irritation. If you’re unsure whether your dog needs paw balm, consult with your veterinarian for personalized advice based on your dog’s specific needs and circumstances.
Is Paw Balm Good for Dogs
Yes, paw balm can be beneficial for dogs, especially in certain situations. Here are some reasons why paw balm can be good for dogs:
- Moisturization: Paw balms often contain moisturizing ingredients that can help prevent and alleviate dryness and cracking of the paw pads. This is particularly important in areas with dry climates or during seasons with harsh weather conditions.
- Protection: Paw balm creates a protective barrier on the paw pads, shielding them from extreme temperatures, rough surfaces, and environmental irritants. This can be especially useful in hot weather where pavement can become very hot or in cold weather when ice and snow can be abrasive.
- Healing: If a dog already has dry or cracked paw pads, certain paw balms may contain ingredients that promote healing. These can include natural oils, vitamins, and other soothing components.
- Prevention: Regular use of paw balm can be a preventive measure, maintaining the health of your dog’s paw pads and reducing the likelihood of issues arising in the first place.
- Comfort: Dogs with sensitive paw pads or those prone to allergies may benefit from the soothing properties of paw balm, making their outdoor activities more comfortable.
It’s important to choose a paw balm specifically designed for dogs and to follow the product’s instructions. If you’re uncertain about whether to use paw balm for your dog, consult with your veterinarian. They can provide guidance based on your dog’s specific needs, health conditions, and the environment in which they live and play.
Storage
Store at room temperature in a sealed container.
If desired, you can always keep it in the fridge so it lasts even longer, but I would warm it up a bit between your fingers before placing it on your dog’s paws so as not to startle them with how cold it is.
Homemade Vicks Rub with Essential Oils
Bug Repellent Mason Jar Luminaries

Dog Paw Balm
If your dog's paws are becoming dry and rough, it's time to make your very own Dog Paw Balm. This homemade dog paw balm balm is crafted with safe, dog-friendly ingredients that are highly beneficial for maintaining paw health. Restore softness and promote overall paw well-being with this easy-to-use, natural remedy specifically formulated for your furry friend.
Ingredients
Instructions
- Be sure to set up the container you’re using in the spot you want it to rest for the four hours it needs to harden before starting. The contents of the measuring glass will be very hot once they’re ready to pour into the container, so you won’t want to have to handle it once they’re poured in.
- Add the water to a 2-quart saucepan.
- Add all the ingredients to a 2-cup heat-proof glass measuring cup and place the cup in the saucepan and water, with the handle outside the pan.
- Heat the pan on the stove over medium heat, do not go any hotter.
- The ingredients will slowly start to simmer. Stir randomly to keep ingredients moved around, but it doesn’t have to be stirred constantly.
- Simmer until all ingredients are melted (this usually takes about 10 minutes to achieve).
- The handle of the measuring cup should remain cool enough to handle, if not, be sure to use an oven mitt.
- Pour the contents of the measuring cup, slowly and gently, into the containers of your choosing. Be sure these containers can handle the hot ingredients before using them. I tend to use two 2-ounce tins so drying time is lessened.
- Only fill the tin or container ¾ of the way full then leave your containers to sit for at least 4 hours or until fully set.
- Keep covered and stored in a cool area for up to 2 months.
- To use on your dog, simply take a bit on your fingers (a little goes a long way) and rub it into their paw pads that have been freshly cleaned and dried. Best if used once a day for rougher pads, or 1-2 times a week for maintenance.
Notes
Items needed:
- 2-Quart Saucepan
- 2-Cup Heat-Proof Glass Measuring Cup
- Rubber Spatula
- Measuring Spoons
- Two 2-Ounce Tin Containers (or one 4 ounce)
I’m Melissa, the imaginative force behind Sparkles to Sprinkles, where creativity comes to life, and sprinkles of joy are scattered generously. Melissa is a proud Jersey girl who found love with a New York boy. As a mom to four wonderful boys and a few fur babies, her journey into the world of blogging began after making the life-changing decision to stay home and raise her children. Previously a dedicated workaholic, Melissa’s blog became her creative outlet and passion project. Inspired by her mother-in-law, a masterful cook renowned for her delicious home-cooked meals and legendary holiday feasts (think mouthwatering sausage stuffing), Melissa honed her culinary skills through a combination of family recipes and countless cooking classes. She often attended these classes with her son Michael, who shared her enthusiasm for cooking from a young age. Melissa’s love for learning extends beyond familiar cuisines, as she enjoys exploring international recipes in hands-on cooking classes. Her blog features a diverse array of recipes, showcasing her expertise with various kitchen appliances such as the Instant Pot, air fryer, Slow Cooker, Ninja Foodi, Instant Vortex Plus, and more. Join Melissa on her culinary adventures as she shares tried-and-true family favorites alongside exciting new discoveries!


