Air Fryer Falafel
Air Fryer Falafel has a nice crispy outside with a soft inside that you will love! It is the perfect middle eastern meal that you can serve with all your favorites.
Air Fryer Falafel
Recently I have been loving everything middle eastern! The other day I shared my homemade hummus recipe which brought me back to how much I love falafel. The only problem is that it is pretty high in fat because they are typically deep fried.
That is why I love this Air Fryer Falafel recipe! It is the healthier version of one of my favorite foods that I pair with pitas and hummus for the perfect weeknight meal everyone raves about.

What is Falafel?
Falafel is chickpeas that are mashed with a variety of spices that are added. This mixture is then formed into balls or discs and either deep fried or in this case air fried. Usually, they are served with delicious vegetables or in pitas.
Air Fryer Falafel

How to Make Air Fryer Falafel
Note: For this recipe, you need to soak the chickpeas one day ahead.
Step 1: (One day ahead): In a large bowl, add the dry chickpeas and water to cover them by about 3 inches. Soak overnight and have in mind that the chickpeas will double in size as they soak, for this reason, choose a bigger container. Cover and place the container inside the refrigerator for 24 hours.
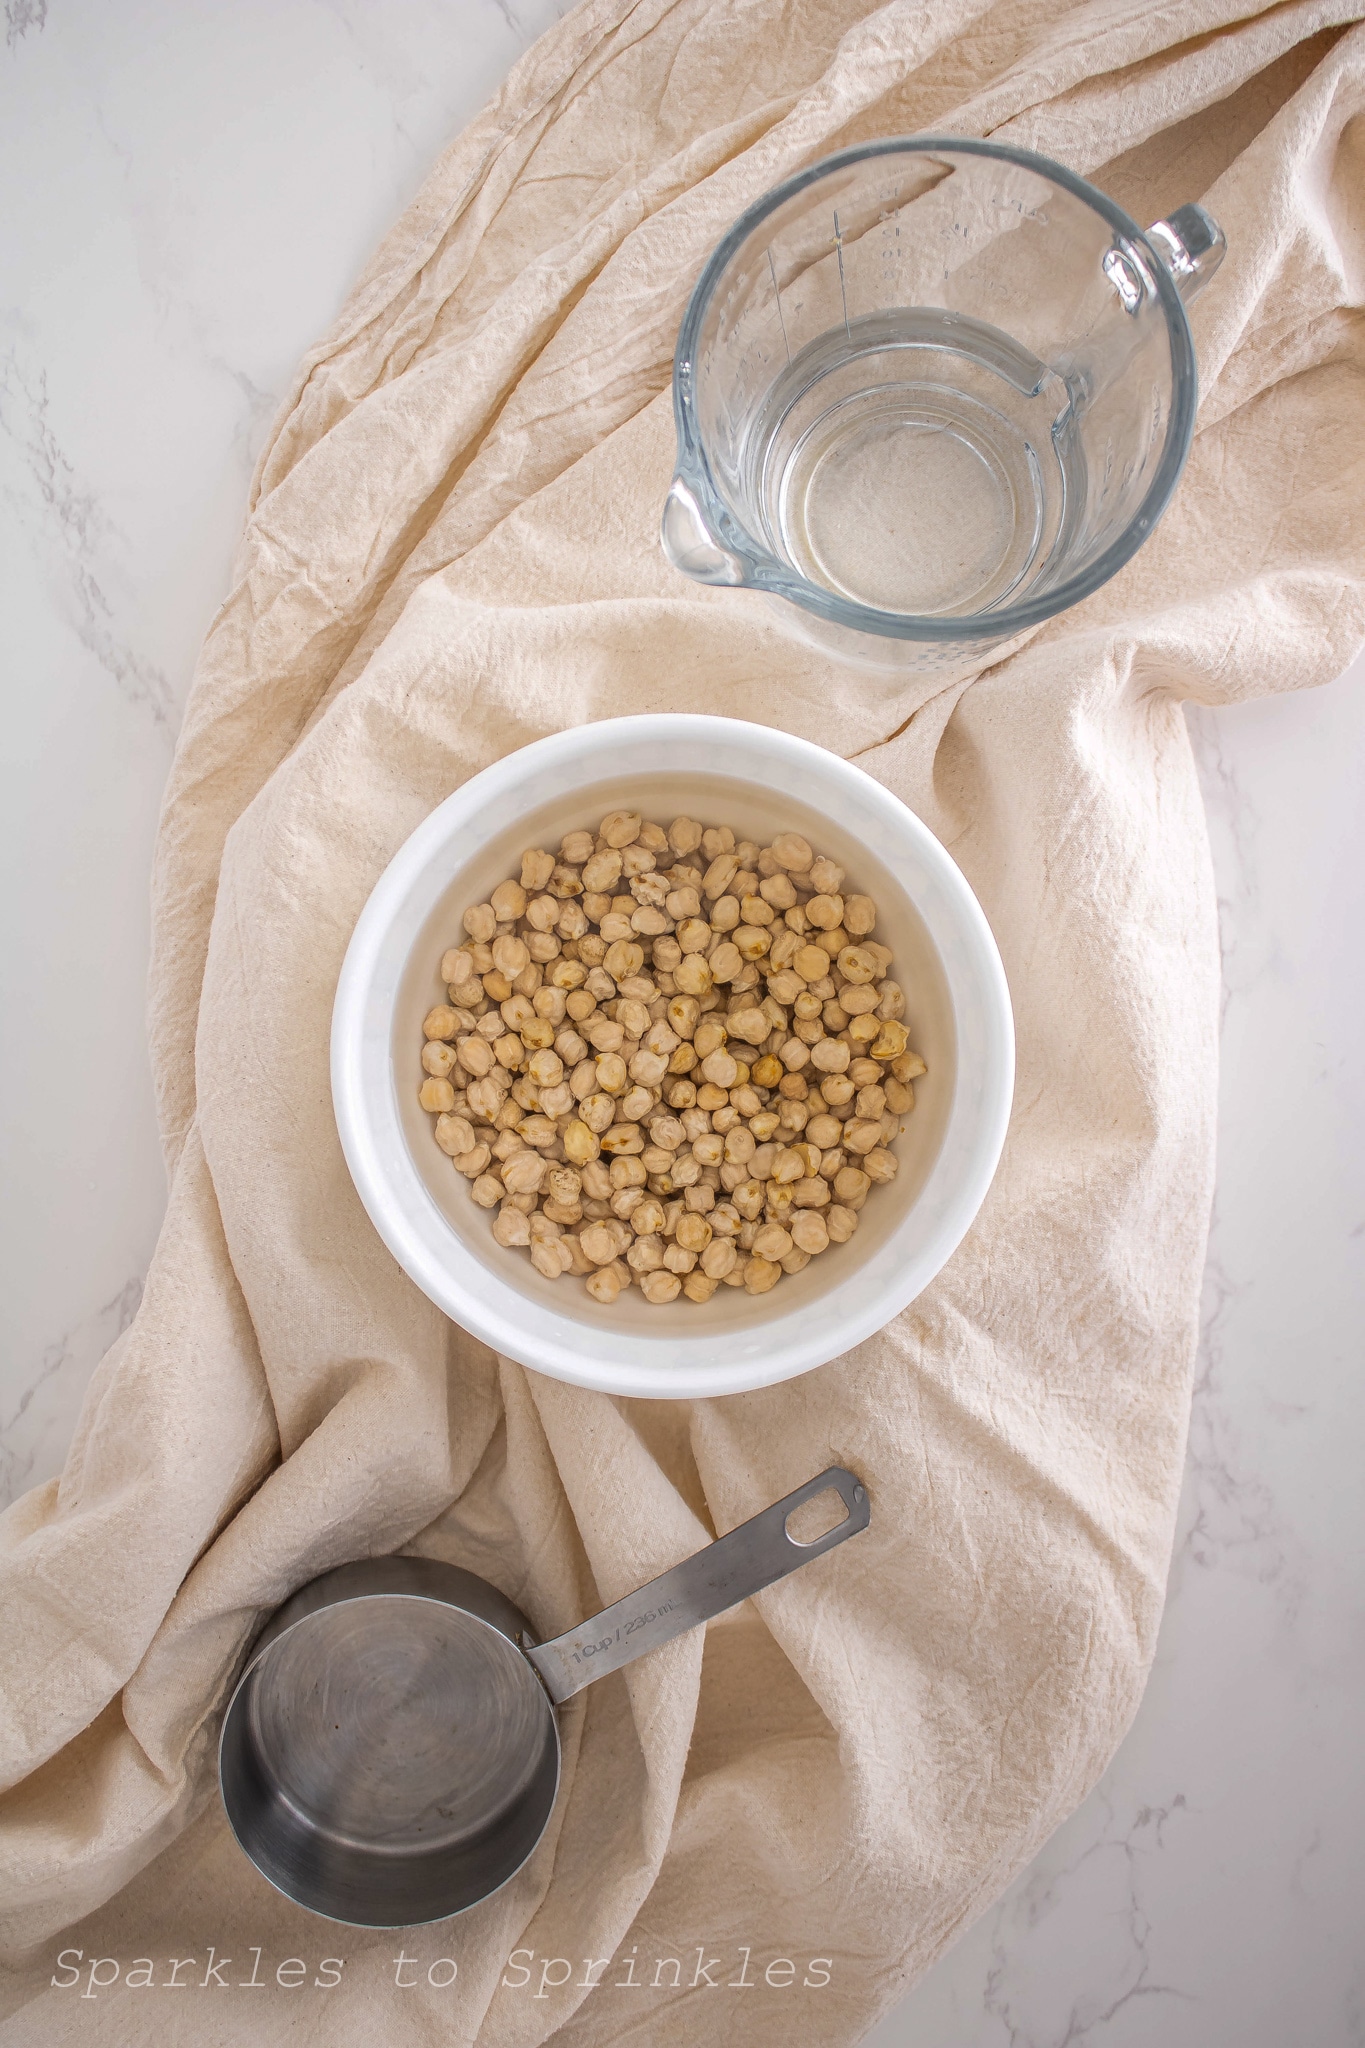

Step 2: (One day before): Remove the chickpeas from the refrigerator, drain them and rinse with running water to remove any skins floating in the water. Leave them draining while preparing the other ingredients.
Step 3: In your food processor, add the drained chickpeas, onion, fresh parsley, fresh cilantro, garlic cloves, chickpea flour, salt, ground cumin, ground coriander, ground black pepper, ground cardamom, and the baking powder.

Step 4: Pulse until you get a smooth consistency.
Note: Pulse several times instead of doing a long pulse. This will help your processor to work properly, and this way you’ll be able to spot big chunks. Use a spatula to remove big chickpea chunks or herbs that are stuck on the food processor walls, and pulse again.
Note: The desired consistency is a smooth mixture, but definitely not a purée. You should be able to spot little chickpea chunks, like a finely minced onion.

Step 5: Using a small ice cream or cookie scoop, make small balls and place them on a baking sheet separately.
Note: The desired consistency should allow you to hold the ball in your hands, and the mixture should hold together without breaking or splitting. In case the balls won’t hold together, you need to process the mixture once again and make sure to get a paste-like consistency. After this step, if the falafel balls won’t hold together, you need to identify the issue: If the mixture is too wet, try adding 1 tbsp of chickpea flour first and test the consistency, if not, add another tablespoon and test once again. If the mixture is too dry, add 1 tbsp (or 2) of water to the mixture and test the consistency.
Note: It is important to keep the balls separated. If you put them next to each other in a bowl, they will stick to each other and the ones at the bottom will deform, and you’ll have a hard time maintaining the ball shape. This is why placing them separated on a baking sheet will make things easier for you and will keep the balls in a nice shape.

Step 6: Place the balls inside the refrigerator for at least 1 hour (preferably 2).
Note: This step is crucial to get a stronger consistency that will help to maintain the shape when the balls are inside the air fryer.
Step 7: Remove the falafel balls from the refrigerator and place them inside the air fryer basket separately.

Step 8: Inside the air fryer basket, brush the falafel balls with olive oil using a basting/pastry brush. Or, you can spray the falafel balls with olive oil spray.
Step 9: Cook the falafel balls at 350 ºF for 10 minutes. Then, remove the air fryer basket and shake it to move the balls around, and cook for 5 more minutes.
Note: If the mixture is well-prepared, the falafel won’t break apart while cooking. When ready, the falafel balls should have a golden brown color on the outside. The perfect falafel is crispy on the outside and soft on the inside.

Step 10: Place the falafel balls in a wire rack and let them cool for 5 minutes, then serve immediately. You can serve falafel alone, or you can also assemble the falafel balls in pita bread with tomato slices, cucumber slices, lettuce & tahini sauce. Enjoy!

Tips Tricks and FAQs
- Be sure you soak your chickpeas for 1 day prior to making this recipe.
- You want to use dry chickpeas. You don’t want to use canned ones because they will not bind correctly.
- I like to shape my Air fryer falafel into balls, but others suggest making discs when cooking them in the air fryer. This is up to your preference.
Storage
You will want to enjoy these right away. I do not recommend storing leftover falafel for later.
You can store uncooked falafel balls in the fridge in an airtight container

Can you make Falafel ahead of time?
You can make uncooked falafel balls and store them for later. Prepare the mixture as directed and place it in the fridge for up to 4 days.
You can also freeze them for up to 3 months.
When you are ready to enjoy, remove the mixture from the fridge, make the falafel balls, and place them in the air fryer.

You will not want to cook the falafel balls ahead of time. If you place these in the fridge after you cook them and try to reheat them they will not have the crispy outside that you are looking for and the inside will be pretty dry.
You want to make and cook the amount that you want to enjoy.
Air Fryer Falafel
Air Fryer Falafel has a nice crispy outside with a soft inside that you will love! It is the perfect middle eastern meal that you can serve with all your favorites.
Ingredients
- 2 cups dry chickpeas (not canned, toasted or cooked)
- 1 small yellow onion, quartered
- 1 cup fresh parsley, chopped
- ½ cup fresh cilantro, chopped
- 4 big garlic cloves, peeled
- 2 tbsp chickpea flour
- 1 tsp salt
- 1 ½ tsp ground cumin
- 1 ½ tsp ground coriander
- 1 tsp ground black pepper
- ⅛ tsp ground cardamom
- 1 tsp baking powder
- 2 tbsp olive oil or olive oil spray
Instructions
Step 1: (One day ahead): In a large bowl, add the dry chickpeas and water to cover them by about 3 inches. Soak overnight and have in mind that the chickpeas will double in size as they soak, for this reason, choose a bigger container. Cover and place the container inside the refrigerator for 24 hours.
Step 2: (One day before): Remove the chickpeas from the refrigerator, drain them and rinse with running water to remove any skins floating in the water. Leave them draining while preparing the other ingredients.
Step 3: In your food processor, add the drained chickpeas, the herbs, and spices, along with the baking powder.
Step 4: Pulse until you get a smooth consistency.
*Note: Pulse several times instead of doing a long pulse. This will help your processor to work properly, and this way you’ll be able to spot big chunks. Use a spatula to remove big chickpea chunks or herbs that are stuck on the food processor walls, and pulse again.
**Note: The desired consistency is a smooth mixture, but definitely not a purée. You should be able to spot little chickpea chunks, like a finely minced onion.
Step 5: Using a small ice-cream or cookie scoop, make small balls and place them on a baking sheet separately.
***Note: The desired consistency should allow you to hold the ball in your hands, and the mixture should hold together without breaking or splitting. In case the balls won't hold together, you need to process the mixture once again and make sure to get a paste-like consistency. After this step, if the falafel balls won’t hold together, you need to identify the issue: If the mixture is too wet, try adding 1 tbsp of chickpea flour first and test the consistency, if not, add another tablespoon and test once again. If the mixture is too dry, add 1 tbsp (or 2) of water to the mixture and test the consistency.
****Note: It is important to keep the balls separated. If you put them next to each other in a bowl, they will stick to each other and the ones at the bottom will deform, and you’ll have a hard time maintaining the ball shape. This is why placing them separated on a baking sheet will make things easier for you and will keep the balls in a nice shape.
Step 6: Place the balls inside the refrigerator for at least 1 hour (preferably 2).
*****Note: This step is crucial to get a stronger consistency that will help to maintain the shape when the balls are inside the air fryer.
Step 7: Remove the falafel balls from the refrigerator and place them inside the air fryer basket separately.
Step 8: Inside the air fryer basket, brush the falafel balls with olive oil using a basting/pastry brush. Or, you can spray the falafel balls with olive oil spray.
Step 9: Cook the falafel balls at 350 ºF for 10 minutes. Then, remove the air fryer basket and shake it to move the balls around and cook for 5 more minutes.
******Note: If the mixture is well-prepared, the falafel won’t break apart while cooking. When ready, the falafel balls should have a golden brown color on the outside. The perfect falafel is crispy on the outside and soft on the inside.
Step 10: Place the falafel balls in a wire rack and let them cool for 5 minutes, then serve immediately. You can serve falafel alone, or you can also assemble the falafel balls in pita bread with tomato slices, cucumber slices, lettuce & tahini sauce. Enjoy!
Notes
Servings: 32 falafel balls
Nutrition Information:
Yield:
32Serving Size:
1Amount Per Serving: Calories: 63Total Fat: 2gSaturated Fat: 0gTrans Fat: 0gUnsaturated Fat: 2gCholesterol: 0mgSodium: 93mgCarbohydrates: 9gFiber: 2gSugar: 1gProtein: 3g
I’m Melissa, the imaginative force behind Sparkles to Sprinkles, where creativity comes to life, and sprinkles of joy are scattered generously. Melissa is a proud Jersey girl who found love with a New York boy. As a mom to four wonderful boys and a few fur babies, her journey into the world of blogging began after making the life-changing decision to stay home and raise her children. Previously a dedicated workaholic, Melissa’s blog became her creative outlet and passion project. Inspired by her mother-in-law, a masterful cook renowned for her delicious home-cooked meals and legendary holiday feasts (think mouthwatering sausage stuffing), Melissa honed her culinary skills through a combination of family recipes and countless cooking classes. She often attended these classes with her son Michael, who shared her enthusiasm for cooking from a young age. Melissa’s love for learning extends beyond familiar cuisines, as she enjoys exploring international recipes in hands-on cooking classes. Her blog features a diverse array of recipes, showcasing her expertise with various kitchen appliances such as the Instant Pot, air fryer, Slow Cooker, Ninja Foodi, Instant Vortex Plus, and more. Join Melissa on her culinary adventures as she shares tried-and-true family favorites alongside exciting new discoveries!