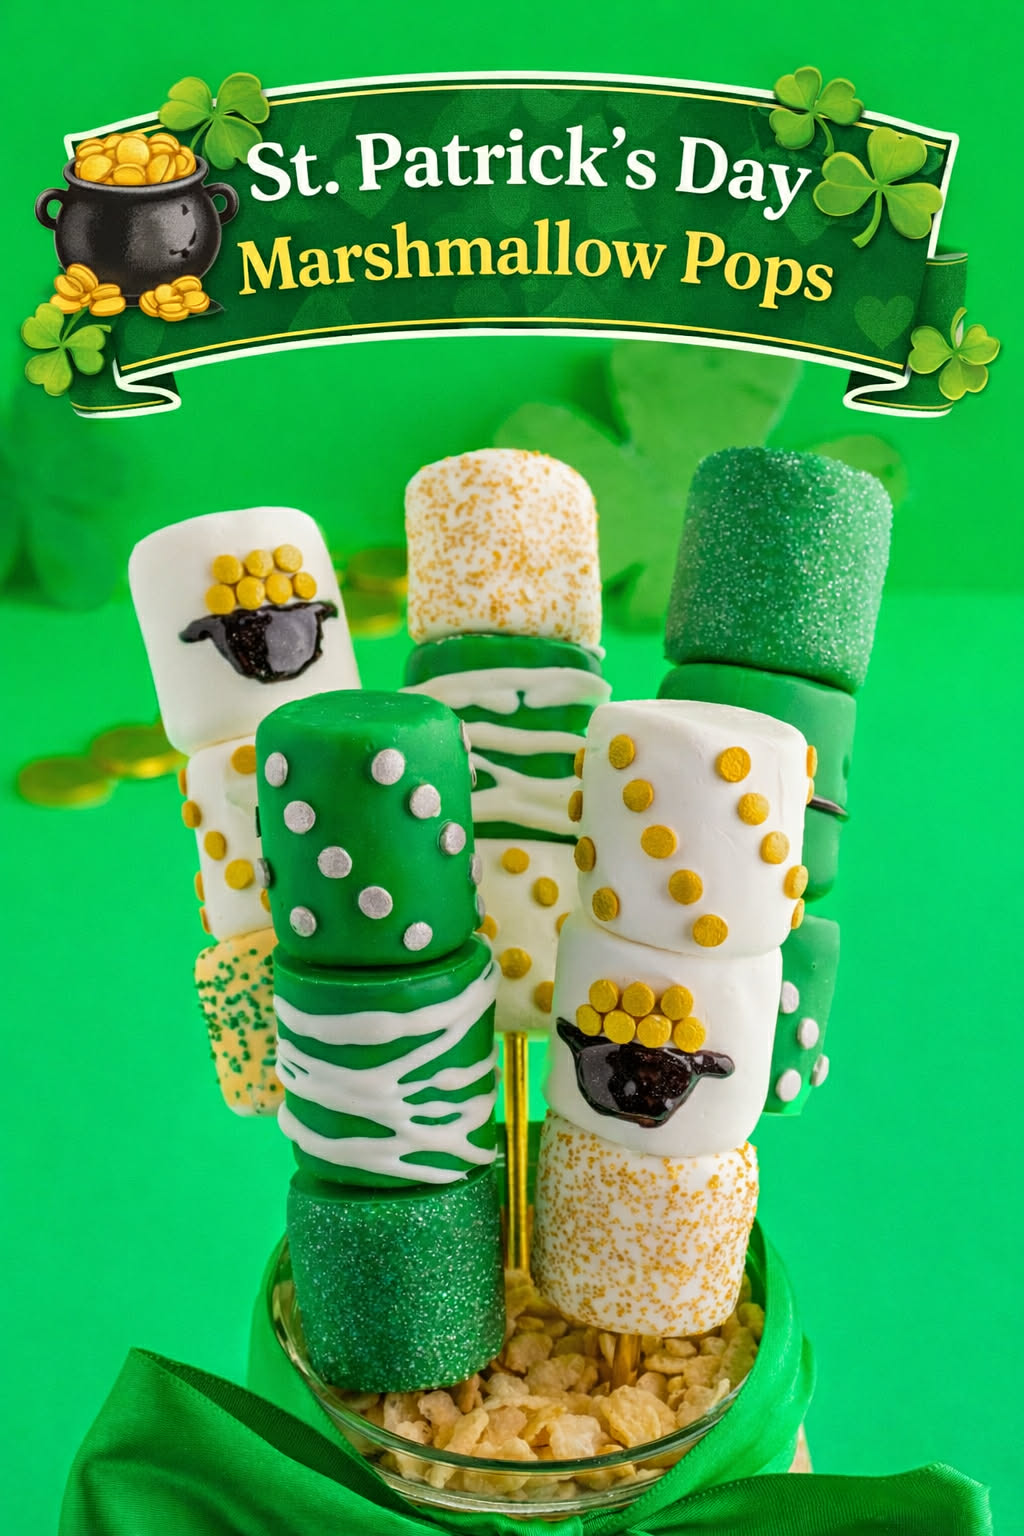
St. Patrick’s Day Marshmallow Pops – A Fun & Festive Treat
If you’re looking for a fun and festive St. Patrick’s Day dessert, these St. Patrick’s Day Marshmallow Pops are just the thing! Dipped in vibrant green and white chocolate, decorated with sprinkles, edible glitter, and even leprechaun belts, these adorable marshmallow pops are as fun to make as they are to eat. Whether you’re hosting a party, sending treats to school, or just celebrating at home, these easy no-bake treats will add a magical touch to your holiday spread.

St. Patrick’s Day Marshmallow Pops
One of the best parts about these marshmallow pops is how creative you can get with the decorations. Each pop is like a little piece of edible artwork—a mix of shimmering gold, sparkling sugar, and playful designs like leprechaun belts and pots of gold. Kids will love decorating their own, and you’ll have just as much fun making them! No fancy baking skills required—just dip, decorate, and enjoy!
Perfect for Parties & Gifting
These marshmallow pops are the ultimate St. Patrick’s Day treat—they’re festive, bite-sized, and easy to package up as gifts or party favors. Arrange them in a vase for a fun centerpiece, wrap them in clear treat bags for a cute party favor, or just enjoy them straight off the stick. No matter how you serve them, they’ll bring plenty of lucky smiles to your celebration!

What You Will Love About This Recipe
No Baking Required – Just dip, decorate, and enjoy!
Super Fun to Make – Get creative with sprinkles, edible glitter, and food gel.
Perfect for Parties – Great for St. Patrick’s Day celebrations, school treats, and gifts.
Festive & Colorful – These marshmallow pops add a bright and cheerful touch to any dessert table.

Ingredients and Supplies
- Lollipop sticks.
- Styrofoam block.
- White chocolate or candy melts. I used candy melts because the color always comes out perfect! But if you really want that white chocolate taste, melt down some chocolate and dye it your preferred color.
- Marshmallows. Regular sized, not the mini’s!
- Gold & silver confetti sprinkles.
- Gold, silver & green sanding sugar.
- Gold food color spray.
- Black food sparkle gel.

How to make St. Patrick’s Day Marshmallow Pops
- Line a baking sheet with parchment paper. Set aside.
- In a small, microwaveable bowl, melt 1 – 1 ½ cups of one color candy melts according to package instructions. Do not overheat. Once candy is smooth, put one marshmallow on a stick (stick can be poked all the way through except for the marshmallow you plan to be on top).

- Dip the marshmallow into the candy melts at a 45° angle, twisting the stick until the marshmallow is fully covered. Gently tap the stick on the edge of the bowl to get rid of excess candy.


- *If adding sprinkles or sanding sugar, add while candy melts are still wet. This will make them stick once the candy dries. For gel or drizzling, add once candy is dry.
- Once a marshmallow is ready to dry, carefully remove it from the stick (using scissors works great) and set it on the parchment paper, the side with the hole facing upwards.


- If you’d like the marshmallow to have a smooth top, put the stick into the styrofoam for the marshmallow to dry.
- Repeat all steps again with the other color of candy melts.
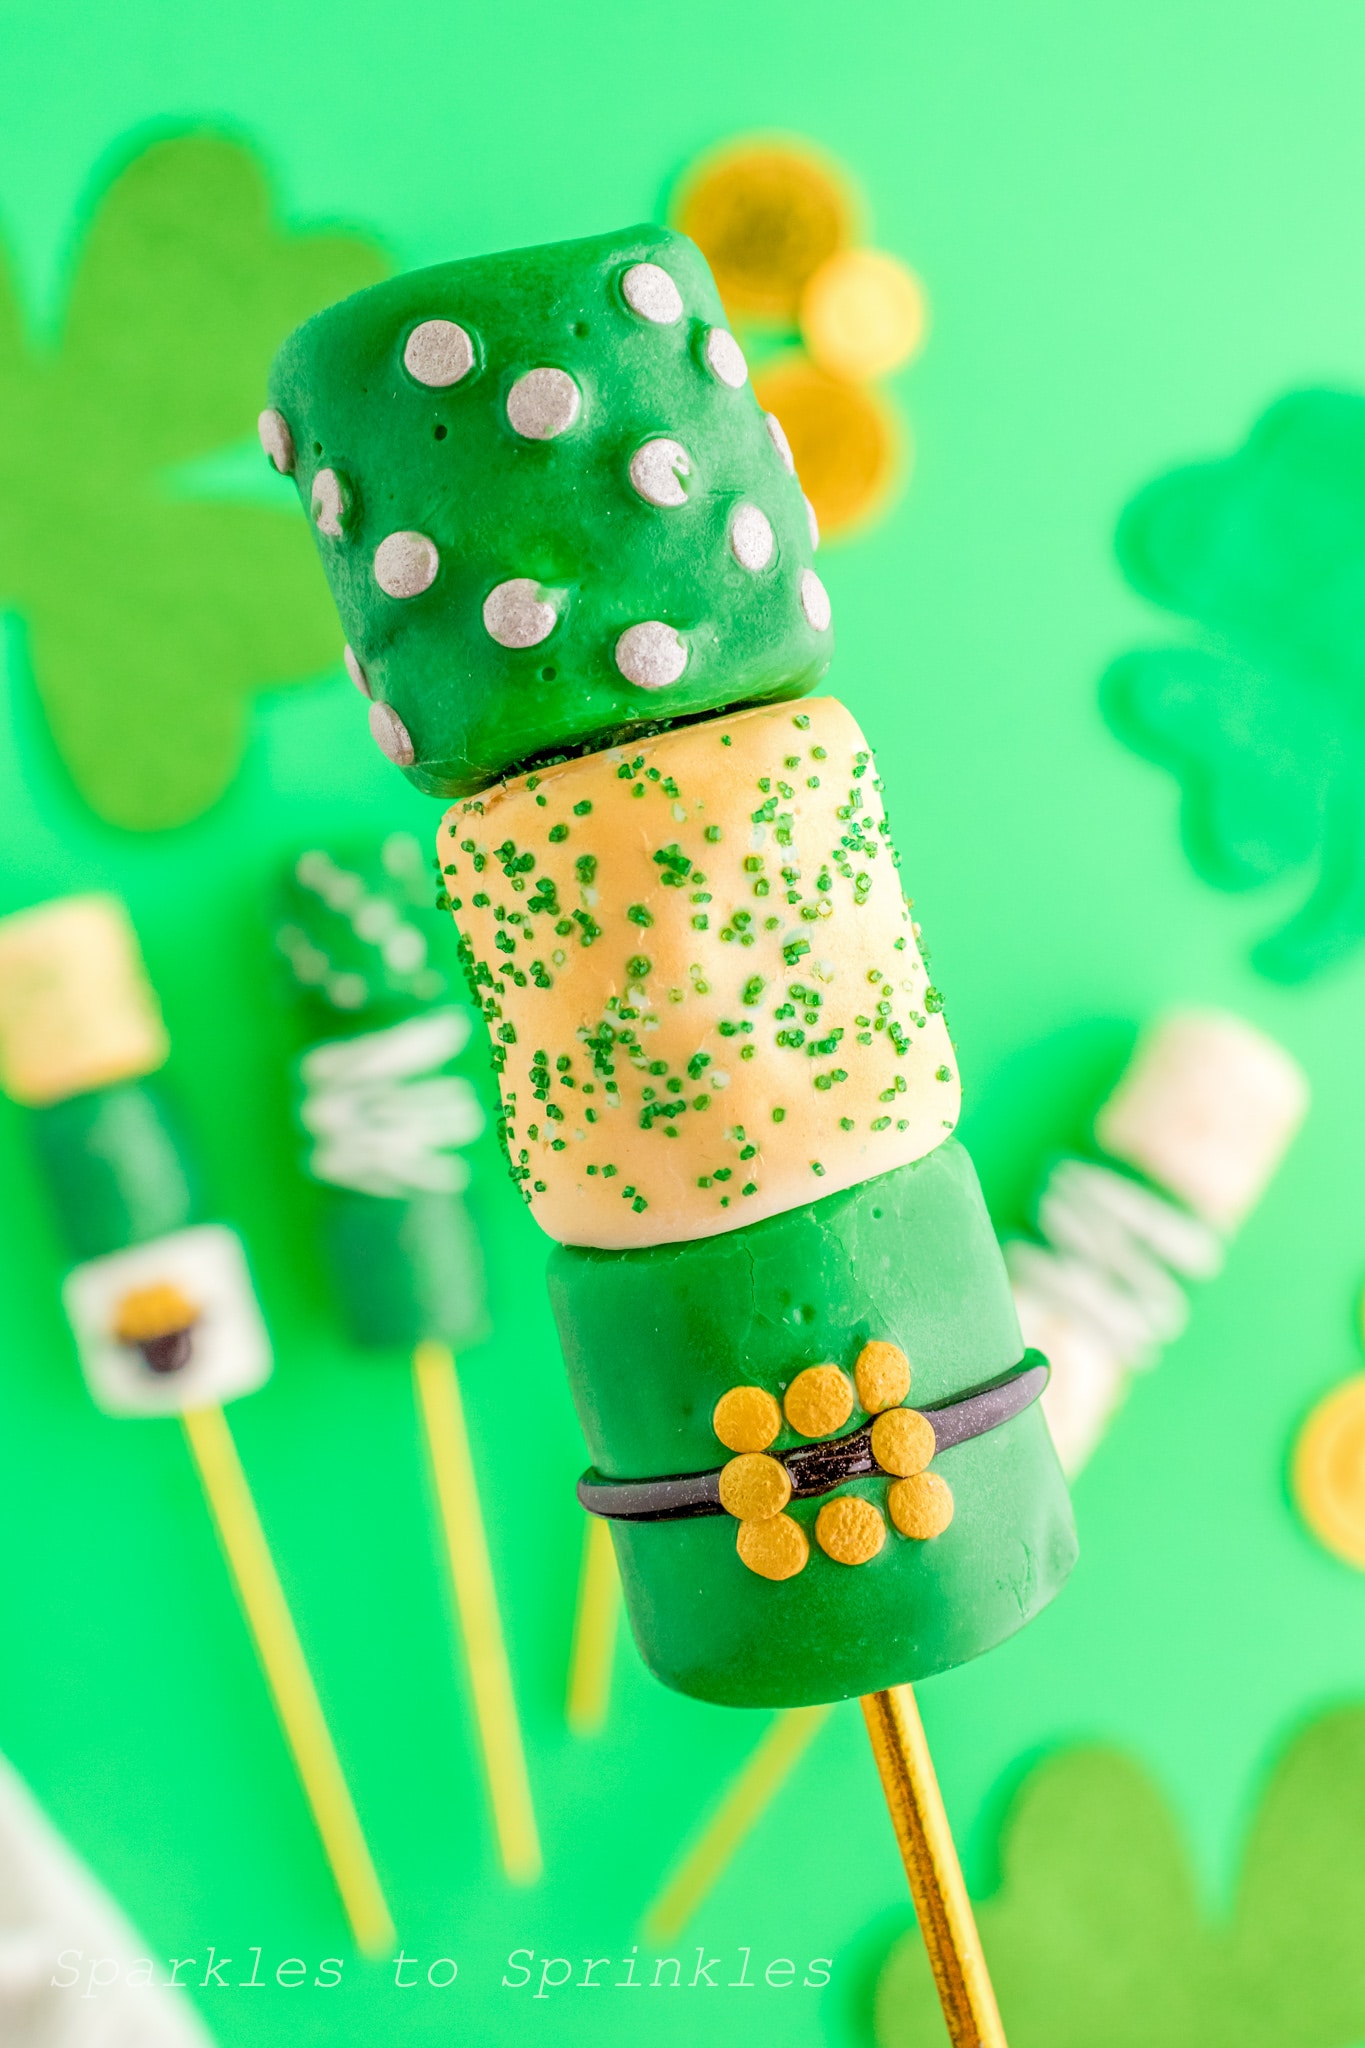
- Once all marshmallows are completely dried and decorated, assemble 3 on each stick and eat!

How to make each marshmallow:
Green marshmallows:
- White candy melt drizzle
- Silver diagonal confetti sprinkles
- Silver sanding sugar
- Leprechaun Belt: Gold confetti sprinkles with black food gel (For the buckle, add 3 gold confetti sprinkles on top and bottom of where black belt line would be while candy is wet. Once dry, draw the black belt line and add the remaining 2 gold sprinkles to complete).
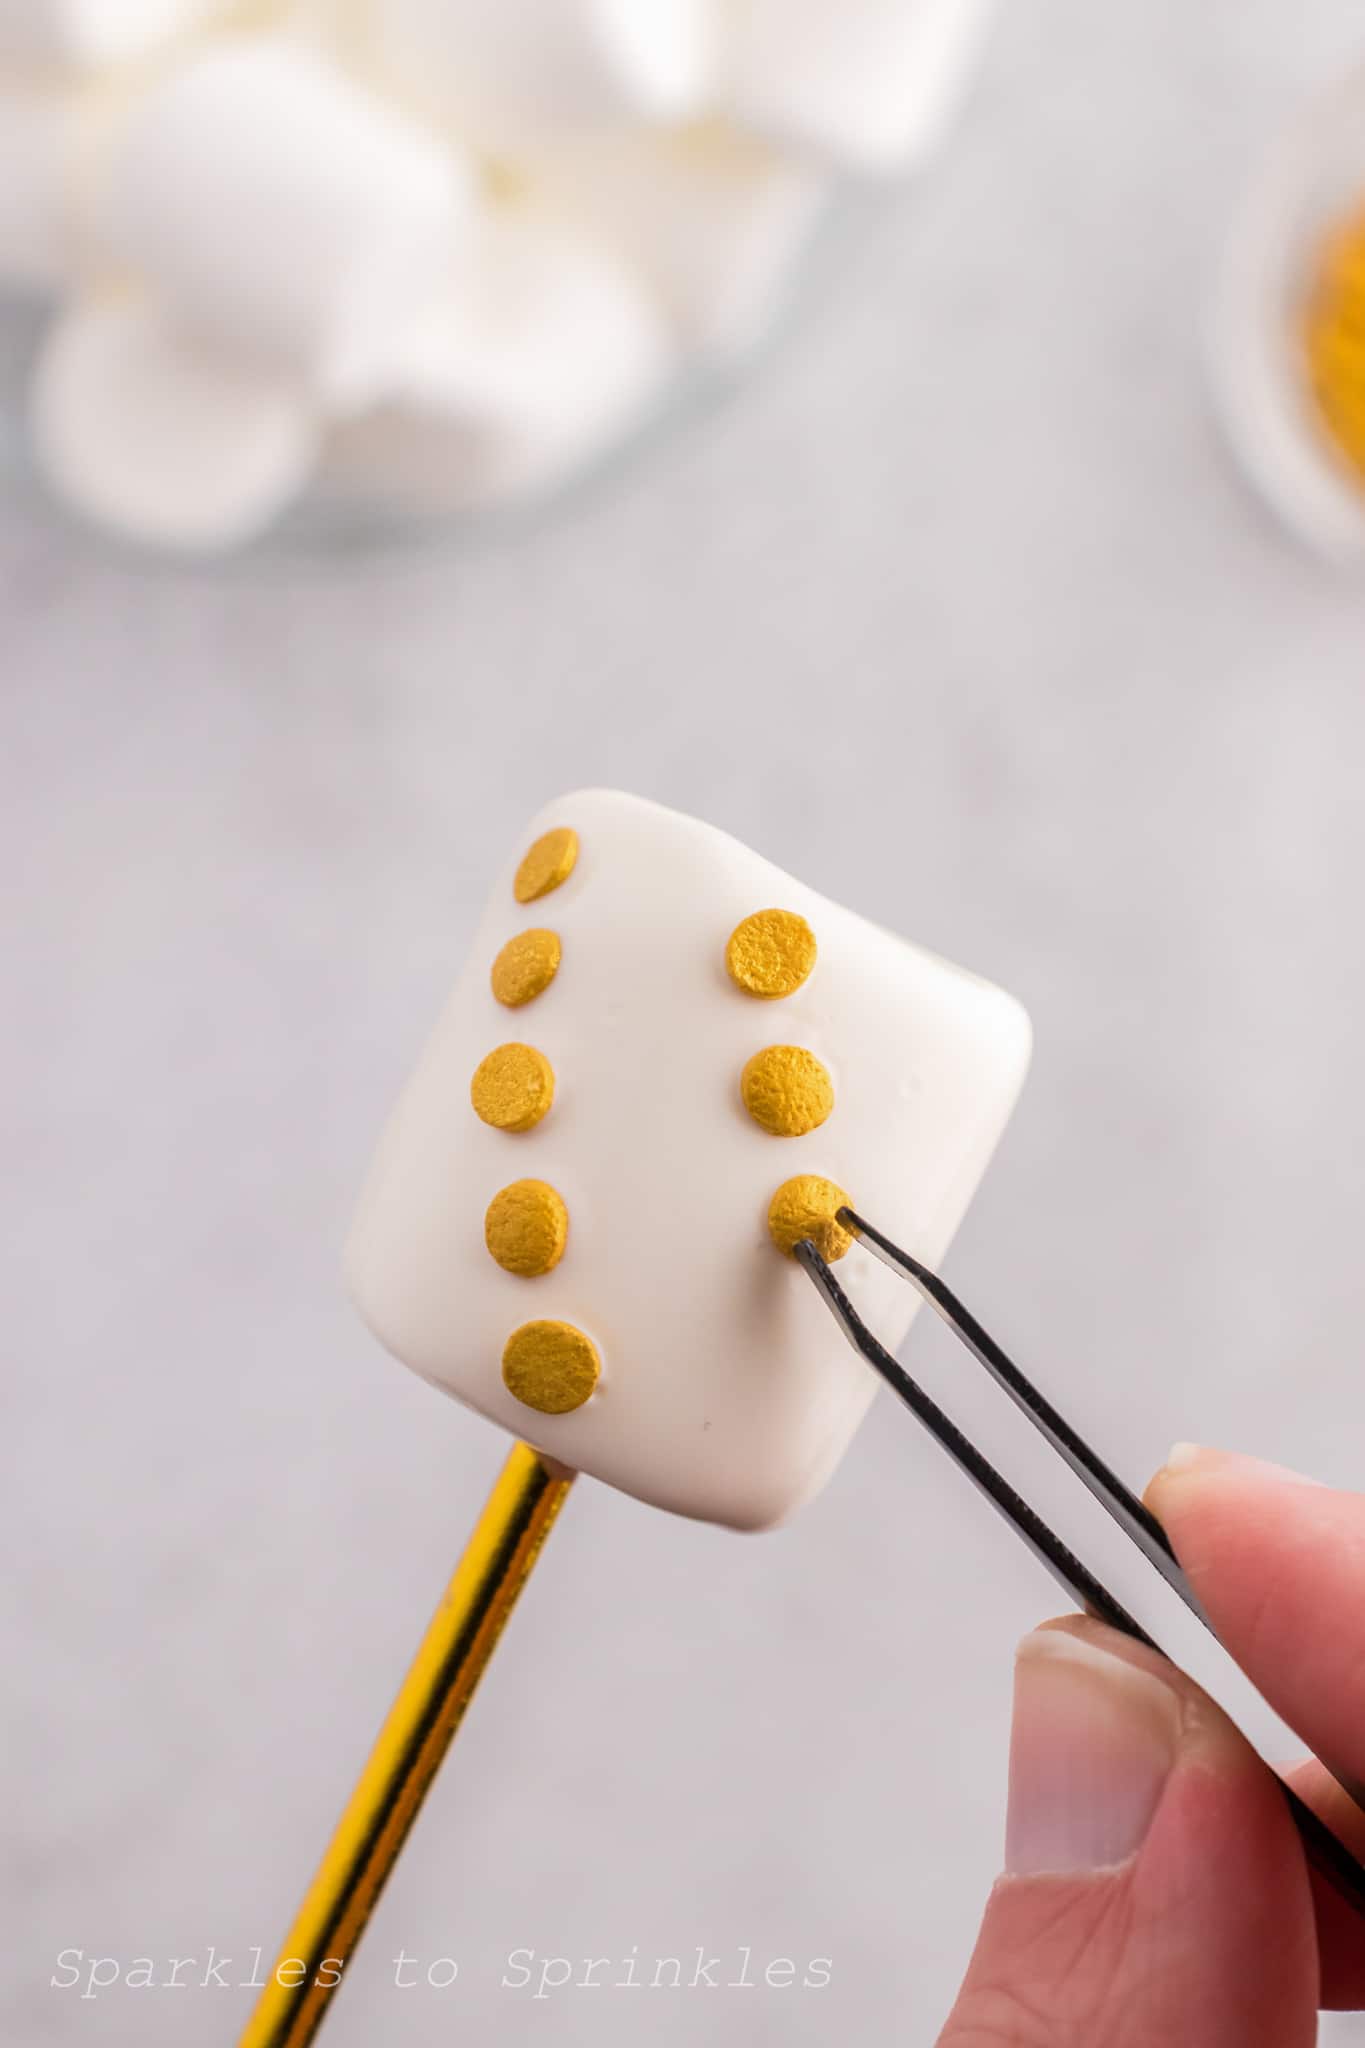
White marshmallows:
- Gold diagonal confetti sprinkles
- Gold sanding sugar
- Gold food color spray with green sanding sugar
- Pot of Gold: Black food gel and gold confetti sprinkles (done when candy is dry, you can use a dot of black food gel on the back of the sprinkle to make it stick).

Tips & Tricks
- ✔ Don’t Overheat the Candy Melts – Melt them in short intervals, stirring in between to keep the texture smooth.
- ✔ Use a Styrofoam Block – This helps the marshmallows dry evenly without smudging the decorations.
- ✔ Add Sprinkles While Wet – Sprinkles and sanding sugar will stick best when the candy melts are still tacky.
- ✔ Let Gel Designs Dry Completely – If adding details like leprechaun belts, let them fully set before handling.

FAQs

St. Patrick’s Day Marshmallow Pops
Marshmallow Pops are a simple yet elegant recipe that will make any novice look like a professional!
Ingredients
- 24 regular sized marshmallows
- 1 (12-ounce) bag green candy melts (I uised Wilton)
- 1 (12-ounce) bag white candy melts (I used Wilton)
- Gold & silver confetti sprinkles
- Gold, silver & green sanding sugar
- Gold food color spray
- Black food sparkle gel
- Supplies:
- 8 long wooden/lollipop sticks (I used gold colored sticks for the final products, and some white sticks to help with dipping)
- Styrofoam block/half sphere
Instructions
- Line a baking sheet with parchment paper. Set aside.
- In a small, microwaveable bowl, melt 1 - 1 ½ cups of one color candy melts according to package instructions. Do not overheat. Once the candy is smooth, put one marshmallow on a stick (stick can be poked all the way through except for the marshmallow you plan to be on top).
- Dip the marshmallow into the candy melts at a 45° angle, twisting the stick until the marshmallow is fully covered. Gently tap the stick on the edge of the bowl to get rid of excess candy.
- If adding sprinkles or sanding sugar, add while candy melts are still wet. This will make them stick once the candy dries. For gel or drizzling, add once the candy is dry.
- Once a marshmallow is ready to dry, carefully remove it from the stick (using scissors works great) and set it on the parchment paper, the side with the hole facing upwards.
- If you’d like the marshmallow to have a smooth top, put the stick into the styrofoam for the marshmallow to dry.
- Repeat all steps again with the other color of candy melts.
- Once all marshmallows are completely dried and decorated, assemble 3 on each stick and eat!
How to make each marshmallow:
Green marshmallows:
- White candy melt drizzle
- Silver diagonal confetti sprinkles
- Silver sanding sugar
- Leprechaun Belt: Gold confetti sprinkles with black food gel (For the buckle, add 3 gold confetti sprinkles on top and bottom of where black belt line would be while candy is wet. Once dry, draw the black belt line and add the remaining 2 gold sprinkles to complete).
White marshmallows:
- Gold diagonal confetti sprinkles
- Gold sanding sugar
- Gold food color spray with green sanding sugar
- Pot of Gold: Black food gel and gold confetti sprinkles (done when candy is dry, you can use a dot of black food gel on the back of the sprinkle to make it stick).
Notes
Makes 24 Marshmallows
Nutrition Information:
Yield:
24Serving Size:
1Amount Per Serving: Calories: 34Total Fat: 0gSaturated Fat: 0gTrans Fat: 0gUnsaturated Fat: 0gCholesterol: 0mgSodium: 7mgCarbohydrates: 9gFiber: 0gSugar: 6gProtein: 0g
I’m Melissa, the imaginative force behind Sparkles to Sprinkles, where creativity comes to life, and sprinkles of joy are scattered generously. Melissa is a proud Jersey girl who found love with a New York boy. As a mom to four wonderful boys and a few fur babies, her journey into the world of blogging began after making the life-changing decision to stay home and raise her children. Previously a dedicated workaholic, Melissa’s blog became her creative outlet and passion project. Inspired by her mother-in-law, a masterful cook renowned for her delicious home-cooked meals and legendary holiday feasts (think mouthwatering sausage stuffing), Melissa honed her culinary skills through a combination of family recipes and countless cooking classes. She often attended these classes with her son Michael, who shared her enthusiasm for cooking from a young age. Melissa’s love for learning extends beyond familiar cuisines, as she enjoys exploring international recipes in hands-on cooking classes. Her blog features a diverse array of recipes, showcasing her expertise with various kitchen appliances such as the Instant Pot, air fryer, Slow Cooker, Ninja Foodi, Instant Vortex Plus, and more. Join Melissa on her culinary adventures as she shares tried-and-true family favorites alongside exciting new discoveries!