
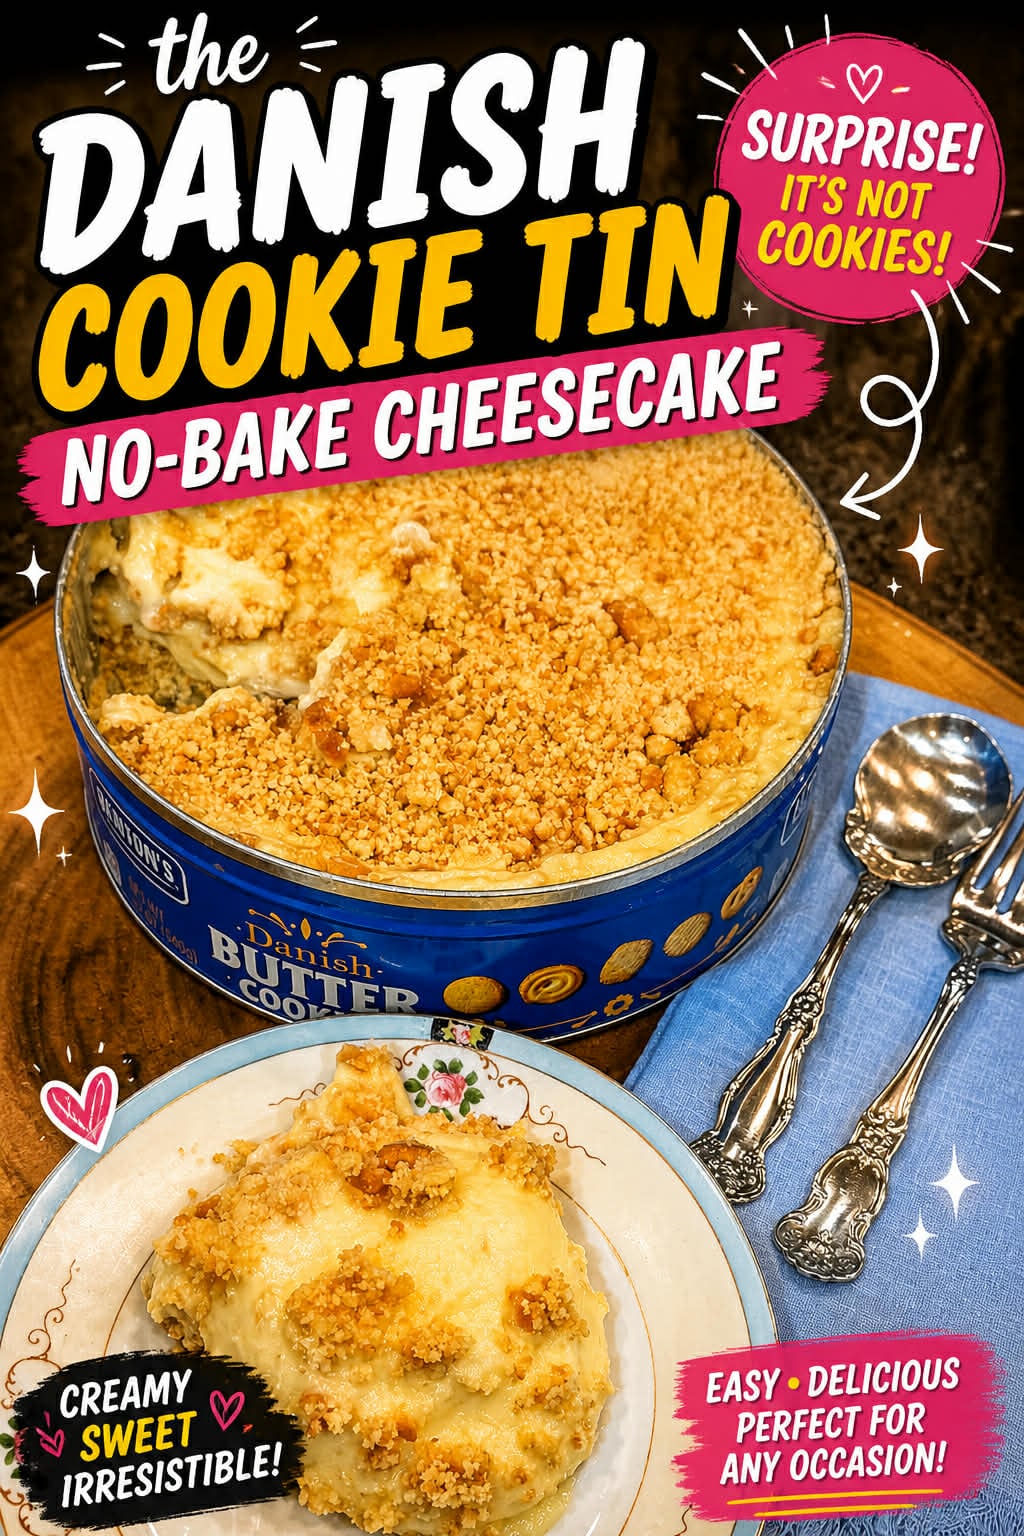
Danish Cookie Tin No Bake Cheesecake
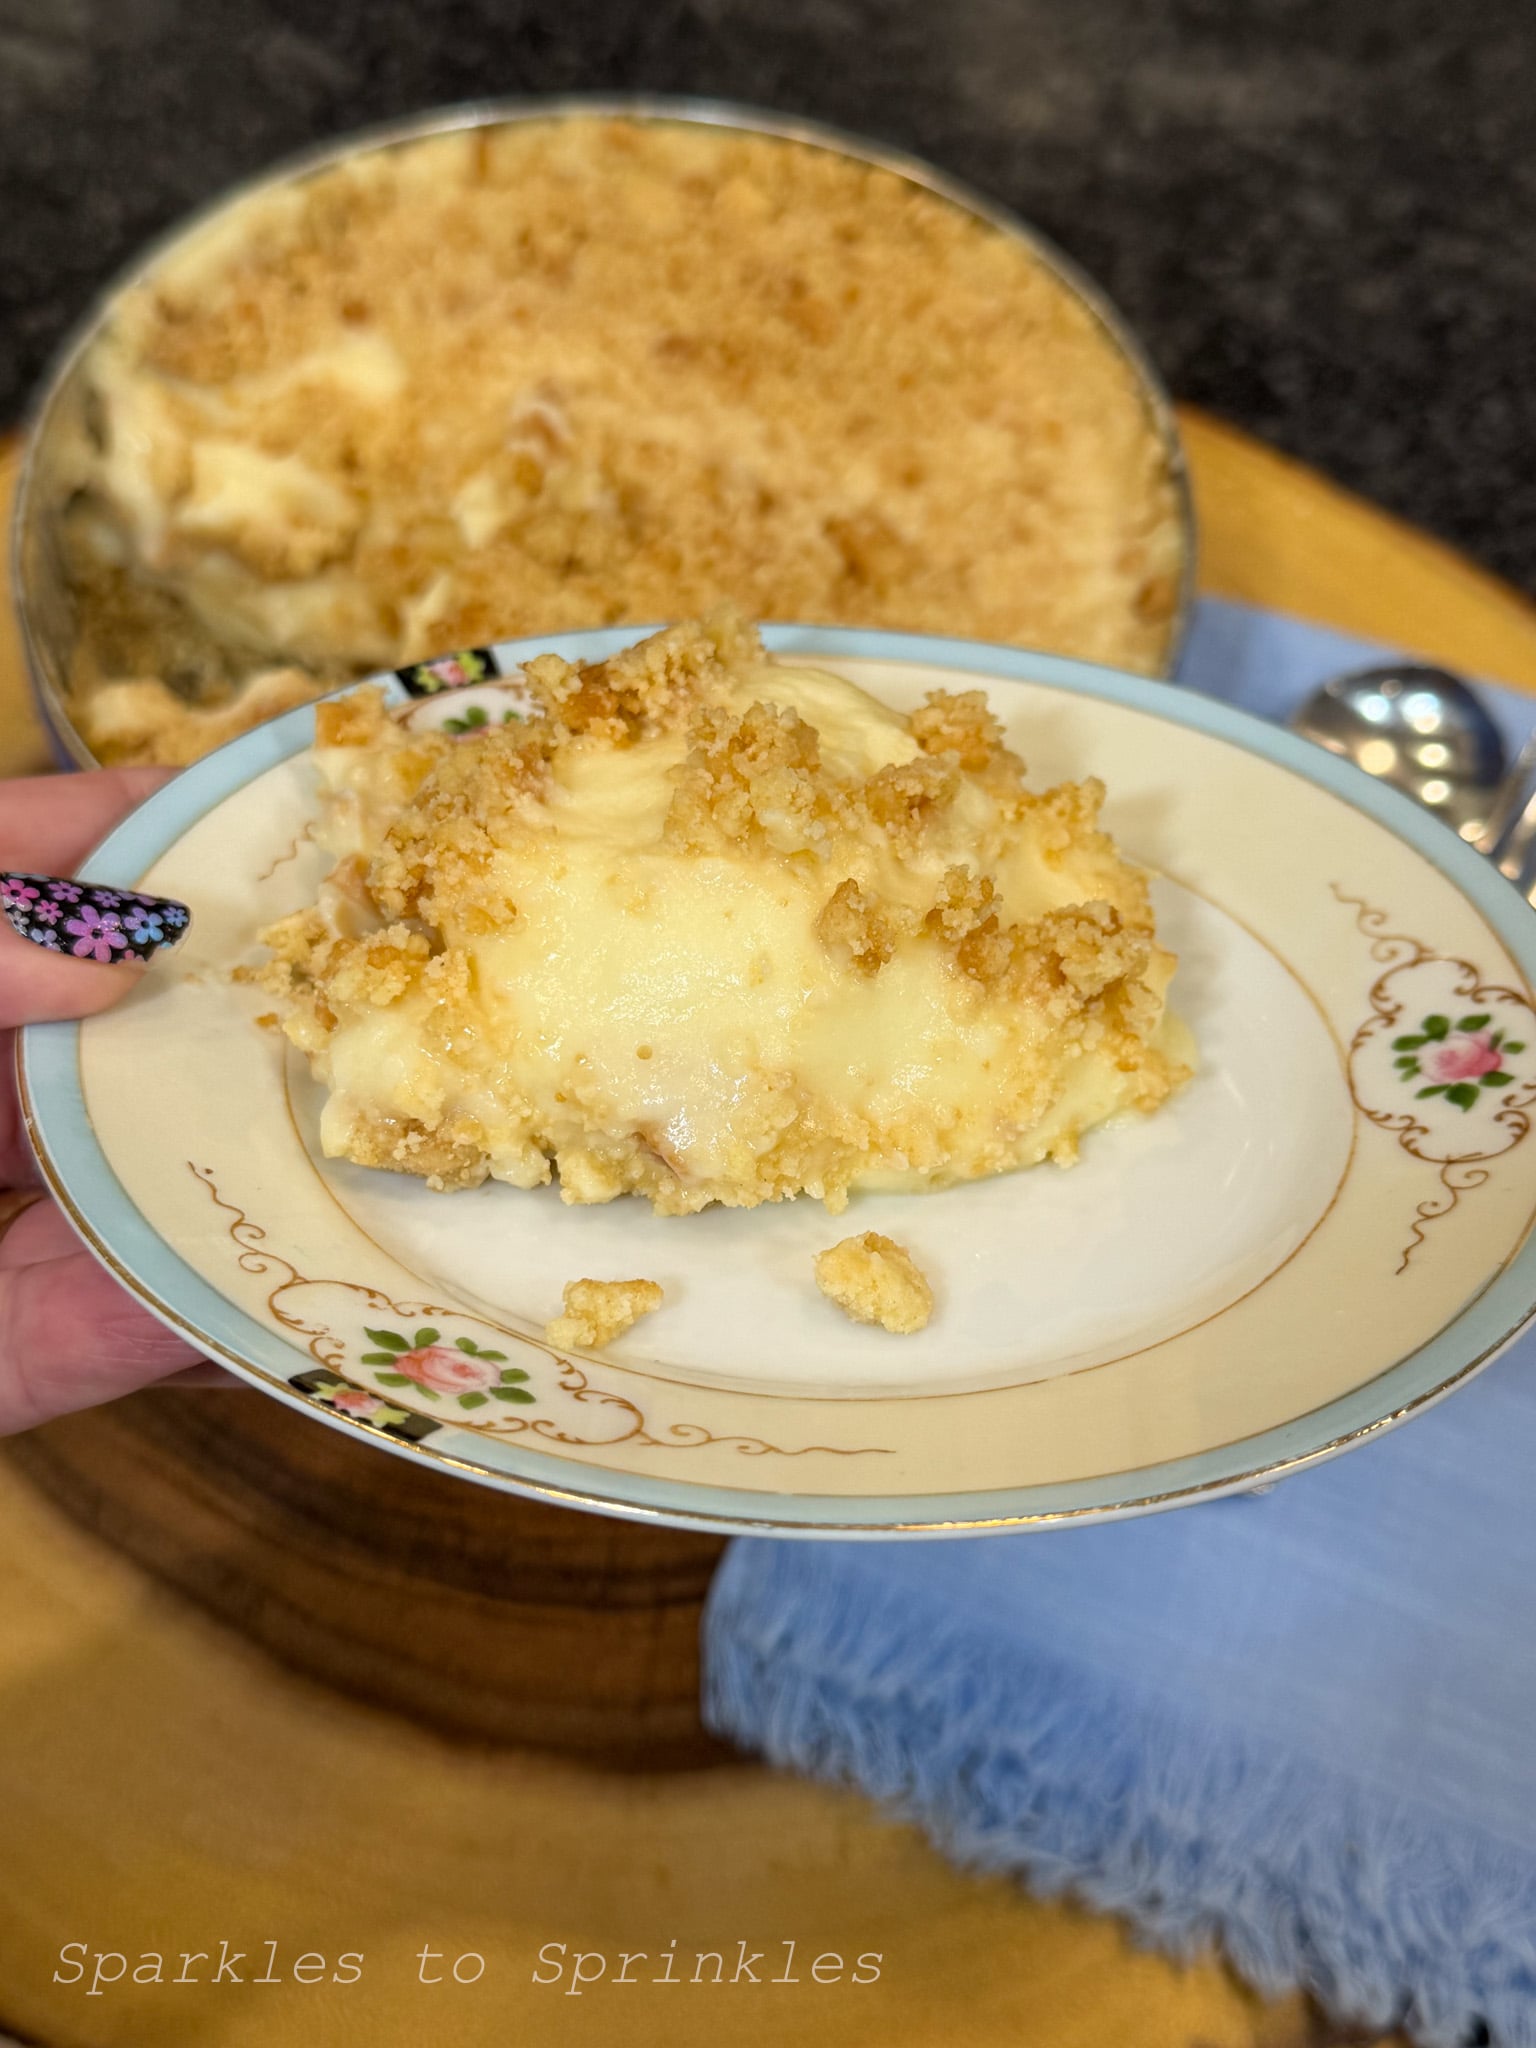
If you have ever opened a Danish cookie tin expecting those classic buttery cookies, this recipe is going to make you smile. This fun Danish Cookie Tin Nov Bake Cheesecake in that nostalgic blue tin is a creamy no-bake cheesecake that completely surprises everyone when they lift the lid. It looks like a simple tin of cookies from the outside, but inside is a smooth cheesecake filling with a buttery cookie crust that tastes just as good as it looks.

Danish Cookie Tin No Bake Cheesecake
This Danish Cookie Tin No Bake Cheesecake has been all over social media, and it is easy to see why. It is simple to make, requires no baking, and has that fun “wait… what?!” moment that people love. If you enjoy easy desserts like [INSERT LINK], no bake treats like [INSERT LINK], or fun viral recipes like [INSERT LINK], this one is going to be right up your alley. It is perfect for holidays, parties, or anytime you want to bring something a little unexpected to the table.
What makes this recipe so popular is the combination of ease and creativity. You are taking something familiar and turning it into a completely different dessert that feels both nostalgic and new. Plus, it is customizable, so you can keep it classic or dress it up with toppings like fruit, chocolate chips, or even pie filling.
What You Will Love About This Recipe
No bake dessert that is quick and easy to make
Uses simple ingredients you can find anywhere
Fun surprise presentation that gets people talking
Perfect for holidays, parties, and gifting
Completely customizable with different toppings
Great make ahead dessert for busy days
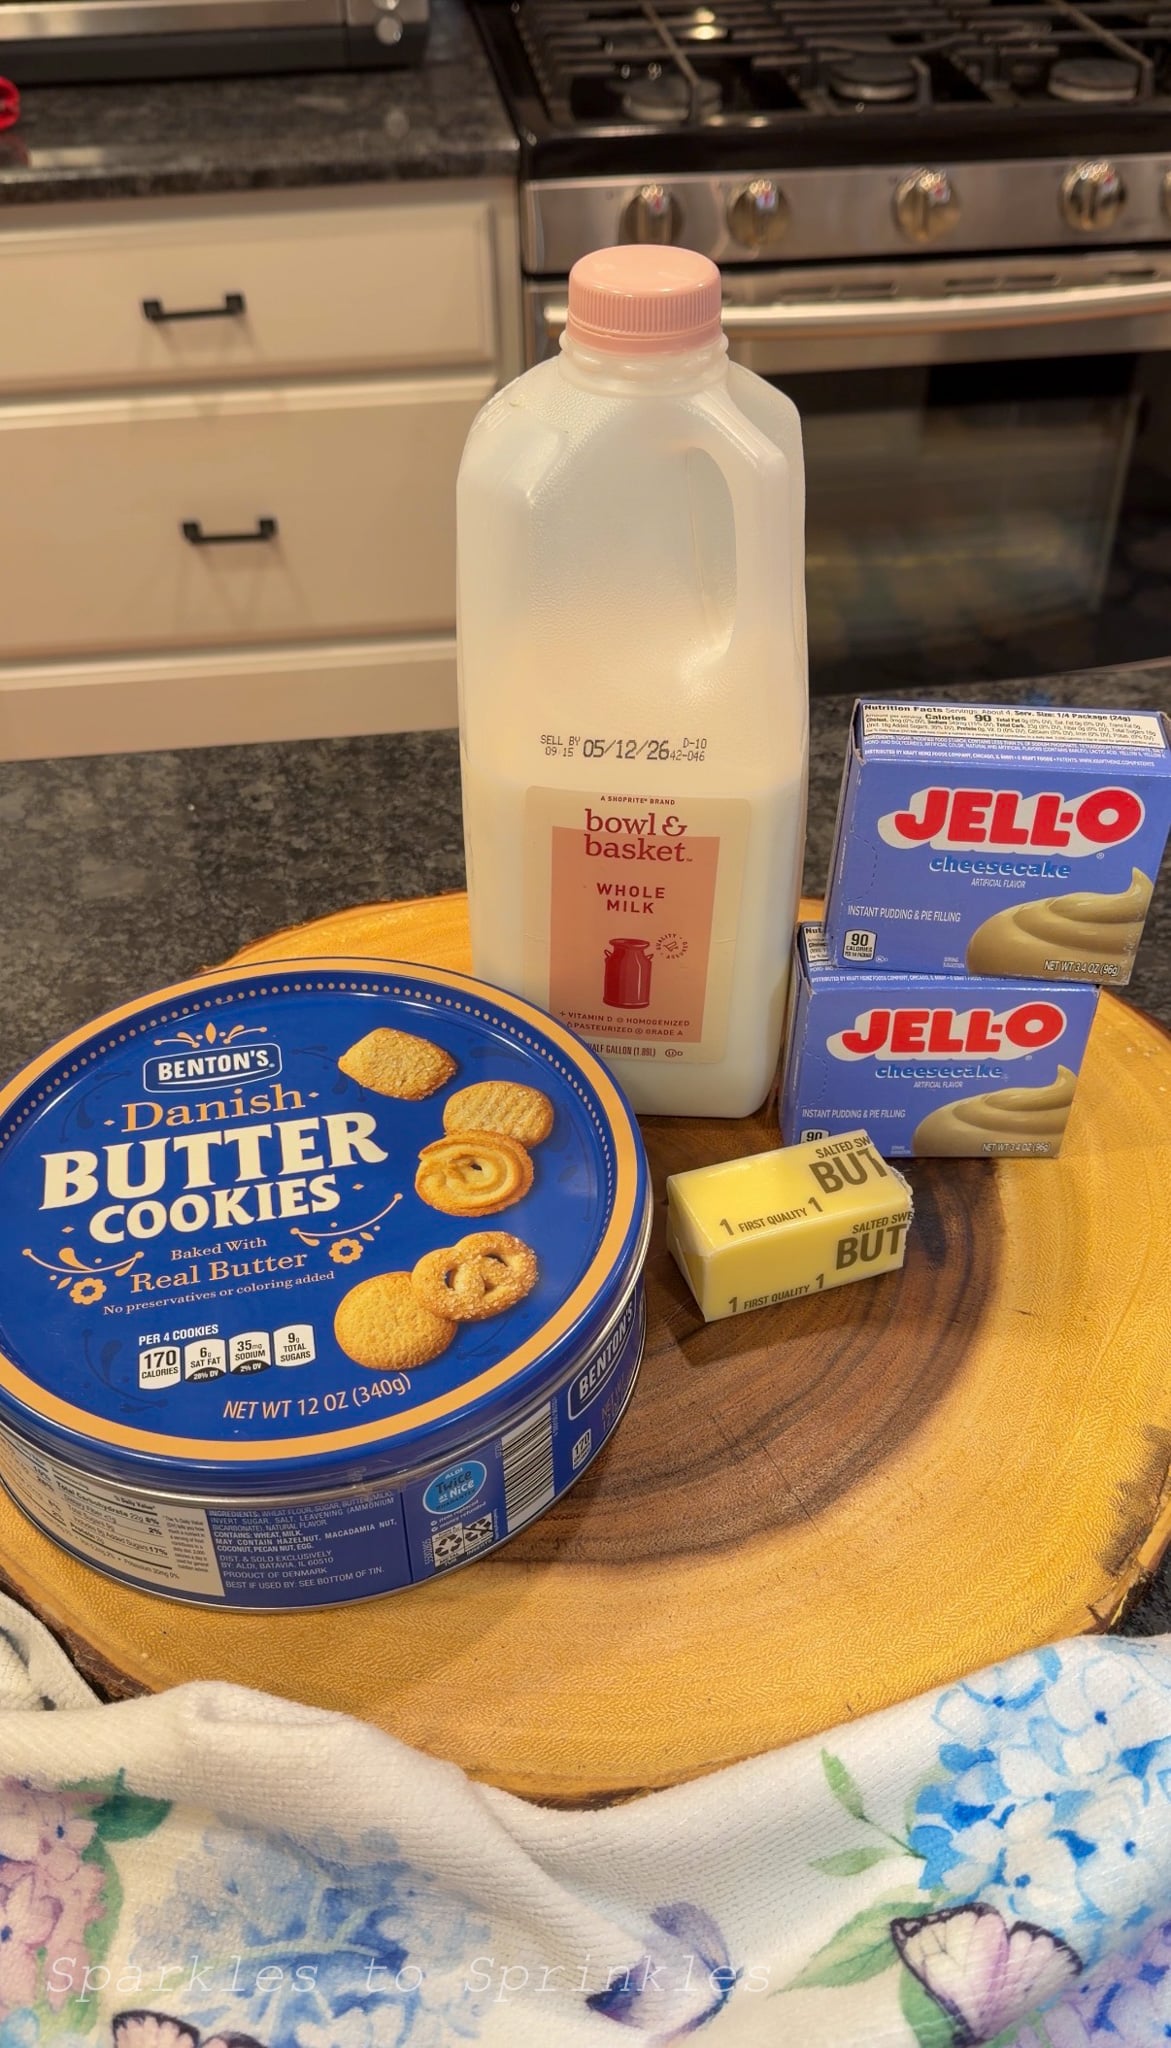
Ingredients
1 regular tin Danish butter cookies
½ stick butter, melted
2 boxes Jello cheesecake pudding mix (3.4 ounce each)
4 cups milk
Instructions
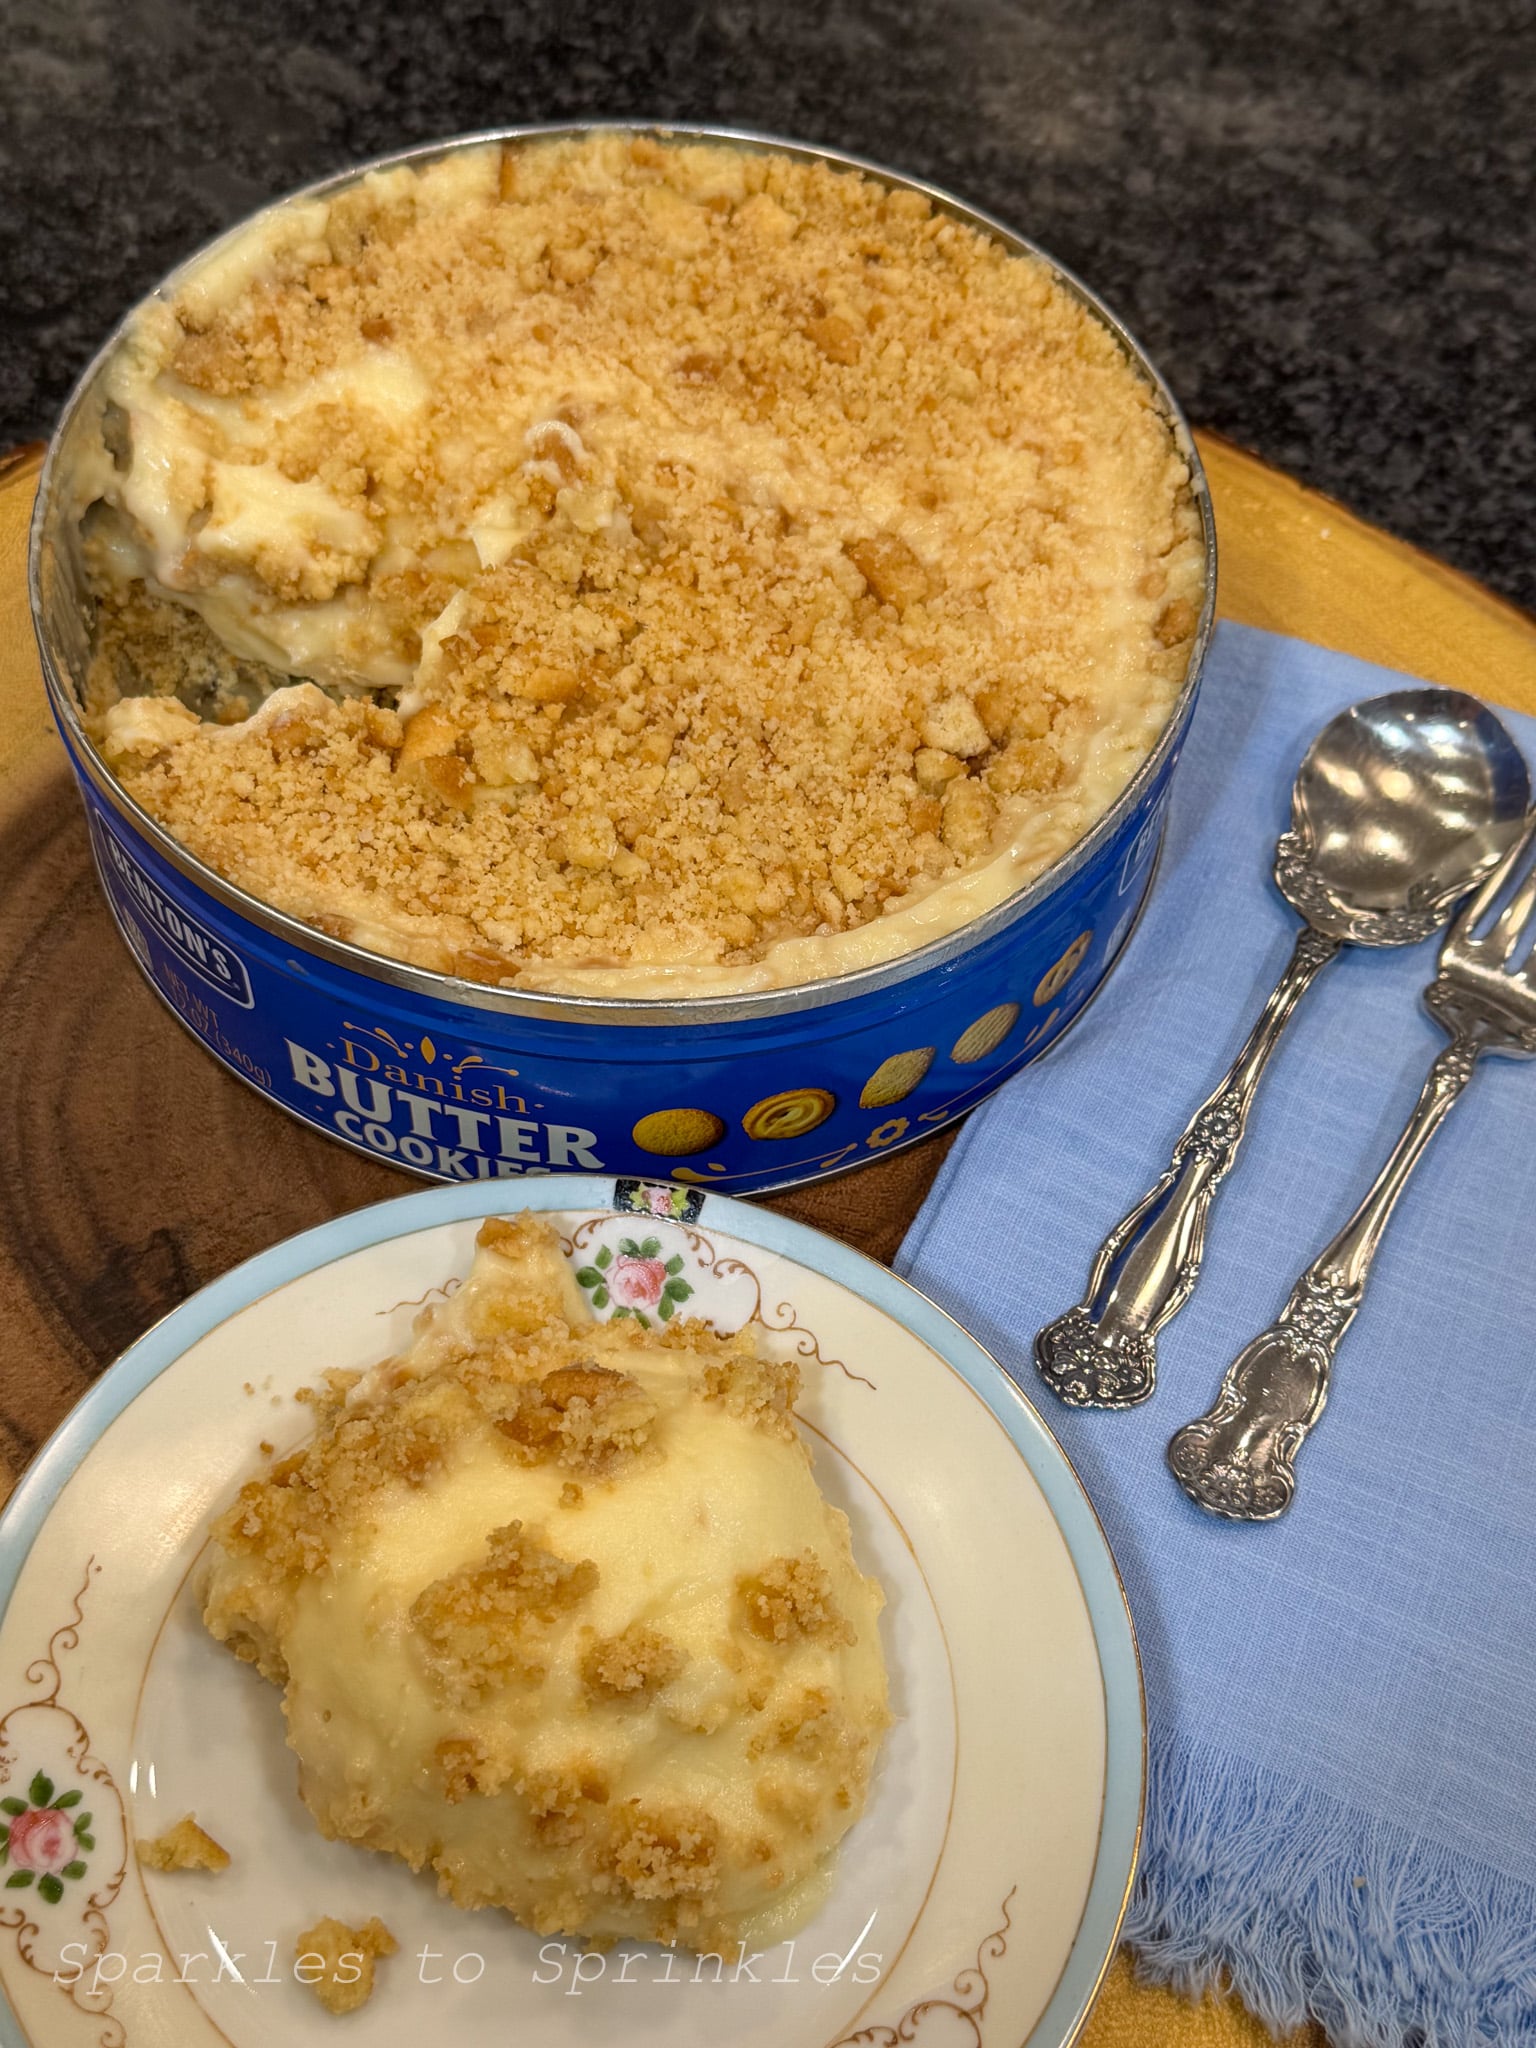
Remove the cookies from the tin and place them into a large zip top bag. Set the empty tin aside, then wash and dry it thoroughly.
Using a rolling pin or a meat chopper, crush the cookies inside the bag until they form small crumbs. You want them fine enough to press into a crust but still with a little texture.
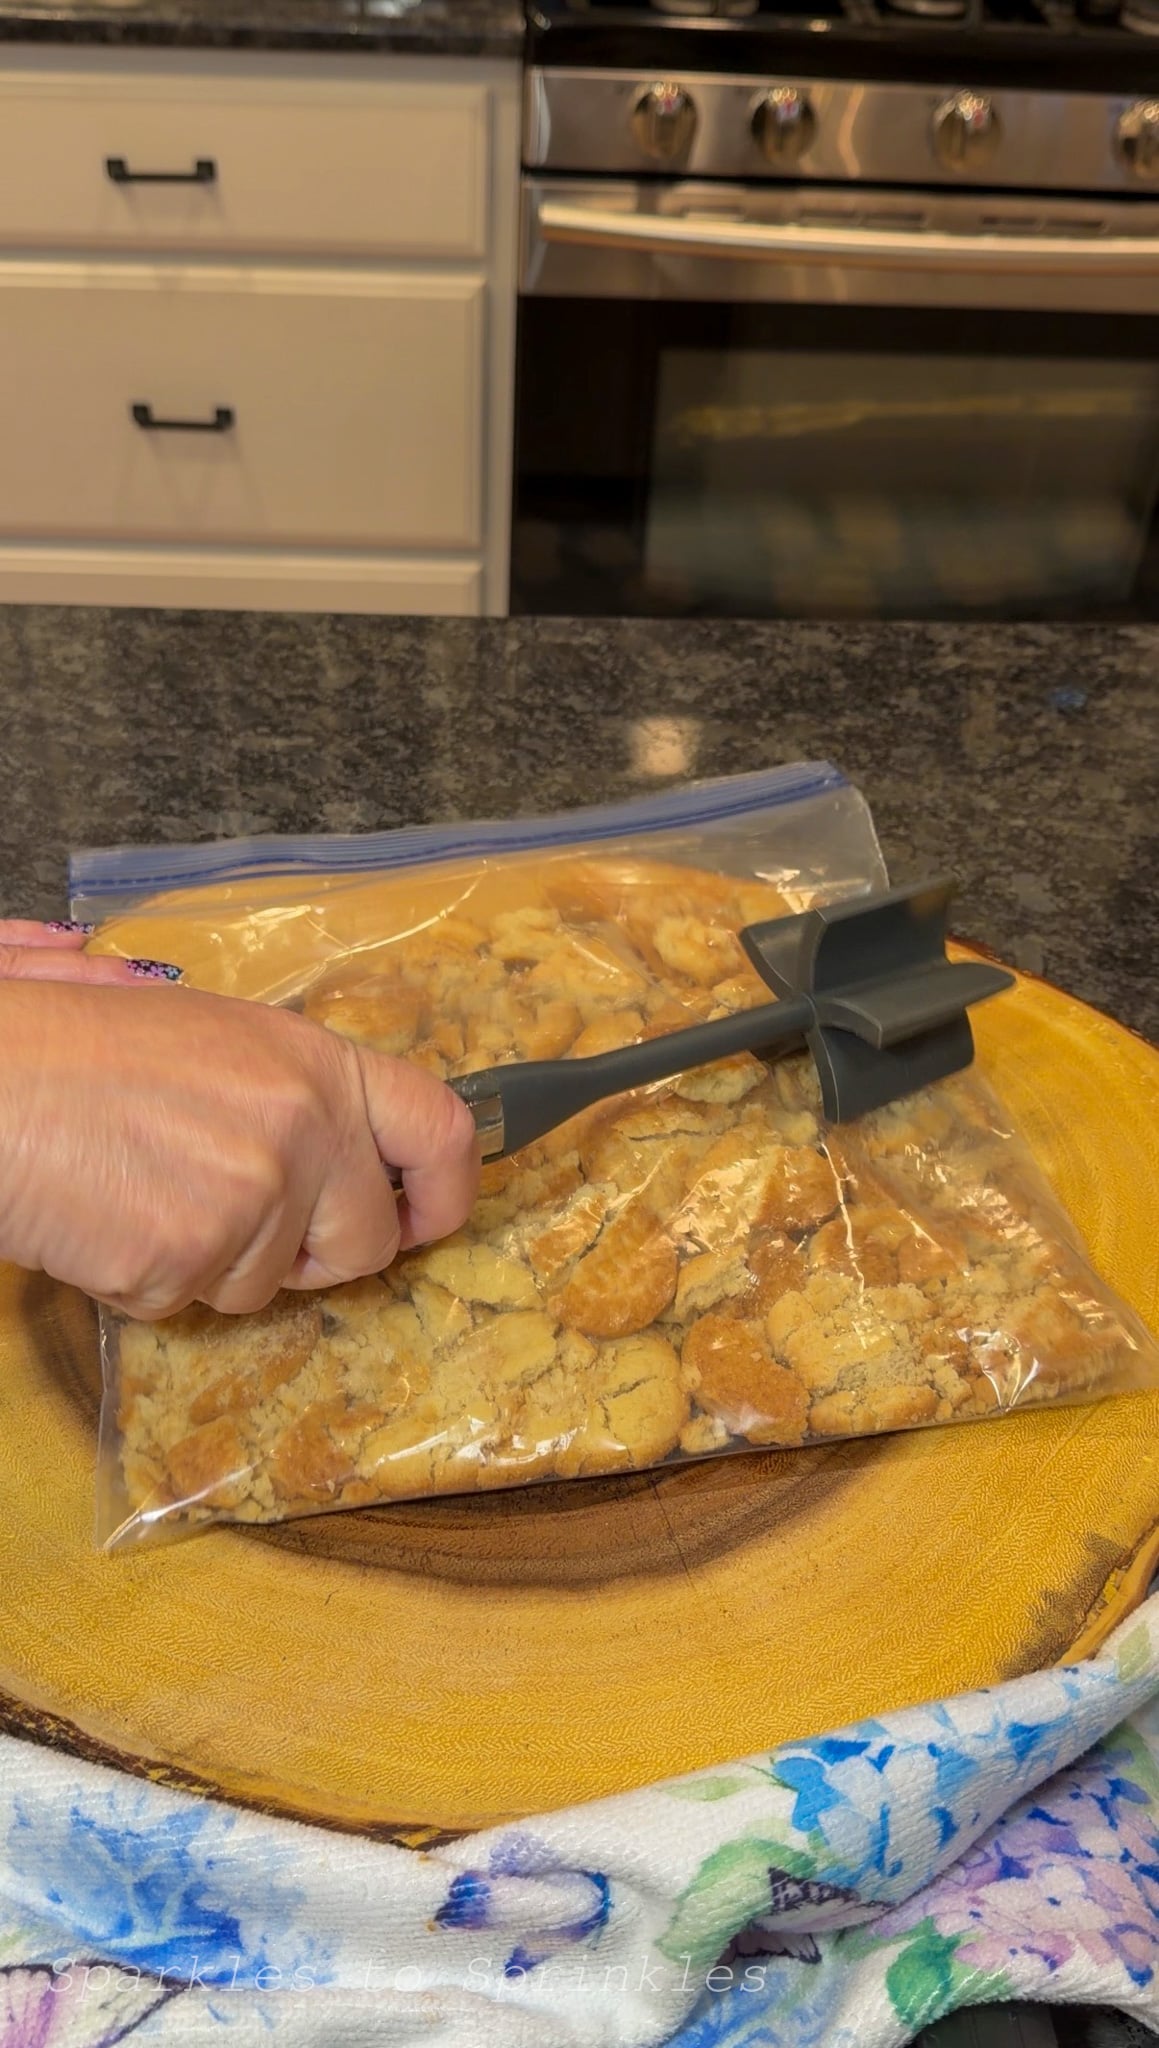
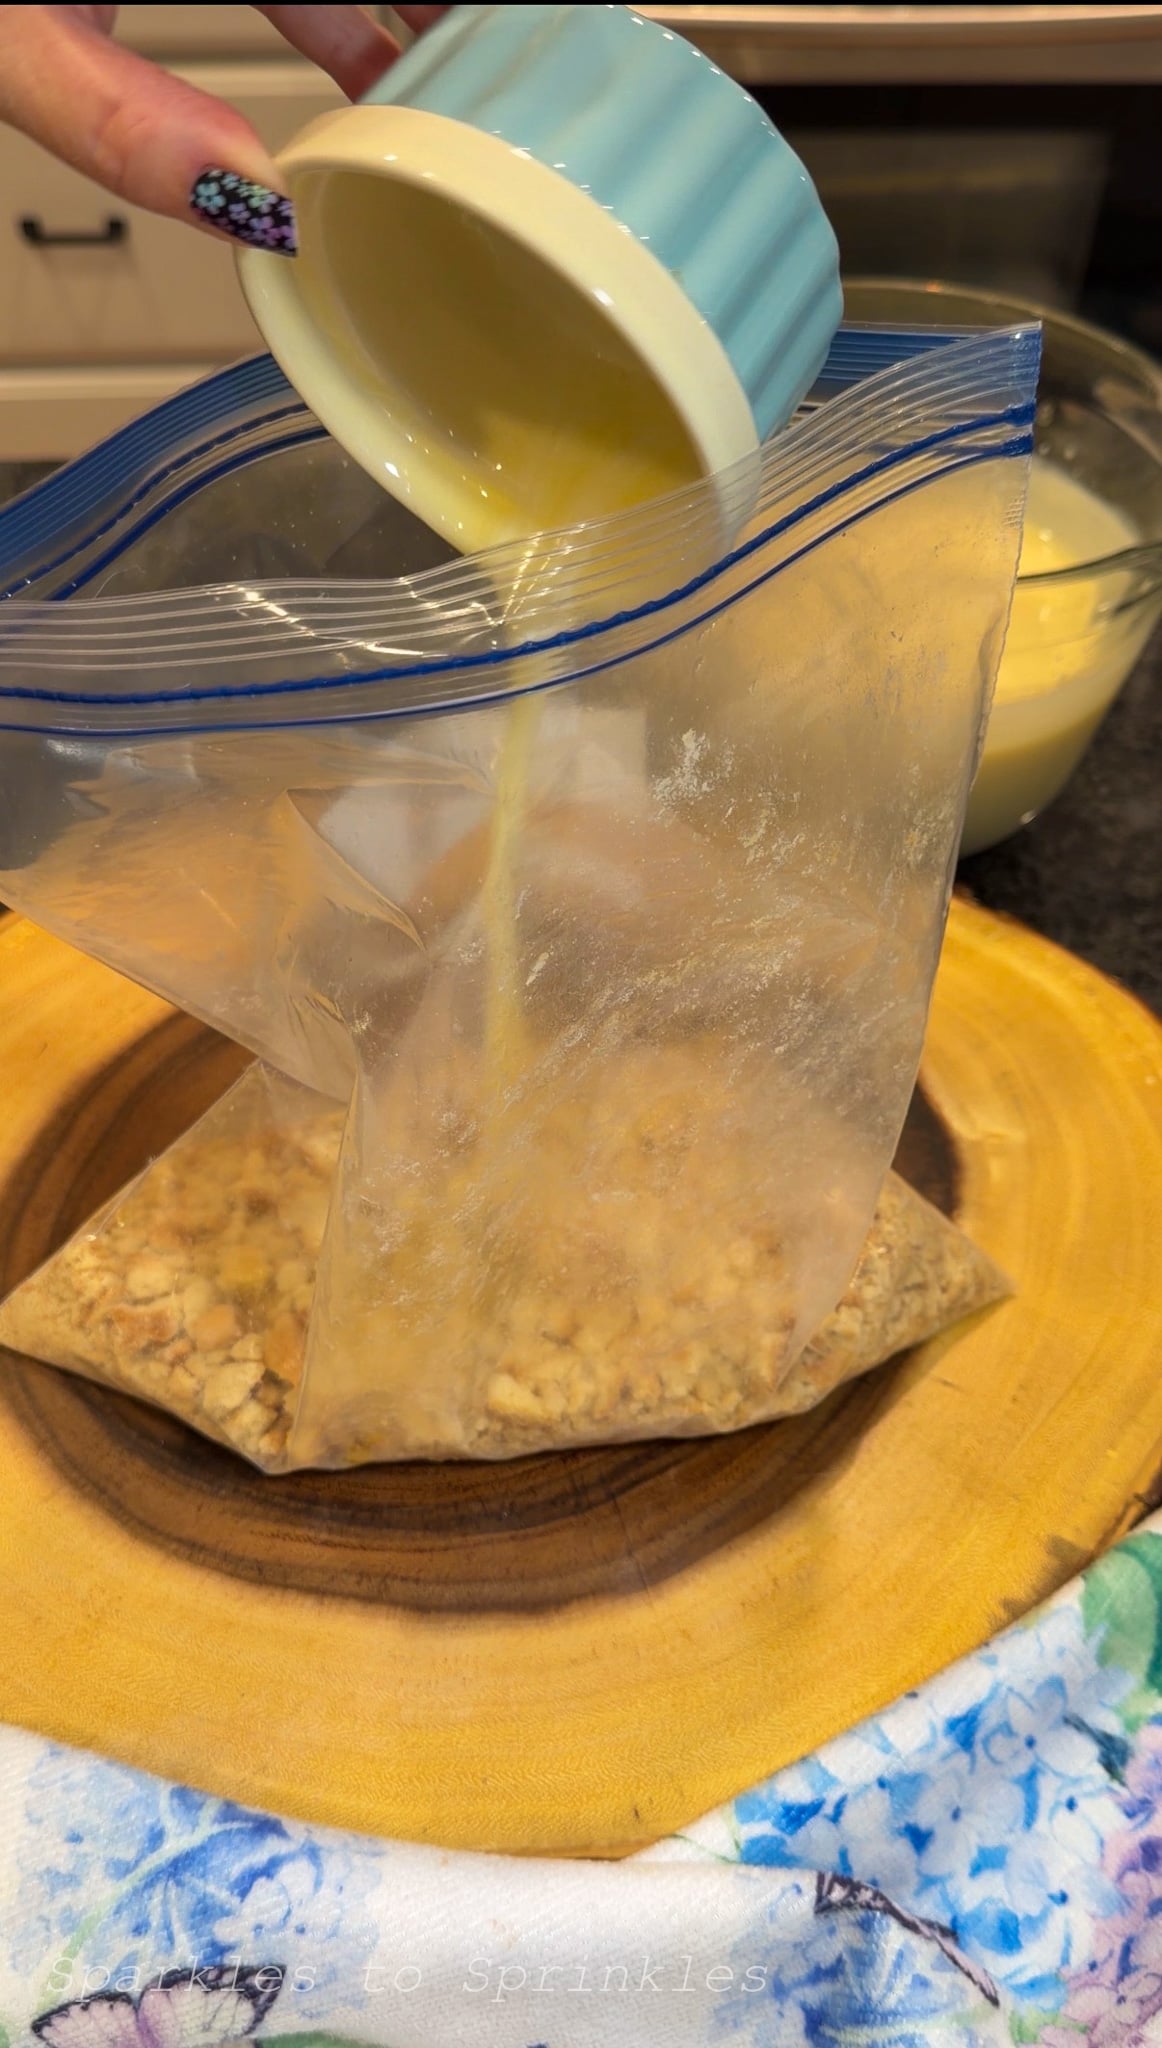
Pour the melted butter into the bag with the cookie crumbs. Seal the bag and gently massage and shake until the butter is fully mixed in and all the crumbs are coated.
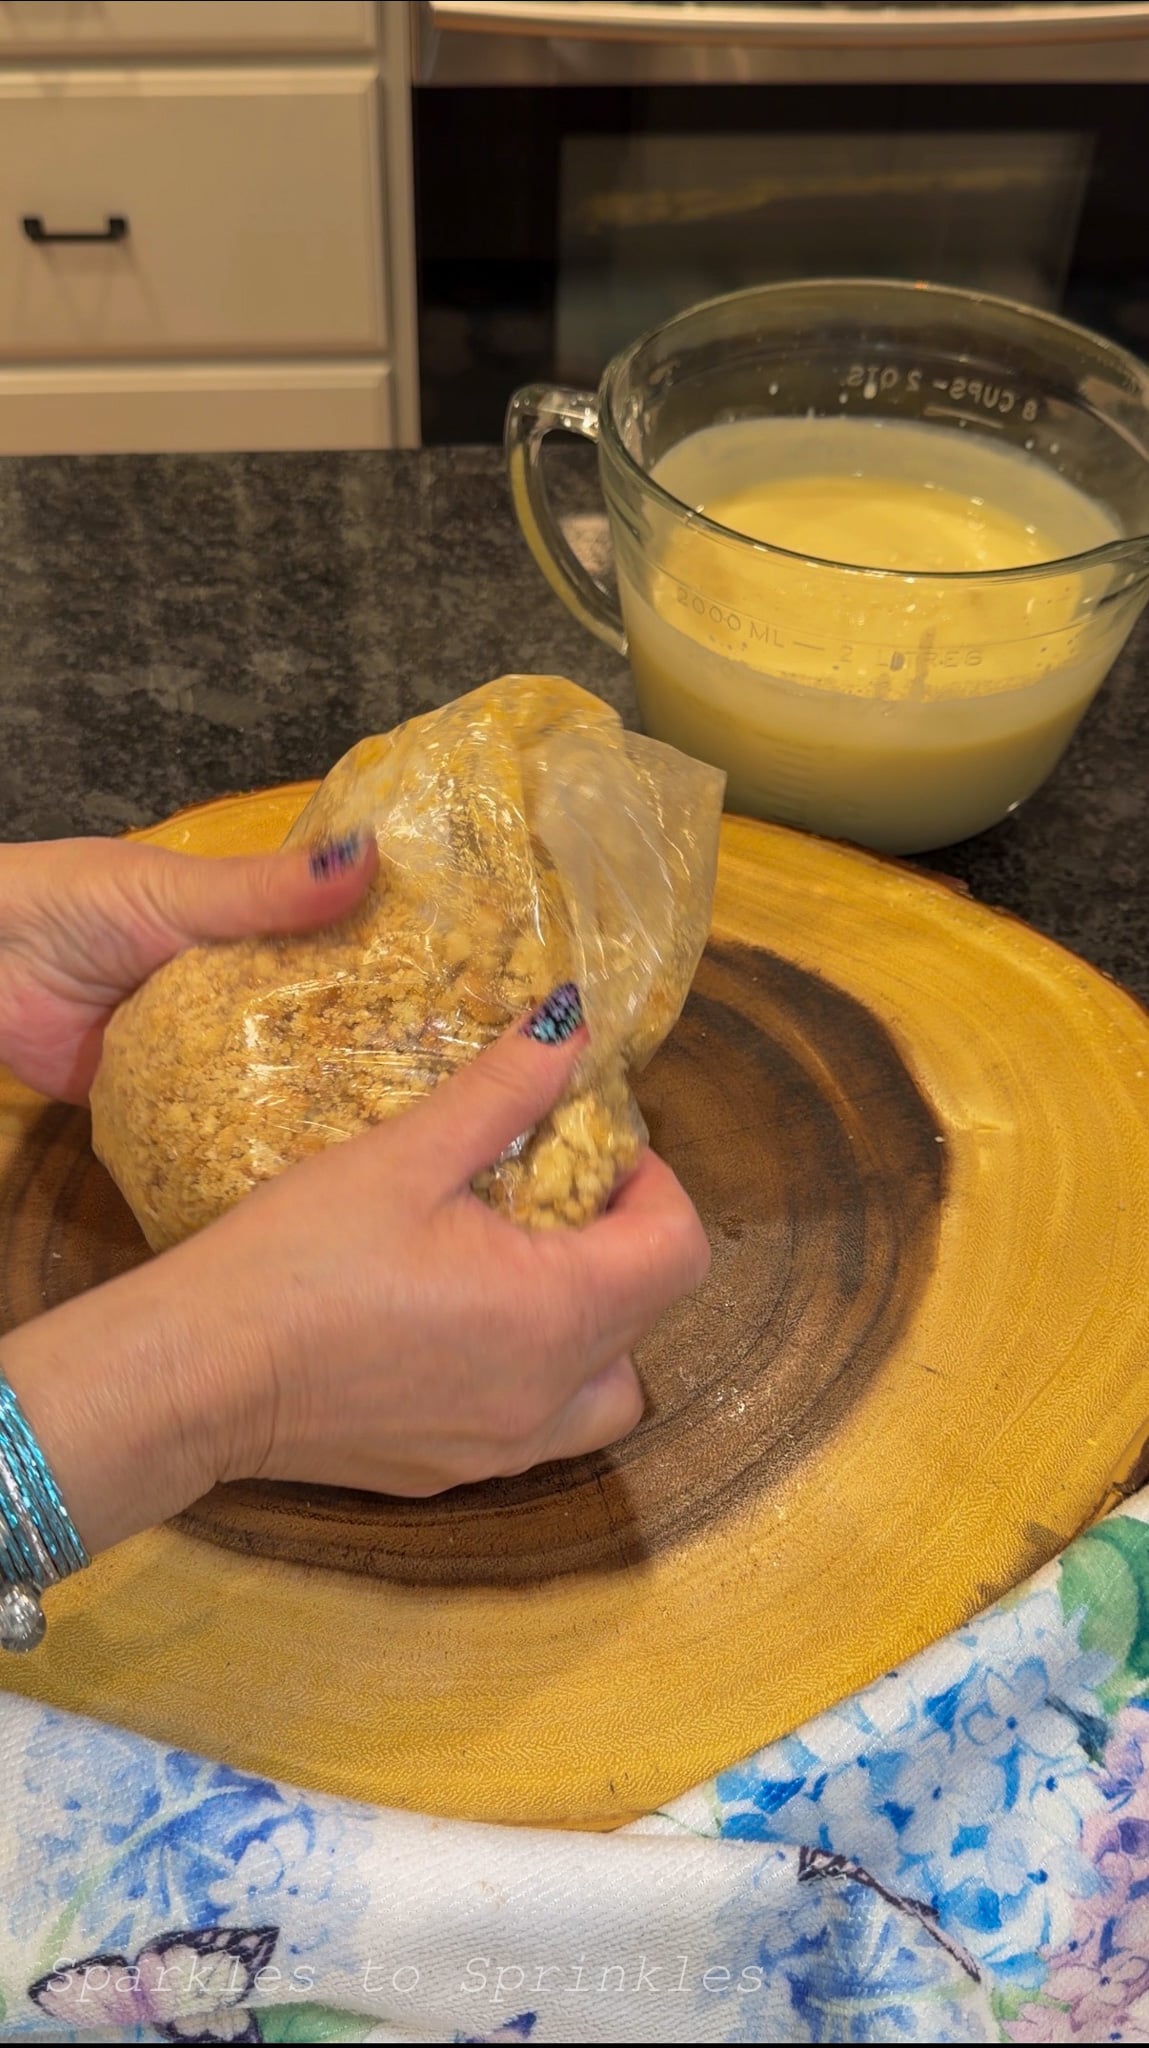
Set aside about 1 cup of the cookie mixture for the topping.
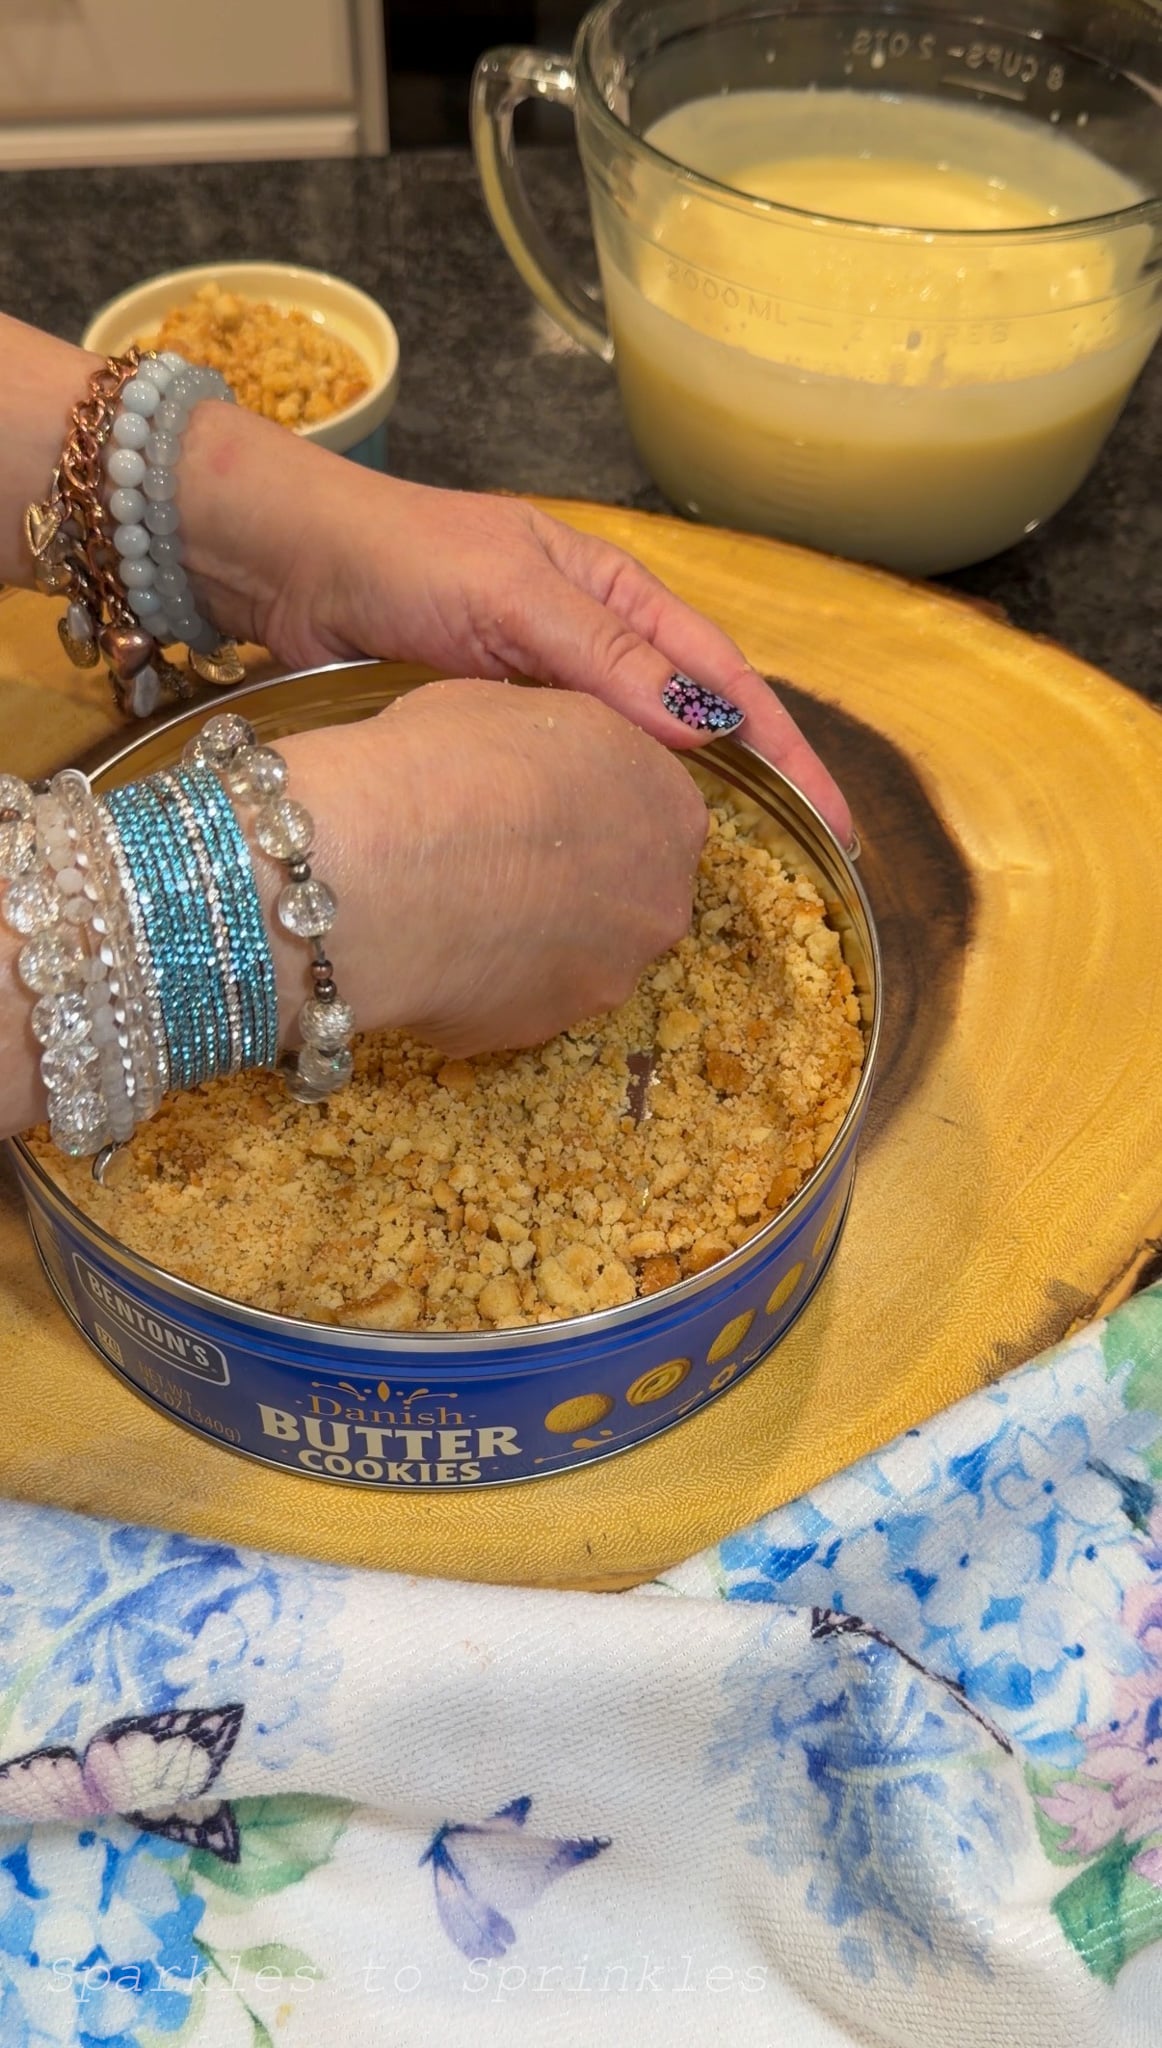
Pour the remaining cookie crumbs into your clean, dry cookie tin. Press the mixture firmly into the bottom and slightly up the sides to form a crust. Using the back of your hand works really well for this.
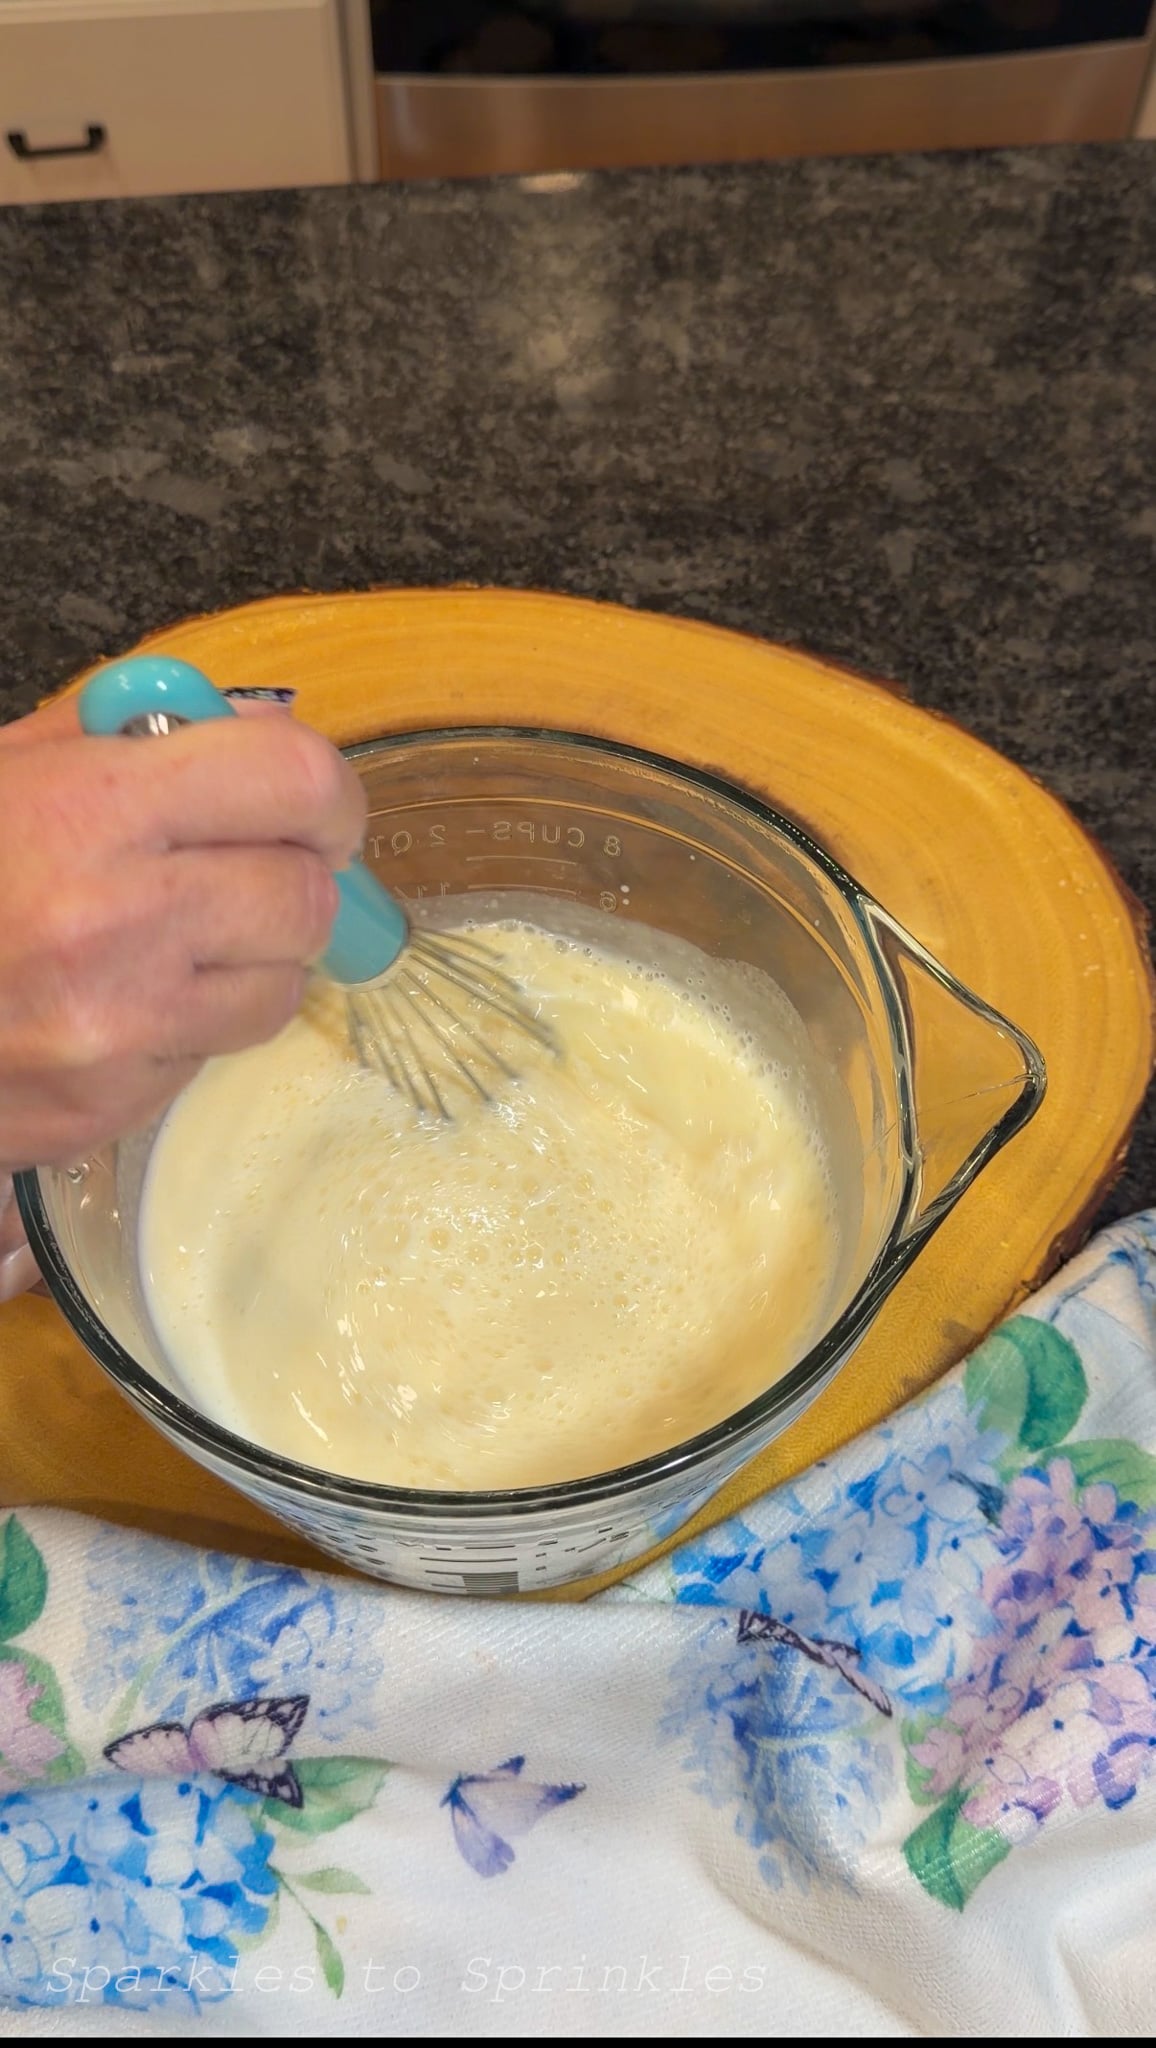
In a large bowl, whisk together both boxes of cheesecake pudding mix with the milk. Continue whisking until smooth, then let it sit for a few minutes so it can begin to thicken.
Pour the pudding mixture into the prepared cookie crust. Smooth the top evenly. Make sure not to overfill so you can still place the lid back on if needed.

Sprinkle the reserved cookie crumbs evenly over the top.
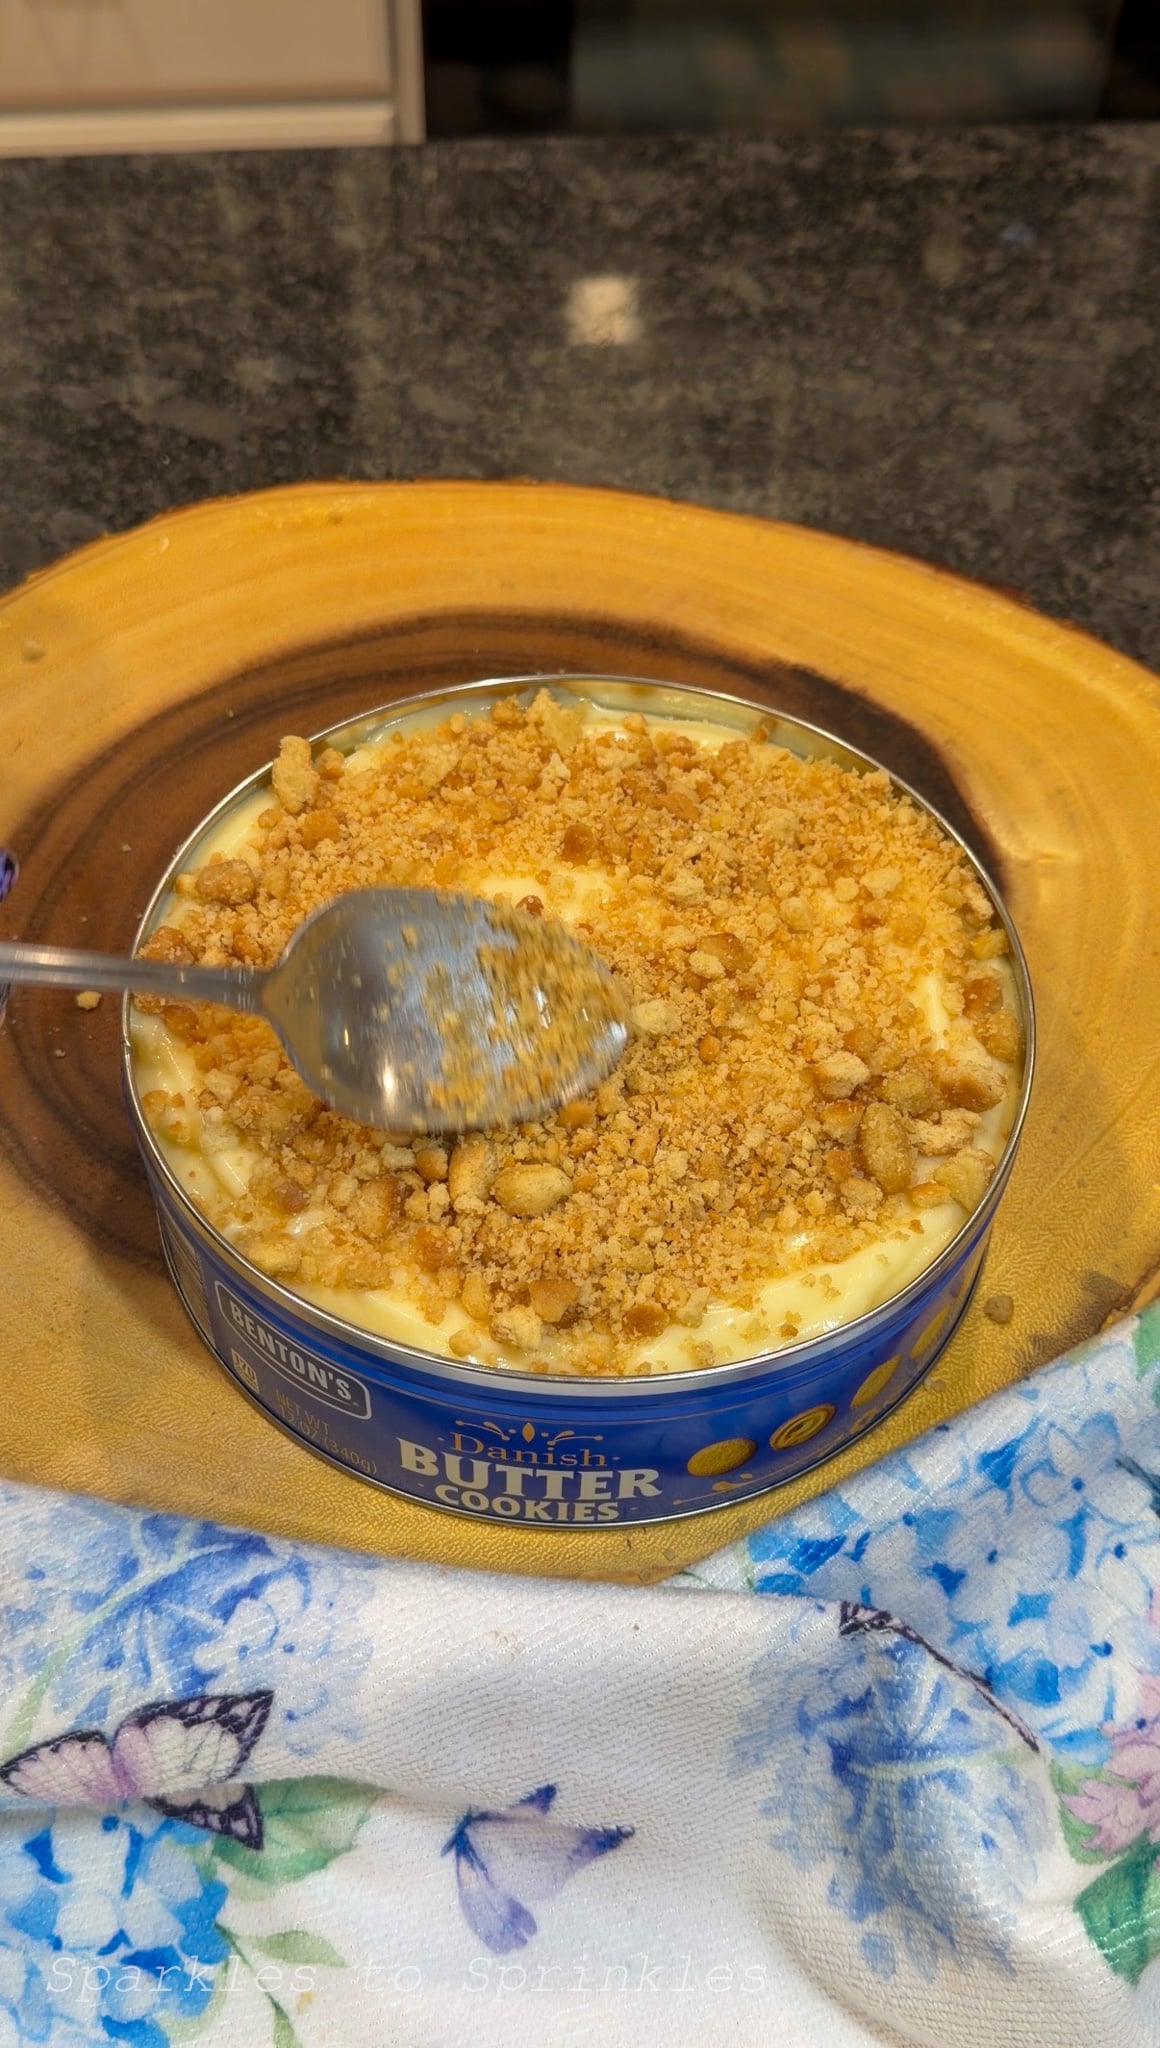
Place the lid on the tin and refrigerate for several hours, or until fully set.
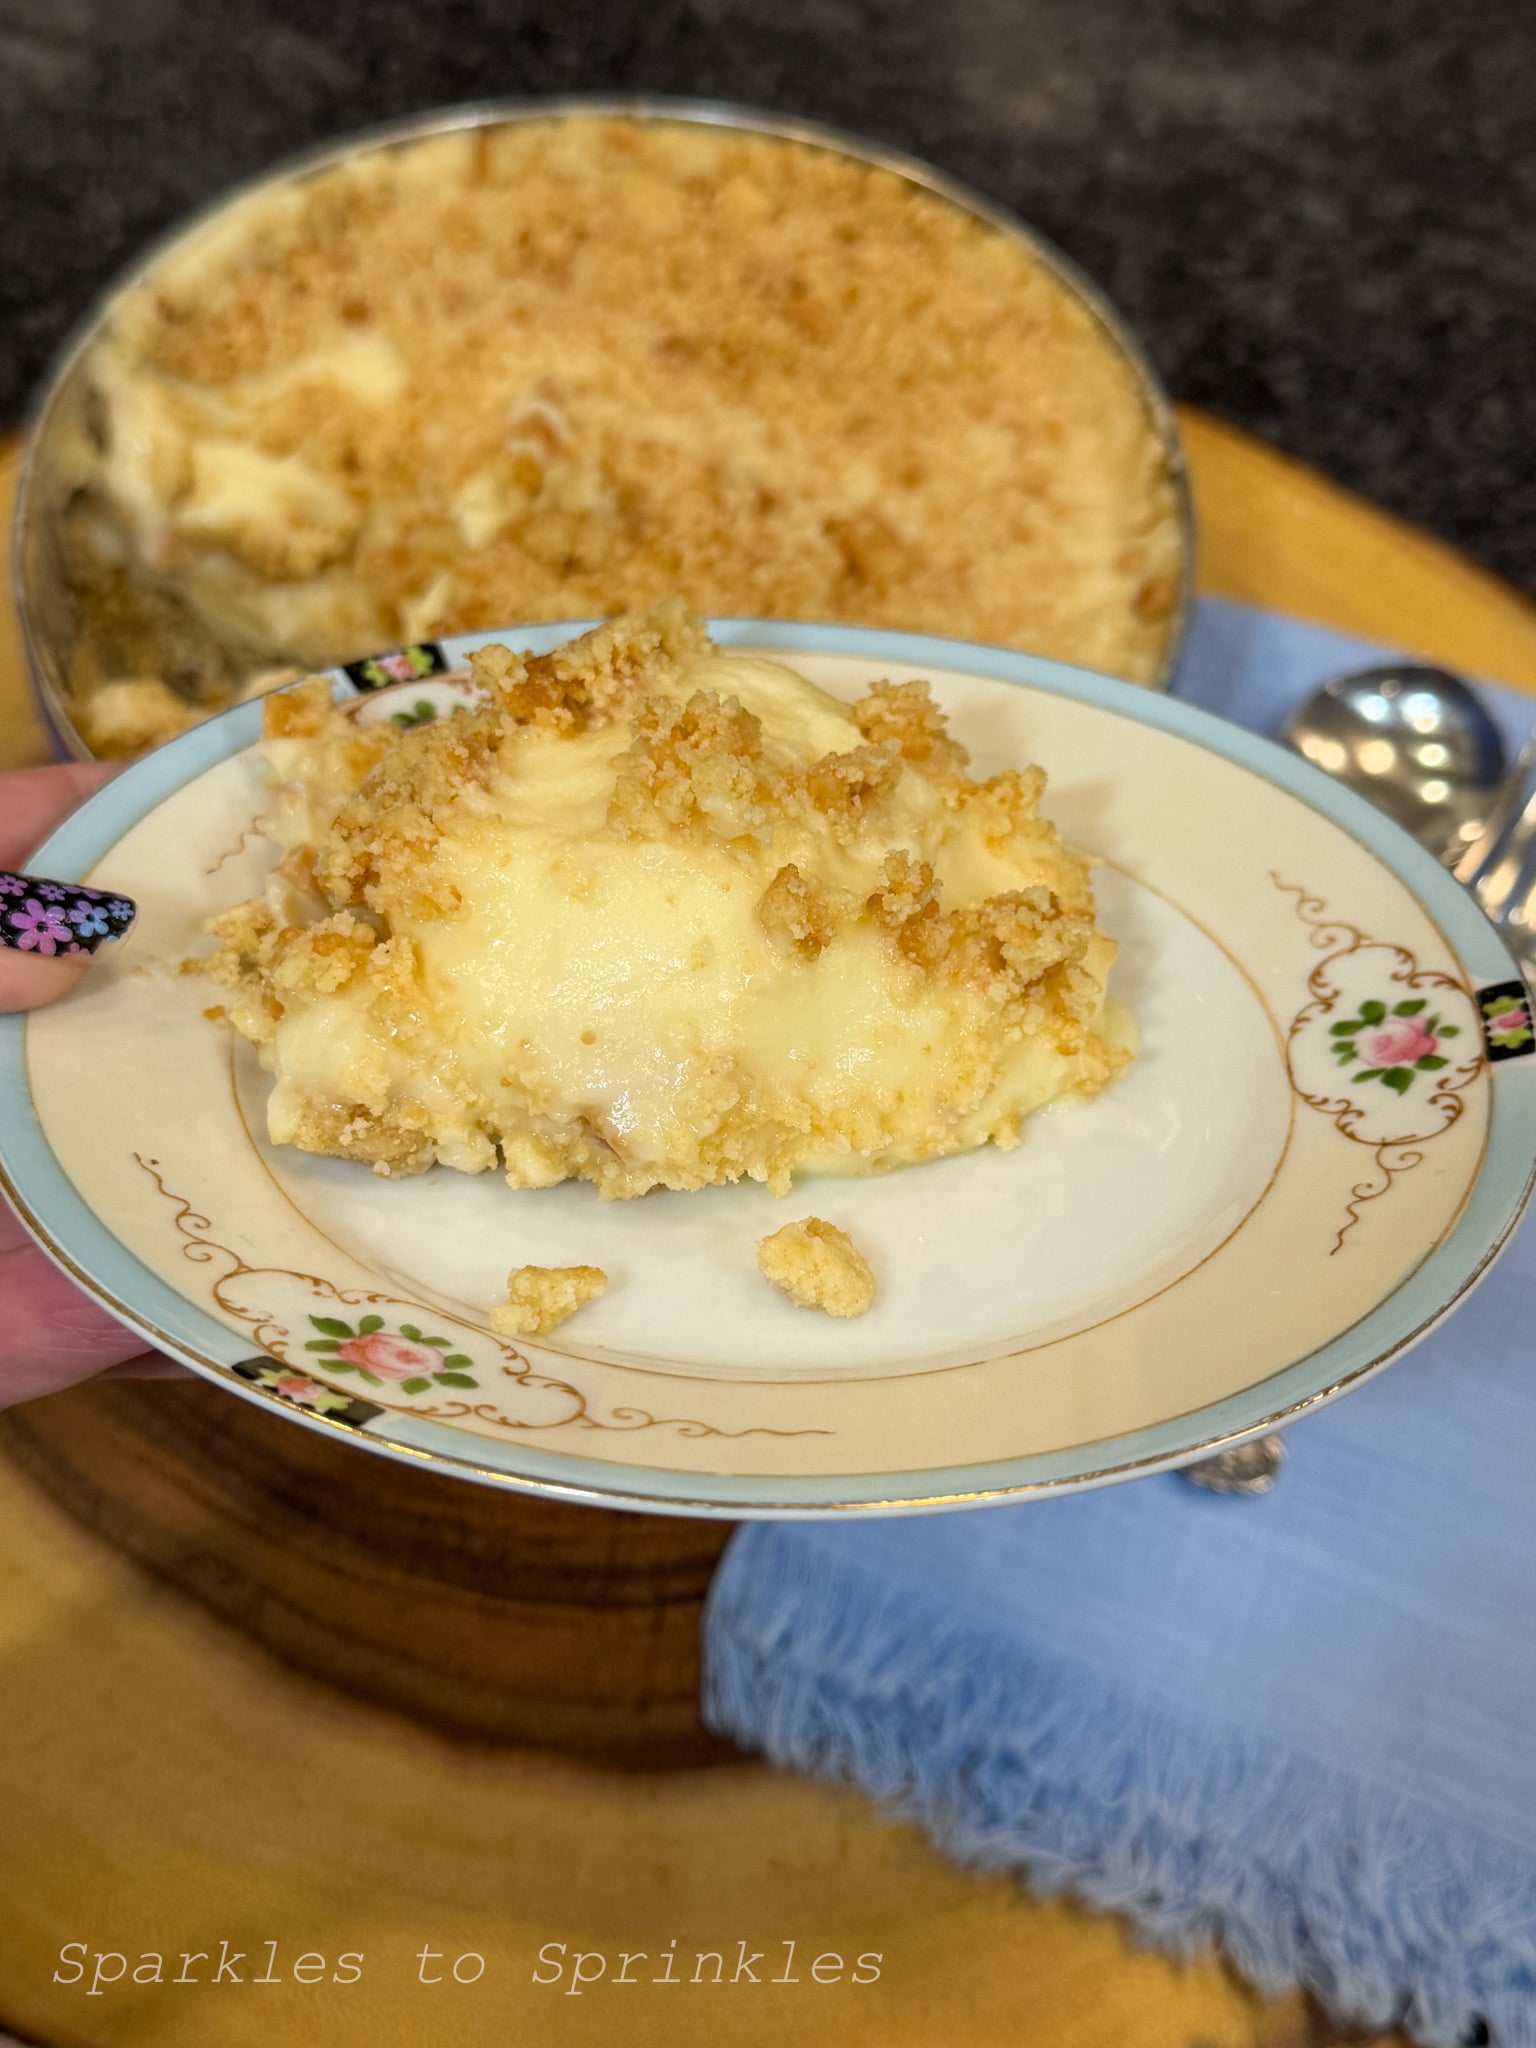
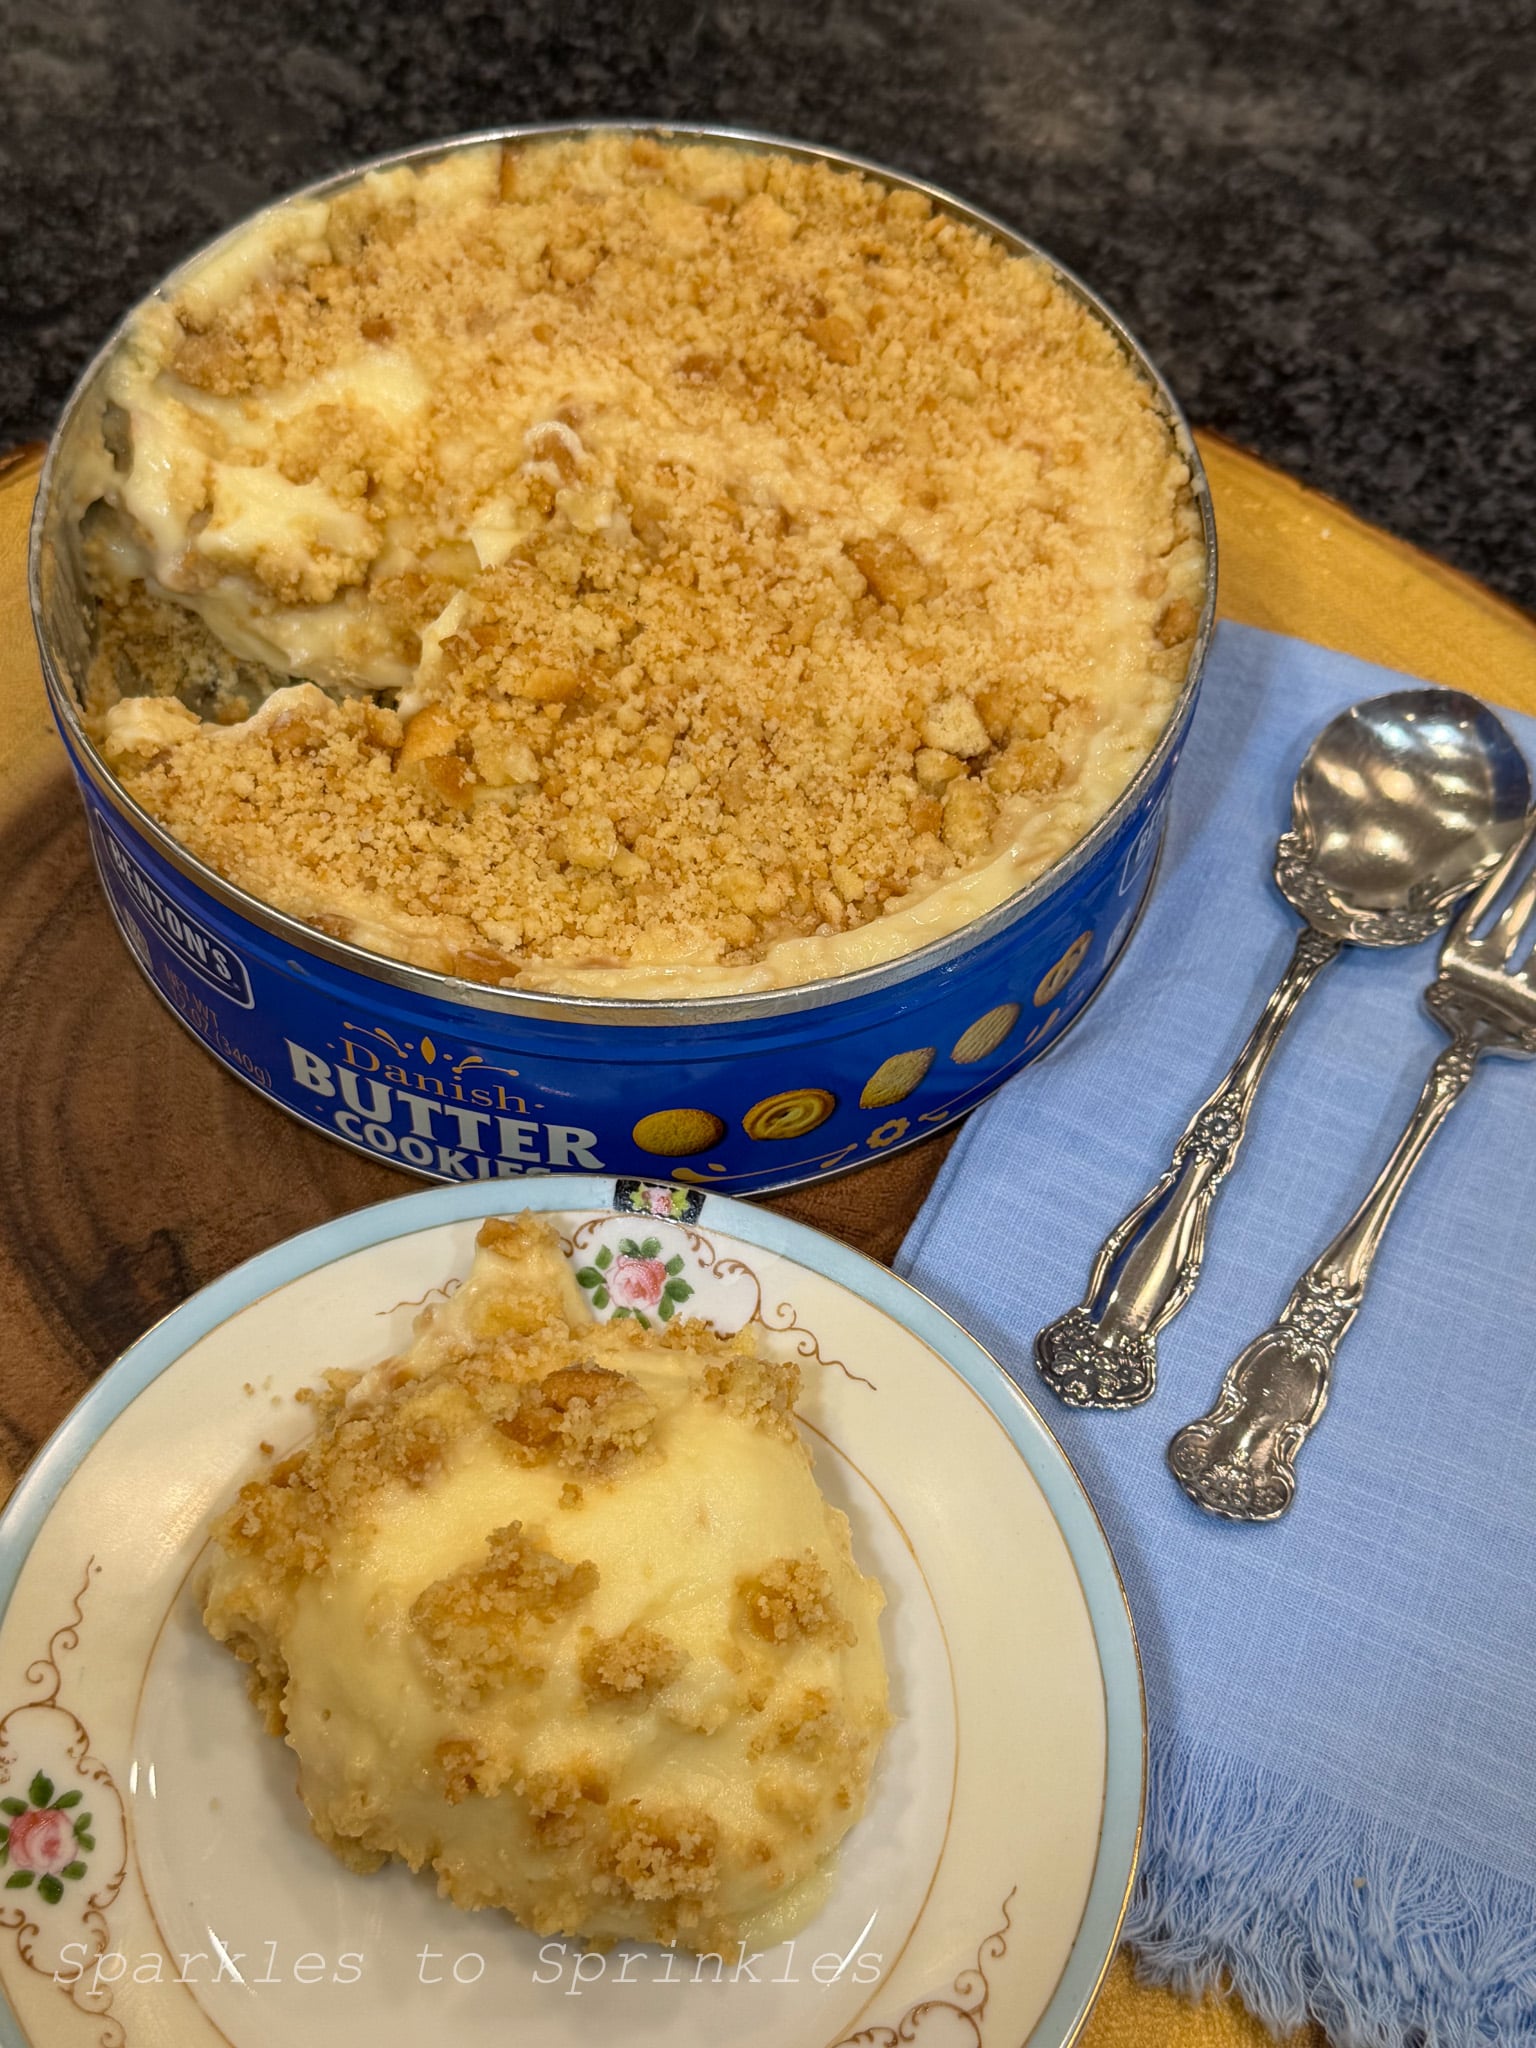
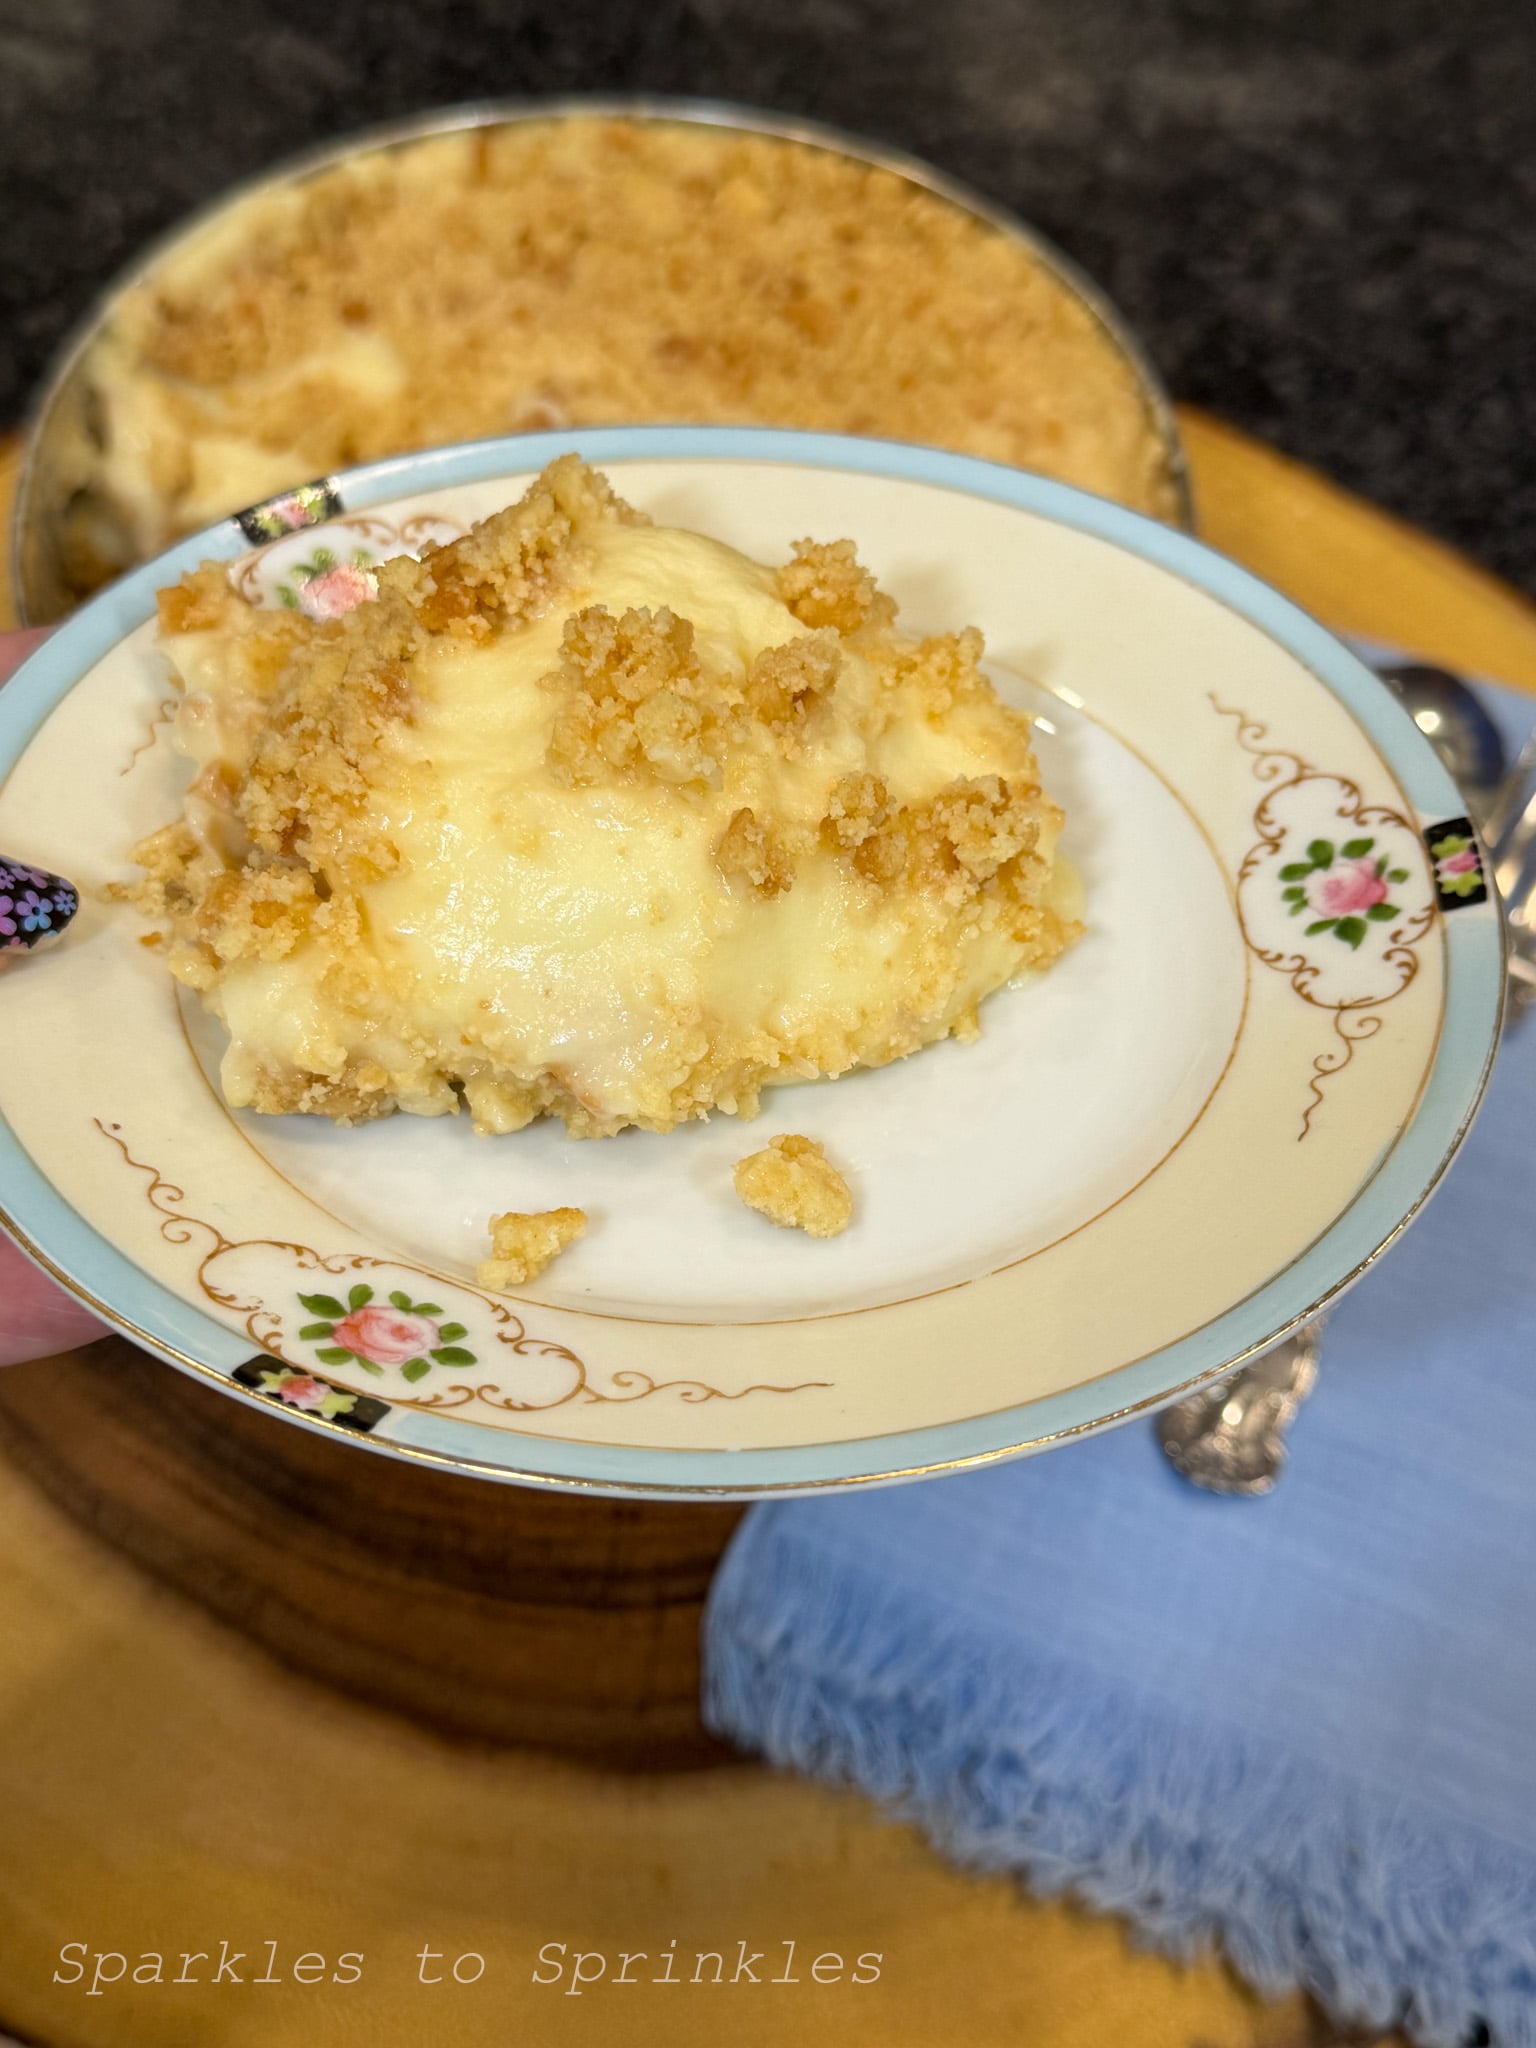
Slice, serve, and enjoy the surprise when everyone realizes it is not cookies inside.
Optional Toppings
Mini chocolate chips
Fruit pie filling
Fresh berries
Extra cookie crumble
Tips & Tricks
- Make sure your cookie crumbs are crushed finely enough to hold together, but leave a little texture so the crust is not too dense.
- Press the crust firmly into the bottom and slightly up the sides of the tin so it holds its shape when sliced.
- Let the pudding mixture sit for a few minutes before pouring so it can thicken slightly and set better.
- Do not overfill the tin. You want enough room to place the lid back on if you are using it for presentation.
- For cleaner slices, chill the cheesecake well and use a sharp knife, wiping it clean between cuts.
- You can easily double the recipe and make it in a traditional dish if you do not want to use a cookie tin.
FAQs

Additional Helpful Information
This recipe is all about the presentation, so have fun with it. Bringing out what looks like a simple cookie tin and revealing a cheesecake inside is such a fun moment that people remember.
If you are serving this at a party or holiday gathering, keep it chilled until right before serving so it holds its shape. If you are transporting it, make sure the lid is secure and the tin stays level.
For those who prefer not to use the tin, you can easily make this recipe in a pie dish or square baking dish and still enjoy the same delicious flavors without the surprise element.
This Danish Cookie Tin No Bake Cheesecake is one of those recipes that is simple, fun, and guaranteed to get people talking. Perfect for when you want something easy but a little different.

Danish Cookie Tin No Bake Cheesecake
Ingredients
- 1 regular tin Danish butter cookies
- ½ stick butter, melted
- 2 boxes Jello cheesecake pudding mix (3.4 ounce each)
- 4 cups milk
- Optional Toppings
- Mini chocolate chips
- Fruit pie filling
- Fresh berries
- Extra cookie crumble
Instructions
- Remove the cookies from the tin and place them into a large zip top bag. Set the empty tin aside, then wash and dry it thoroughly.
- Using your hands or a rolling pin, crush the cookies inside the bag until they form small crumbs. You want them fine enough to press into a crust but still with a little texture.
- Pour the melted butter into the bag with the cookie crumbs. Seal the bag and gently massage and shake until the butter is fully mixed in and all the crumbs are coated.
- Set aside about 1 cup of the cookie mixture for the topping.
- Pour the remaining cookie crumbs into your clean, dry cookie tin. Press the mixture firmly into the bottom and slightly up the sides to form a crust. Using the back of your hand works really well for this.
- In a large bowl, whisk together both boxes of cheesecake pudding mix with the milk. Continue whisking until smooth, then let it sit for a few minutes so it can begin to thicken.
- Pour the pudding mixture into the prepared cookie crust. Smooth the top evenly. Make sure not to overfill so you can still place the lid back on if needed.
- Sprinkle the reserved cookie crumbs evenly over the top.
- Place the lid on the tin and refrigerate for several hours, or until fully set.
- Slice, serve, and enjoy the surprise when everyone realizes it is not cookies inside.
Nutrition Information:
Yield:
6Serving Size:
1Amount Per Serving: Calories: 178Total Fat: 5gSaturated Fat: 3gUnsaturated Fat: 2gCholesterol: 22mgSodium: 401mgCarbohydrates: 26gFiber: 1gSugar: 12gProtein: 7g
I’m Melissa, the imaginative force behind Sparkles to Sprinkles, where creativity comes to life, and sprinkles of joy are scattered generously. Melissa is a proud Jersey girl who found love with a New York boy. As a mom to four wonderful boys and a few fur babies, her journey into the world of blogging began after making the life-changing decision to stay home and raise her children. Previously a dedicated workaholic, Melissa’s blog became her creative outlet and passion project. Inspired by her mother-in-law, a masterful cook renowned for her delicious home-cooked meals and legendary holiday feasts (think mouthwatering sausage stuffing), Melissa honed her culinary skills through a combination of family recipes and countless cooking classes. She often attended these classes with her son Michael, who shared her enthusiasm for cooking from a young age. Melissa’s love for learning extends beyond familiar cuisines, as she enjoys exploring international recipes in hands-on cooking classes. Her blog features a diverse array of recipes, showcasing her expertise with various kitchen appliances such as the Instant Pot, air fryer, Slow Cooker, Ninja Foodi, Instant Vortex Plus, and more. Join Melissa on her culinary adventures as she shares tried-and-true family favorites alongside exciting new discoveries!


