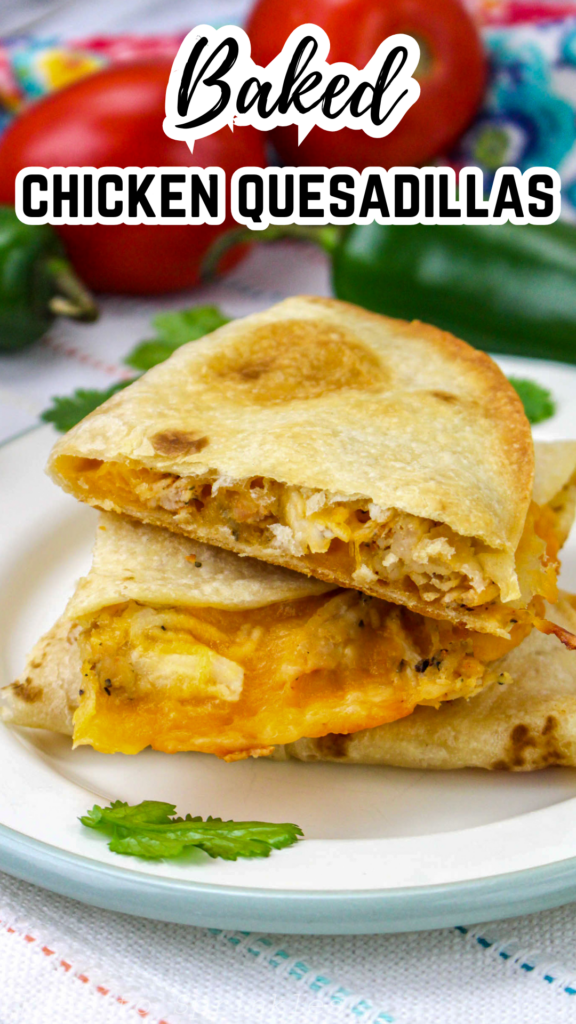
Oven Baked Chicken Quesadillas – Crispy, Cheesy & So Easy!
If you love crispy, golden quesadillas with melty cheese and juicy chicken, you’re going to love this baked chicken quesadilla recipe! Instead of standing over a stovetop flipping tortillas one by one, this oven-baked method lets you make a big batch all at once—perfect for feeding a crowd or making weeknight dinners a breeze.

Baked Chicken Quesadillas
With just four simple ingredients and less than 30 minutes of cook time, these quesadillas are quick, easy, and incredibly delicious. The buttery, golden-brown tortillas crisp up beautifully in the oven, while the cheesy chicken filling stays warm and gooey. Serve them with salsa, sour cream, or guacamole for the ultimate meal or snack.
These quesadillas are also great for meal prep! You can make a batch ahead of time, freeze them, and reheat them for a quick lunch, dinner, or even a snack. Whether you’re making them for game day, a family dinner, or a grab-and-go meal, they’re guaranteed to be a hit!

What You Will Love About This Recipe
Quick & Easy – Minimal ingredients and baked in one batch—no flipping required!
✔ Crispy & Buttery – The tortillas turn golden brown and crispy with just the right amount of butter.
✔ Great for Meal Prep – Make ahead and reheat when needed.
✔ Kid-Friendly & Customizable – Add beans, veggies, or different cheeses for a fun twist.

Ingredients
- ½ cup butter, melted
- 10 flour tortillas
- 4 cups cooked chicken, shredded
- 4 cups fiesta blend cheese, shredded

How to Make Baked Chicken Quesadillas
- Preheat the oven to 400 degrees. Prepare a large baking sheet by lining it with parchment paper.
- Brush the parchment paper with melted butter. Place tortillas over the baking sheet.
- Working on one half of each tortilla, add cheese and chicken with a small sprinkle of cheese on top of the chicken.


- Fold the top half of each tortilla over the filled half.
- Brush the closed quesadillas with butter.

- Place a sheet of parchment paper over the quesadillas and add another baking sheet on top of the parchment paper to help keep the quesadillas closed in the oven.


- Place in the oven and bake for approximately 20 minutes. Remove the top baking sheet and parchment paper. Continue baking for an additional 5 minutes or until crisp and golden.

- These may be served with salsa or sour cream for dipping.


Tips & Tricks
- Use Rotisserie Chicken – Saves time and adds extra flavor.
- Shred Cheese Fresh – Pre-shredded cheese has anti-caking agents that prevent it from melting as smoothly.
- Press with a Baking Sheet – This trick keeps the quesadillas sealed and helps them bake evenly.
- Make It Your Own – Add black beans, sautéed onions, or a drizzle of hot sauce for an extra kick.
- Dip & Enjoy! – Serve with salsa, guacamole, ranch, or sour cream for extra flavor.


FAQs

What toppings can I add to this dish?
Some of our favorite toppings to dip our quesadilla in our as follows:
- Sour cream
- Salsa
- Hot sauce
- Pico De Gallo
- Guacamole
- Queso

Baked Chicken Quesadillas
Baked chicken quesadillas are my go-to dish when I need an easy meal! Whether it's when I am feeding a bunch of hungry kids at lunch or trying to survive dinner time, these baked quesadillas are what saves me every time!
Ingredients
- ½ cup butter, melted
- 10 flour tortillas
- 4 cups cooked chicken, shredded
- 4 cups fiesta blend cheese, shredded
Instructions
- Preheat the oven to 400 degrees. Prepare a large baking sheet by lining it with parchment paper.
- Brush the parchment paper with melted butter. Place tortillas over the baking sheet.
- Working on one half of each tortilla, add cheese and chicken with a small sprinkle of cheese on top of the chicken.
- Fold the top half of each tortilla over the filled half.
- Brush the closed quesadillas with butter.
- Place a sheet of parchment paper over the quesadillas and add another baking sheet on top of the parchment paper to help keep the quesadillas closed in the oven.
- Place in the oven and bake for approximately 20 minutes. Remove the top baking sheet and parchment paper. Continue baking for an additional 5 minutes or until crisp and golden.
- These may be served with salsa or sour cream for dipping.
Nutrition Information:
Yield:
10Serving Size:
1Amount Per Serving: Calories: 542Total Fat: 35gSaturated Fat: 17gTrans Fat: 1gUnsaturated Fat: 14gCholesterol: 120mgSodium: 641mgCarbohydrates: 29gFiber: 2gSugar: 0gProtein: 28g
I’m Melissa, the imaginative force behind Sparkles to Sprinkles, where creativity comes to life, and sprinkles of joy are scattered generously. Melissa is a proud Jersey girl who found love with a New York boy. As a mom to four wonderful boys and a few fur babies, her journey into the world of blogging began after making the life-changing decision to stay home and raise her children. Previously a dedicated workaholic, Melissa’s blog became her creative outlet and passion project. Inspired by her mother-in-law, a masterful cook renowned for her delicious home-cooked meals and legendary holiday feasts (think mouthwatering sausage stuffing), Melissa honed her culinary skills through a combination of family recipes and countless cooking classes. She often attended these classes with her son Michael, who shared her enthusiasm for cooking from a young age. Melissa’s love for learning extends beyond familiar cuisines, as she enjoys exploring international recipes in hands-on cooking classes. Her blog features a diverse array of recipes, showcasing her expertise with various kitchen appliances such as the Instant Pot, air fryer, Slow Cooker, Ninja Foodi, Instant Vortex Plus, and more. Join Melissa on her culinary adventures as she shares tried-and-true family favorites alongside exciting new discoveries!


