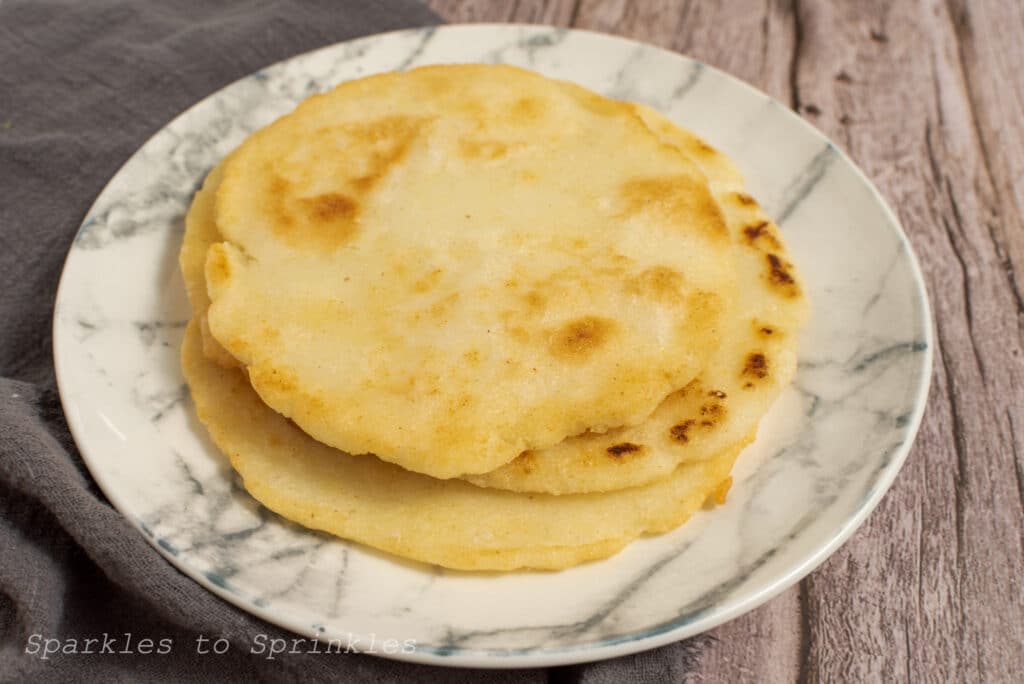
Arepas Recipe
This Arepas recipe makes soft thick tortillas easy on a skillet and stuffed with all the fillings of your dreams – black bean, yellow corn, shredded beef, and more!
If you have never made arepas before, please be warned: after you have these, you will never go back. Arepas will become a part of your normal diet, and your life will be better for it.

So, if you have never heard of an arepa before, let’s get started at the basics.
What is an arepa?
Arepas are present in many South American cuisines – there are most commonly Colombian Arepas and Venezuelan Arepas. They are cooked in a flat circle, like a pancake, and can be either fried or roasted, with the main ingredient being a precooked corn flour called masarepa, which is widely available and should be on the shelf at your local supermarket.

Ingredients
Like I said, only 3 ingredients which are most likely already in your pantry, and if not, can be easily found at the grocery store! You will need:
- Warm water.
- Salt.
- Masarepa. I use the brand Harina P.A.N, or Masa Harina.
How to make Arepas
These are so easy to make! To start out making the arepa dough:
Combine the salt and masarepa in a medium bowl. Stir just to combine and then form a well in the middle.
Slowly pour the warm water into the well and lightly knead until it is all combined into a dough. Cover with a warm towel and let rest for 5 minutes.
Divide the dough into 4 even-sized balls, dip each ball in cold water, and then wrap in plastic wrap. Press a plate down on each ball, applying light pressure until you get the desired thickness – I like mine to be about ½ inch thick.
Take a large skillet or cast iron pan and drizzle with a bit of vegetable oil. Place the skillet over medium heat. Fry the arepas for about 2-4 minutes on each side, or until they’ve reached a lovely golden brown color.
Remove from the heat and enjoy!

Storage
These store at room temperature for up to 2 days. To keep the arepas a bit longer, keep them in an airtight container in the fridge for up to 5 days. If you choose to refrigerate, reheat in the oven for a few minutes before serving.

How to serve Arepas
Arepas are completely delicious on their own, but you can serve them in so many ways!
- For breakfast, place a fried egg on top and top with chives and freshly cracked black pepper.
- Serve as a side to dinner.
- Make a tasty bread dip to dip your arepa into.
- Make it as a sandwich with any shredded meat of your choosing.
- A classic filling is black beans and crumbled cheese!
- Add ham and cheese for a great lunch.
- Serve on their own with some butter on top.

Arepas Recipe
This Arepa recipe makes soft thick tortillas easy on a skillet and stuffed with all the fillings of your dreams - black bean, yellow corn, shredded beef, and more!
Ingredients
- 1 cup masarepa (I used the brand P.A.N.)
- 1 cup warm water
- ½ tsp salt, or to taste
Instructions
- In a medium-sized bowl, place the masarepa and the salt. Stir to combine and form a well in the middle.
- Slowly start pouring the warm water into the well. Knead the dough lightly until all the water is combined. Cover with a towel and allow to rest for 5 minutes.
- Divide the dough into 4 even balls.
- Dip the ball in cold water, so it doesn’t stick, and place it on plastic wrap. Fold the plastic wrap over the ball and press down with a plate. Make them as thick or thin as you like. Repeat this with each ball of dough.
- In a pan, heat a little bit of vegetable oil and fry each arepa for about 2-4 minutes on each side, or until the edges start to brown a little bit.
- You can also eat this with cheese or a fried egg on top.
- Enjoy!
Nutrition Information:
Yield:
4Serving Size:
1Amount Per Serving: Calories: 0Total Fat: 0gSaturated Fat: 0gTrans Fat: 0gUnsaturated Fat: 0gCholesterol: 0mgSodium: 293mgCarbohydrates: 0gFiber: 0gSugar: 0gProtein: 0g
I’m Melissa, the imaginative force behind Sparkles to Sprinkles, where creativity comes to life, and sprinkles of joy are scattered generously. Melissa is a proud Jersey girl who found love with a New York boy. As a mom to four wonderful boys and a few fur babies, her journey into the world of blogging began after making the life-changing decision to stay home and raise her children. Previously a dedicated workaholic, Melissa’s blog became her creative outlet and passion project. Inspired by her mother-in-law, a masterful cook renowned for her delicious home-cooked meals and legendary holiday feasts (think mouthwatering sausage stuffing), Melissa honed her culinary skills through a combination of family recipes and countless cooking classes. She often attended these classes with her son Michael, who shared her enthusiasm for cooking from a young age. Melissa’s love for learning extends beyond familiar cuisines, as she enjoys exploring international recipes in hands-on cooking classes. Her blog features a diverse array of recipes, showcasing her expertise with various kitchen appliances such as the Instant Pot, air fryer, Slow Cooker, Ninja Foodi, Instant Vortex Plus, and more. Join Melissa on her culinary adventures as she shares tried-and-true family favorites alongside exciting new discoveries!


