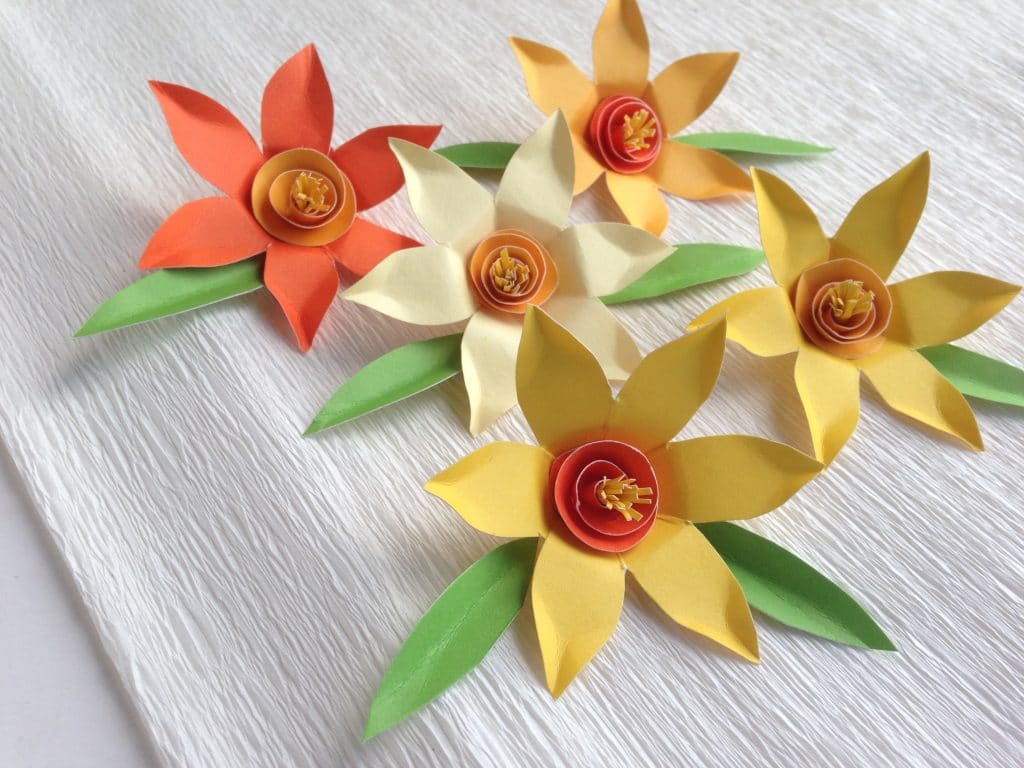
Paper Daffodil Craft
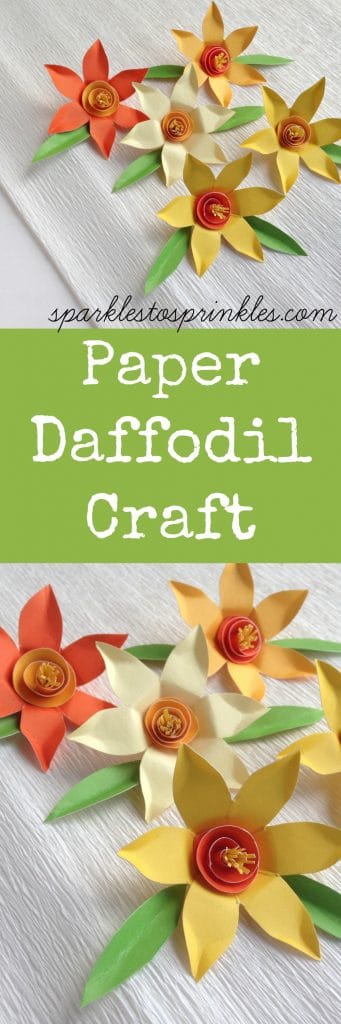
One of my favorites moments of Spring is seeing the Daffodil’s starting to bloom. Living in New Jersey, winters can be pretty rough some years. Once I see those daffodils it is such a sense of relief and pure excitement for spring. This Paper Daffodil Craft is such a sweet way to celebrate with your children. Better yet, create your own daffodil garden in the middle of a blizzard.
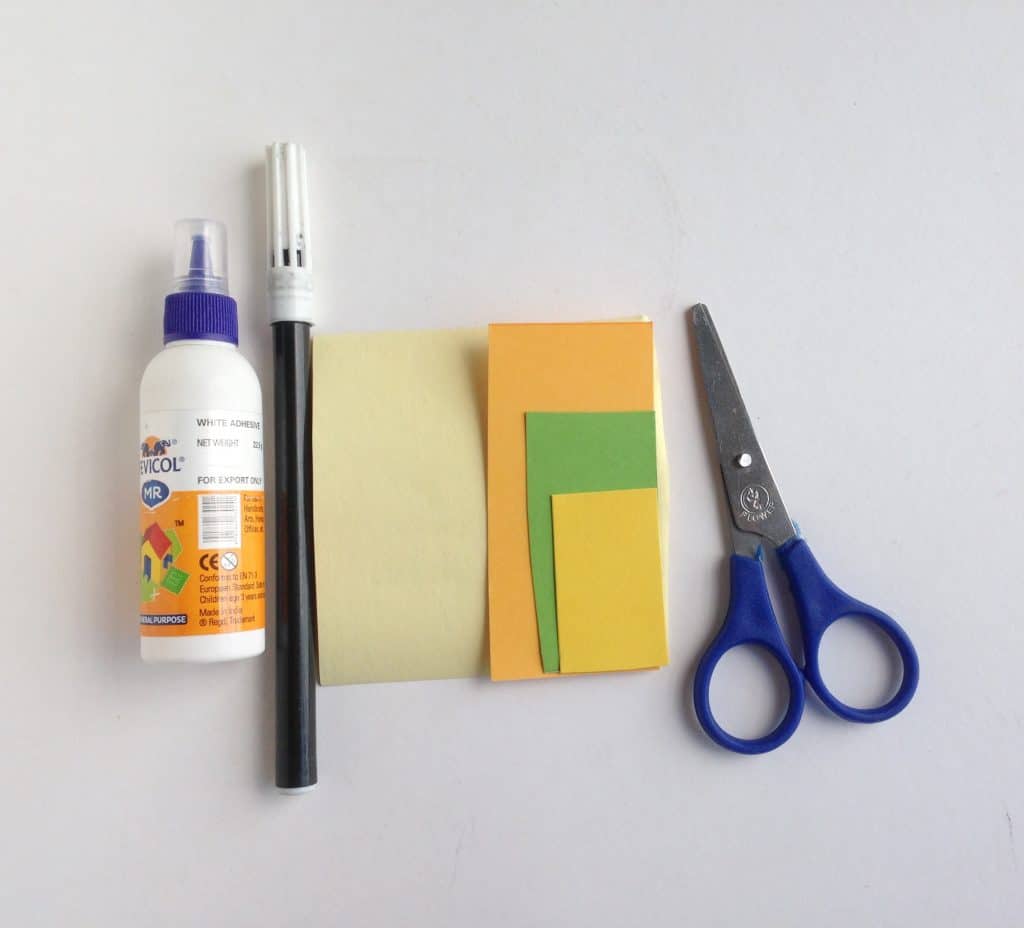
List of Supplies:
- Craft papers – 2 to 3 different colors
- Craft glue
- Scissors
- Pencil or marker – for tracing template
- Template cutouts (print below)
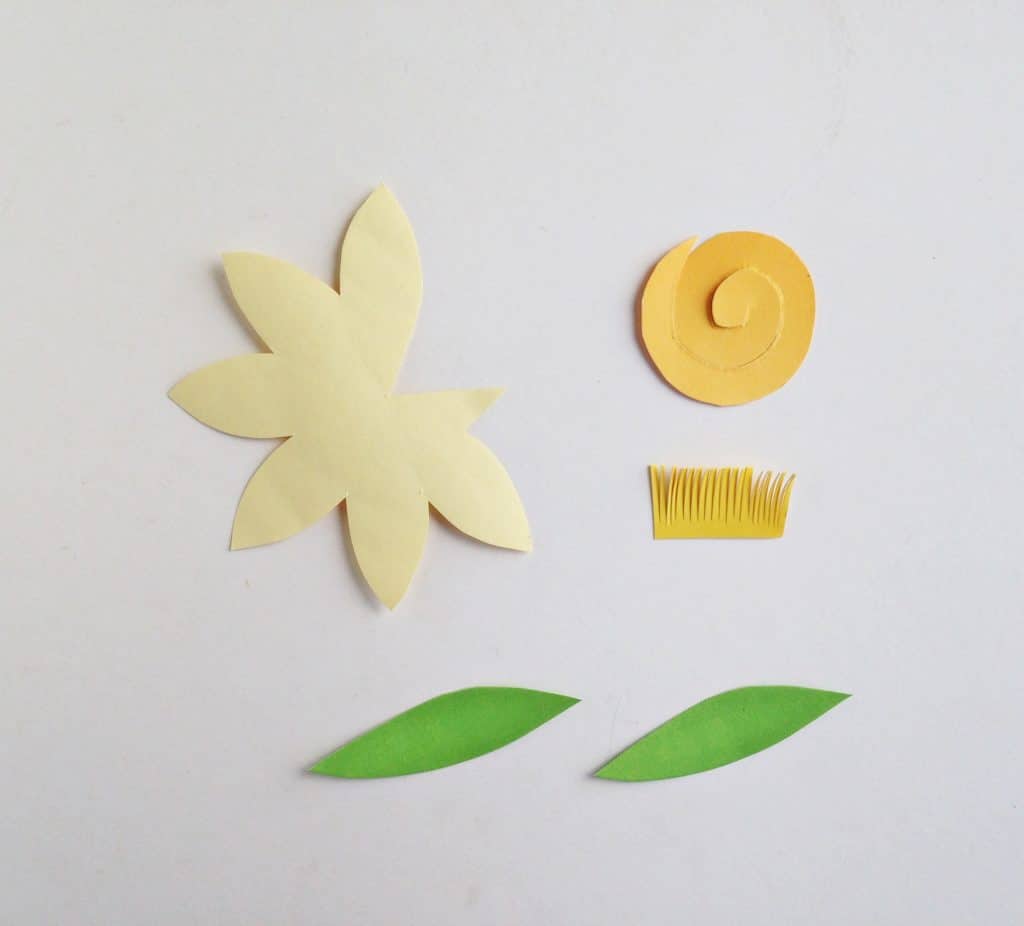
Step (1)
Trace the patterns from the template on the selected craft papers. Cut out the patterns from the craft papers by cutting along the traced lines. Cut small fringes on the rectangular cut out.
Step (2)
Take the 6 petaled paper cut out and create folding lines between every petal.
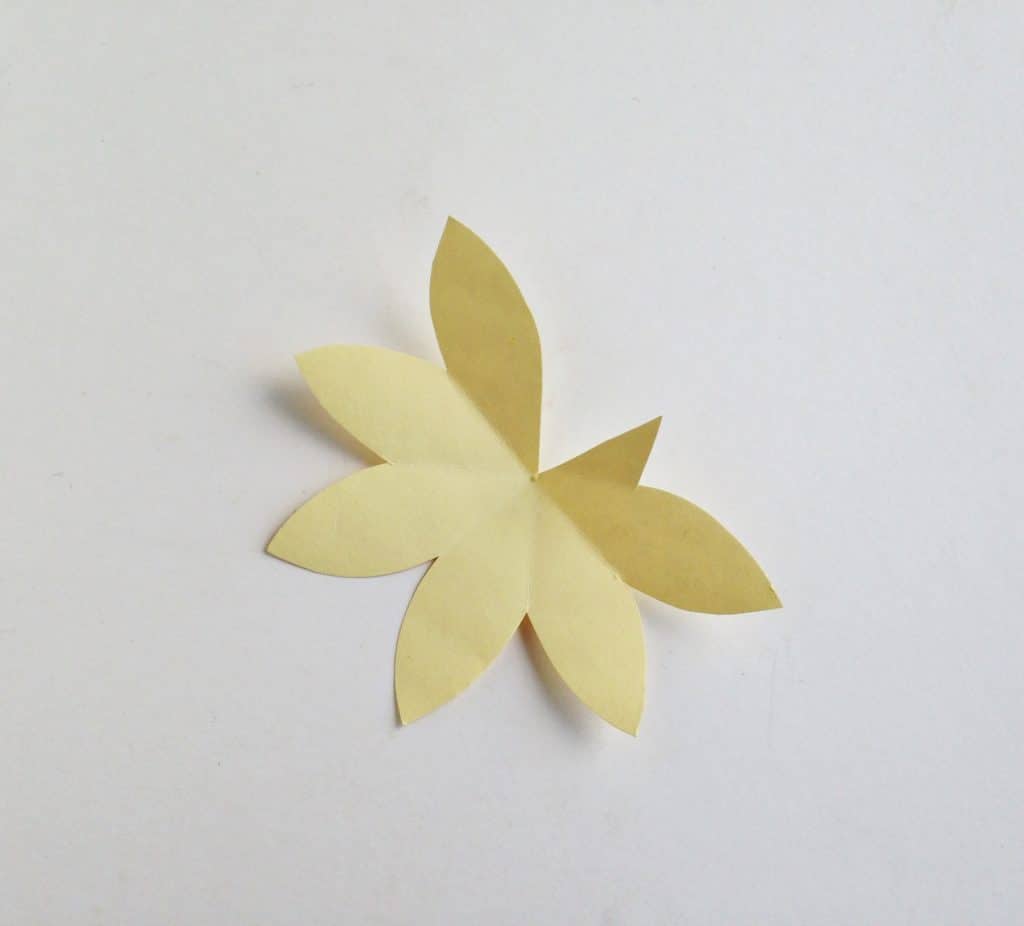
Step (3)
Apply a small amount of glue on the extra part of the petaled paper.

Step (4)
Join the glued part with the open end petal to close the pattern.

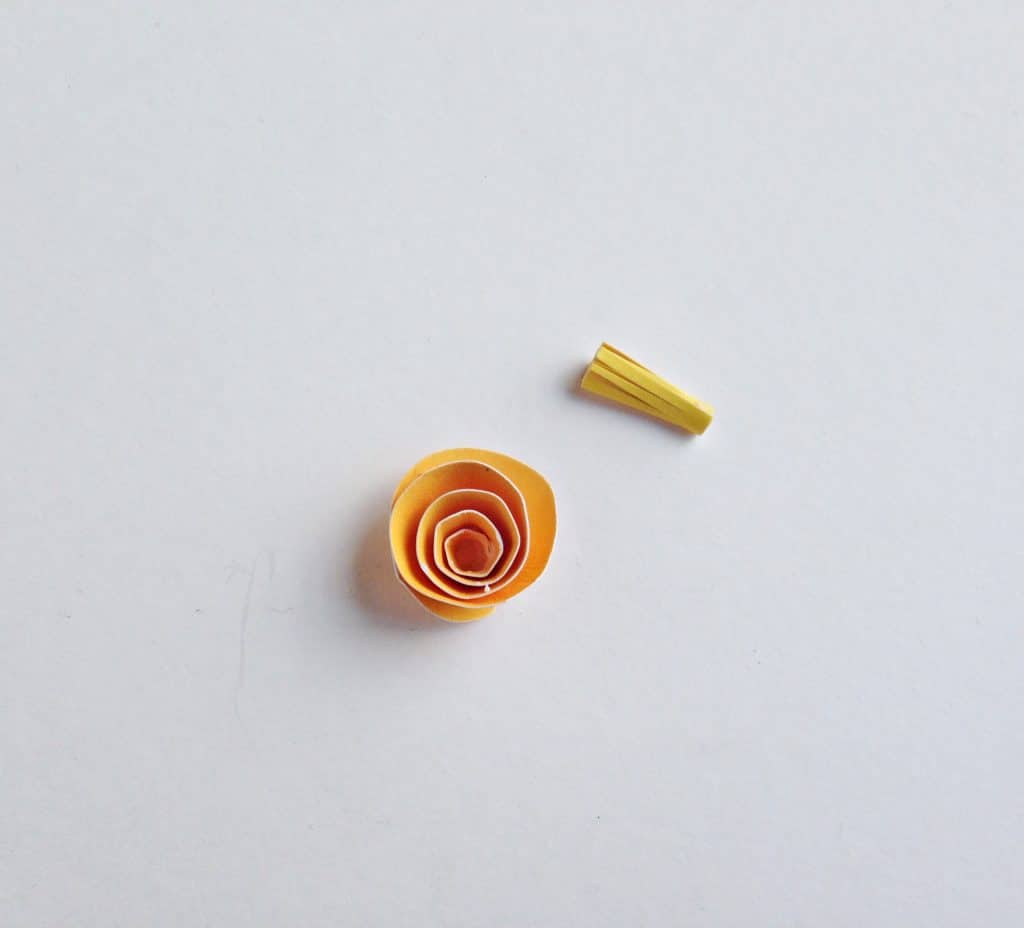
Step (5)
Roll the spiral cut out from its open end and continue to roll until reaching the center; Glue the roll with the center to create a rolled flower. Take the fringed cut out and roll it along its intact part, keeping the fringed end open. Glue at the end of the roll to secure it.
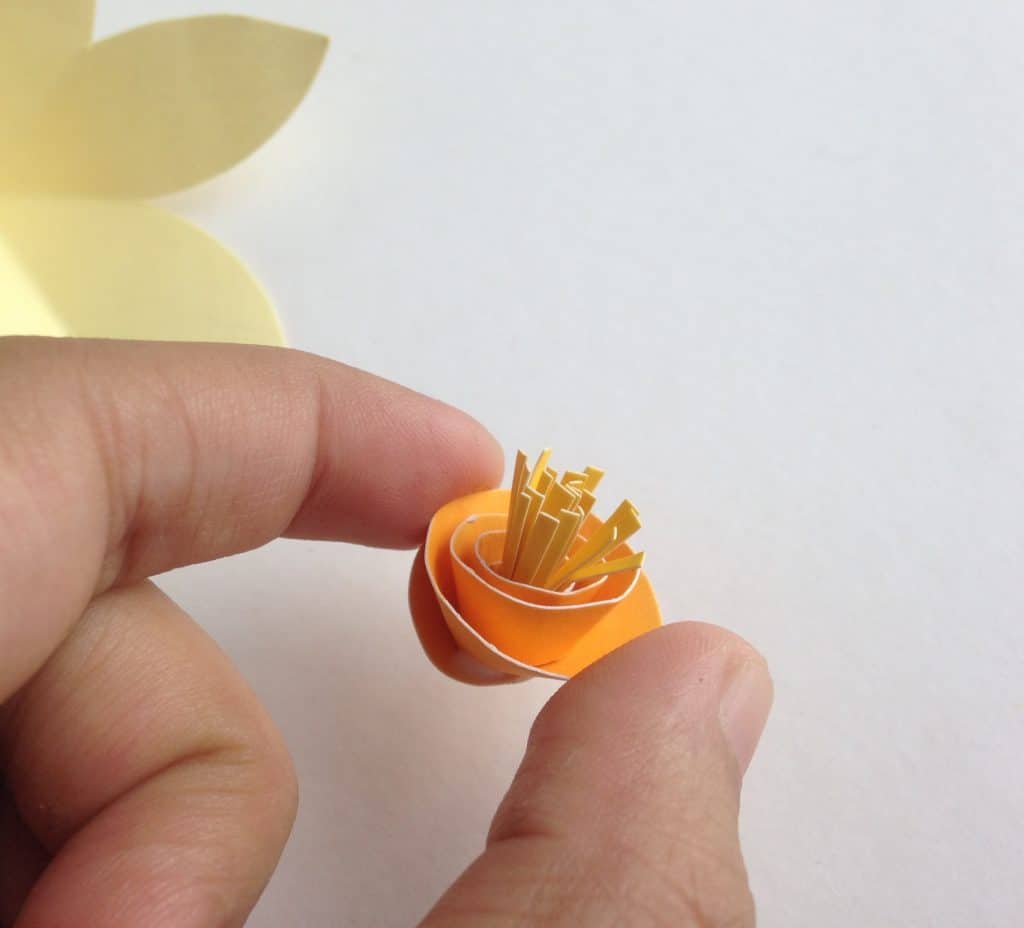
Step (6)
Place and glue the rolled fringed pattern in the center of the rolled flower pattern. This will be the center of the flower.
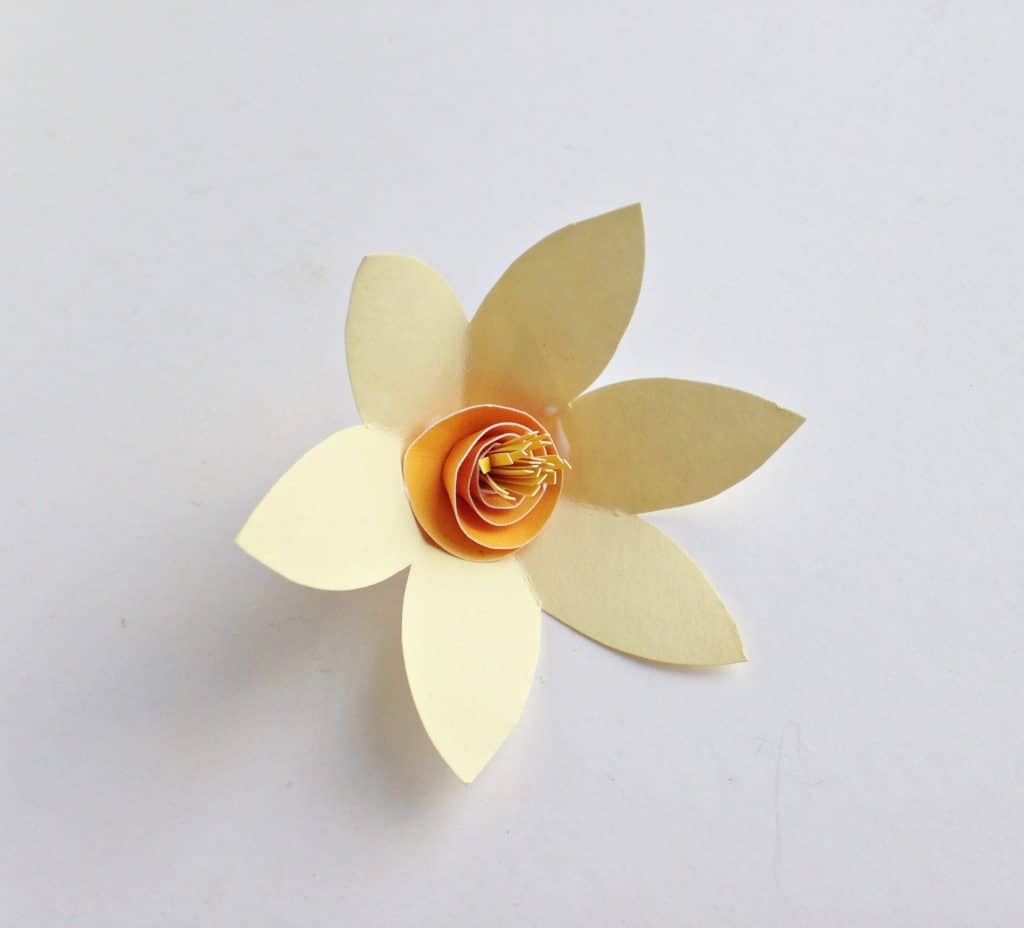
Step (7)
Now glue the center part created in step 6 on the center of the flower pattern.
Step (8)
Fold each of the petals backwards and then release the fold.

Step (9)
Now squeeze the tip of each petal to create a pointy tip. There, done!
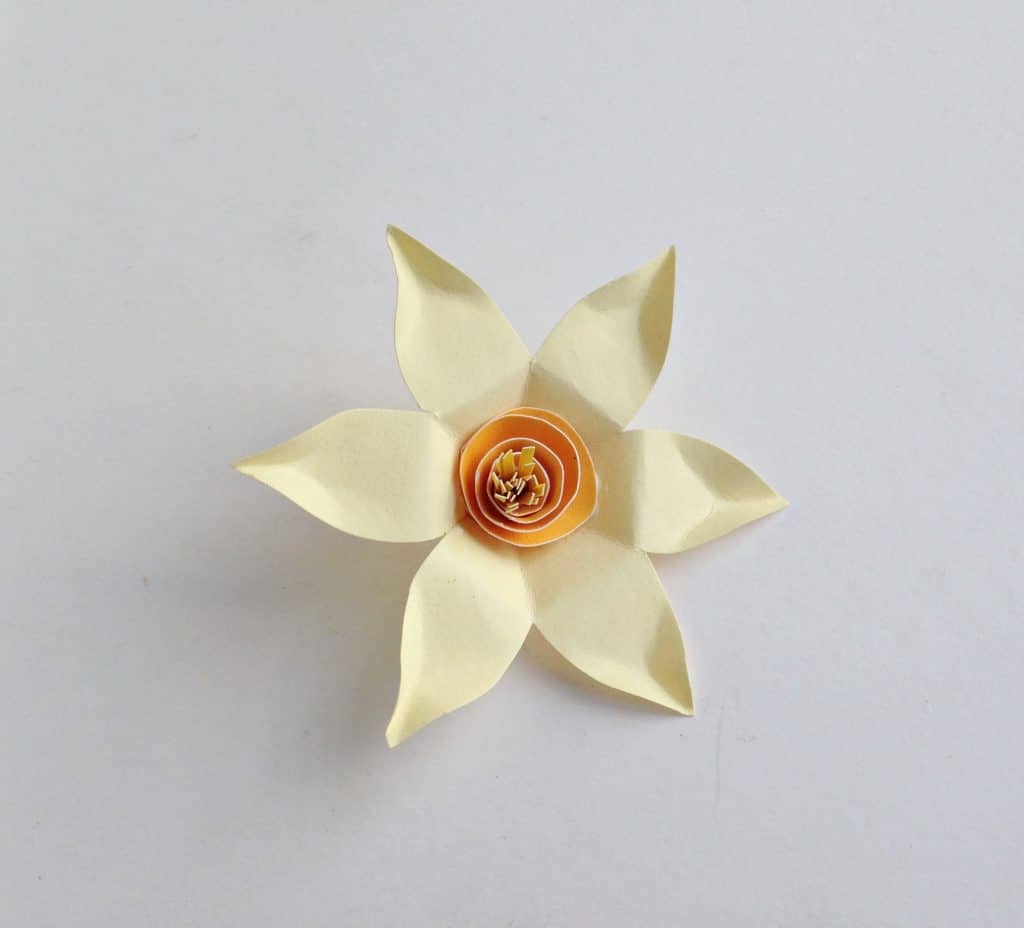
Use different colored craft papers, mix and match to create tons of variation!
CLICK HERE TO PRINT THE TEMPLATE

I’m Melissa, the imaginative force behind Sparkles to Sprinkles, where creativity comes to life, and sprinkles of joy are scattered generously. Melissa is a proud Jersey girl who found love with a New York boy. As a mom to four wonderful boys and a few fur babies, her journey into the world of blogging began after making the life-changing decision to stay home and raise her children. Previously a dedicated workaholic, Melissa’s blog became her creative outlet and passion project. Inspired by her mother-in-law, a masterful cook renowned for her delicious home-cooked meals and legendary holiday feasts (think mouthwatering sausage stuffing), Melissa honed her culinary skills through a combination of family recipes and countless cooking classes. She often attended these classes with her son Michael, who shared her enthusiasm for cooking from a young age. Melissa’s love for learning extends beyond familiar cuisines, as she enjoys exploring international recipes in hands-on cooking classes. Her blog features a diverse array of recipes, showcasing her expertise with various kitchen appliances such as the Instant Pot, air fryer, Slow Cooker, Ninja Foodi, Instant Vortex Plus, and more. Join Melissa on her culinary adventures as she shares tried-and-true family favorites alongside exciting new discoveries!